Vintage Airstream Travel Trailer Renovation: Post 1 - Before and After pics
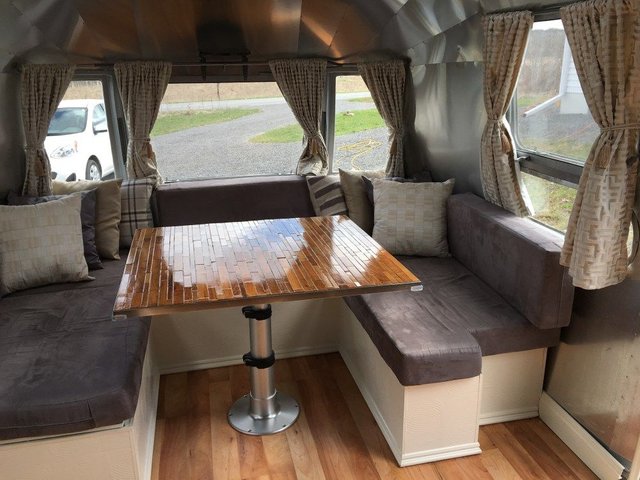
Before I post the specific details of this project, I wanted to post some before and after pictures to demonstrate what is possible as I've now completed the Airstream.


And now, on to the first entry:
I am going to be documenting the complete renovation of a 1971 31ft. Airstream International Land Yacht Travel Trailer. There are some great resources online for a project like this, however it can be difficult to find specific information on an exact model year trailer. Hopefully some of the information will be transferable to other models and years.
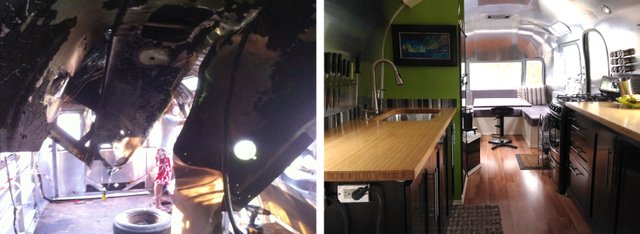
The interior of this particular trailer was damaged in a fire so a complete overhaul was necessary. I wanted to strip it down to the bare frame anyways as trailers before the mid 80’s may have been built with asbestos and other toxic substances.
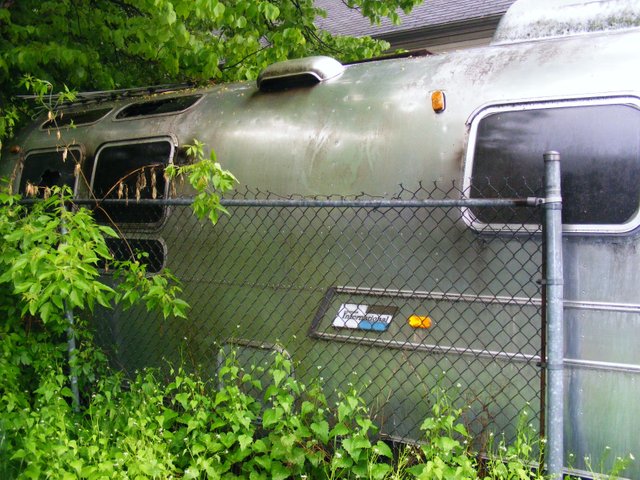
I purchased the trailer from a kijiji ad. These are the first photos I had of it.
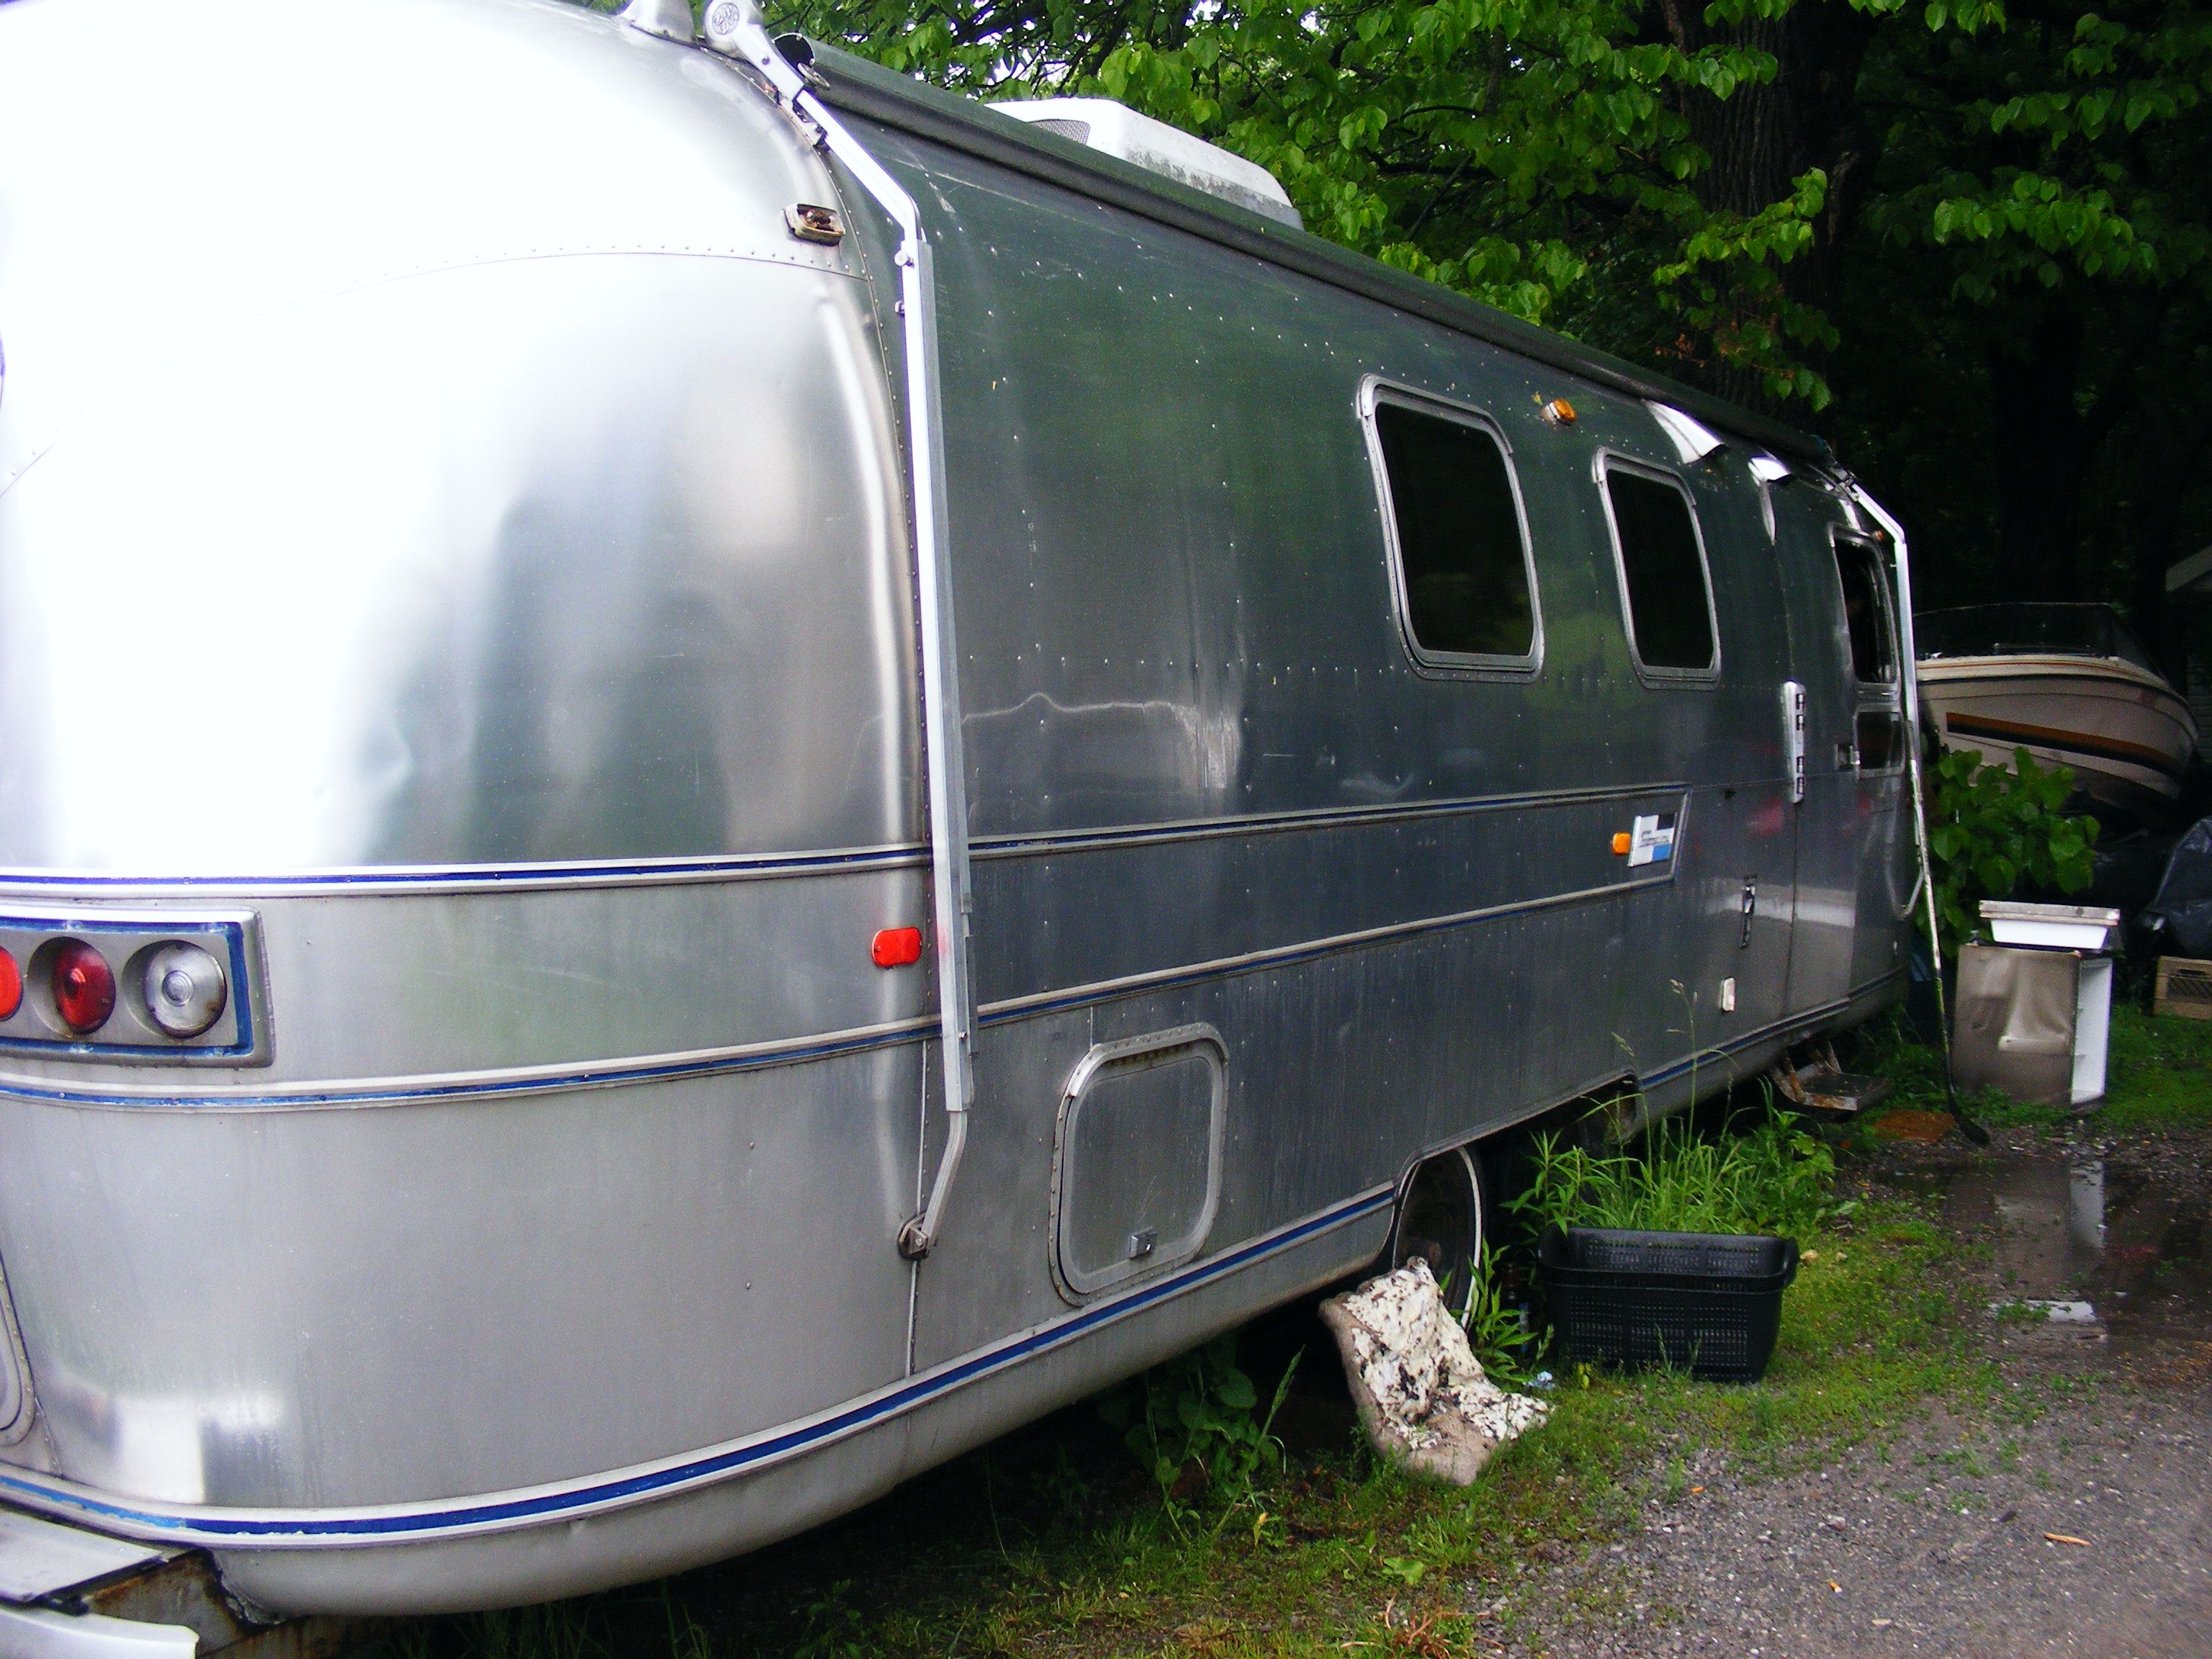
The exterior shell is in pretty good shape.
When I purchased the trailer, it was missing four windows: The large flat window at the front of the trailer, 1 vista view which was broken and is visible in this photo, and two of the 30 inch standard windows. The first place to check out for parts is http://www.odmrv.com/catalog/index.php. They are called Out Of Doors Mart and have a great selection of all kinds of Airstream parts. The vista view window is around $230, the flat window is easy to replace at any local window/glass shop but the 30 inch windows are quite expensive at almost 500 a piece plus shipping. You cannot buy just the glass (must buy the frame too) and every glass shop, even auto glass places that I spoke to said they could not get the glass for these windows. Some people have used plexi-glass instead, but that will quickly show wear. If $500 is too much for a window, ask your local glass shop about Lexan. Its similar to plexi glass but doesn’t wear as much. I have not yet tried this product.
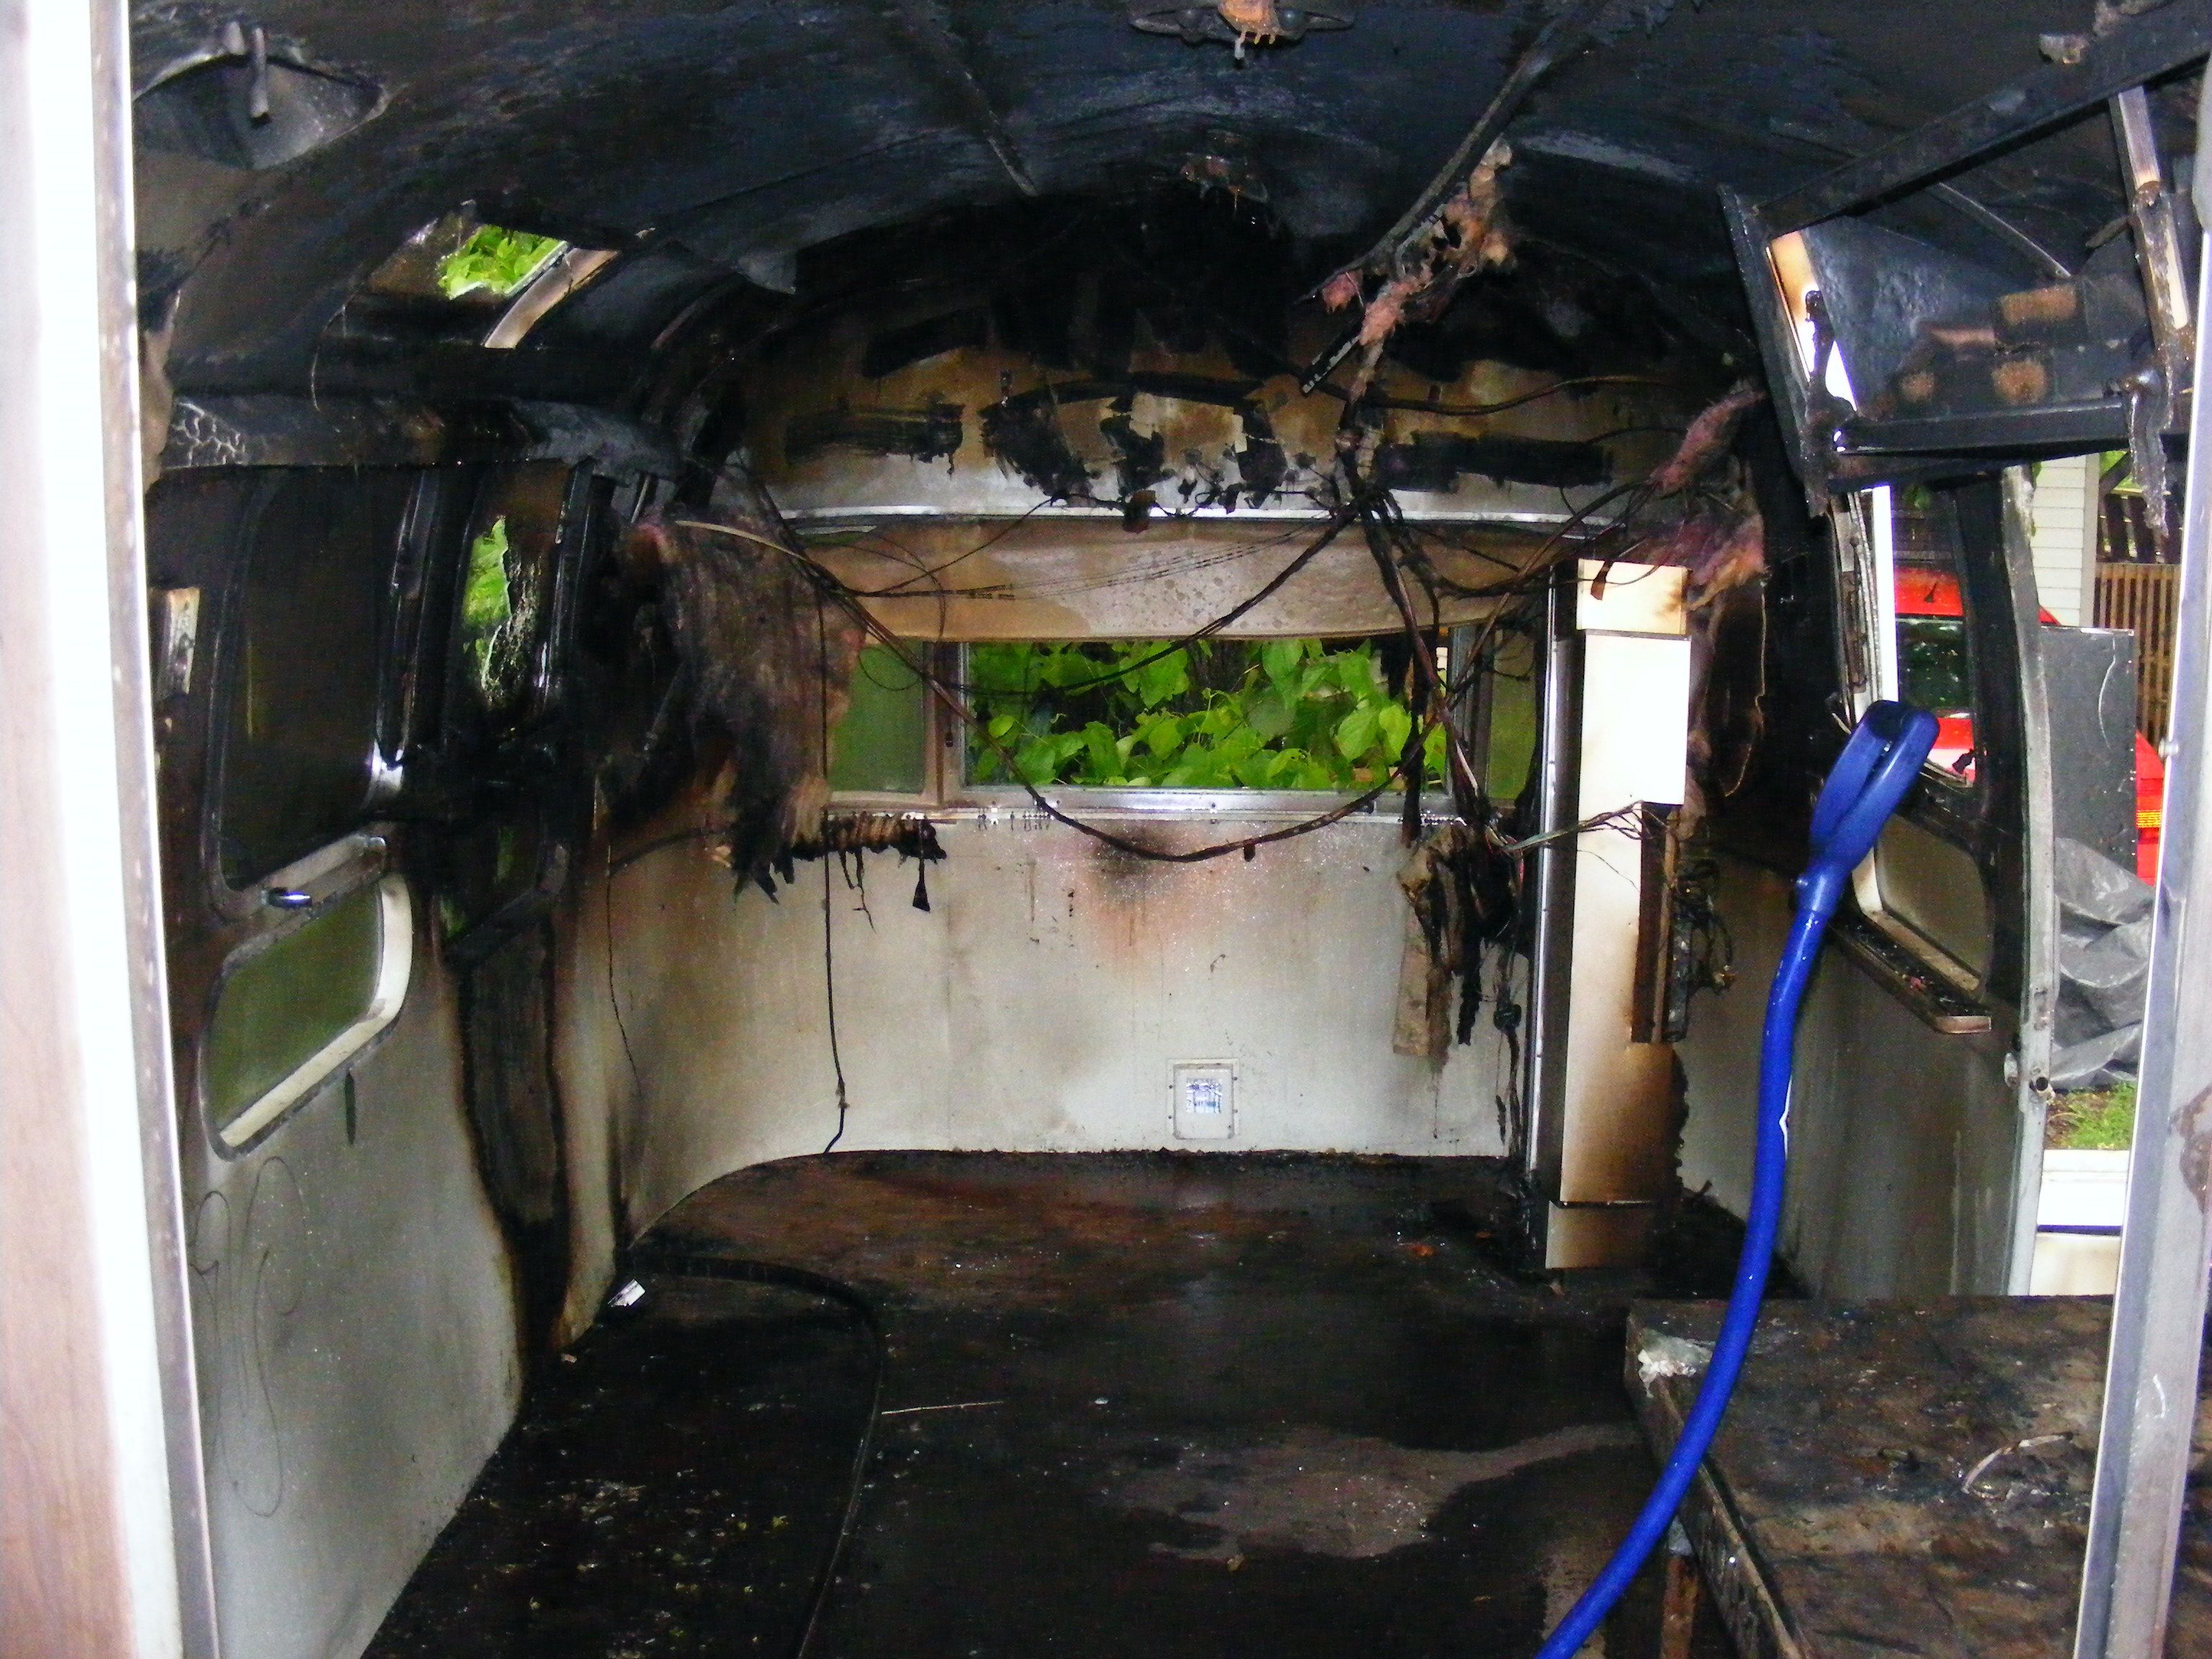
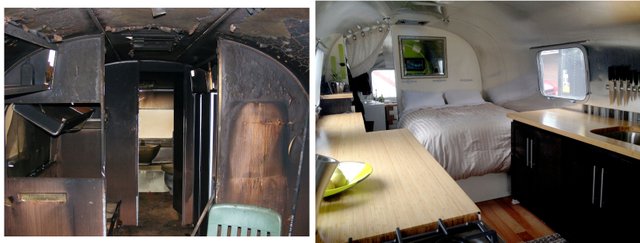
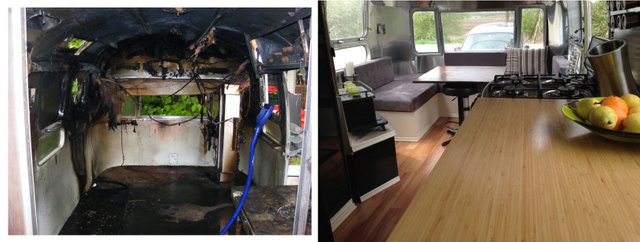
The interior was a disaster. The fire started under one of the front left windows, you can see the scorch marks. Fortunately it was a small fire and was put out quickly by the fire department but it left a lot of smoke damage and was further damaged when the firefighters entered.
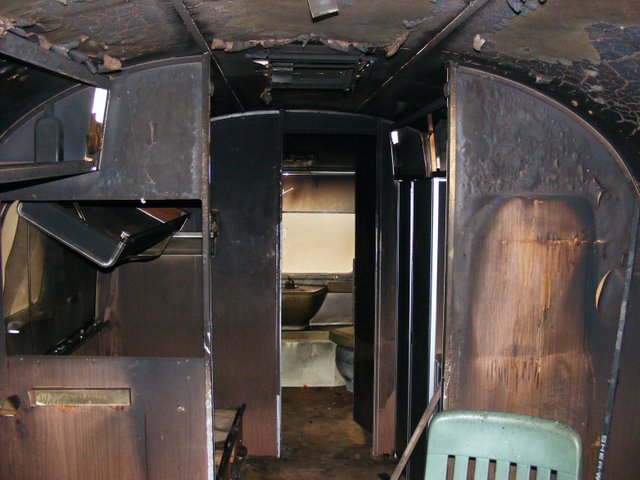
All of those fixtures were very well attached. Each was riveted to the wall, and ceiling and then screwed into the floor. Use a 1/8 drill bit to remove the rivets one at a time. This is time consuming and tedious. Safety glasses are a good idea especially for the ceiling rivets as little pieces of metal will go flying.
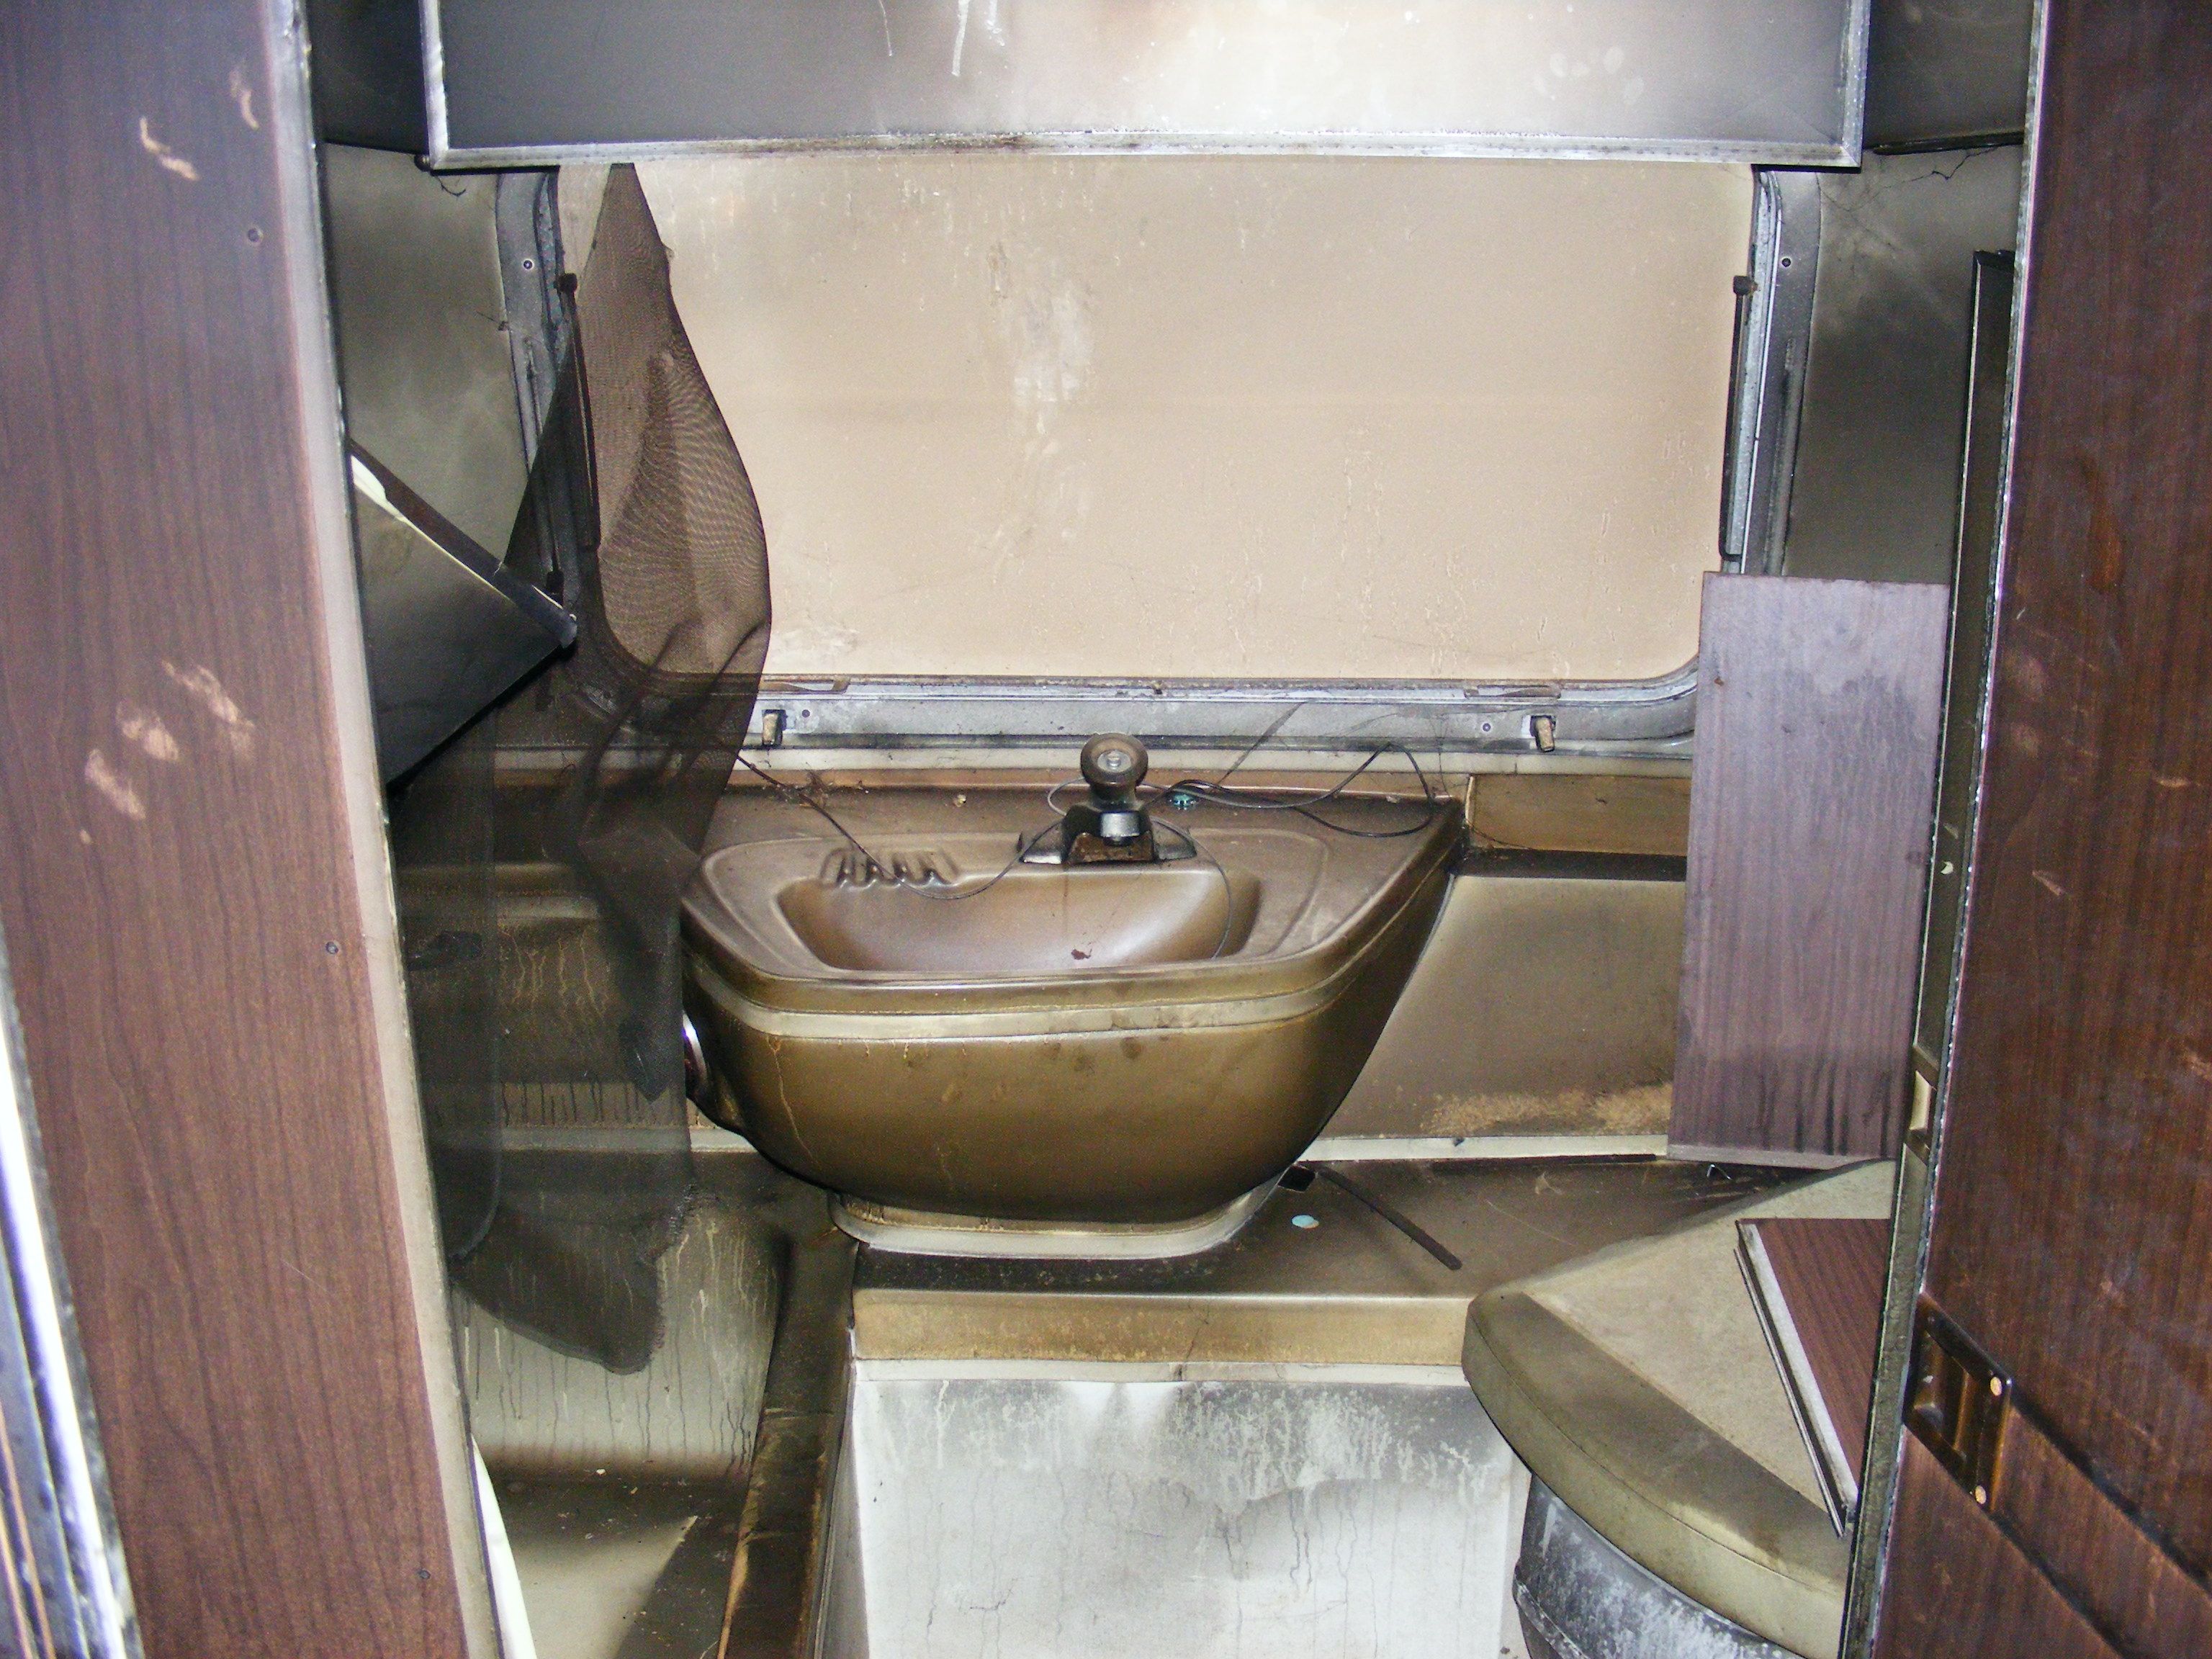
This was the bathroom at the rear. There are many hidden rivets in there and its difficult to get that fiberglass shell out if you miss one. Fortunately, the fiberglass breaks down easily but wear gloves and long sleeves, I had a bit of a reaction to it when it touched my skin.
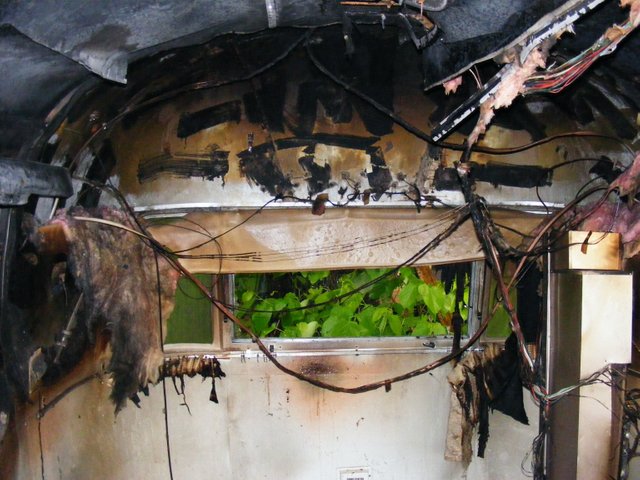
Those wires had to be removed in order to even get into that mess. Obviously, make sure there is no power or propane running to anything when removing wires or propane lines.
A better shot of where the fire began. I know it doesn’t look like it now, but those windows and frames are totally salvageable and come up looking new with some steel wool, paint stripper, goo gone, metal primer and aluminum enamel.
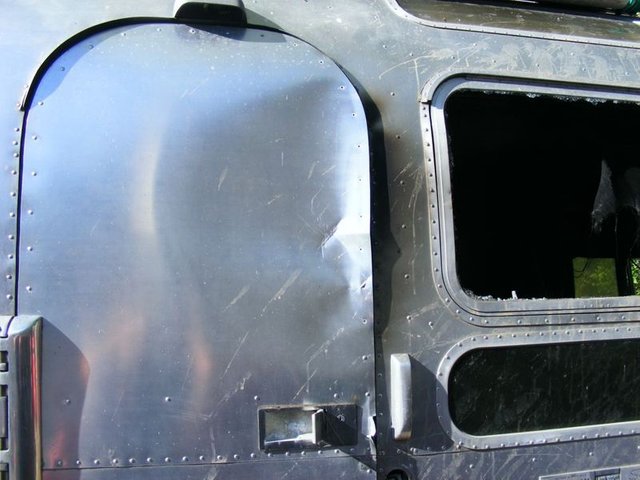
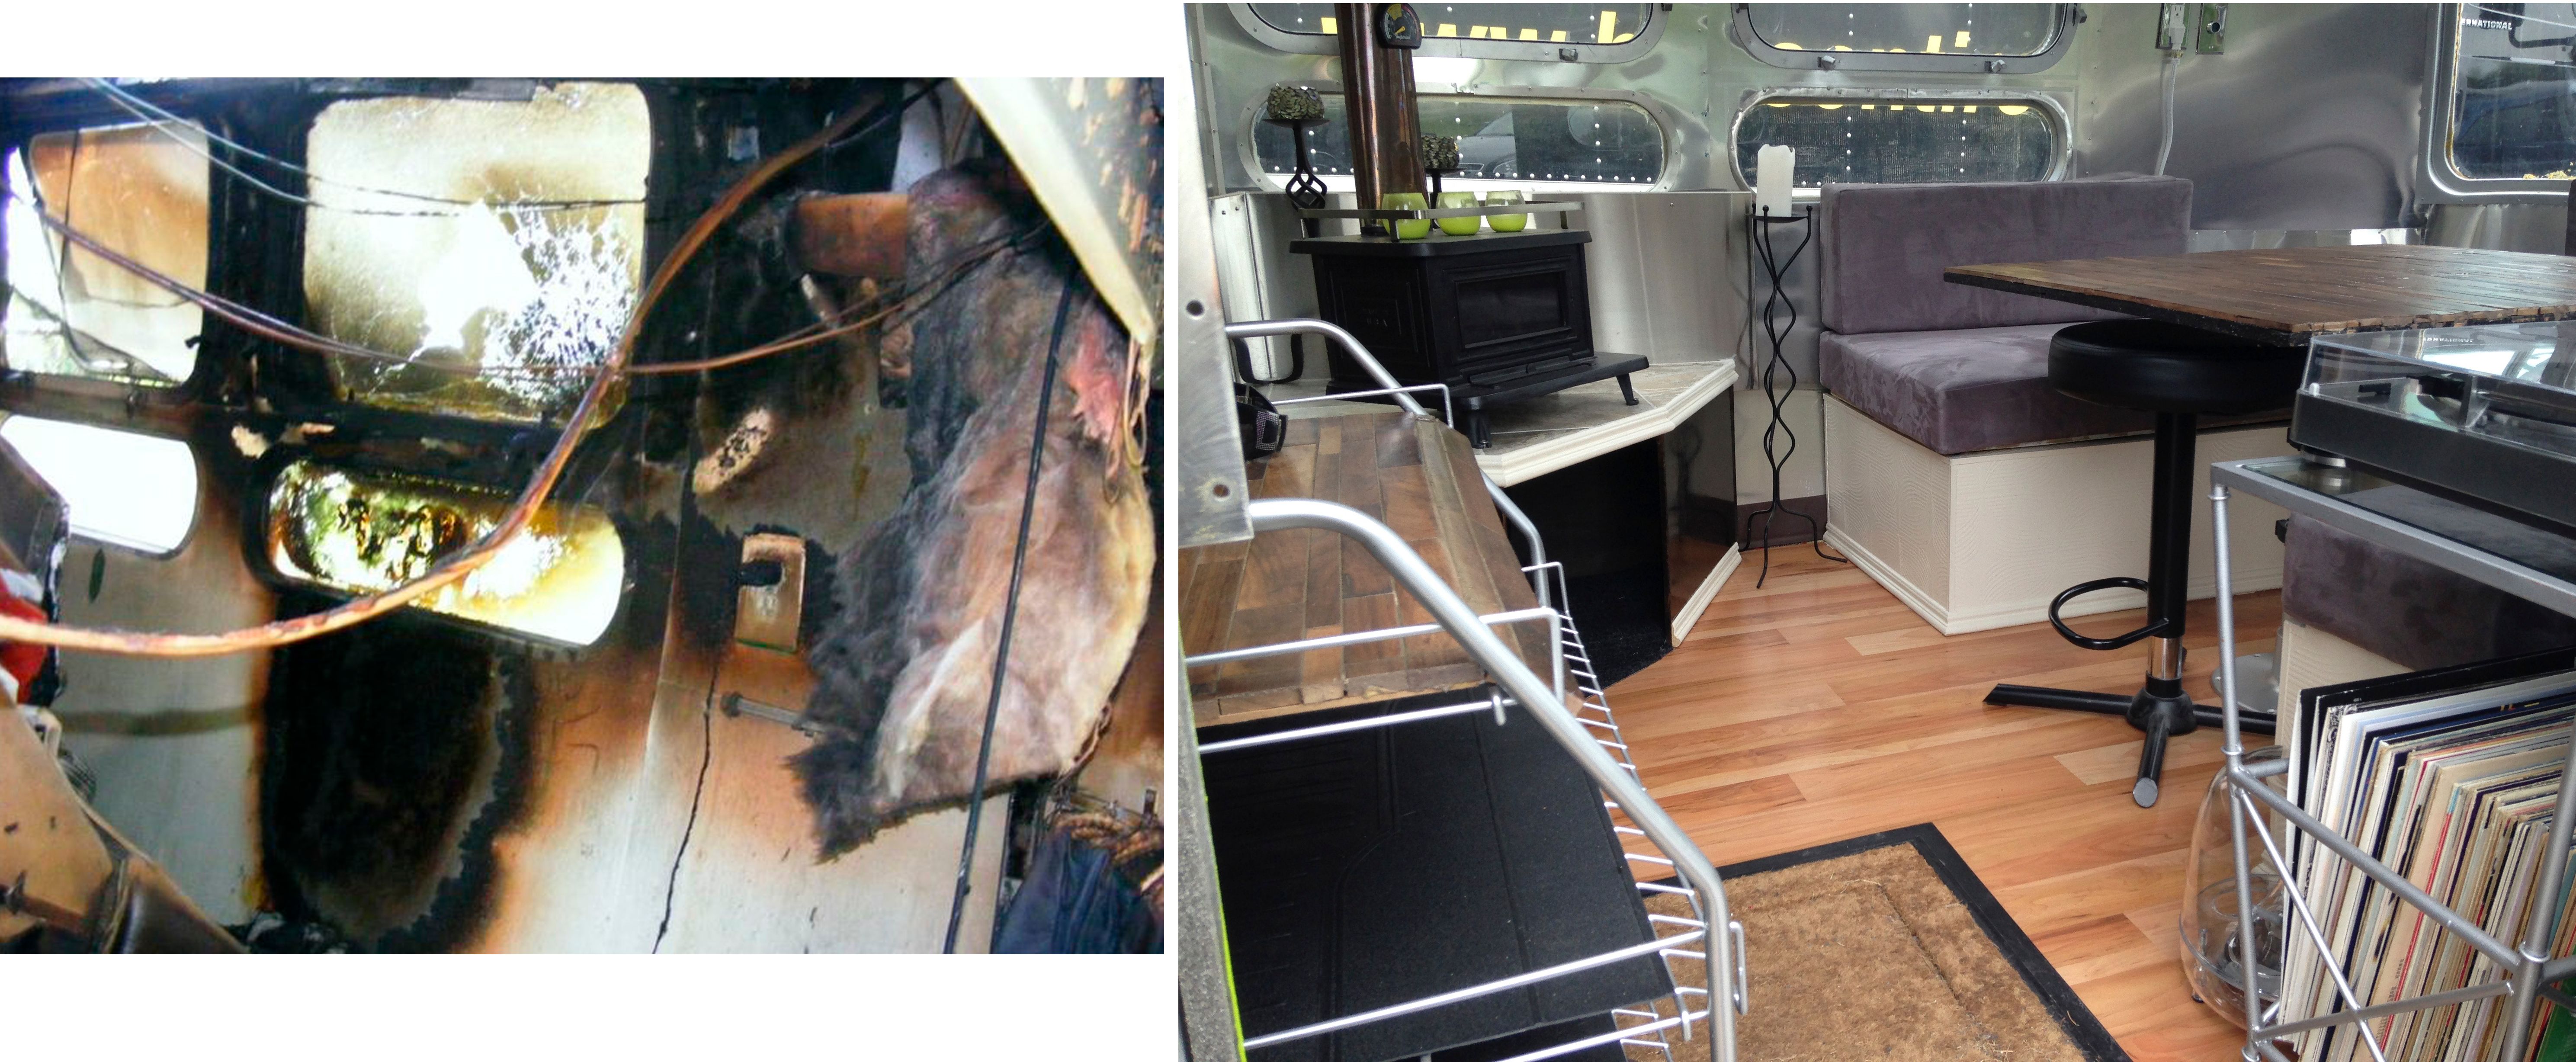
Quite a bit of damage to the main door when the firefighters entered and the locking mechanism was completely wrecked. A near exact replacement of the lock alone is extremely expensive, but a regular household door lock can be installed with minor modification. The door itself is not replaceable but you can get some aircraft grade aluminum to replace the damaged panel and rivet it in place. As I write this, a 4×8 sheet of 5150 aluminum is around $350. In this particular case, my door can be salvaged and come up looking great! More to come on that too.
The next post will detail preparations for transporting a trailer in this condition.
Congratulations @mistahlee! You have completed some achievement on Steemit and have been rewarded with new badge(s) :
Click on any badge to view your own Board of Honnor on SteemitBoard.
For more information about SteemitBoard, click here
If you no longer want to receive notifications, reply to this comment with the word
STOPIf you want to support the SteemitBoard project, your upvote for this notification is welcome!
This is awesome! We have started our own Airstream project. I just made my first post about it. Hopefully we will be able to finish ours next year. How long did it take you to complete this project?