Learn How to Code - How to create your first webpage from start to finish with HTML and CSS
Have you ever wondered what it takes to create a webpage? In this tutorial I will guide you step by step, and show you what it takes to code a simple webpage with custom styling and links using HTML and CSS.
Ready? Let's get started!
The first thing we need is a text editor. There are so many choices for text editors. If you want to get a great text editor, I recommend installing one of the following two free text editors:

or Sublime Text.
(Note: Sublime Text does cost some money if you want to purchase a license, but it is free to install and currently has no time limit on the free trial period)
Personally, my favorite text editor is Sublime Text, and that is what I will be using in this tutorial. Go ahead and get your text editor ready if you want to follow along with me in the tutorial.
Now let's create a folder to contain our code files. I created a new folder on my Desktop and named it MyWebPage.
Next, use Sublime Text, (Or the text editor of your choice) to create a file. Then save the file with the name "myCustomWebPage.html" (Note: By convention, HTML files should end in .html but can also end in .htm. Also, including the .html extension in our filename causes our operating system to open the file in our default web browser. This means that if our .html file is not open and you want to reopen it to modify the code, you will need to right-click the file and select to open it up in a text editor, otherwise your operating system will try to open it as a webpage in your browser).
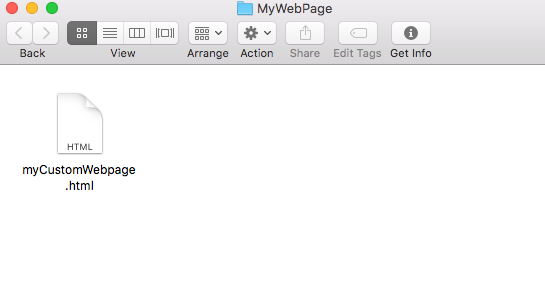
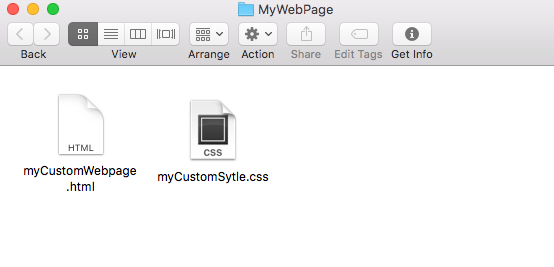
If you are following along, you should now have the file "myCustomWebPage.html" inside your MyWebPage folder. (If you are using a Mac like I am, your project should look like the picture below. If you are using Windows or Linux it will look a little different but still basically the same idea, one folder with one file).
Now let's make sure that our file is open in our text editor and let's copy and paste the code provided below into our myCustomWebpage.html file. This code will give our webpage the basic structure it needs to be rendered in a web browser. The code below is HTML. HTML is an acronym that stands for Hyper Text Markup Language. You can think of HTML as the basic building block code for web pages.
<!doctype html>
<html>
    <head>

    </head>
    <body>

    </body>
< /html>
Let's look at our code piece by piece starting at the top.
An HTML page consists of HTML tags. However, the very fist thing in the webpage is not an HTML tag, instead it tells the web browser what version of HTML to use. The first line we enter tells our web browser that we are using HTML5.
<!doctype html>
There are many different versions of HTML we could use, but <!doctype html>is the code we need to render our webpage in version HTML5. If you are interested in seeing other options, W3Schools has a good resource page here.
Next, we start the HTML code by adding the following tag.
<html>
The <html> tag is the start of the webpage. This marks the beginning of our HTML code.
Next we have the headsection of our webpage.
    <head>

    </head>
All of the tags that we place between the start <head> tag and the close head tag </head> are used to give our webpage special instructions which are not usually visible on the main web page.
Next, we have the body section of the webpage.
    <body>

    </body>
The body section of our webpage is where we place the code that tells our browser what information we want to show up on the webpage. The body of an HTML document starts with the <body> tag and ends with the </body> tag.
Then finally, we tell our browser that our HTML instructions are complete by ending our file with the closing html tag.
< /html> (Note: I have an extra space that is not needed between the <and the /html> tag here because the markup language I am using to write this blog post is not rendering properly if I remove the space).
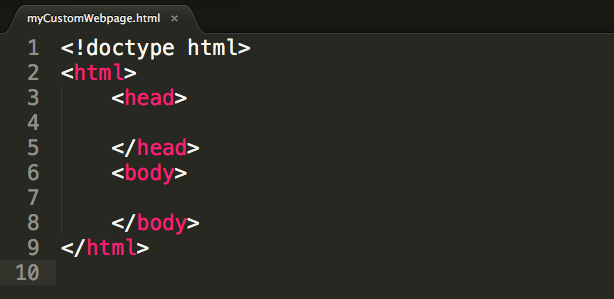
At this point, here is what our webpage looks like in the Sublime Text editor.
Now, let's go ahead and put the following information in the head section of our webpage.
        <title>My Custom Webpage</title>
        <link rel="stylesheet" type="text/css" href="myCustomSytle.css">
The title tag tells the browser what to display in the top tab of our webpage. The following HTML code will place the words "My Custom Webpage" in the title tab of our webpage.
<title>My Custom Webpage</title>
When we save our file in the text editor and then double-click on our myCustomWebpage.html file that is in our MyWebPage folder, our browser will render a blank page with the words "My Custom Webpage" displayed in the tab of our browser.

The second tag in our title is a link tag. Here we will specify that we want to style our page with a separate file which we will create and name "myCustomSytle.css".
<link rel="stylesheet" type="text/css" href="myCustomSytle.css">
Our link tag has three attributes. rel, type, and href. Attributes are included in certain tags to give more information about how a particular tag should be rendered. The rel attribute helps describe the relationship of the file being linked and the webpage that is linking to it.
rel="stylesheet"
The type attribute tells the browser what type of information to expect in the linked file.
type="text/css"
The href attribute describes the name and location of the file that we are linking.
href="myCustomSytle.css"
You can find more information about the link tag here if you are interested.
For our example we only need to provide the href attribute with the the name of our stylesheet since we will place our stylesheet in the same folder as our webpage. Let's go ahead and create our myCustomStyle.css file and place it in our MyWebPage folder. We will put code into myCustomStyle.css a little later in this tutorial, but for now we will just leave the myCustomStyle.css file empty and include it in our MyWebPage folder.
At this point we should have the following two files in our MyWebPage folder.
Our HTML code should look like this.

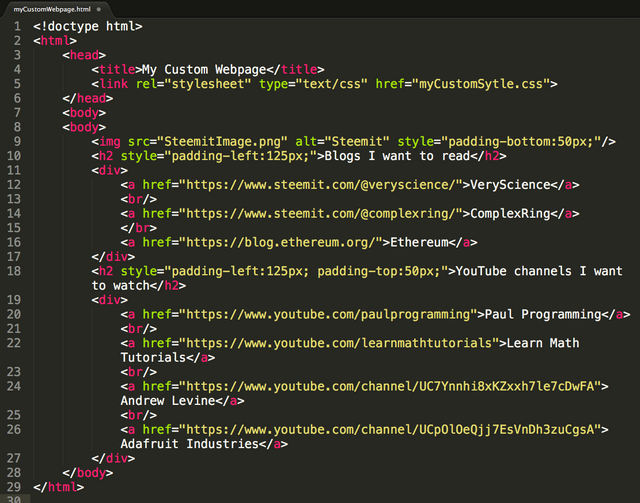
Next lets add the following code between the start <body> tag and the end </body> tag. The code below is simply a set of links to blogs and YouTube channels that I find interesting.
        <img src="SteemitImage.png" alt="Steemit" style="padding-bottom:50px;"/>
        <h2 style="padding-left:125px;">Blogs I want to read</h2>
        <div>
            <a href="https://www.steemit.com/@veryscience/">VeryScience</a>
            <br/>
            <a href="https://www.steemit.com/@complexring/">ComplexRing</a>
            </br>
            <a href="https://blog.ethereum.org/">Ethereum</a>
        </div>
        <h2 style="padding-left:125px; padding-top:50px;">YouTube channels I want to watch</h2>
        <div>
            <a href="https://www.youtube.com/paulprogramming">Paul Programming</a>
            <br/>
            <a href="https://www.youtube.com/learnmathtutorials">Learn Math Tutorials</a>
            <br/>
            <a href="https://www.youtube.com/channel/UC7Ynnhi8xKZxxh7le7cDwFA">Andrew Levine</a>
            <br/>
            <a href="https://www.youtube.com/channel/UCpOlOeQjj7EsVnDh3zuCgsA">Adafruit Industries</a>
        </div>
The first line that we have inside the body is an img tag.
<img src="SteemitImage.png" alt="Steemit" style="padding-bottom50px;"/ >
The img tag instructs our web browser to display an image in our webpage. In order for this to render an image we need to include an image named "SteemitImage.png" in our folder. (Note: To create the "My Custom Steemit Webpage" image below, I inspected and modified a local copy of the source code on the Steemit main page to get the following to be displayed in my browser, then I used a snipping tool to create the following picture. I can explain how to do that in a different tutorial if there is enough interest. But for now any image you have on your computer will work. Just make sure to adjust the name in your src attribute to be the name of your image).

I have included three attributes in the img tag. They are src, alt and style. src tells our web browser where to find the image. Since I will be including the image in the same folder as my webpage, I only need to give the name of the image file. The alt text is alternative text that will be displayed if for some reason the webpage has an issue displaying the image. The third attribute is the style attribute. This gives our img tag further instructions on how to style the image. Here our style attribute tells the browser to put an extra 50 pixels of space below the image. padding-bottom:50px;
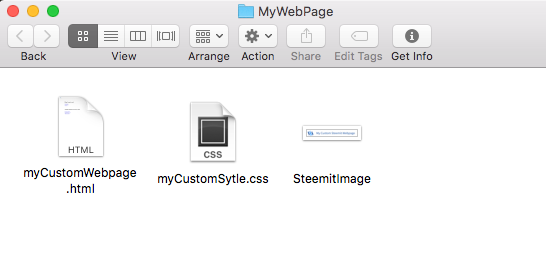
Now our MyWebPage folder should have a .html file, a .css file, and an image as pictured in the folder below. (Note: My image is a .png file but it is common to also have .jpg files, so if you are following along, there is a chance that your src attribute may need to list a file with the .jpg extension rather than the .png extension that I have).
Next we have a <h2> heading. Headings can be h1,h2, h3,h4,h5, and h6. The h1 tag signifies the most important heading of the webpage and the h6signifies the least important heading of the webpage. Text can be placed in the headings of a webpage. Headings can be used as titles which describe a section of a webpage. For example to include the text "I am smart!" inside a h1 tag, we would enter <h1>I am smart!</h1>, but for this webpage I am going to list links to blogs that I find interesting and place the title inside of a h2tag so I will include the following HTML code.
<h2 style="padding-left:125px;">Blogs I want to read</h2>
You can switch it around between h1 and h6to get a feel for the different sizes of headings. Additionally, I have given the h2 tag a style attribute style="padding-left:125px;". This style attribute instructs the browser to put 125 pixels of white space on the left hand side of the heading text.
The next section of our webpage is a div. Everything that exists between a starting<div>and an ending </div> tag is grouped together. We don't have to worry too much more about divs for the purposes of this tutorial, but as long as you know they exist and they are used to separate chunks of content on a web page, that is good enough for now. Inside this div section I have listed three anchor tags. The anchor tags can be used to link text to different webpages. An anchor tag starts with an <a> then has some text in the middle for the link, then ends with the closing </a> tag. In addition to this, we include a href attribute inside of the <a> tag. The href tag tells our browser what webpage to open when we click on the text between the the opening <a> tag and the closing </a> tag. For example if we wanted a link to Google on our page we could enter the following HTML <a>href="https://www.google.com">Take me to Google</a> and that would produce the following link on our webpage: Take me to Google.
For this tutorial I have decided to create links to three blogs that I think are worth checking out. The first link is to my Steemit blog, VeryScience. The second is another Steemit blog that looks interesting to me, called ComplexRing, and the third link is to the Ethereum Blog which is really great if you are at all interested in blockchain technology. Finally, the <br/> tags simply instructs our browser to put a line break between our anchor tags. If we did not include the<br/> tags, our webpage would display all three of these links on the same line, rather than on separate lines.
        <div>
            <a href="https://www.steemit.com/@veryscience/">VeryScience</a>
            <br/>
            <a href="https://www.steemit.com/@complexring/">ComplexRing</a>
            </br>
            <a href="https://blog.ethereum.org/">Ethereum</a>
        </div>
Next we will add a similar section. However, this time our h2 heading will say "YouTube channels I want to watch" and then we will list four links inside of our div. I chose to include my two YouTube channels. The first is Paul Programming where I teach mainly C++ data structures content. My second channel is Learn Math Tutorials where I teach mathematics. Also I have included two other YouTube channels that I find interesting. The first one is Andrew Levine's channel. Andrew seems to be a good resource for learning about Steemit. Finally, I am including Adafruit Industries YouTube channel. Adafruit is a distributer of micro-computers, micro-controllers and accessories for each. I will probably be doing a few blog posts on some projects you can do with Adafruit products in the future.
        <div>
            <a href="https://www.youtube.com/paulprogramming">Paul Programming</a>
            <br/>
            <a href="https://www.youtube.com/learnmathtutorials">Learn Math Tutorials</a>
            <br/>
            <a href="https://www.youtube.com/channel/UC7Ynnhi8xKZxxh7le7cDwFA">Andrew Levine</a>
            <br/>
            <a href="https://www.youtube.com/channel/UCpOlOeQjj7EsVnDh3zuCgsA">Adafruit Industries</a>
        </div>
Now our webpage should be complete (but not styled). Here is what it looks like in the Sublime Text editor now.
At this point, we can save our changes in our myCustomWebpage.html file then double click on our myCustomWebpage.html file that is in our MyWebPage folder and we should get a webpage displayed in our browser that look similar to the image below (Note: We have not added the CSS yet so this will not look all that great at first, but the links are functional).
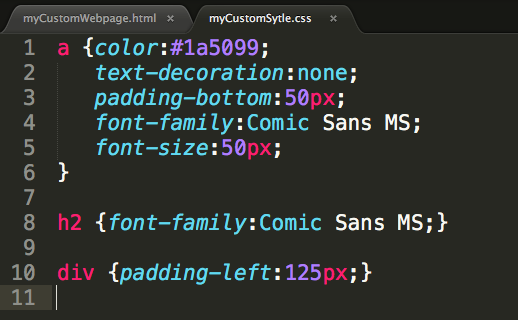
Ok great! At this point our webpage is functional. When we click on the links, we go to the blogs and channels that we are expecting, but I think we can make this look a little better by adding styling instructions to the myCustomStyle.css file that we created and linked earlier. To add some style, let's go ahead and open up the myCustomStyle.css file in our text editor and enter the following CSS code into it.
a {color:#1a5099;
   text-decoration:none;
   padding-bottom:50px;
   font-family:Comic Sans MS;
   font-size:50px;
}

h2 {font-family:Comic Sans MS;}

div {padding-left:125px;}
CSS stands for Cascading Style Sheets. CCS code is used to customize the look and appearance of a website.
In the code pictured above we are listing specific instructions for the <a>, <h2>, and <div>tag types that appear in our webpage.
Let's look a the first section. This section styles our <a> tags.
a {color:#1a5099;
   text-decoration:none;
   padding-bottom:50px;
   font-family:Comic Sans MS;
   font-size:50px;
}
color:#1a5099; describes what color to use for the text in our links. text-decoration:none; removes the underline below our links. padding-bottom:50px; places an extra 50 pixels of whitespace below each of our links. font-family:Comic Sans MS; tells our browser to render the text links with the "Comic Sans MS" font. font-size:50px; tells our browser to make our font size 50 pixels in size.
The next section tells our web browser to also display our text in our h2 headings with the "Comic Sans MS" font.
h2 {font-family:Comic Sans MS;}
Finally, the last CSS instruction tells our browser to add 125 pixels of white space in the left hand side of our div tags. This essentially moves our content away from the left side of the page by 125 pixels.
div {padding-left:125px;}
Now our myCustomStyle.css file looks like this.
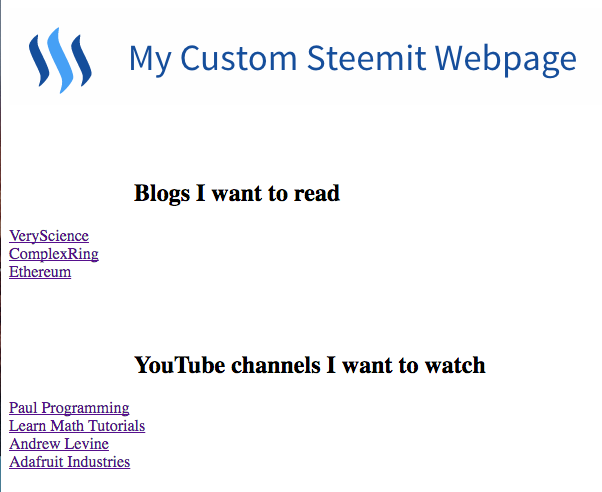
Now let's save both our myCustomWebpage.html file and our myCustomStyle.css file and then double-click on the myCustomWebpage.html file in our MyWebPage folder. Now with our custom CSS styling, our webpage looks like this.
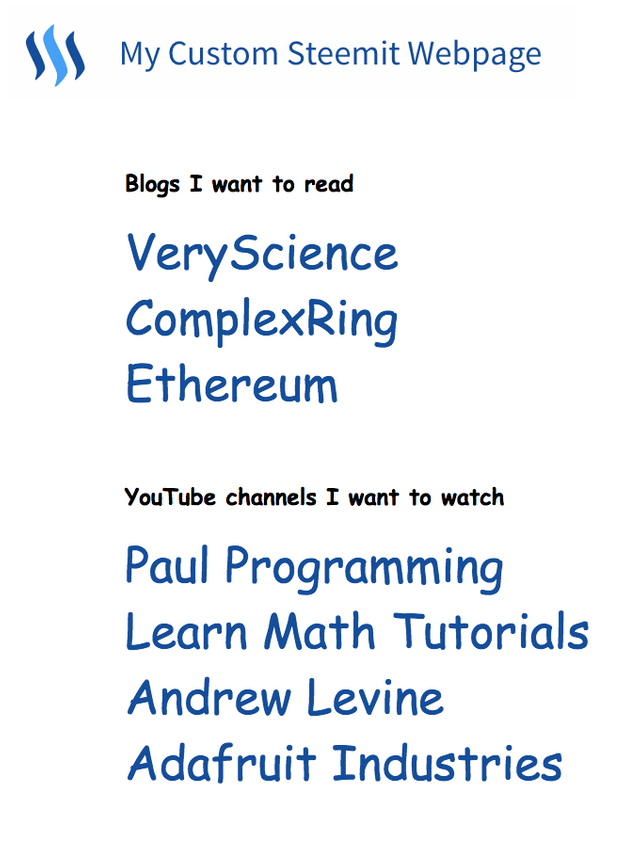
Perfect! We now have our own custom webpage! In the future I will create a tutorial that explains how to setup your own personal website where you can share your custom webpages with the world, so stay tuned for that. If you enjoyed this article make sure to follow my blog for more math, science, and programming tutorials!
See you next time! Feel free to suggest other programming or mathematics topics that you would like me to cover!
Nice intro. Note that you don't even need a text editor, you can do it all online, see for example https://jsfiddle.net
Very nice article. I'm certainly not the biggest fan of web design, but I am a fan of great content! You should maybe pop a reference link in there to something like w3schools, or Codecademy, as your comment section already indicates that you've inspired some fellow Steemers to get into web design. Upvoted for inspiration, and Followed for future content.
Before I head back out into the madness that is the trending page, I wanted to leave a link to my last article here in the hopes that you could let me know what you think of it (conceptually it's very similar to yours) whenever you have the chance. I'd be more than appreciative for any feedback and the chance to share thoughts. Thanks!
https://steemit.com/howto/@crsm/internet-privacy-comprehensive-everything-you-need-starter-s-guide-on-how-to-retake-your-privacy-on-the-web
Good tutorial... add some more... keep up the good work...
This is great. Kudos. Everyone should know at least the basics of HTML, no matter what they do.
Great info here. I learned only minimal coding c+ in school, will have to try my hand at this. Would like to learn more about html.
awesome.thanks
good post
Awesome post! Very easy to understand and get through
Excellent post. The instructions are easy to follow. Thanks for posting.
good job,
Great post