How to Make Modelling Object House Using Blender 3D || Bagaimana Membuat Modelling Object Rumah Menggunakan Blender 3D
[ENG]
Hello everyone ..
today im gonna show tutorial #7 "How to Make Modelling Object House Using Blender 3D"
[IND]
Hai semua ..
hari ini saya akan memposting tutorial #7 "Bagaimana Membuat Modelling Object Rumah Menggunakan Blender 3D"
[ENG]
Intro
Blender is Aplication open source , you can create or make anything object here
blender often used for design object , everything can be make in this aplication
[IND]
Pengenalan
Blender adalah aplikasi open source , kamu bisa membuat apapun object di blender , bleder sering digunakan untuk men-desain object . semua dapat di buat dalam aplikasi blender ini.
Langkah - Langkah untuk pembuatan dapat dilihat dibawa ini :
For Step by Step you can see down here :
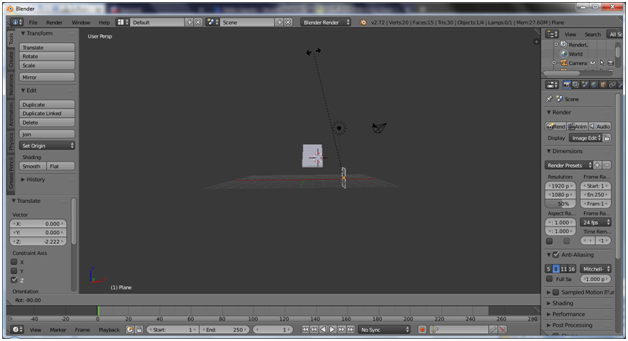
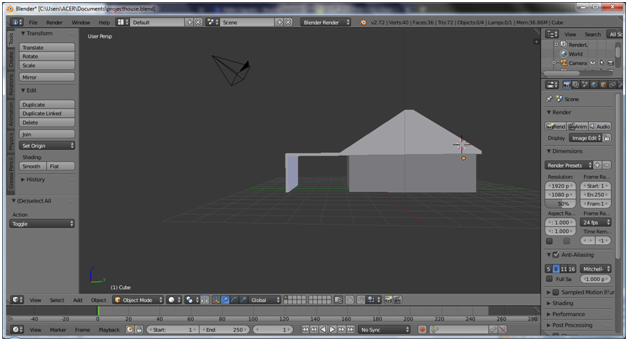
1.Buka Aplikasi Blender
Open Blender application
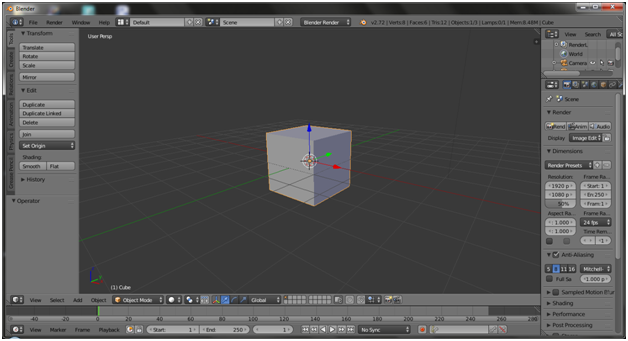
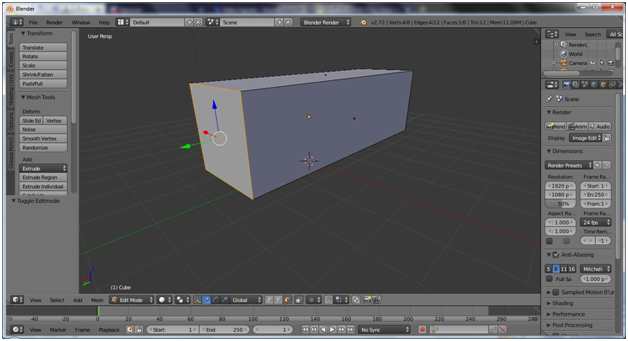
2.Object yang akan digunakan adalah (kubus)
The object that used is (Cube)
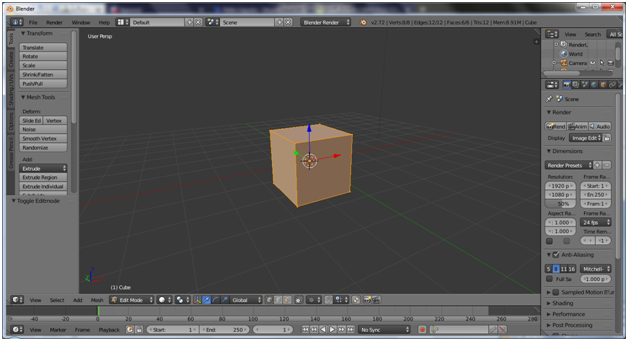
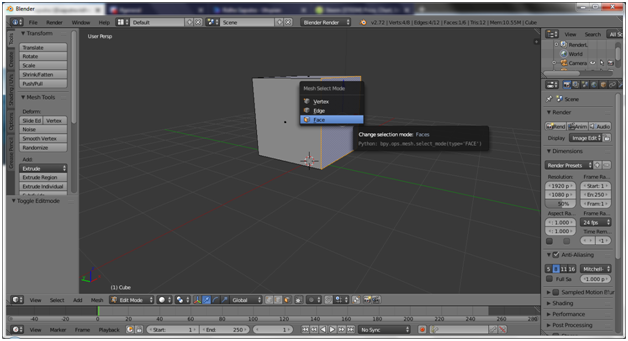
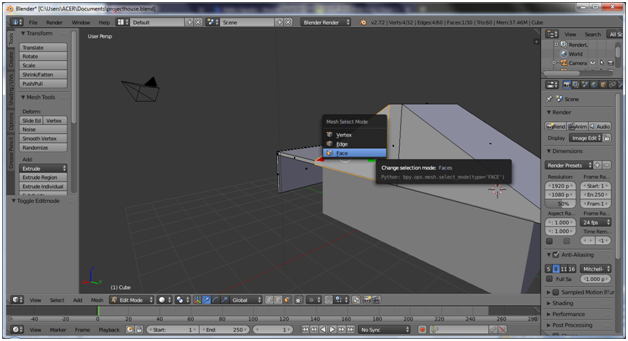
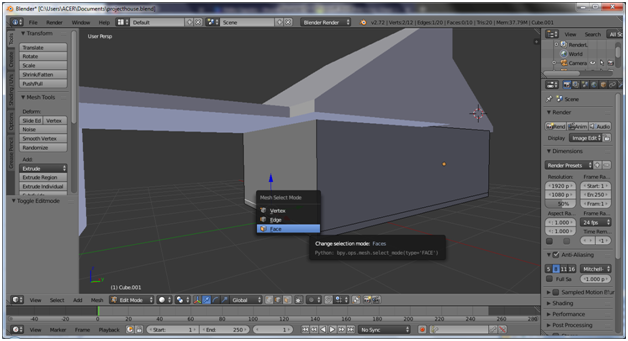
3.Klik --> Tab pada object kubus , klik Ctrl+TAB --> pilih Face
Click --> Tab on the object , then click Ctrl+TAB --> choose Face
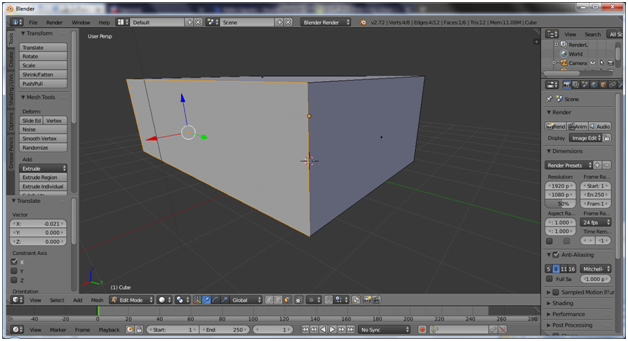
4.Klik pada bagian kanan object kubus , geser ke arah samping kanan menggunakan arah panah warna (hijau)
click on the right part object, than move to right way using arrow way white (green) colour
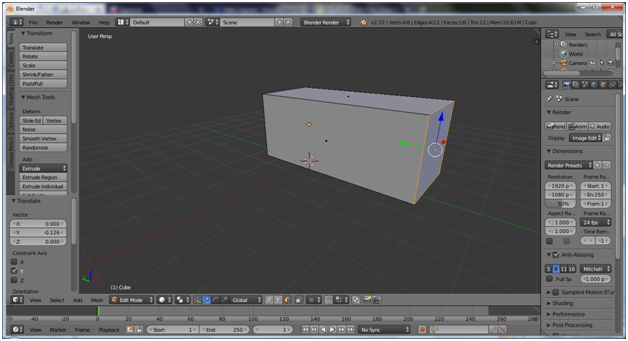
5.Klik pada bagian kanan object kubus , geser ke arah samping kiri menggunakan arah panah warna (hijau)
click on the right part object, than move to left way using arrow way white (green) colour
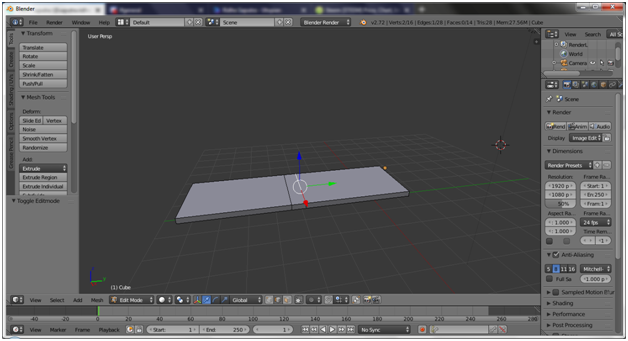
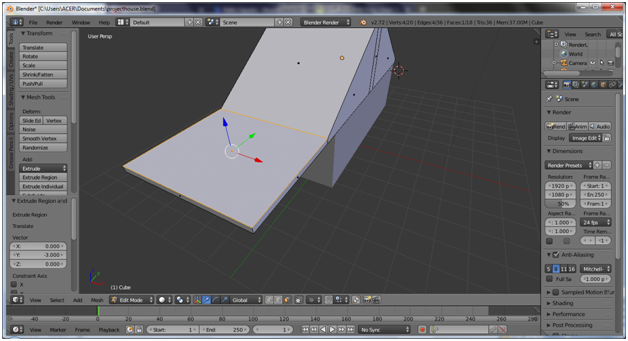
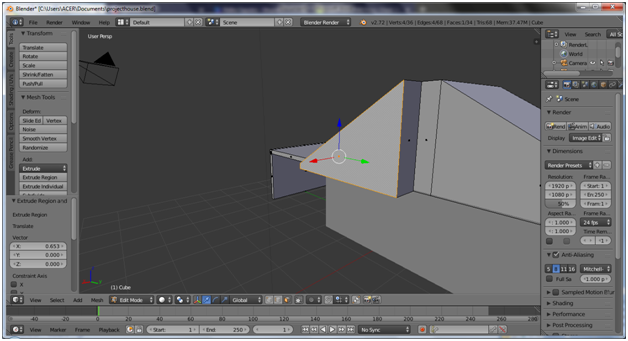
6.Klik pada bagian atas object kubus , kemudian tipiskan menggunakan arah panah warna (merah) dan tarik kebawah.
Click on the top part of object , than make it tiny using arrow way with (Red) colour.
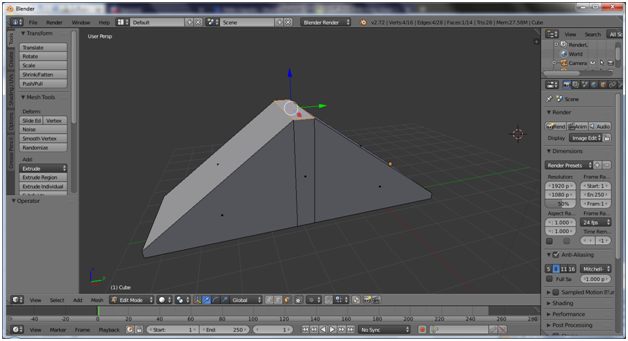
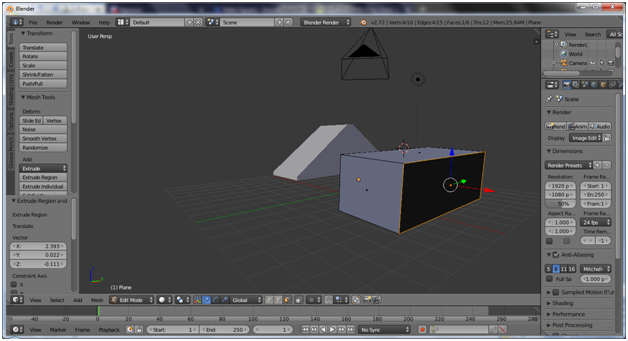
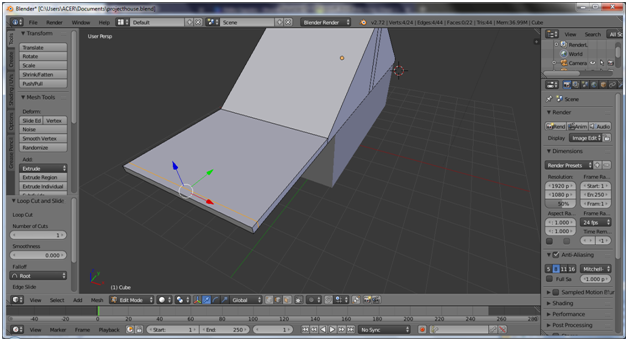
7.Potong object menggunakan Ctrl +R
Cut the object using Ctrl+R
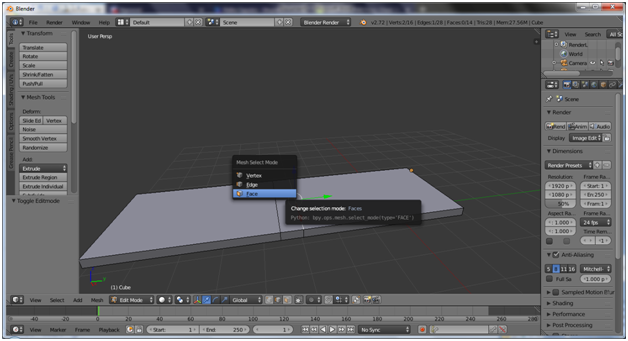
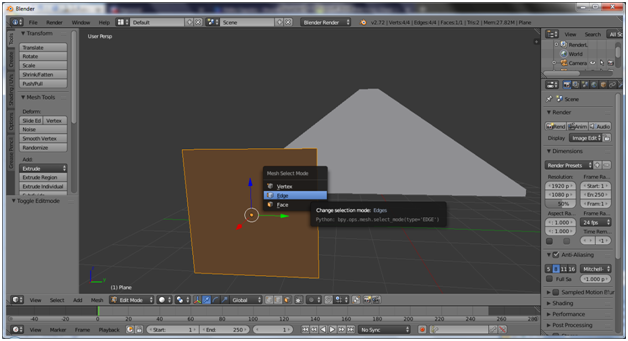
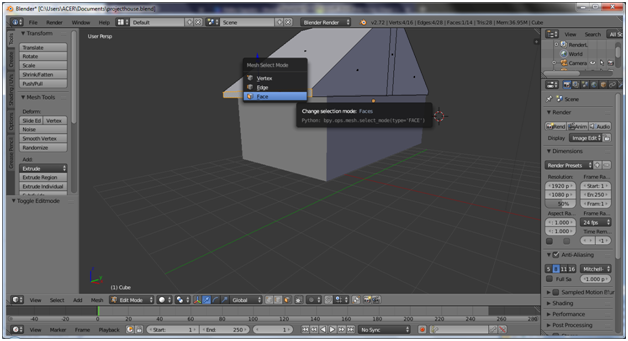
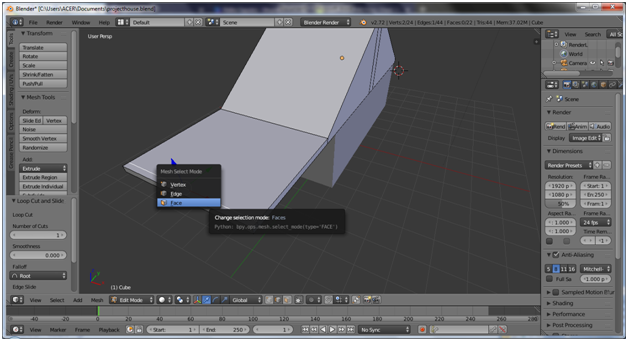
8.Klik Ctrl + Tab Pilih Face
Click Ctrl + Tab Choose Face
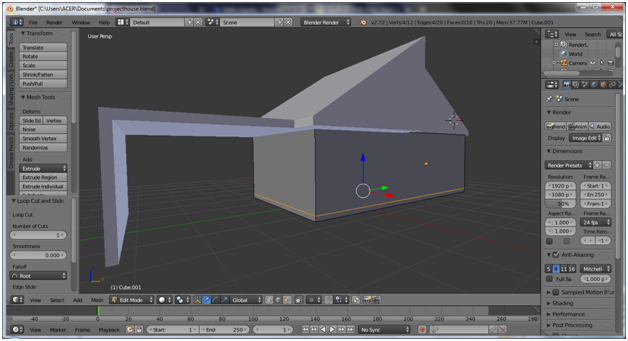
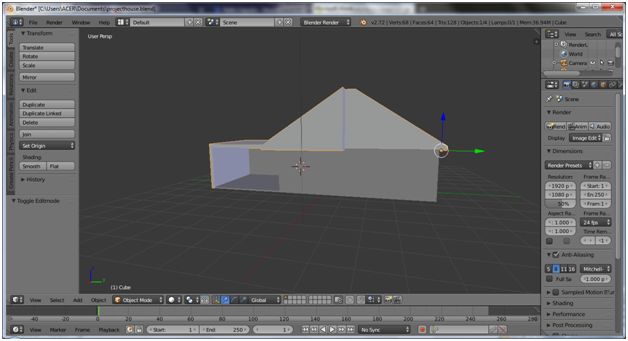
9.Klik arah panah warna (biru) kemudian tarik ke atas
Click the arrow way with (blue) colour than pull it up
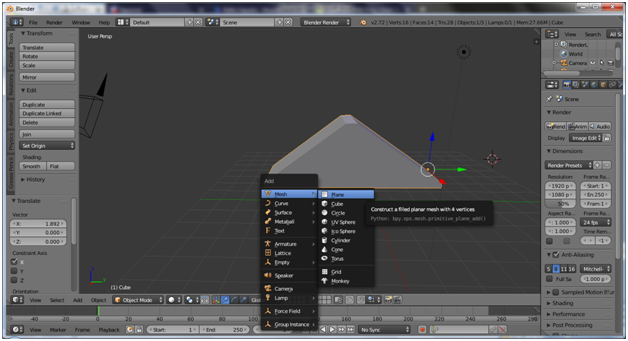
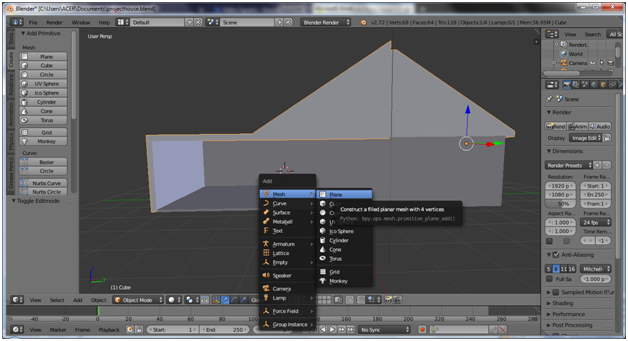
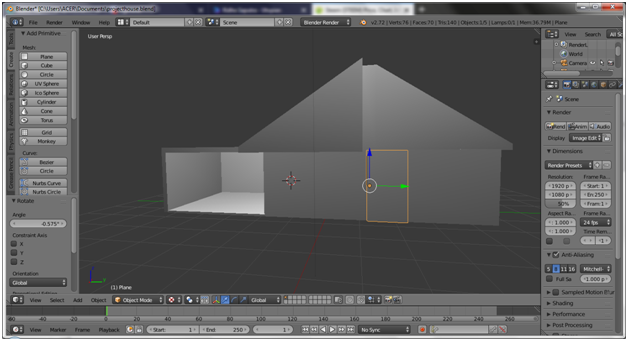
10.Tambahkan object plane klik Ctrl+A pilih --> Plane
Add the plane object , click Ctrl+A choose --> Plane
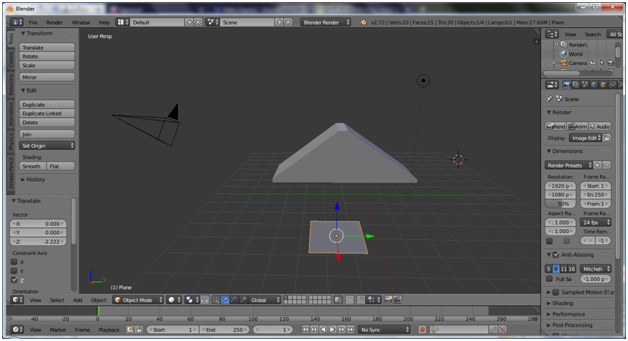
11.Putar arah object plane menggunakan Ctrl+R
Rotate plane object using Ctrl+R
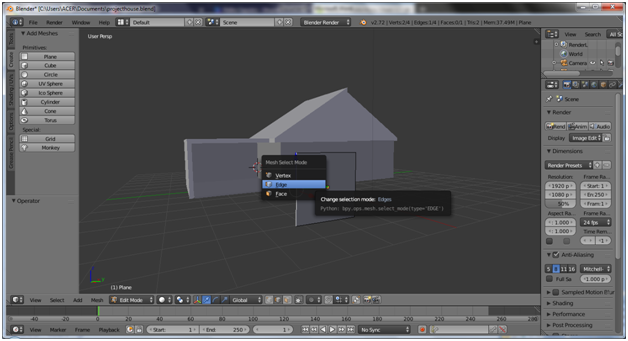
12.Klik pada object plane , Ctrl+Tab --> pilih Edge
Click on the plane object , Ctrl+Tab --> choose Edge
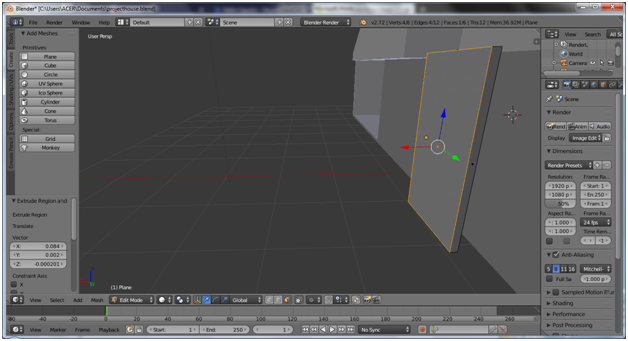
13.Klik pada bagian samping kanan objct plane , kemudian tarik ke arah kanan menggunakan arah panah warna (hijau)
Click on the right part of plane object , than pull to the right way using arrow with (green) colour
14.Klik Ctrl+Tab --> Pilih Face
Click Ctrl+Tab --> Choose Face
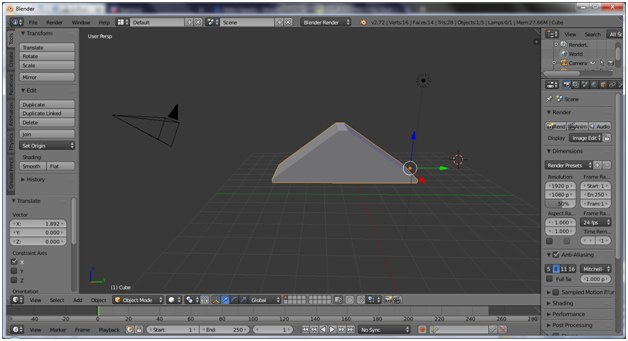
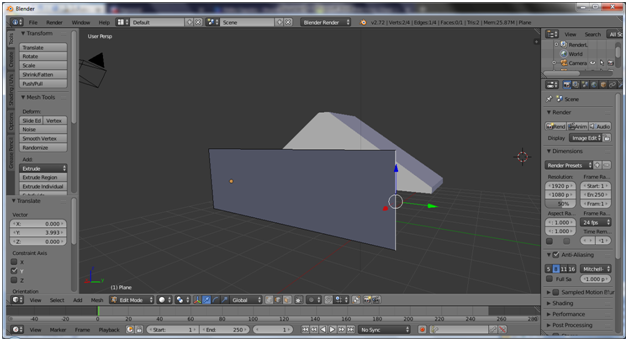
15.Hasil
Results
16.Klik pada sudut kiri pada object kubus , kemudian klik Ctrl+Tab pilih Face
Click on the left corner at the object , then click Ctrl+Tab choose Face
17.Tarik ke arah samping kiri menggunakan arah panah warna (hijau)
Pull to the left way using arrow with (green) colour
18.Kemudian potong bagian sudut kiri object menggunakan Ctrl+R
Then cut the left corner part using Ctrl+R
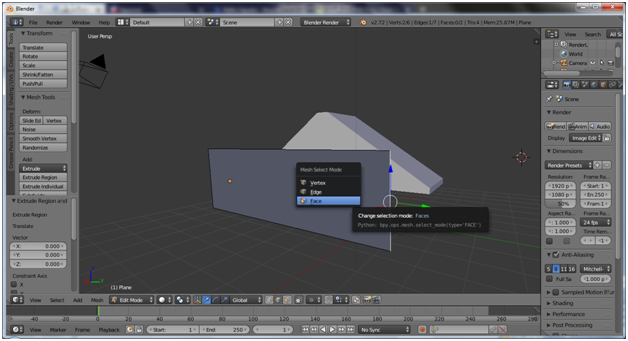
19.Klik Ctrl + Tab --> Pilih Face
Click Ctrl + Tab --> Choose Face
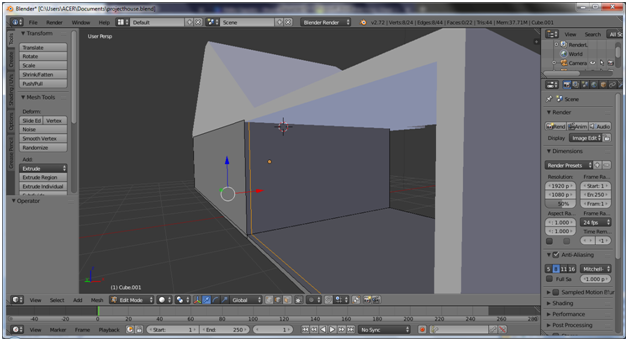
20.Klik pada bagian bawah yang sudah dipotong , kemudian Klik Ctrl+E dan tarik ke bawah
Click on the bottom part that has been cut, then Click Ctrl+E and pull down
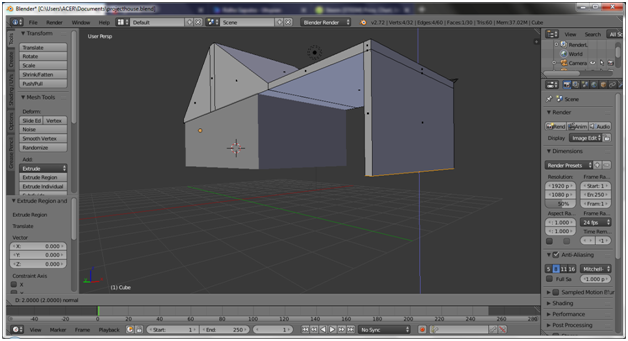
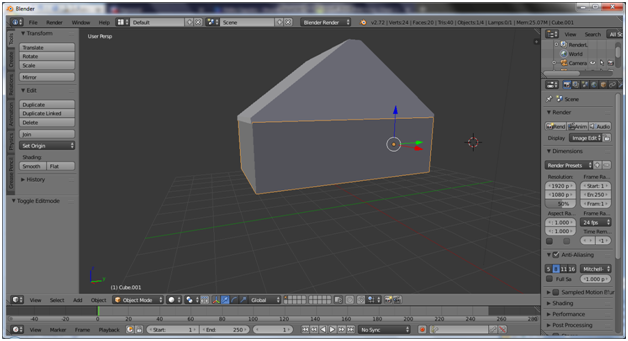
21.Hasil
Results
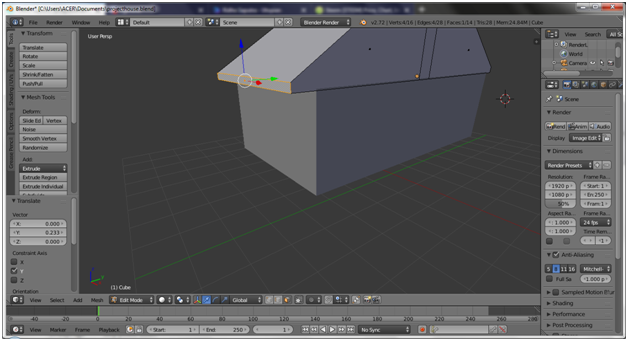
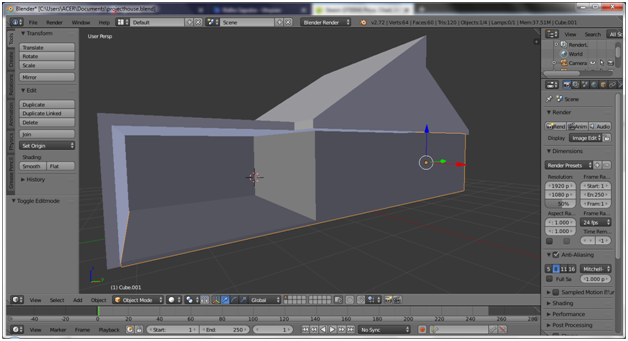
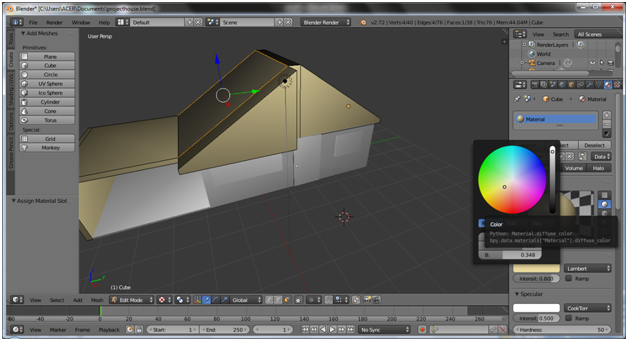
22.Klik pada bagian atap rumah , klik Ctrl+Tab pilih Face dan tarik kedepan menggunakan arah panah warna (merah)
Click on the top of the roof , Click Ctrl+Tab choose Face and pull straight a head using arrow with (red) colour
23.Klik pada bagian bawah rumah , kemudian potong menggunakan Ctrl +R
Click on the bottom part of the house , then cut it using Ctrl +R
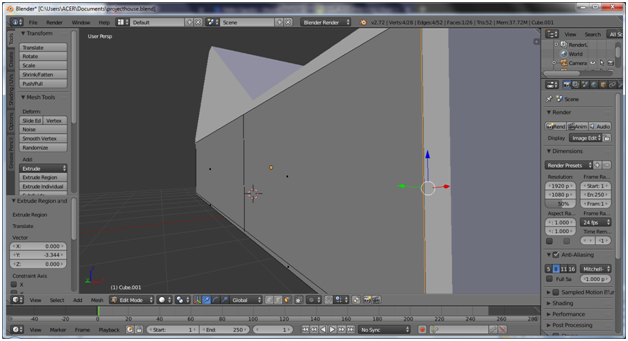
24.Klik Ctrl+Tab pilih Face
Click Ctrl+Tab choose Face
25.Klik E dan tarik kesamping kiri
Click E then pull to left side

26.Hasil
Results

- Lakukan hal yang sama pada langkah (25)
do the same thing like step (25)
28.Hasil
Results
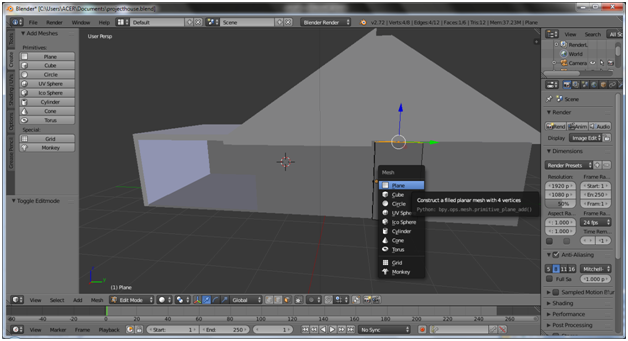
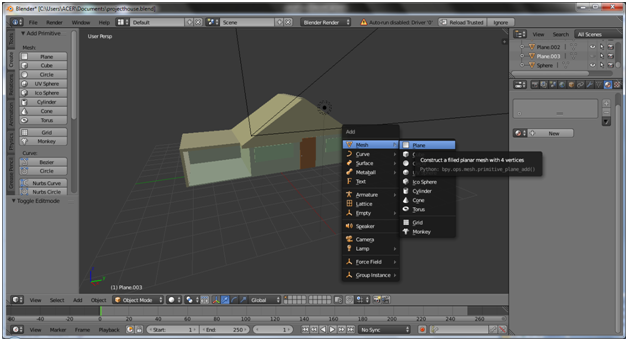
29.Tambahkan object plane lagi klik Ctrl+A pilih Plane
Add more plane object click Ctrl+A choose Plane
30.Putar arah object plane menggunakan Ctrl+R
Rotate the way plane object using Ctrl+R

31.Klik pada object plane , kemudian klik Ctrl+Tab Pilih Edge
click on the plane object , then Ctrl+Tab chooseEdge
32.Hasil
Results

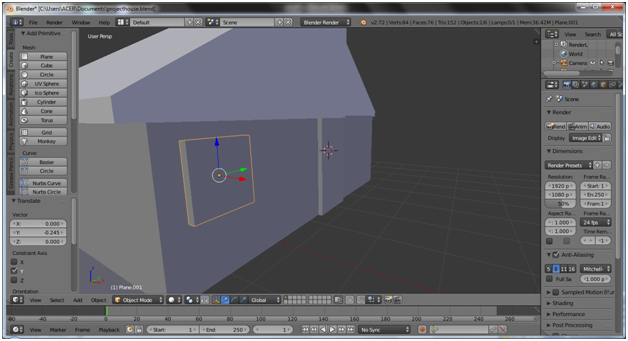
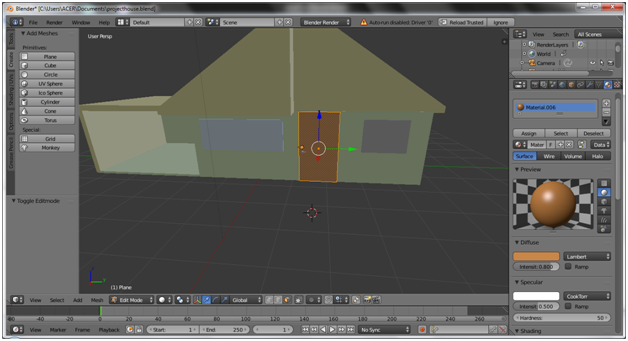
33.Object plane tersebut digunakan sebagai (pintu) kemudian ,letakkan object tersebut sesuai gambar dibawah ini .
the object plane used by (door) then , putt the object like the picture down here
34.Hasil
Results
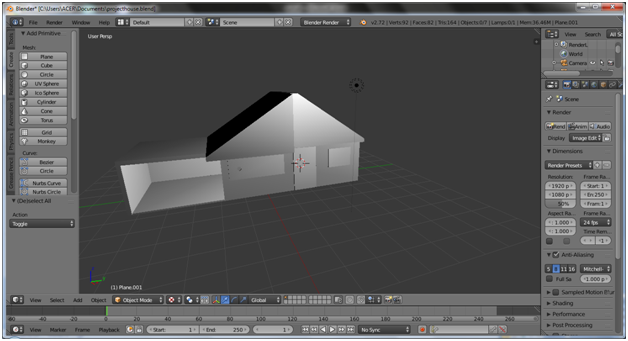
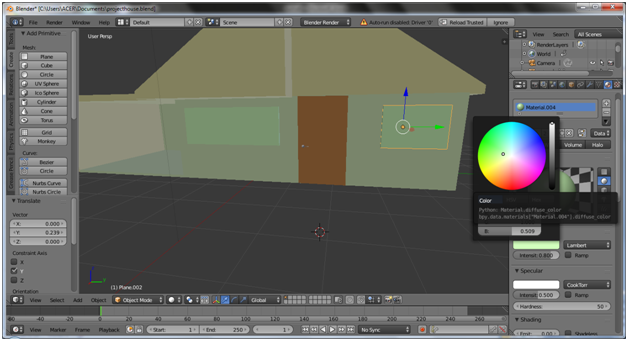
35.Tambahkan lagi object plane (untuk jendela), klik Ctrl+A pilih Plane
add more the plane object (for windows), klik Ctrl+A choose Plane
36.Hasil
Results
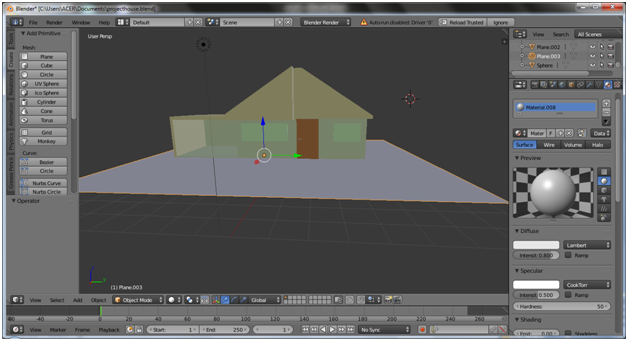
37.Pewarnaan pada object :
colouring on the object
38.Tambahkan object plane lagi digunakan (sebagai alas bawah dari object rumah) Ctrl+A pilih Plane
add more plane object (used for the field on the house object) Ctrl+A choose Plane
39.Hasil
Results
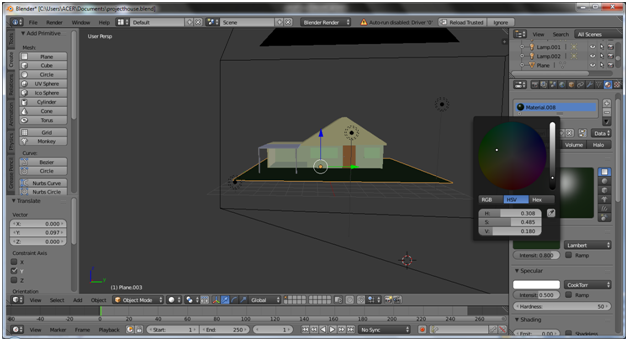
40 Pewarnaan
Colouring
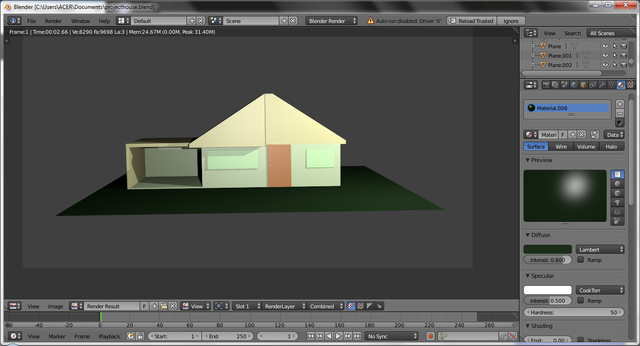
41.Klik F12 untuk proses renderring
Click F12 to renderring process
Posted on Utopian.io - Rewarding Open Source Contributors
Thank you for the contribution. It has been approved.
You can contact us on Discord.
[utopian-moderator]
Tulisan yang bagus ini dan sudah kami upvote dan resteem ke 1895 follower ya.. 😋
thanks.
wah jadi pengen coba
silahkan sobat
Hey @saputra.ridho I am @utopian-io. I have just upvoted you!
Achievements
Suggestions
Get Noticed!
Community-Driven Witness!
I am the first and only Steem Community-Driven Witness. Participate on Discord. Lets GROW TOGETHER!
Up-vote this comment to grow my power and help Open Source contributions like this one. Want to chat? Join me on Discord https://discord.gg/Pc8HG9x