How Can We Use Clipboard in Electron Applications
Repository
Electron GitHub Address
https://github.com/electron/electron
My GitHub Address
This Project GitHub Address
How Can We Use Clipboard in Electron Applications
What Will I Learn?
- You will learn how to use clipboard in electron applications.
- You will learn the functions writeText, writeBookmark, writeHtml and writeImage.
- You will learn the functions readText, readBookmark, readHtml and readImage.
- You will leran routing operations with AngularJS
- You will learn ng-src and ng-ng-show features
- You will learn the electron nativeImage module.
- You will learn the functions createFromPath() and toDataURL().
Requirements
Difficulty
- Intermediate
Tutorial Contents
Clipboard for a desktop application is an important issue. Some applications may want to copy and paste operations from the end user.
After you select a specific area of text, the copy operation may be long it is better to copy with a button instead of this.
Currently there is a clipboard for copy-paste operations of the operating systems. I'll tell you how to copy-paste using this pano on this example. I'll show you how to place a text on the clipboard, as well as html, bookmark and image in clipboard placement.
I will use the angularjs ui-router to copy and paste on different pages. I will also use bootstrap for page designs.
Let's start building our example.
First write the necessary codes for electron in the main.js file.
In main.js
const {app,BrowserWindow}=require('electron')
const url=require('url')
const path=require('path')

let win;

function createWindow(){
  win=new BrowserWindow({
    width:900,
    height:900
  })

  win.loadURL(url.format({
    pathname:path.join(__dirname,'index.html'),
    protocol:'file:',
    slashes:true
  }))

  win.openDevTools()


}

app.on('ready',createWindow)
Let's create the index.html page and add the necessary CDN's.
In index.html
<head>
    <meta charset="UTF-8">
    <meta name="viewport" content="width=device-width, initial-scale=1.0">
    <meta http-equiv="X-UA-Compatible" content="ie=edge">
    <link href="https://stackpath.bootstrapcdn.com/bootstrap/4.1.1/css/bootstrap.min.css" rel="stylesheet"
    integrity="sha384-WskhaSGFgHYWDcbwN70/dfYBj47jz9qbsMId/iRN3ewGhXQFZCSftd1LZCfmhktB" crossorigin="anonymous">
    <script src="https://cdnjs.cloudflare.com/ajax/libs/angular.js/1.3.15/angular.min.js"></script>
    <script src="https://cdnjs.cloudflare.com/ajax/libs/angular-ui-router/0.3.2/angular-ui-router.min.js"></script>
    <script type="text/javascript" src="script.js"></script>
    <title>Document</title>
</head>
We can now use ui-router and bootstrap features on our page. I will place copy and paste buttons when end-user click on these buttons they will direct its to their pages.
In index.html
<body ng-app="myApp">
    <div class="container">
        <div class="jumbotron">
            <div class="row">
                <div class="col-md-6">
                    <button class="btn btn-primary" ui-sref="copy">Copy Page</button>
                </div>
                <div class="col-md-6">
                    <button class="btn btn-primary" ui-sref="paste">Paste Page</button>
                </div>
            </div>
        </div>
        <div>
            <div ui-view> </div>
        </div>

    </div>
</body>
We used the ng-app attribute in the body tag. After you have defined myApp, we can use the AngularJS code in the body tag and with ui-sref, we need to define state names.
The pages that are clicked on the button will be pulled to the ui-view area.
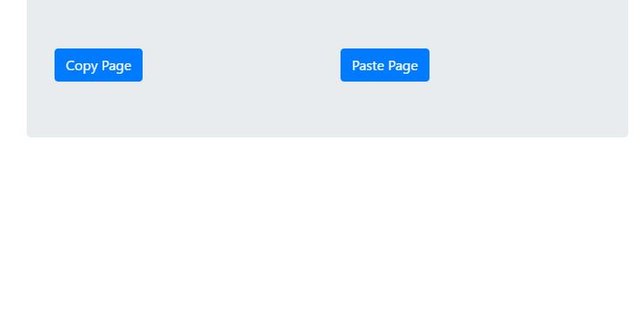
As a result of the codes we wrote, index.html is as follows.
Let's create the script.js page and write the necessary code for routing.
In script.js
var app=angular.module('myApp',['ui.router']);

app.config(['$stateProvider',function($stateProvider){

    $stateProvider
    .state('copy',{
      url:'/copy',
      templateUrl:'copy.html',
      controller:'copyCtrl'
    })
    .state('paste',{
        url:'/paste',
        templateUrl:'paste.html',
        controller:'pasteCtrl'
      })


  }]);
Create a copy.html page.
In copy.html
<div lang="en">
        <div class="row">
                <div class="col-md-12">
                    <div class="form-group">
                        <label>Text: </label>
                        <input type="text" class="form-control" ng-model="text">
                    </div>
                    <button type="submit" class="btn btn-success" ng-click="doCopyText()">Copy Text</button>
                </div>
            </div>

            <div class="row">
                    <div class="col-md-12">
                        <div class="form-group">
                            <label>HTML: </label>
                            <input type="text" class="form-control" ng-model="html">
                        </div>
                        <button type="submit" class="btn btn-success" ng-click="doCopyHTML()">Copy HTML</button>
                </div>
            </div>
            <div class="row">
                <div class="col-md-12">
                    <div class="form-group">
                        <label>Title</label>
                        <input type="text" class="form-control" ng-model="title"/>
                    </div>
                    <div class="form-group">
                        <label>Url</label>
                        <input type="text" class="form-control" ng-model="url" >
                    </div>
                    <button type="submit" class="btn btn-success" ng-click="doBookmark()">Copy Bookmark</button>
                </div>
            </div>
            <div class="row">
                    <div class="col-md-12">
                        <div class="form-group">
                            <label>Image: </label>
                            <input type="file" class="form-control" id="file-copy2" >
                        </div>
                        <button type="submit" class="btn btn-success" ng-click="doCopyImage()">Copy Image</button>
                        < img src=""  class="img-thumbnail" width="304" height="236" ng-src="{{path}}">
                </div>
            </div>
</div>
I need to explain this page a bit.
There are 4 areas for clipboard operations. These areas:
- Text
- HTML
- BookMark
- Image
There are necessary inputs and buttons for each area. The texts in the input will be copied into the clipboard when these buttons are clicked in copyCtrl.
We can not talk about the input for the image. I have placed one file upload element for the image.
We will copy this picture when we select the picture on our computer. I placed an img tag to see the image we selected here. With the ng-src feature we can set the path to the image.
Some features that should be known with ng-src :
- The
ng-srcdirective overrides the original src attribute of animgelement. - The
ng-srcdirective should be used instead of src if you have AngularJS code inside the src value. - The
ng-srcdirective makes sure the image is not displayed wrong before AngularJS has evaluated the code.
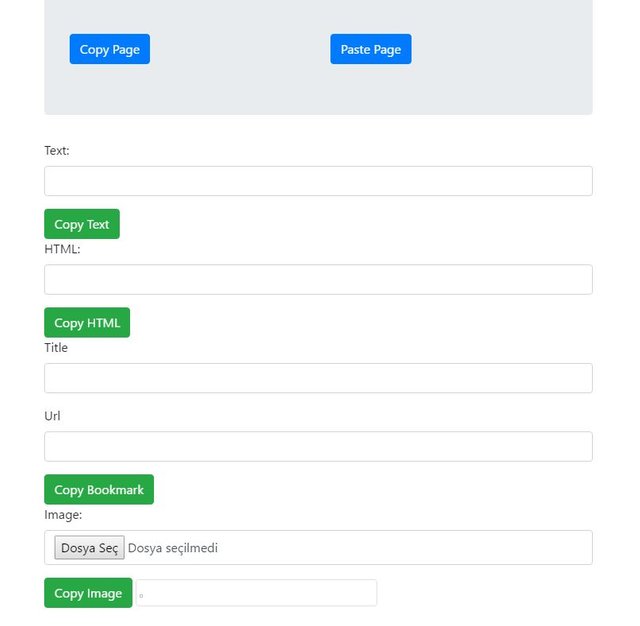
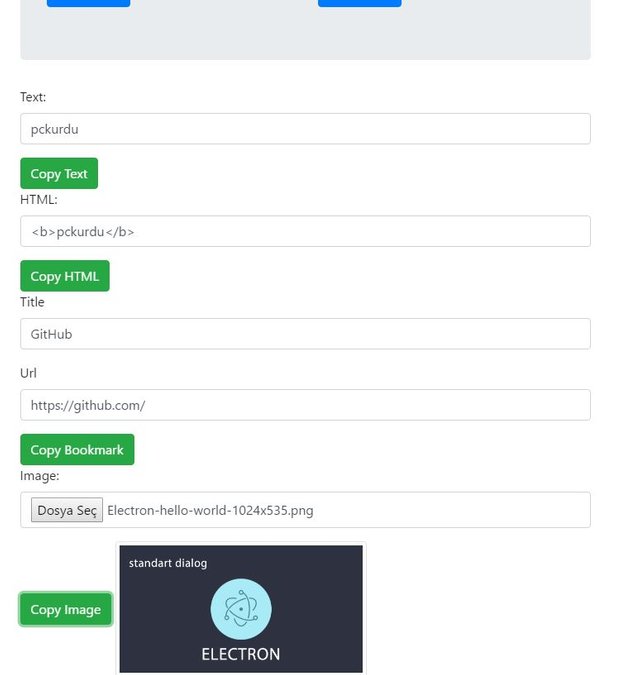
Click on the copy button and copy.html looks like this.
Let's create copyCtrl and start clipboard operations.
First we need to load the clipboard module.
const {clipboard} = require('electron')
clipboard.writeText(text,[type])
With writeText() we can copy a text to the clipboard. The text to be copied with text is symbolized. With [type], the board to be copied is also symbolized.
clipboard.writeHtml(html,[type])
With writeHtml() we can copy a text to the clipboard. The html to be copied with html text is symbolized. With [type], the board to be copied is also symbolized.
clipboard.writeBookmark(title,url)
With writeBookmark() we can copy the bookmark properties to the clipboard. We can get these fields as parameters in the bookmark() function since there is a title and url part in a bookmark.
clipboard.writeImage(nativeImage)
With writeImage() we can copy the images. I have to take a image for the electron inside the nativeImage parameter
Let's define copyCtrl.
app.controller('copyCtrl',function($scope){


    $scope.doCopyText=function(){
        clipboard.writeText($scope.text, 'selection')

    }

    $scope.doCopyHTML=function(){
        clipboard.writeHtml($scope.html, 'selectionHTML')

    }

    $scope.doBookmark=function(){
        clipboard.writeBookmark($scope.title, $scope.url)


    }

    $scope.doCopyImage=function(){

        $scope.selectedFile = document.getElementById('file-copy2').files[0];
        $scope.path=$scope.selectedFile.path;
        clipboard.writeImage(nativeImage.createFromPath($scope.path));
    }

});
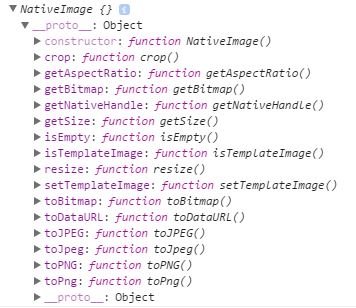
When the image button is clicked, the path of the selected file is taken by the file. There is now a way to get the picture. The nativeImage module's createFromPath() method allows us to access a path known as the image.
We must define the nativeImage module before.
const {nativeImage}=require(‘electron’)
Now we can design paste.html page.
<div>
        <div class="row">
                <div class="col-md-12">
                    <div class="form-group">
                        <input type="text" class="alert alert-info"  ng-model="text" ng-show="showtext==true"></input>
                    </div>
                    <button type="submit" class="btn btn-success" ng-click="doPasteText()">Paste Text</button>
                </div>
            </div>

            <div class="row">
                    <div class="col-md-12">
                        <div class="form-group">
                             <p type="text" ng-model="text" id="p" ng-show="showhtml==true"></p>
                        </div>
                        <button type="submit" class="btn btn-success" ng-click="doPasteHTML()">Paste Text</button>
                    </div>
            </div>
            <div class="row">
                <div class="col-md-12">
                    <div class="form-group">
                        <a href="" id="bookmark" ng-show="showbookmark==true"></a>
                    </div>
                    <button type="submit" class="btn btn-success" ng-click="doPasteBookmark()">Paste Bookmark</button>
                </div>
            </div>
            <div class="row">
                    <div class="col-md-12">
                        <div class="form-group">
                             < img class="img-thumbnail" ng-src="{{path}}" ng-model="img" ng-show="showImg==true">
                        </div>
                        <button type="submit" class="btn btn-success" ng-click="doPasteImage()">Paste Image</button>

                </div>
            </div>
</div>
I have defined the p tags to paste the texts we copied, but I do not want to display these p tags at boot time because the paste.html page is not a nice image when opened.
I use ng-show to turn off p tags. p tags will be visible when ng-show is true inside. Do it true when the buttons are clicked.
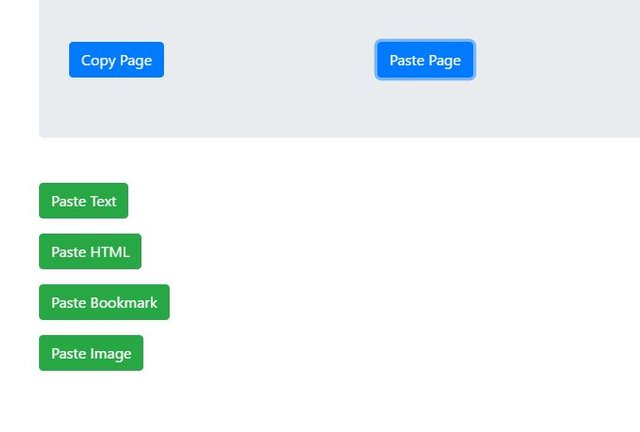
The paste.html page looks like this at the opening
app.controller('pasteCtrl',function($scope){


    $scope.doPasteText=function(){

       $scope.text=clipboard.readText('selection')
       $scope.showtext=true;

    }

    $scope.doPasteHTML=function(){
        let p=document.getElementById('p');
        p.innerHTML=clipboard.readHtml('selectionHTML')
        $scope.showhtml=true;


    }
    $scope.doPasteBookmark=function(){
        let abookmark=document.getElementById('bookmark');
        let bookmark=clipboard.readBookmark();
        abookmark.innerHTML=bookmark.title;
        abookmark.href=bookmark.url;
        $scope.showbookmark=true;

    }

    $scope.doPasteImage=function(){
        let image=clipboard.readImage();
        $scope.path=image.toDataURL();
        $scope.showImg=true;

    }

})
clipboard.readText([type])
Clipboarda allows you to paste text as text. The type can be selected clipboard.
clipboard.readHtml([type])
Allows the copyed html text to be pasted.
clipboard.readBookmark()
Allows paste the copied bookmark.
The value returned is object. The url and title fields are accessible.
In this example, the title and url properties of <a> element are filled in by readBookmark.
clipboard.readImage()
Allows the copied image to be pasted.
The copied image can be accessed as base64 with the toDataURL() function. It can be compared to the src attribute of the img tag to show it on our page.
Conslusion
In this tutorial I showed the electron clipboard module.
Now let's see how the application works.
We are filling in the fields on the page copy.html.
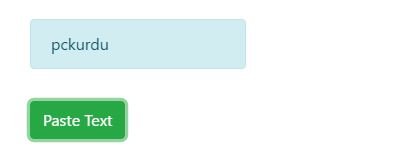
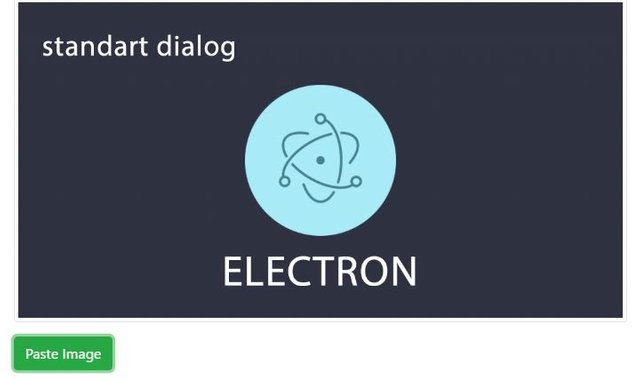
When we click the buttons on the paste.html page, the following image appears.
- When paste text button is clicked
- When paste html button is clicked
- When paste bookmark button is clicked
When GitHub link is clicked, github page opens in the application.
- When paste image button is clicked
Curriculum
Routing Operations in Electron Application



I thank you for your contribution. Here are my thoughts on your post;
Tutorials should teach the user something unique, shouldn't show ubiquitous functions and replicate well-documented concepts. What you really do here is copying and pasting with already defined functions, then dressing it with Electron.
As you're teaching a lesson about coding. It's advised to explain what the code does. Your code blocks are only meant to be copy-pasted. Next time, please explain what they do without making it filler content.
In Utopian, we don't approve any plagiarized content. Plagiarism is a very important crime and there isn't any pardon for it. As you plagiarized 3 sentences from w3schools and didn't cite it, in the voting phase, your tutorial will not be considered. Also, your account will be suspended for a time.
Your contribution has been evaluated according to Utopian policies and guidelines, as well as a predefined set of questions pertaining to the category.
Need help? Write a ticket on https://support.utopian.io/.
Chat with us on Discord.
[utopian-moderator]
Hey @yokunjon
Here's a tip for your valuable feedback! @Utopian-io loves and incentivises informative comments.
Contributing on Utopian
Learn how to contribute on our website.
Want to chat? Join us on Discord https://discord.gg/h52nFrV.
Vote for Utopian Witness!