Recycled Chicken Coop: day 4 the finale
Well that's a wrap...at least for what I am going to make a post out of. Today was a beautiful afternoon outside finishing up the recycled chicken coop. I cut and attached the metal roof. I built a pop door. I built laying boxes, and even got to over build a bit haha.
I have been having so much fun with this build. It has been a challenge to get everything sorted and put together like an artistic puzzle. I gathered up material from the owners house, his old barn, the property we are on, but I had to actually go buy some things today. I managed to build this entire coop out of repurposed / free material, and today I needed to buy some screws and a couple of bits. So it came up to about 8 bucks!
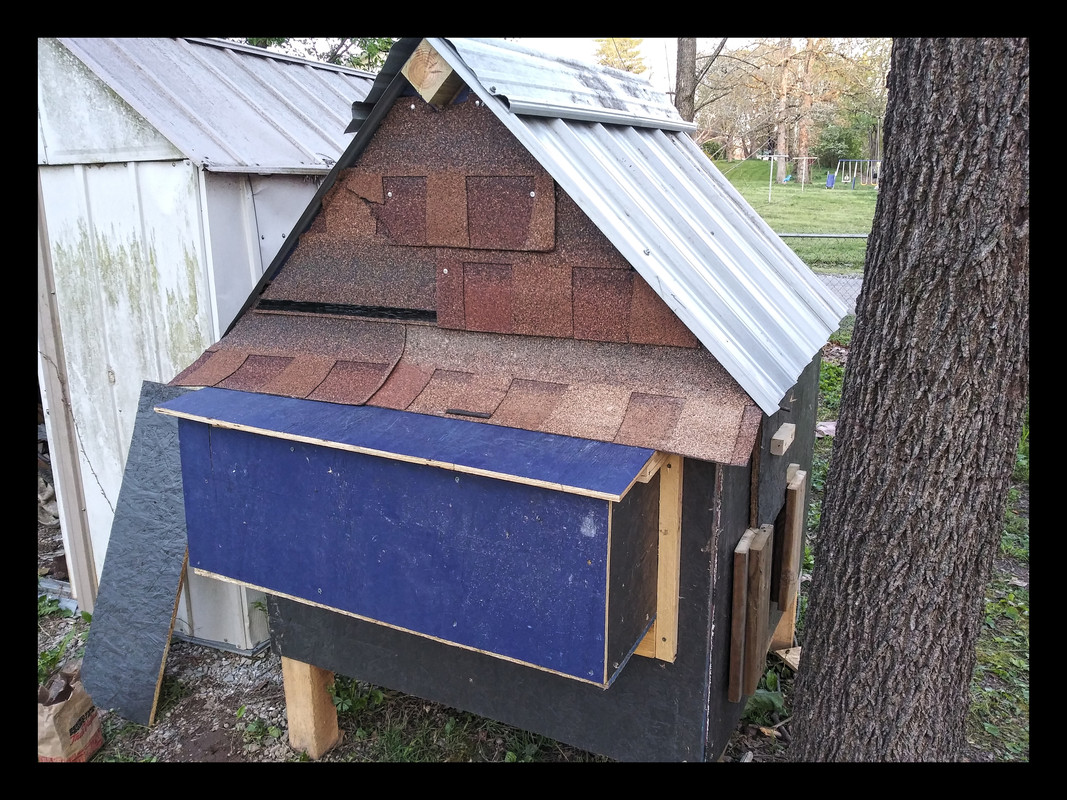
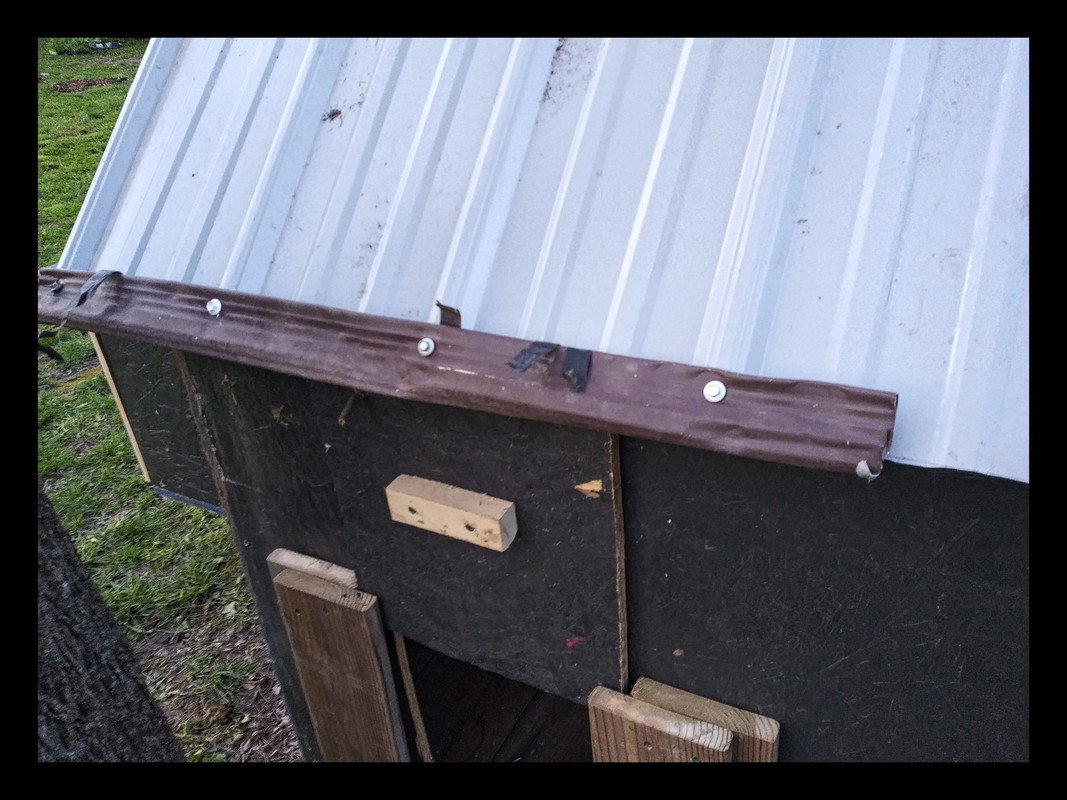
I started this phase of the build by putting the roof on. Listen, when you are working with sheet metal please remember it is sharp as crap. It takes very little effort to cut yourself very badly. I made it out with two tiny cuts that actually came while I was cutting it. I didn't even feel it...but I saw the blood!
The pieces were about 40 inches long. I was able to use a full sheet wide, and then cut it to length. For the last little section I had to both cut it to length and cut it long ways to fit. Out of the four pieces that I attached as the roof, three were grey and one was red. I love that it adds a bit of quirky to it. I finished the roof by using the long pieces that I cut off as a ridge cap. It isn't a perfect fit, but it should deter alot of rain for sure. I simply laid it over the top and screwed it in.
Next I built the laying boxes. Since the first time that I build exterior laying boxes, I have been in love with it. So I wanted to make three boxes that could be removed for coop access, or maybe I could just access by take off half of the roof....that might actually be easier haha.
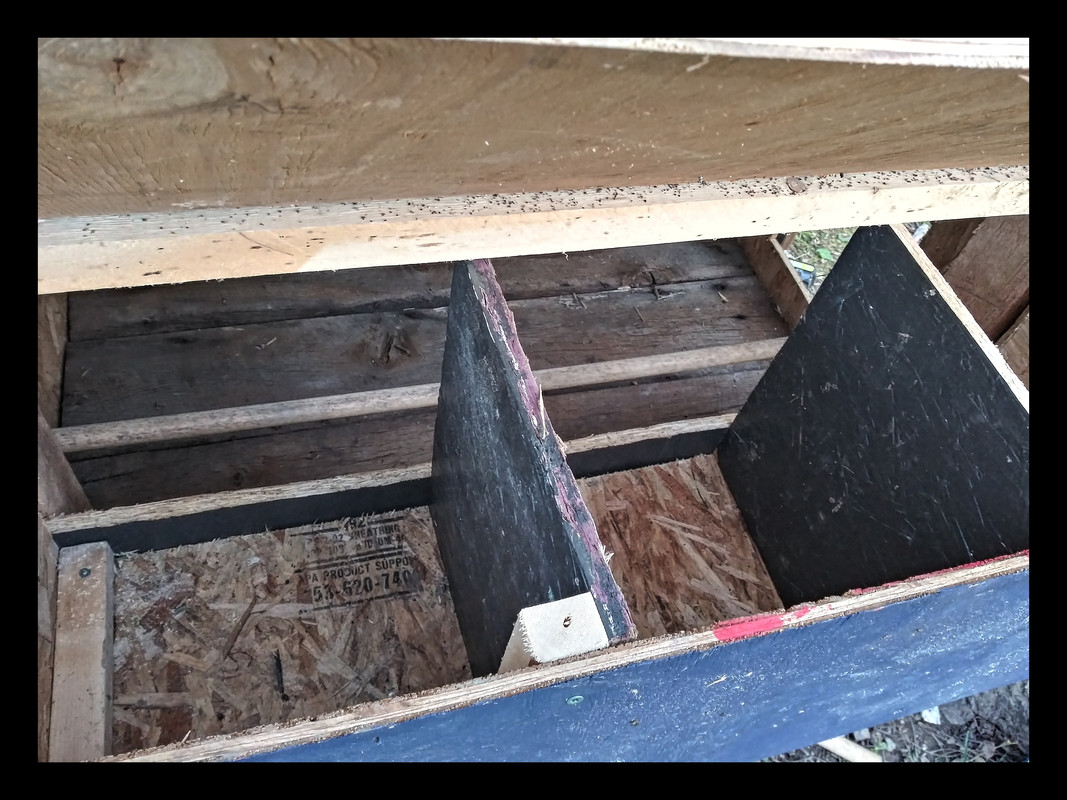
I started with what I would call the frame. I attached a 2x4 across the bottom, and 2x2's up the sides and across the top of the hole. I cut the piece that would act as the bottom of the laying boxes, and then I cut the end pieces. I used pieces of 2x2 to hold all of the vertical pieces together. I then cut the two dividing boards, and also attached everything with pieces of 2x2.
The artsy over build happened when it was time to build the lid for the laying boxes. I used one solid board that was attached with three hinges. It attached to the actual coop and then it laid at an angle down onto the boxes. The issue that I ran into was where the lid met the coop. There was a pretty decent gap, and I am pretty sure that the rain would soak that alot. So I used a couple of old shingles to hopefully fix the water issue. I attached the shingles so that they are just less than halfway down the lid. I nailed the top to the coop, and when I open the lid the shingles slide down the lid. This way the shingle won't wear out and the hinges and gap are covered. I went ahead and took the shingles all the way up to the top, and I hope that it is enough to help keep the laying boxes dry.
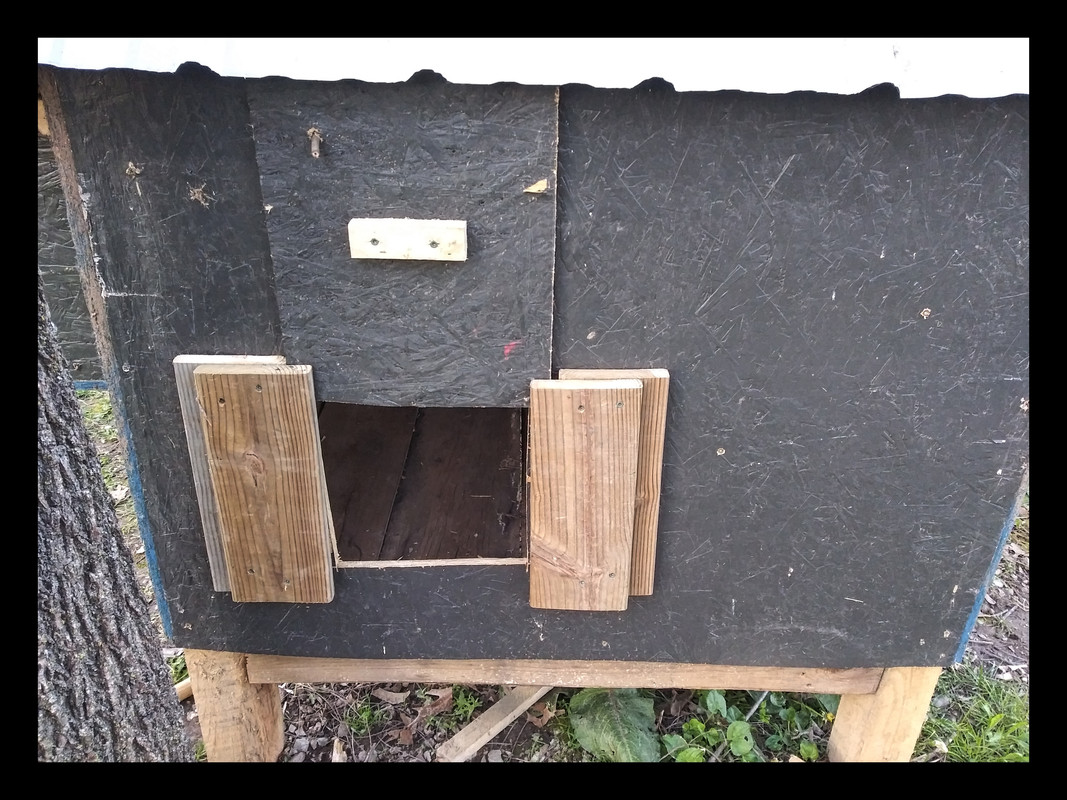
Over on the side of the coop is where the pop door is. This is just a little door that lets the chickens in and out, and also closes to keep predators out. The style I love the most is called a guillotine. It had a rail on each side, and the door slides up and down. When I build the little ramp for the birds, the door will rest on it. I added a handle so we can manually open it, and it is held in place with a very high tech and sophisticated stick.
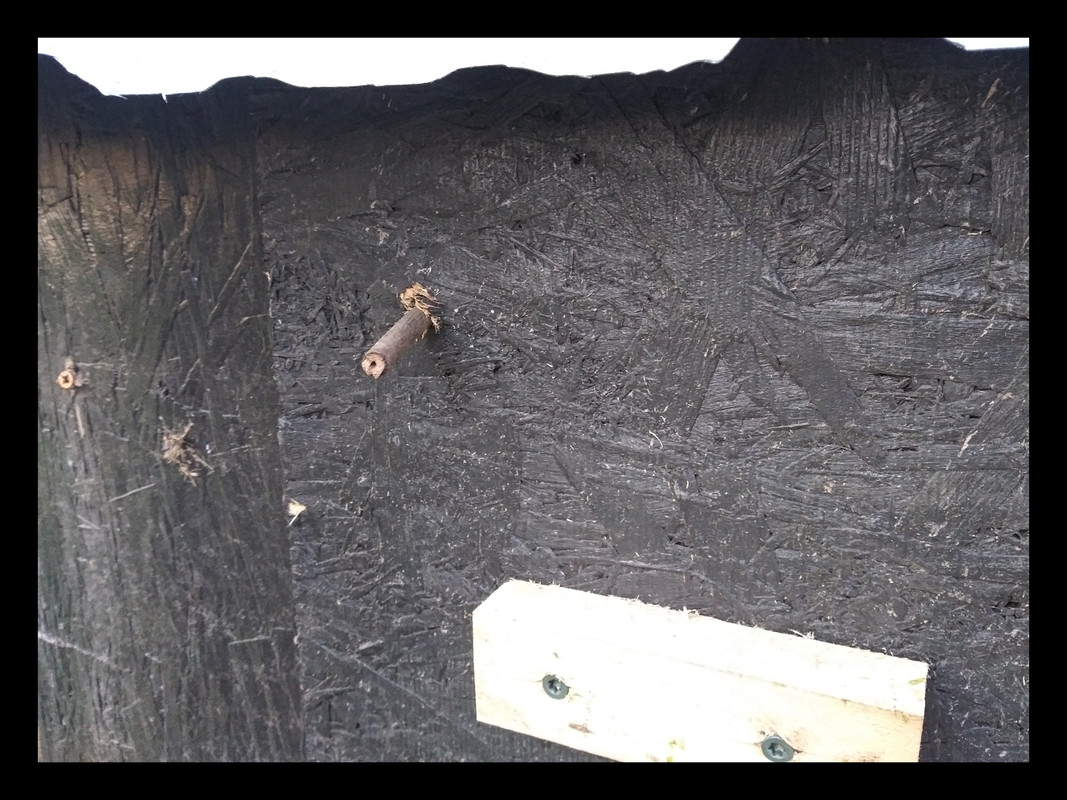
So, speaking of cutting your hands all up, I also made a modification to the metal just above the door. Because that stuff is so dad gum sharp, I didn't want any of my family to risk getting cut. I found a piece of drain pipe and flattened it. I then folded it in half, and screwed it over the sharp edge. That way if anyone bumps their hand or arm they will hit a smooth metal edge!
The last things that I still have to do is build the ramp for them to walk down, and also build a feeder. The ramp is pretty easy. It is pretty much just a piece of wood, and then you put small wood strips across the ramp spaced about 6 inches apart. That gives them some tread to walk up a potentially slippery surface.
The feeder though, that might be a bit trickier. I am thinking about doing a PVC feeder that goes through the wall. I will start with a 4 inch opening that tapers down to a two inch pipe. I will use 45 degree couplings and take it through the wall and down to a Y. I will step up from a 2 inch to a 4 inch so the Y pipe will be wide enough to get their heads into. Since we free feed, it prevents them from mobbing the food all at once, so we don't need them to all have access at the same time.
As far as the whole build goes, I would say this isn't bad for spending 8 dollars. The feeder though, because it is all optional, I am going to choose to buy some pieces to build something I want even thought I could build something free. I have built enough coops, and feed enough chickens to know exactly want I want versus what will work haha.
Thanks for joining me through all of these steps, and building this sweet chicken coop. If you don't have chickens, but think you might be able to have them...I recommend them. It is amazing to see them just living their lives, they eat chicken scraps, and they provide eggs for those that eat eggs. I am really excited to start looking around for some chickens locally. Oh, and I am going to find some fencing to put up around the area and let them have a real big area to be in. I would let them free range, but I am not fencing in the garden, so I don't want them to eat our garden haha.
Thanks again.
Be well
~The Yeti
Join me on Discord https://discord.gg/zyqFjJ3

🏆 Hi @freedompoint! You have received 0.05 STEEM reward for this post from the following subscribers: @tyrnannoght
Subscribe and increase the reward for @freedompoint :) | For investors.
@tipu curate
Upvoted 👌 (Mana: 12/20 - need recharge?)
Congratulations, your post has been upvoted by @dsc-r2cornell, which is the curating account for @R2cornell's Discord Community.
Congratulations! Your post has been selected as a daily Steemit truffle! It is listed on rank 1 of all contributions awarded today. You can find the TOP DAILY TRUFFLE PICKS HERE.
I upvoted your contribution because to my mind your post is at least 5 SBD worth and should receive 144 votes. It's now up to the lovely Steemit community to make this come true.
I am
TrufflePig, an Artificial Intelligence Bot that helps minnows and content curators using Machine Learning. If you are curious how I select content, you can find an explanation here!Have a nice day and sincerely yours,

TrufflePig