Creating My Own Maple Knife Scales

Some of you may not be familiar with the idea of what knife scales are, so that is where I will start this blog. Knife scales are the pre-cut and preconditioned pieces of material that will be used to create the handle for a knife. These are commonly sold in a match set, so there are two pieces.
After many weeks of planning and talking through the details with Stacie D(@freedomtowrite), all of the wheels are in motion for me to start creating custom knives again. I say create because I think that it helps to define what is happening. You don't simply make a custom blade, but you create it. It comes together after planning, focus, and when the creative energy flows through you. That is one thing I found early on with my knife making. If I try to produce a knife...all I do is produce a piece of junk.
The various bits and bobs are starting to trickle in from where I have ordered them from. The last things are coming now and it is wood hardener and epoxy. Once that is in I will be ready to actually put a blade together. While I am waiting though I am putting the knife making station together. I am sorting out what goes where in the shop and creating a work flow. So when the time comes I will be all set and ready.
Today I had an opportunity to do something that I have never done before. I took a raw piece of wood and turned it into knife scales!!! I mean, I did help a friend create some scales for me, but this time I did it myself! Here in Northern Michigan there are many different types of trees to choose from. The farmer has several species that he has had milled and stacked, and they are all dry now. So around the farm it isn't hard to find a good piece of wood to work with, and that is just what I did.
I couldn't positive ID the wood when I first cut into the board. Usually there is a particular color and a distinct smell. Like Red and White Oaks smell like A1 sauce and grape jelly. Once I took the board over to the wood shop, the farmer did ID it as Maple. It is a beautiful light wood and will make some amazing handles.
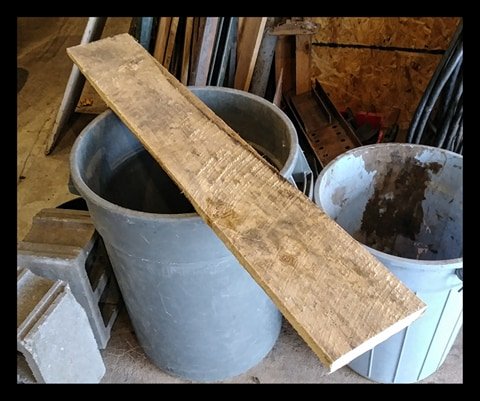
It was a bit of a process to get it from a manky old rough sawn piece of maple into the scales that they are now. First, I started by cutting the board down to a usable length. Something shorter that I could easily handle while making all of the cuts.

The next step was when things got pretty exciting. I had to cut it into strips using a table saw. This was my first time using a table saw and it was a little intimidating. I have used all sorts of machines and equipment, and anytime I am using something new I am extra careful. Lucky for me the farmer was there to give me some helpful tips. The strips were just over 1 inch thick and they were about 1 3/4" wide.
I ripped the strips and then readjusted the table saw for the next cut. The second cut was to bring it into the final width of 1 1/2". After that I ended up with three strips of wood that were 1 1/2" wide, 1 inch thick, and about 5 and a half feet long.

The next cut was a little more interesting because it felt counter intuitive. I readjusted the table saw and the safety fence and made the final cut. I flipped the strip of wood up on it's side and cut it in half long ways. This now gave me two strips that 1 1/2" wide and about 1/2" inch thick.
Moving on to the next sweet piece of equipment today was the planer. The planer is used to give the wood a more finished surface while taking away thickness. So if you can imagine the wood is still looking pretty rough, but once it goes through the planer a couple of times it will look more like a finished piece of wood.
Once the strips were all cut and planed I used the miter saw to cut the pieces into length. I set a jig so that I could quickly reset the piece of wood for the exact length. It was amazing...bang...bang...bang... one after another. When it was all done I had 28 individual pieces. That would make 14 sets. So essentially that would be 14 custom knives.

The next step in the scale making process is going to come once the wood hardener is delivered. I am going to modify a peanut butter jar and attach a car brake bleeder vacuum to the lid. This will let me put several scales into the jar and then fill it with the wood hardener. Once the jar is filled up I can close the lid tight and suck out the air. This will cause the wood hardener to be pulled into and through the wood creating a stabilized scale. If the wood is stabilized it will prevent issues do to moisture and climate changes, and ultimately make for a better functioning and cleaner handle.
Thank you all for following me on this journey and I look forward to all of the connections and comments along the way.
Be well.
~The Yeti
https://steemit.com/@freedompoint
https://twitter.com/the_alpha_yeti
https://www.instagram.com/thealphayeti/


To listen to the audio version of this article click on the play image.

Brought to you by @tts. If you find it useful please consider upvoting this reply.