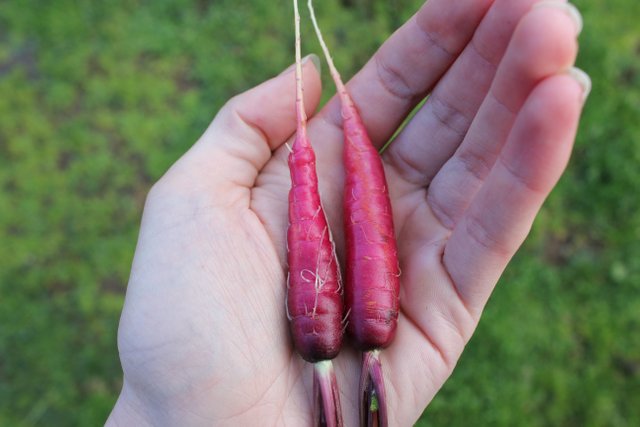
Preserving the Harvest: Lacto-fermented Purple Dragon Carrots
We picked most of our carrot crop last week and, rather than letting them go limp in the fridge or trying to eat them all in one hit, we fermented them (and made a stop motion animation with one).
What is lacto-fermentation?
In simple terms, lacto-fermentation is basically encouraging a certain type of ‘good’ bacteria (such as lactobacillus, naturally found on the surface of plants) to flourish. These good bacteria produce lactic acid, creating an environment unsuitable for ‘bad’ bacteria and, by keeping the baddies at bay, prevent food from spoiling.
Lacto-fermentation can increase the nutritional value of food. The good bacteria’s metabolic byproducts include beneficial enzymes and anti-cancer substances. Fermenting makes food more digestible, too, so nutrients are more readily accessed by the body. Lactic acid also promotes the growth of healthy gut flora.
If you’re interested in trying lacto-fermentation out for yourself, the Cultures For Health website is really useful. If you’re especially keen, Sandor Katz’s book, The Art of Fermentation, is possibly the best resource you’ll find on the subject – we’ve got a copy and use it all the time (I'm not an affiliate, just a fan).

Lacto-fermented carrot recipe
Here's what we did:
1. Found an old pickle jar and gave it a good wash.
2. Cut up as many carrots as needed to fill the jar, so they were packed in fairly tight. We cut long-ways down the middle. Our carrots were fairly small, if you have big carrots you might want to cut each into more pieces to increase the surface area so the liquid can penetrate sufficiently.
3. Made a salt solution: 2 cups of water with 2 tablespoons of salt (we used pink Himalayan salt, any good quality salt will do). You may need more or less depending on the size of your jar, just keep the 1 cup:1 tablespoon ratio.
4. Poured the solution over the carrots in the jar, making sure the carrots didn’t float up – they’re fine so long as they’re submerged, but anything above the surface of the liquid can grow mould.
5. Shoved some dill from the garden in the top. We did this because we’d washed the carrots, reducing the number of good bacteria on the surface, so the dill fresh from the garden would supply more good bacteria and add a little flavour.
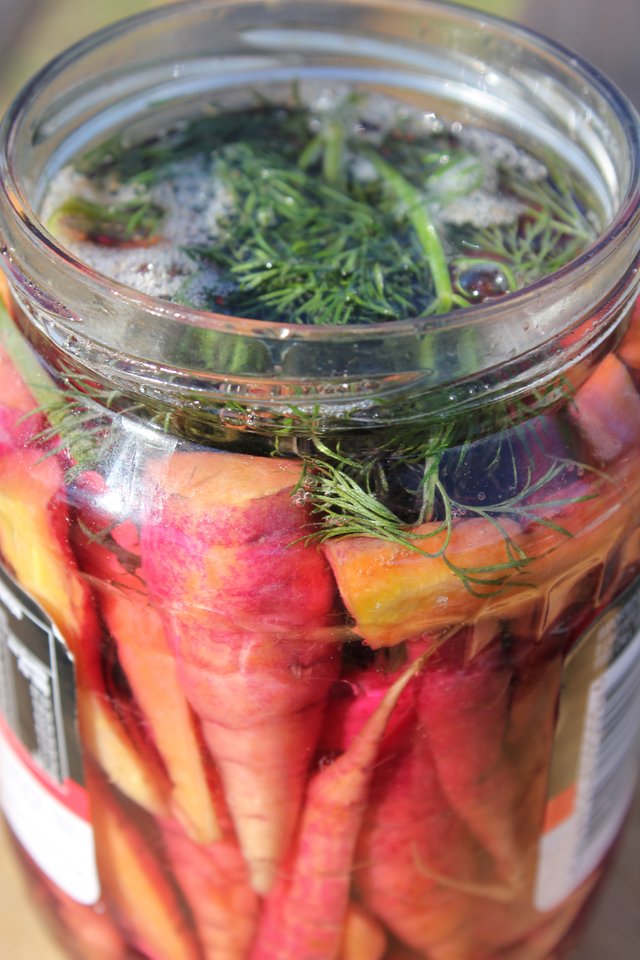
The end result
The weather is fairly mild over here at the moment, and temperature affects the rate of fermentation (more heat = faster fermenting), so we decided to leave them for a week before the first taste test - in hot weather you may only need a few days. The longer you leave them, the stronger the taste - it's really up to personal preference when you eat them.
For us, a week was the perfect amount of time for this batch of fermented carrots and we've eaten them on salad sandwiches and had them as a side dish with omelettes. Delicious!

I did a similar post using this method to turn cucumbers into pickles :)
We'll be planting cucumbers soon, so will definitely be doing some pickling with the next harvest - your recipe looks perfect.
Cool. Let me know how it goes!
Thank you for the instructions... Nice post
You're very welcome, and I can definitely recommend giving it a try if you enjoy playing around in the kitchen!
Thanks for the info on lacto-fermentation, @emilyjane!
You're welcome, and I'll be trying your omelette recipe as soon as our chickens start laying properly again!