How to Add a Human Creation like Text to a Rainy Window using GIMP | GIMP Tutorial
What Will I Learn?
- You will learn how to add a human creation like text in the object
- You will learn how to edit the text to match the object perfectly
Requirements
- Before we start, you need to prepare your GIMP software. If you don't have it, you can download it in their official site
Download GIMP Official - The rainy window photo (you can use any kinds you want)
Difficulty
- Basic
Tutorial Contents
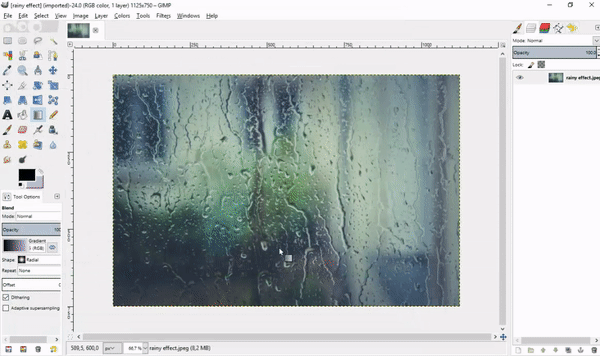
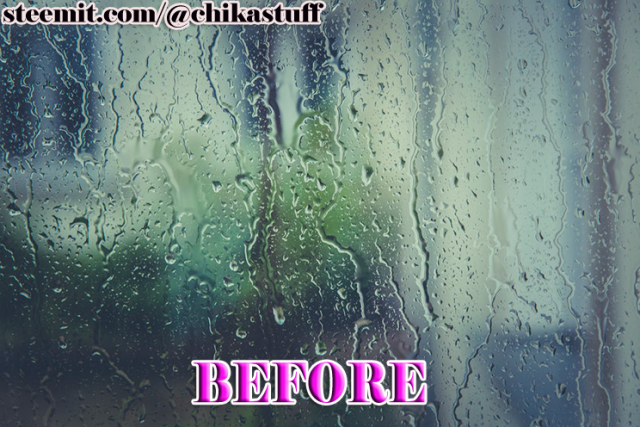
First of all, You need to prepare the rainy window photo (you can use any kinds that you wanted to). For me I use a rainy window photo from Pexels with a free to use license. After that File > Open the photo.
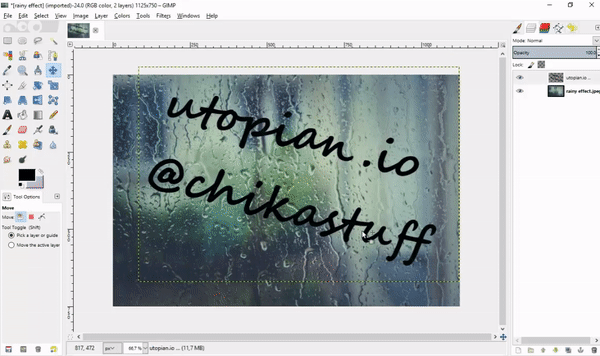
Click the Text Tool on the left side or by clicking Tools > Text, then you can set the Font and Size as you want or simply follow my setting. Write anything that you want to put in the rainy window, And then move the text using Move Tool on the left or by clicking Tools > Transform Tools > Move and you also can rotate it using Rotate Tool or by clicking Tools > Transform Tools > Rotate put the text in the best position that you wanted.
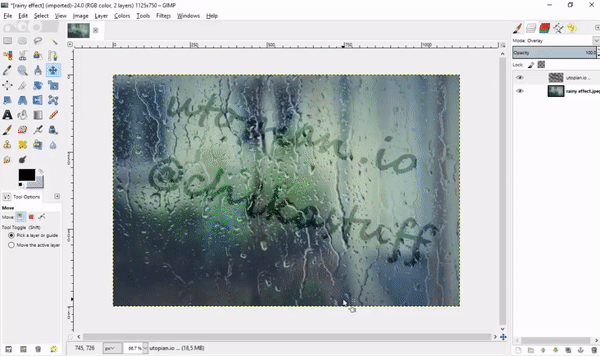
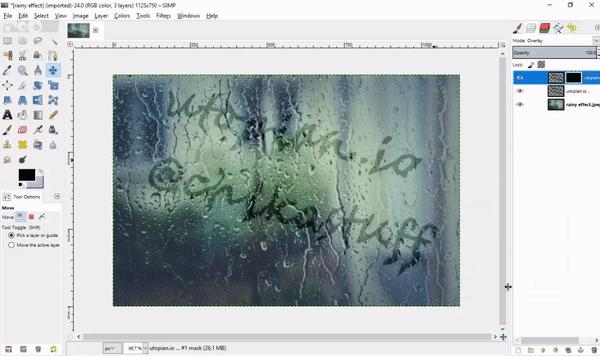
Next, Right Click the text layer and choose Layer to Image Size. After that change the text layer mode by clicking Mode > Overlay in the top right of the layer.
Next part, we need to make the text looks exactly written in the window by clicking Filters > Map > Displace. Then, change the X displacement and Y displacement to 20 and the layer chosen into the rainy window layer. Let the Displacement Mode as Cartesian and the Edge Behavior as Wrap and click Ok.

After that, we will make a shaping effect on the text so it looks like a real human creation. Click Filters > Distorts > IWarp, then choose the Deform Mode as *Move. Set the Deform radius to 10(lower if you want a smaller effect) and the Deform amount to 0.6. Don't forget to check the Bilinear, after that start making the effect on the text as you like. Click Ok after you finish.
Note: This will take some time but you need to make it clean so the effect will be great.
Next part, duplicate the layer by clicking Duplicate Layer on the bottom part of the layer or by clicking Layer > Duplicate Layer then Right Click the duplicate layer Add Layer Mask > Black(full transparency.

For the final part, click the Blend Tool on the left or by clicking Tools > Paint Tools > Blend. After that Right Click the duplicate layer, choose Alpha to Selection, and pull the arrow from the bottom center of the text straight to the top. Then click Select > None to remove all the selection.
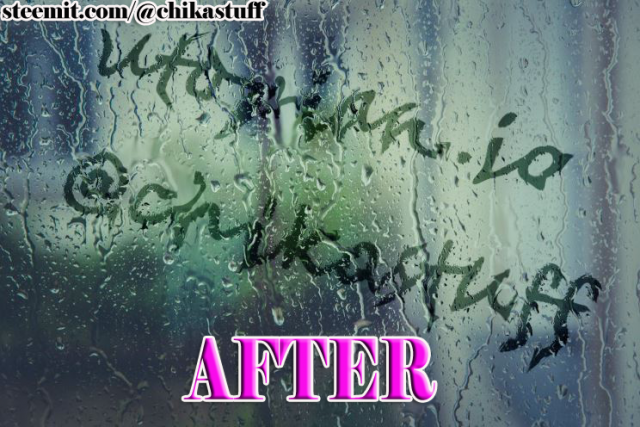
Final Result
Curriculum
Enjoy the vote and reward!
Your contribution cannot be approved because it does not
follow the Utopian Rules.
You can contact us on Discord.
[utopian-moderator]
Congratulations @chikastuff! You have received a personal award!
Click on the badge to view your Board of Honor.
Do not miss the last post from @steemitboard:
SteemitBoard World Cup Contest - The results, the winners and the prizes
Congratulations @chikastuff! You received a personal award!
You can view your badges on your Steem Board and compare to others on the Steem Ranking
Vote for @Steemitboard as a witness to get one more award and increased upvotes!