Focus Stacking Tutorial – Part 2 Preparing Insects
Click on the images to view at higher resolution
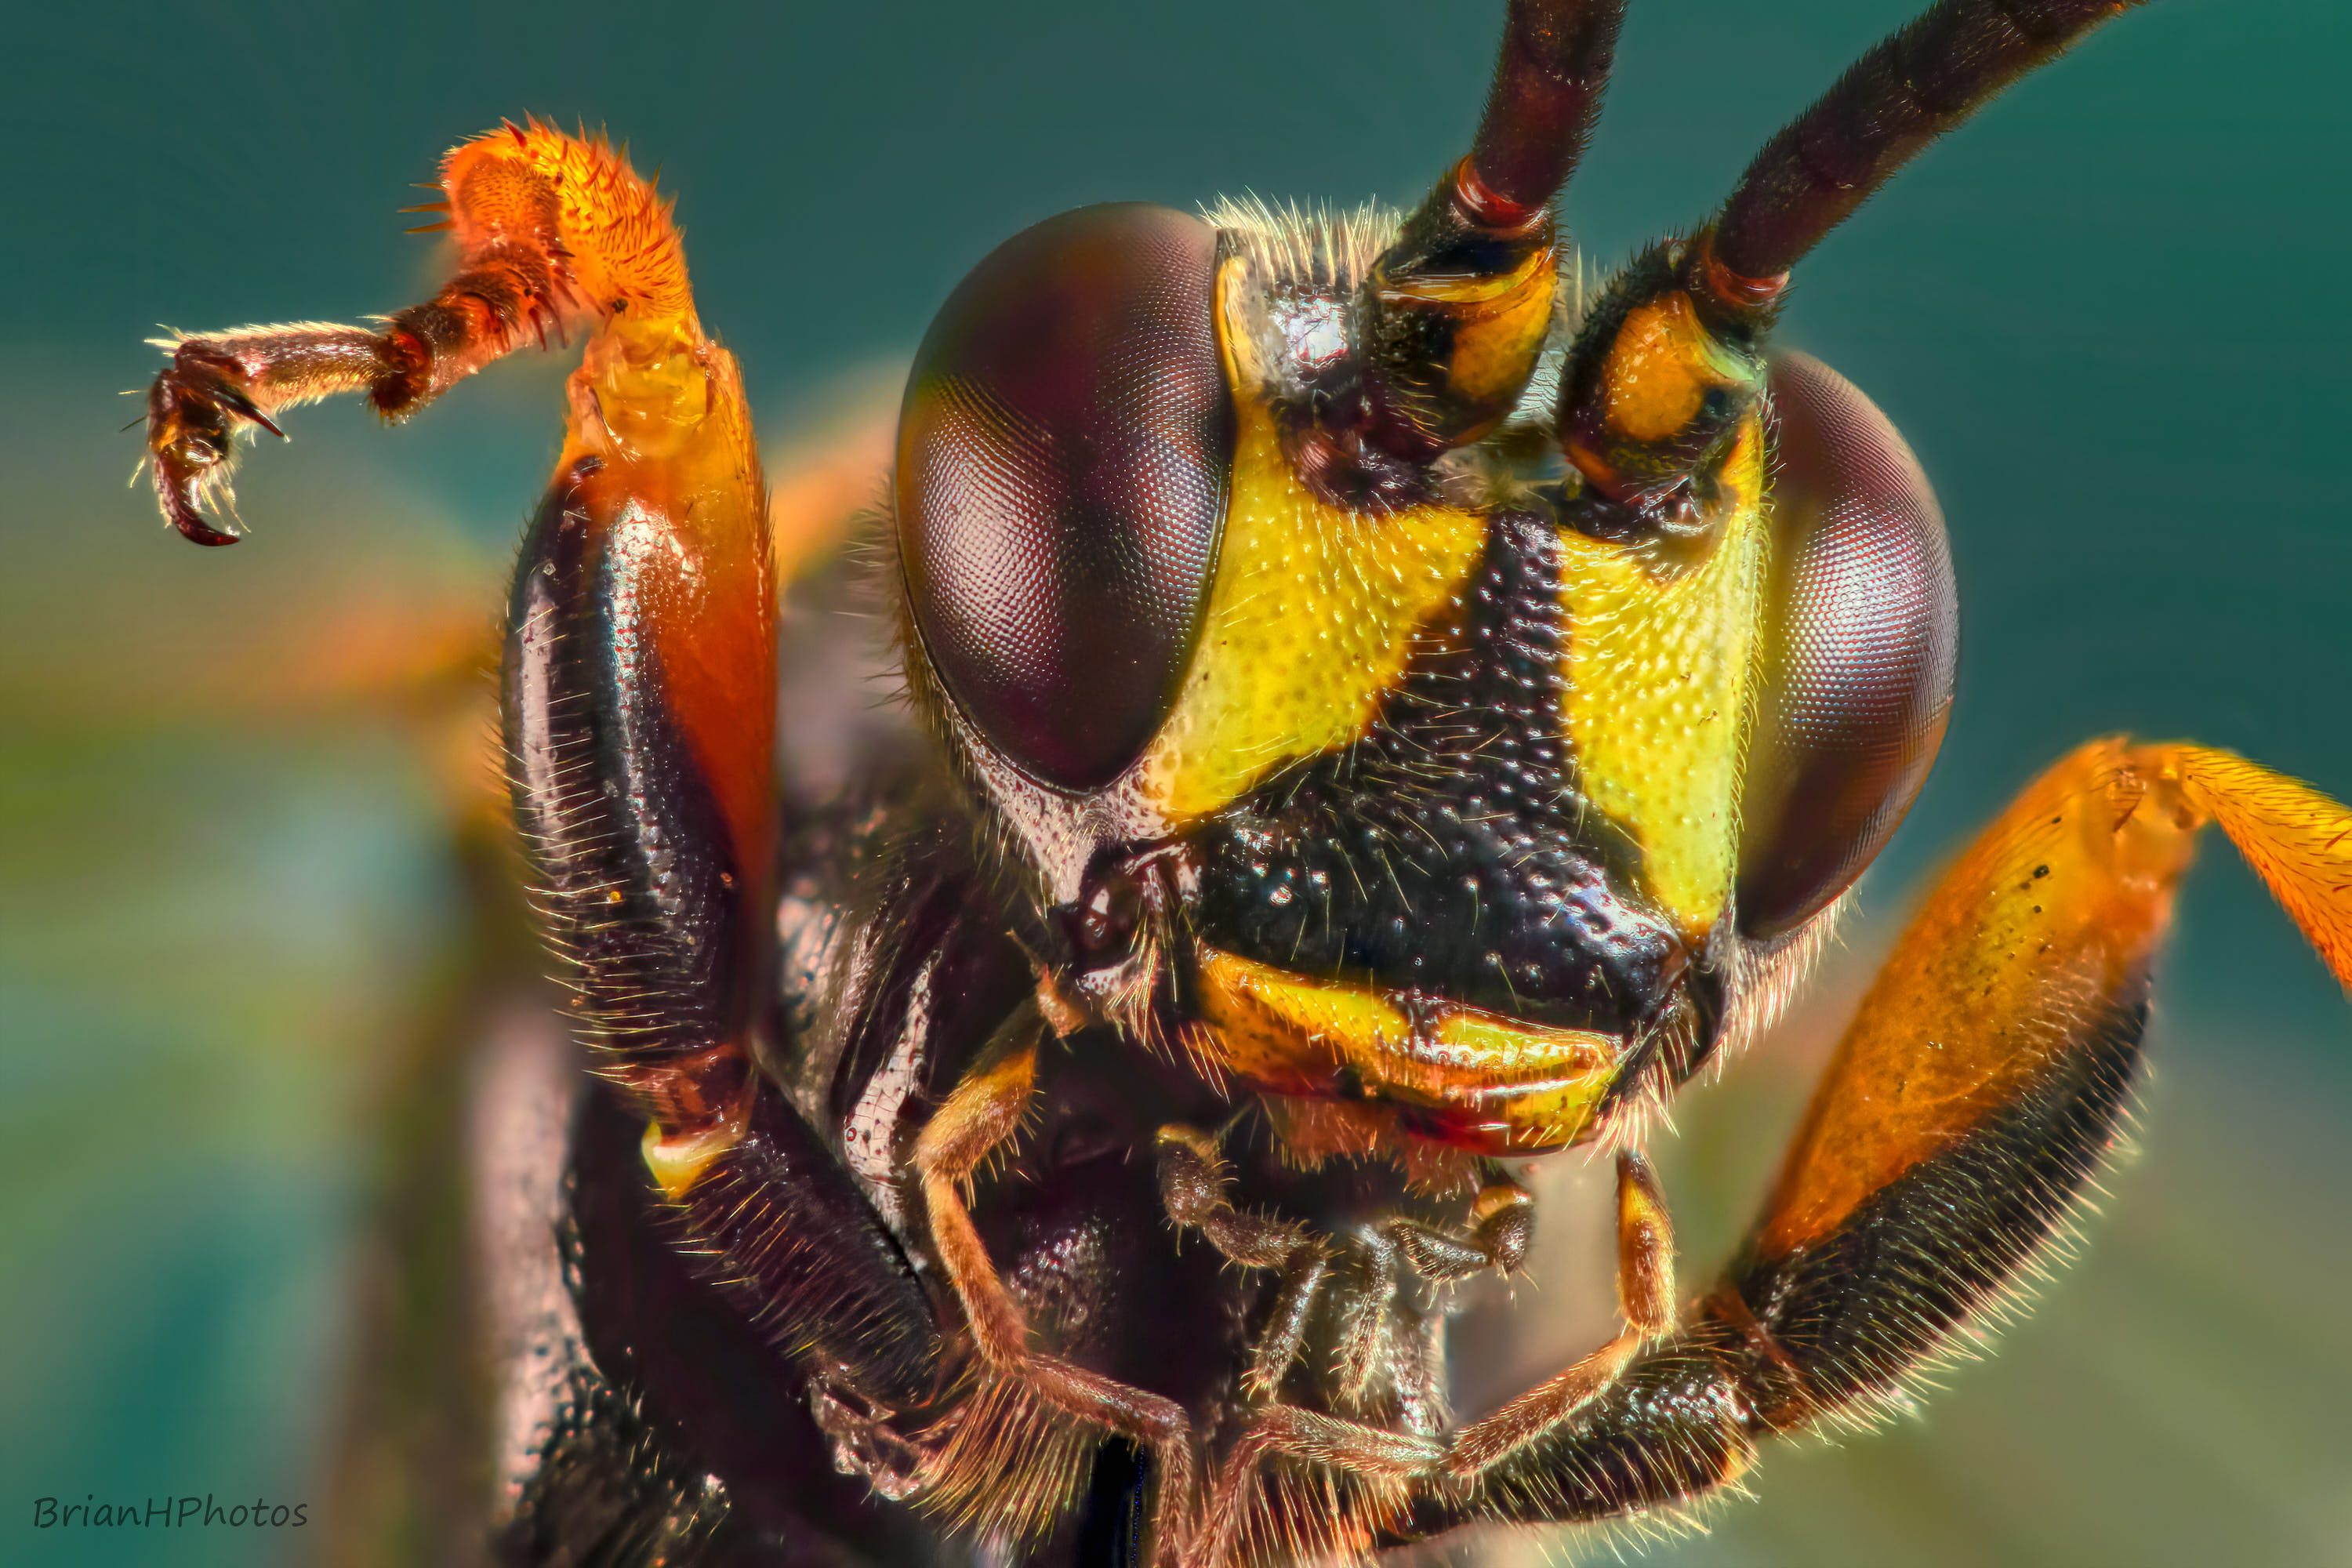
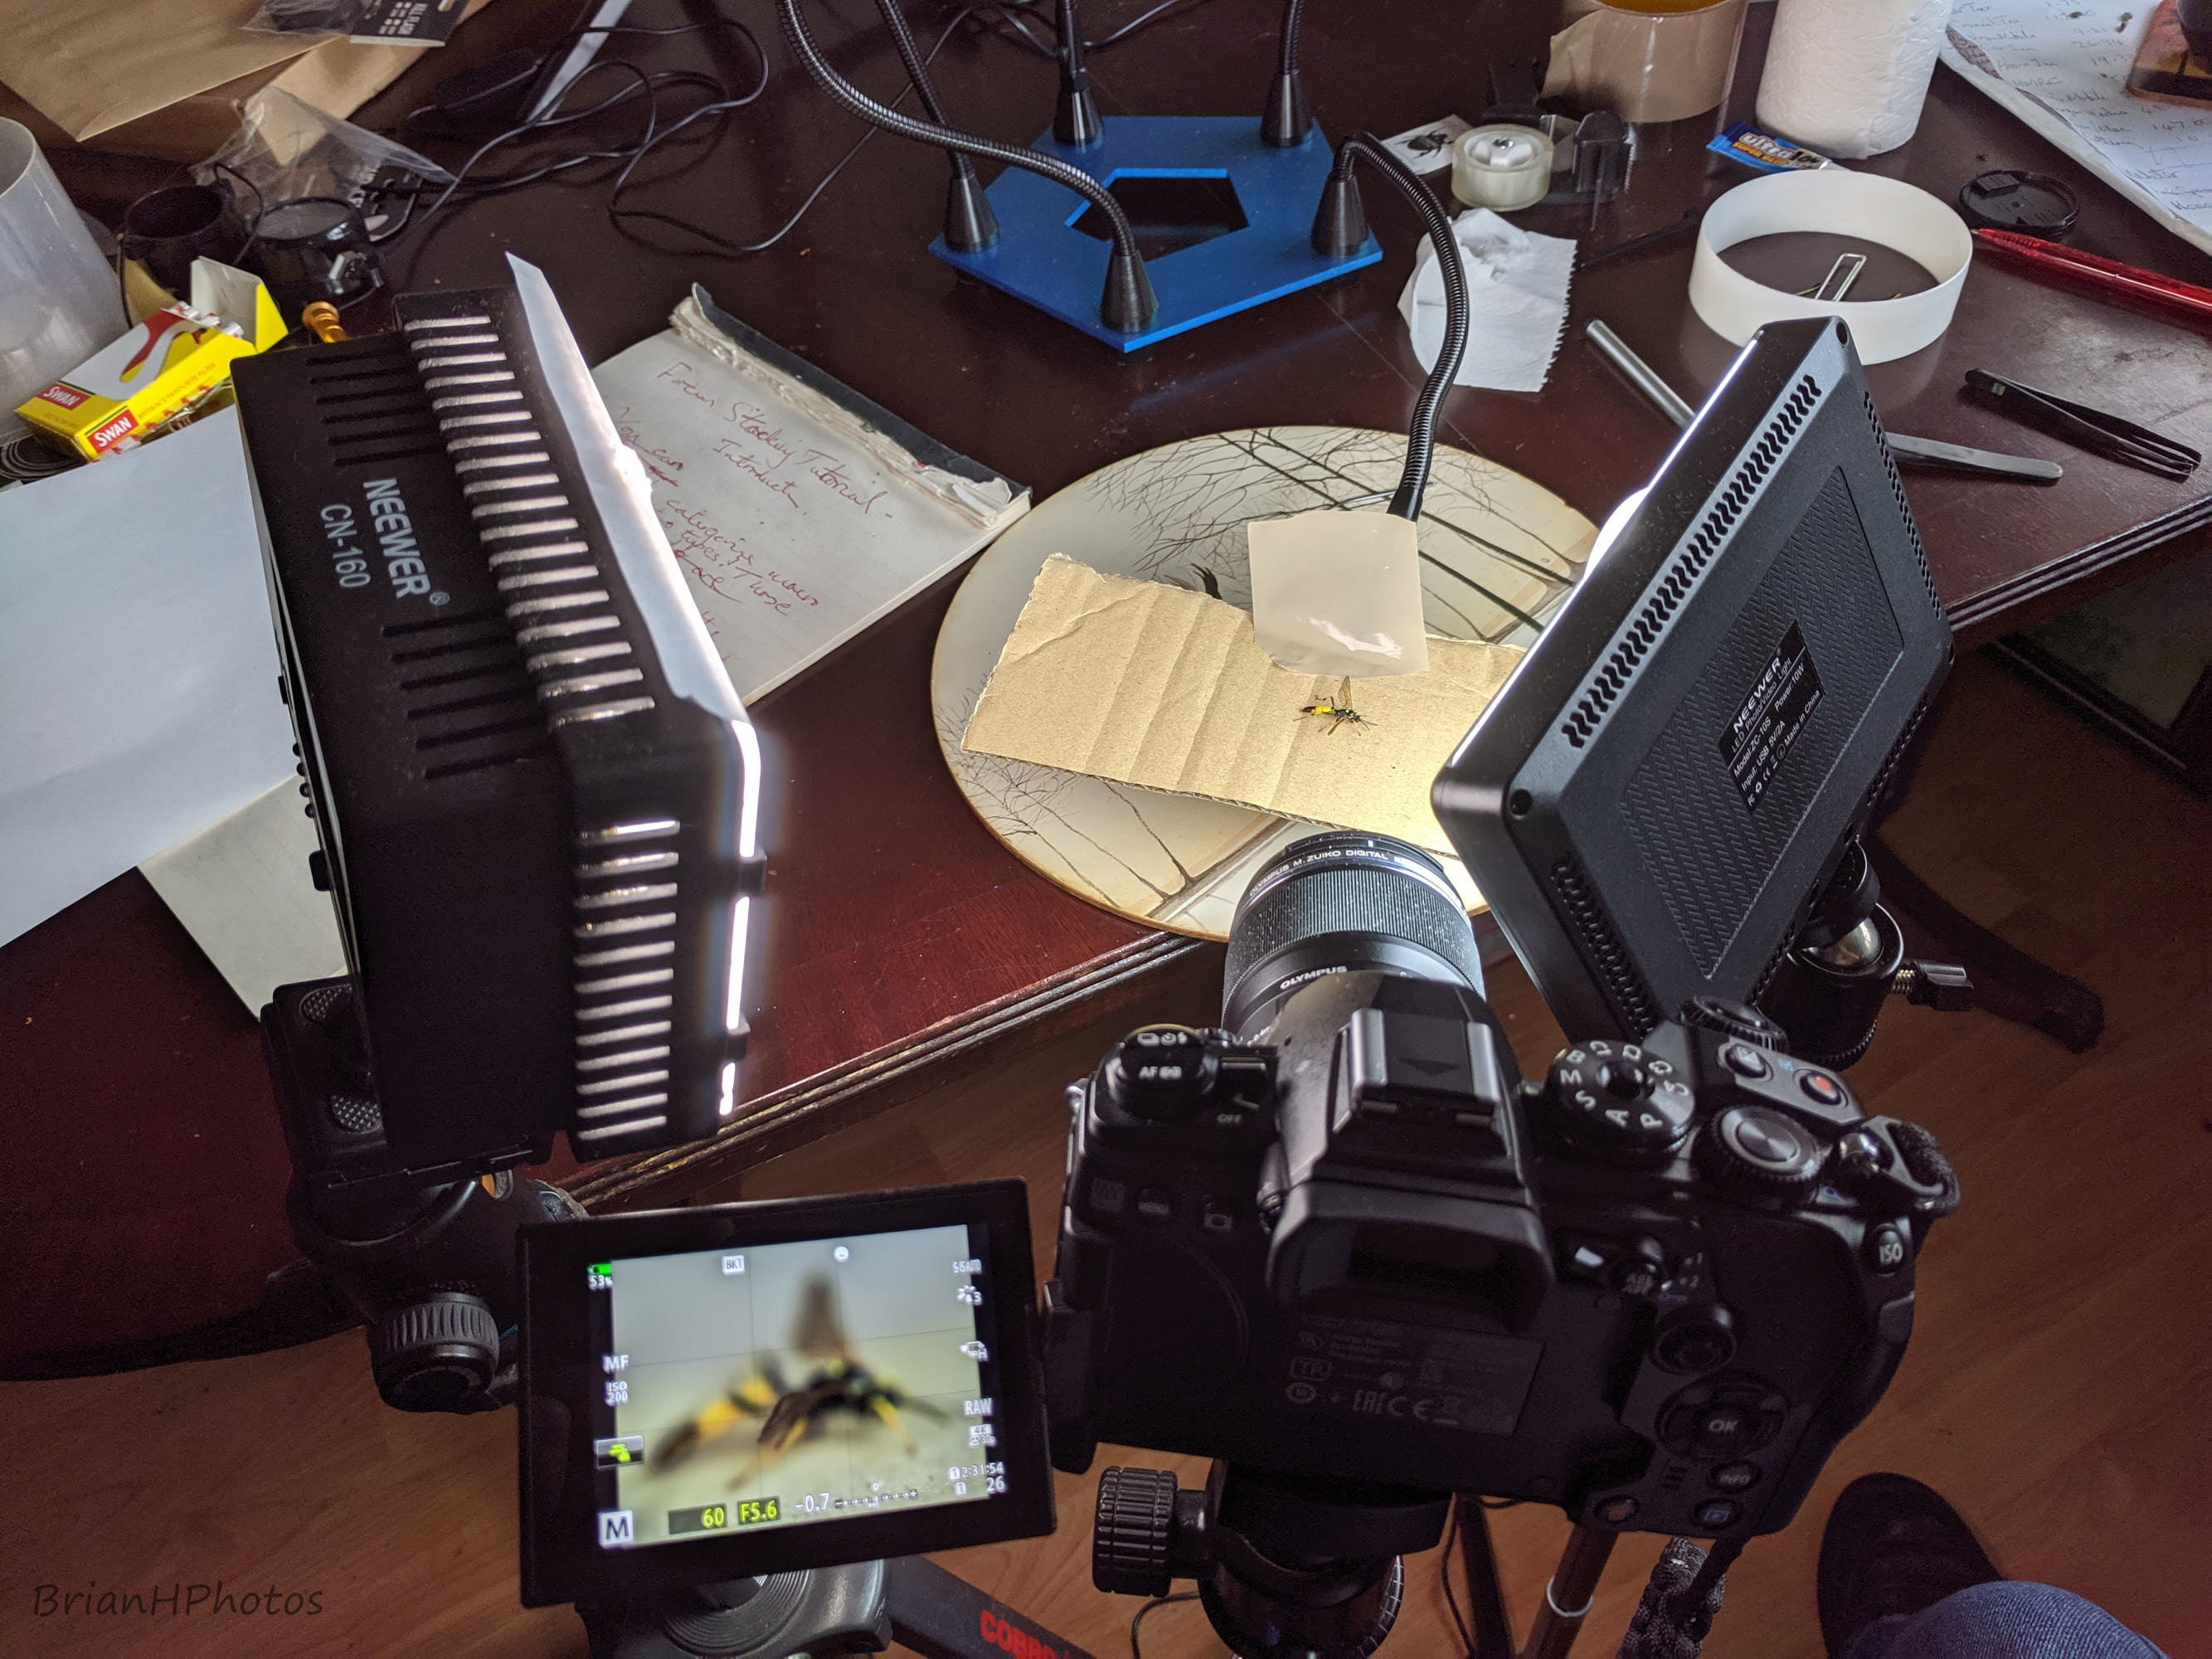
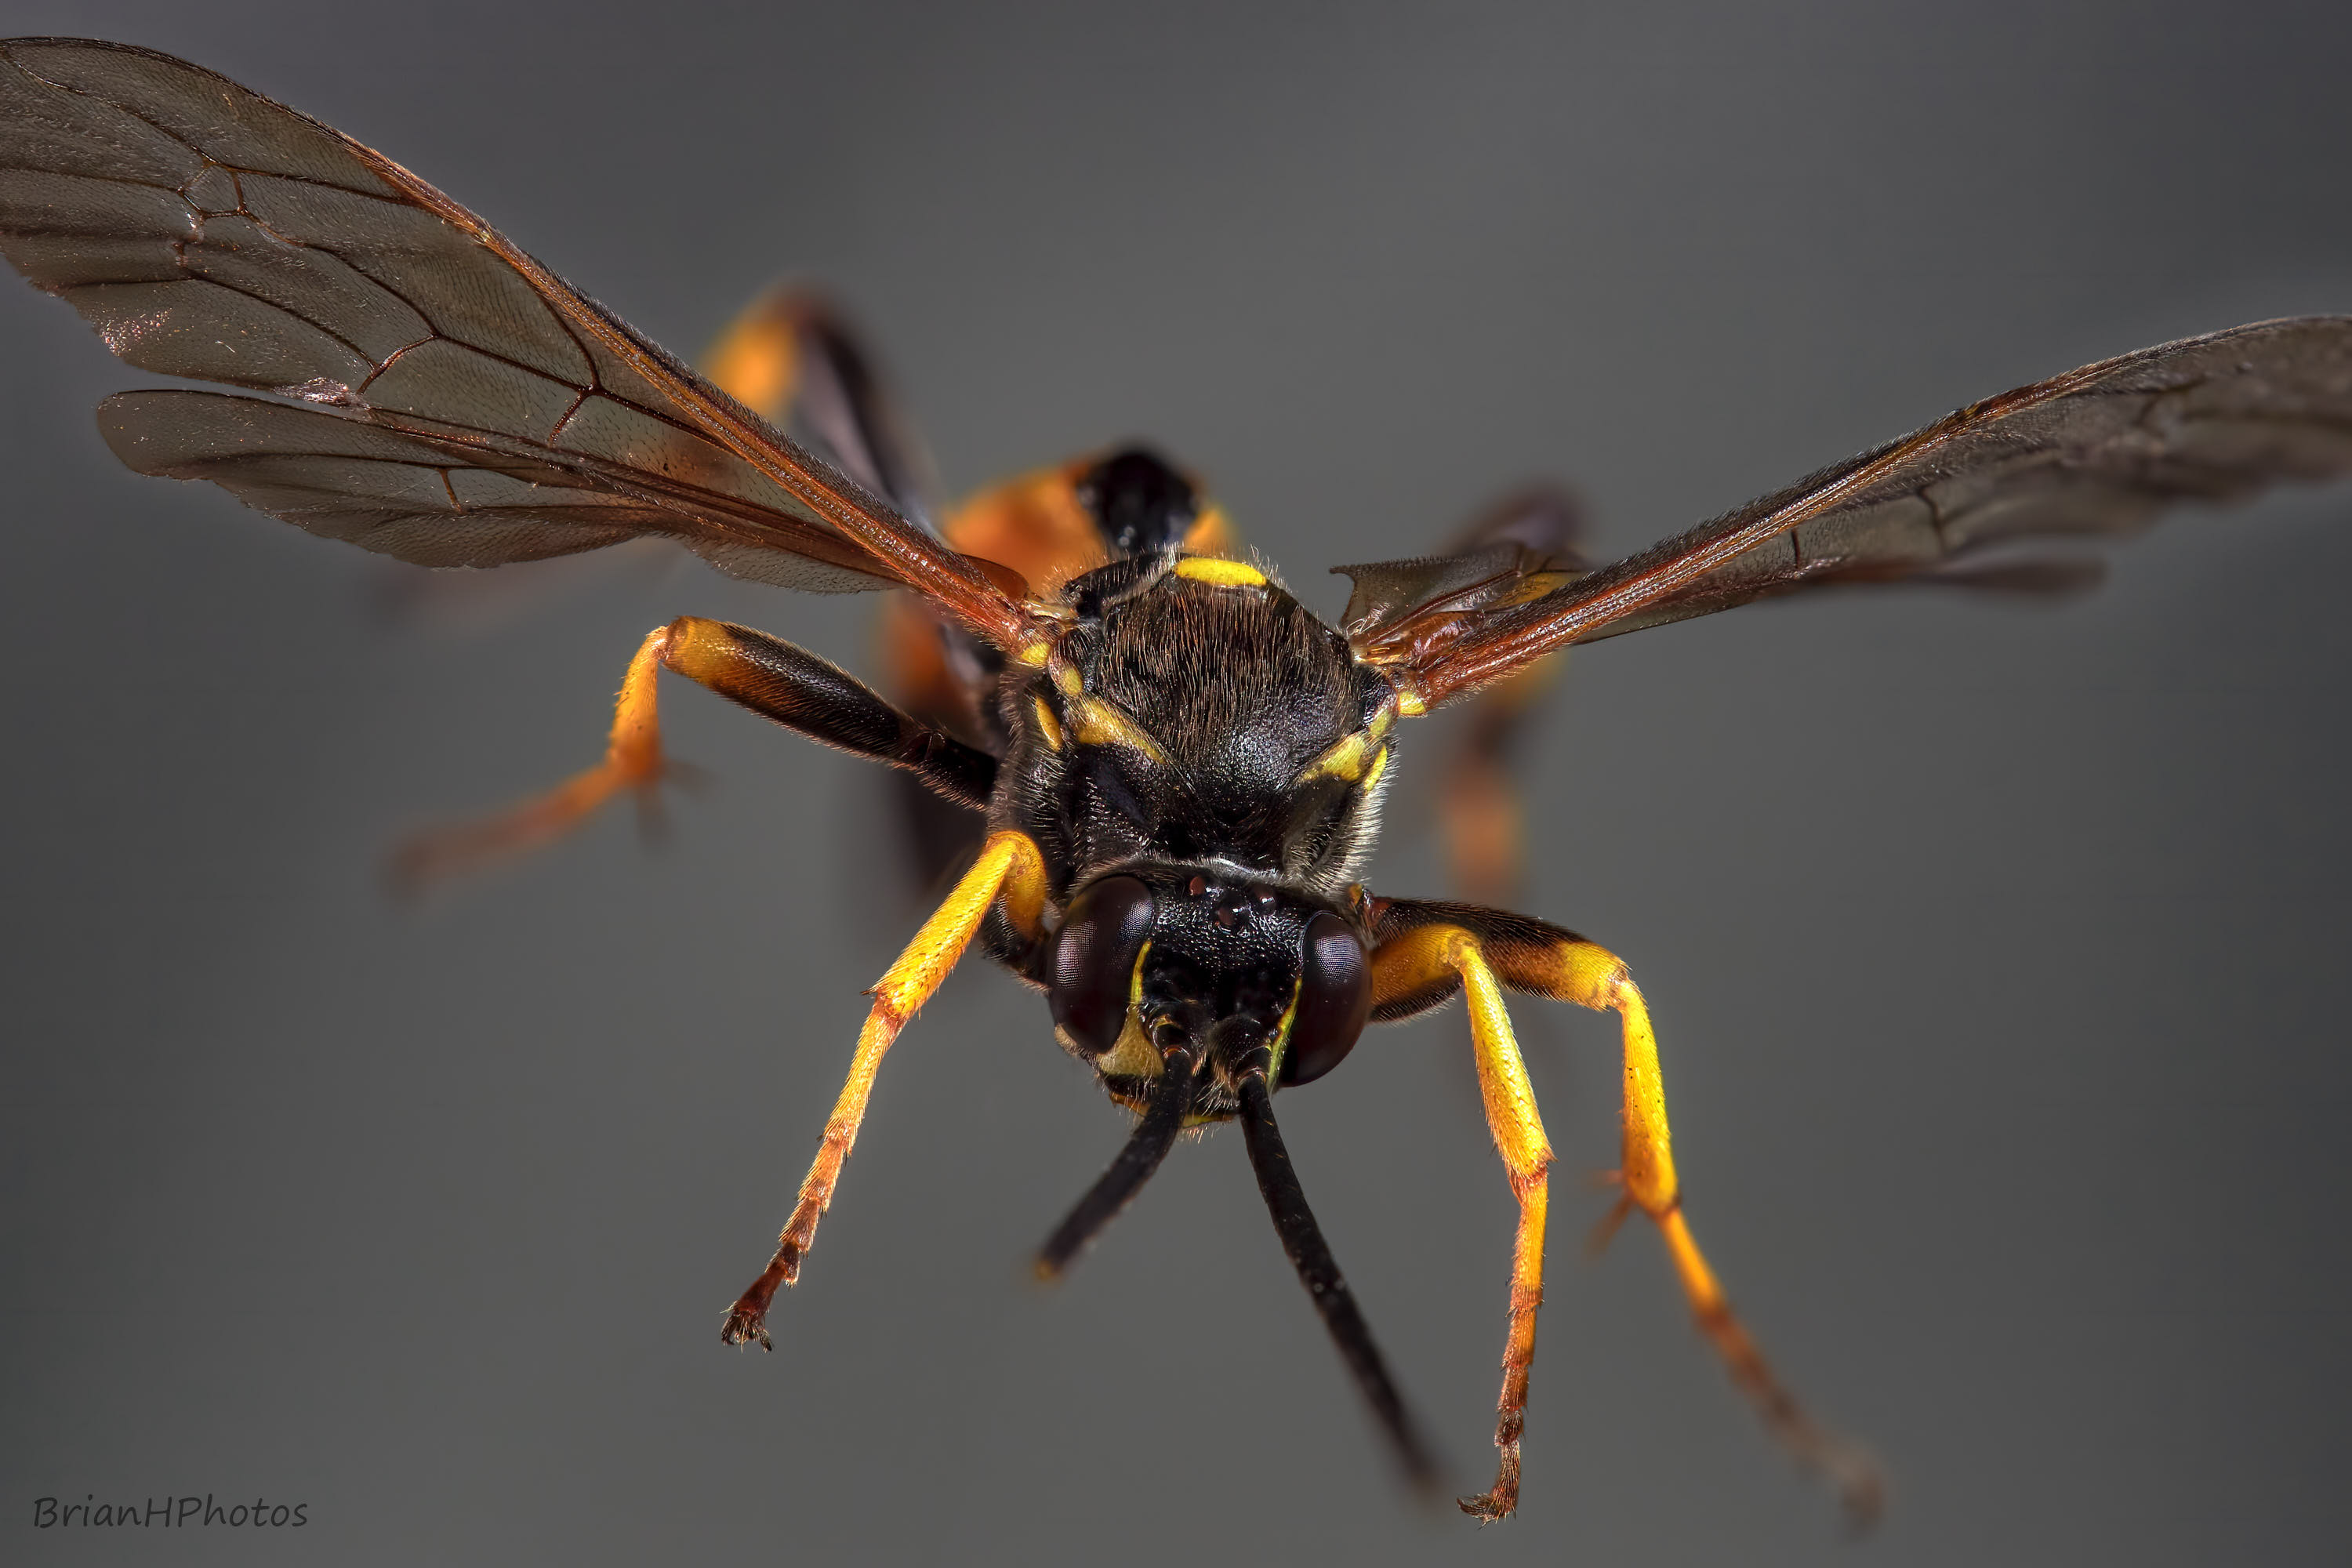
- Main image taken with the Olympus E-M1 III and 60mm macro lens + extension tubes and 2x converter
- Stacked with Zerene Stacker
- Edited with Capture One and Aurora HDR
The purpose of this post is to show you how I catch and prepare my flying insects, ready for photographing.
When taking a stack of shots that will be used for focus stacking it is crucial that your subject does not move during the time it takes from the first shot to the last shot. Live insects rarely stay still long enough for you to take a good stack of shots, so it is generally necessary to catch the insect and kill it. For those who may have a problem killing insects it is always an option to find any dead insects around the house, although it does limit the insects you are going to find. I am also informed that open air swimming pools are a good place to find dead insects.
Note that spiders are not insects. Spiders will quite often stay still long enough to enable you to shoot a good stack of shots so no need to kill spiders. They say that if you kill a spider then you have saved 100 insects because that’s how many insects the spider would have killed over its life time.
Up until recently I mainly took macro pictures of flowers and the occasional dead housefly or live spider. Over the last few weeks I have become more interested in shooting more insects and have come up with this simple way to catch and kill them.
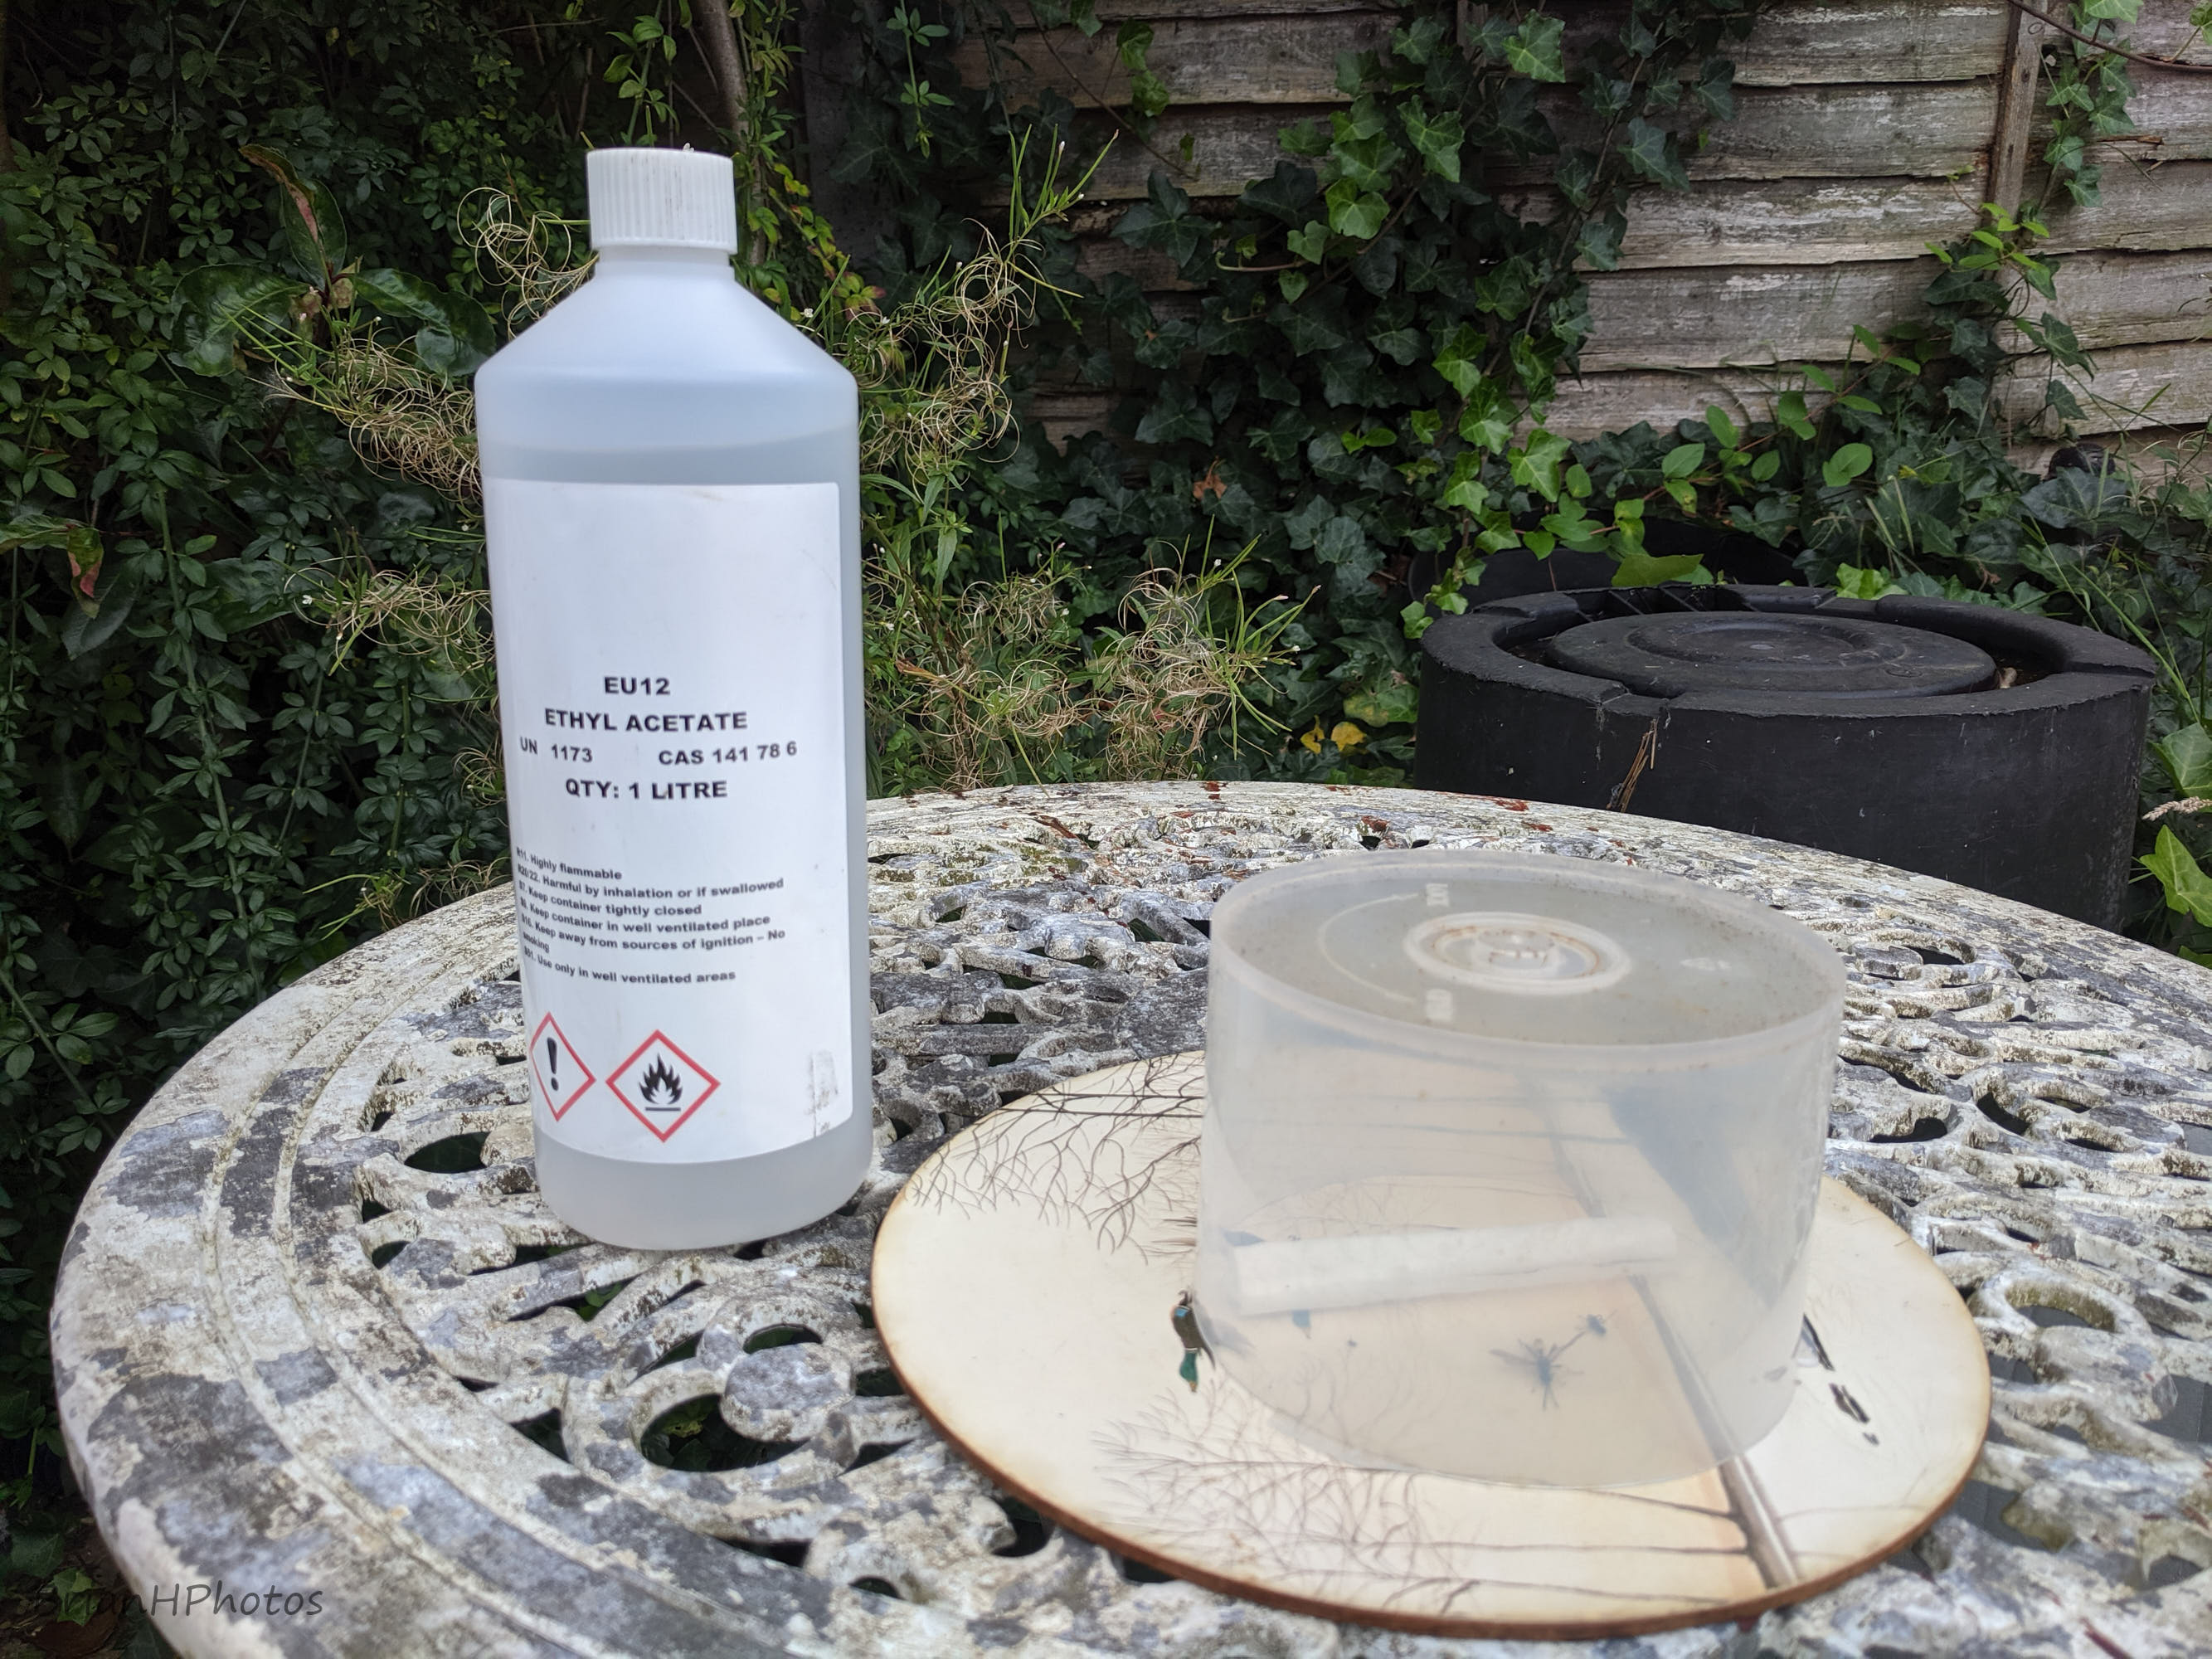
Above is a picture of my insect catching and killing equipment. Catching equipment consists of a hard flat surface and a clear open ended container. Here I’m using a hard dinner table mat and the cover that sits over a set of 50 recordable DVD’s. Killing equipment is some ethyl acetate.
When I have caught the insect I dip some tissue in the ethyl acetate solution and quickly and carefully lift up the container and put the tissue in the container with the insect. The ethyl acetate vapor very quickly sedates and then kills the insect. It may look like the insect is dead after just a few minutes but you want to leave the insect for at least half an hour before removing it from the container. If you take it out too soon you may find that some of the insect limbs still move a little which will ruin you stack of shots.
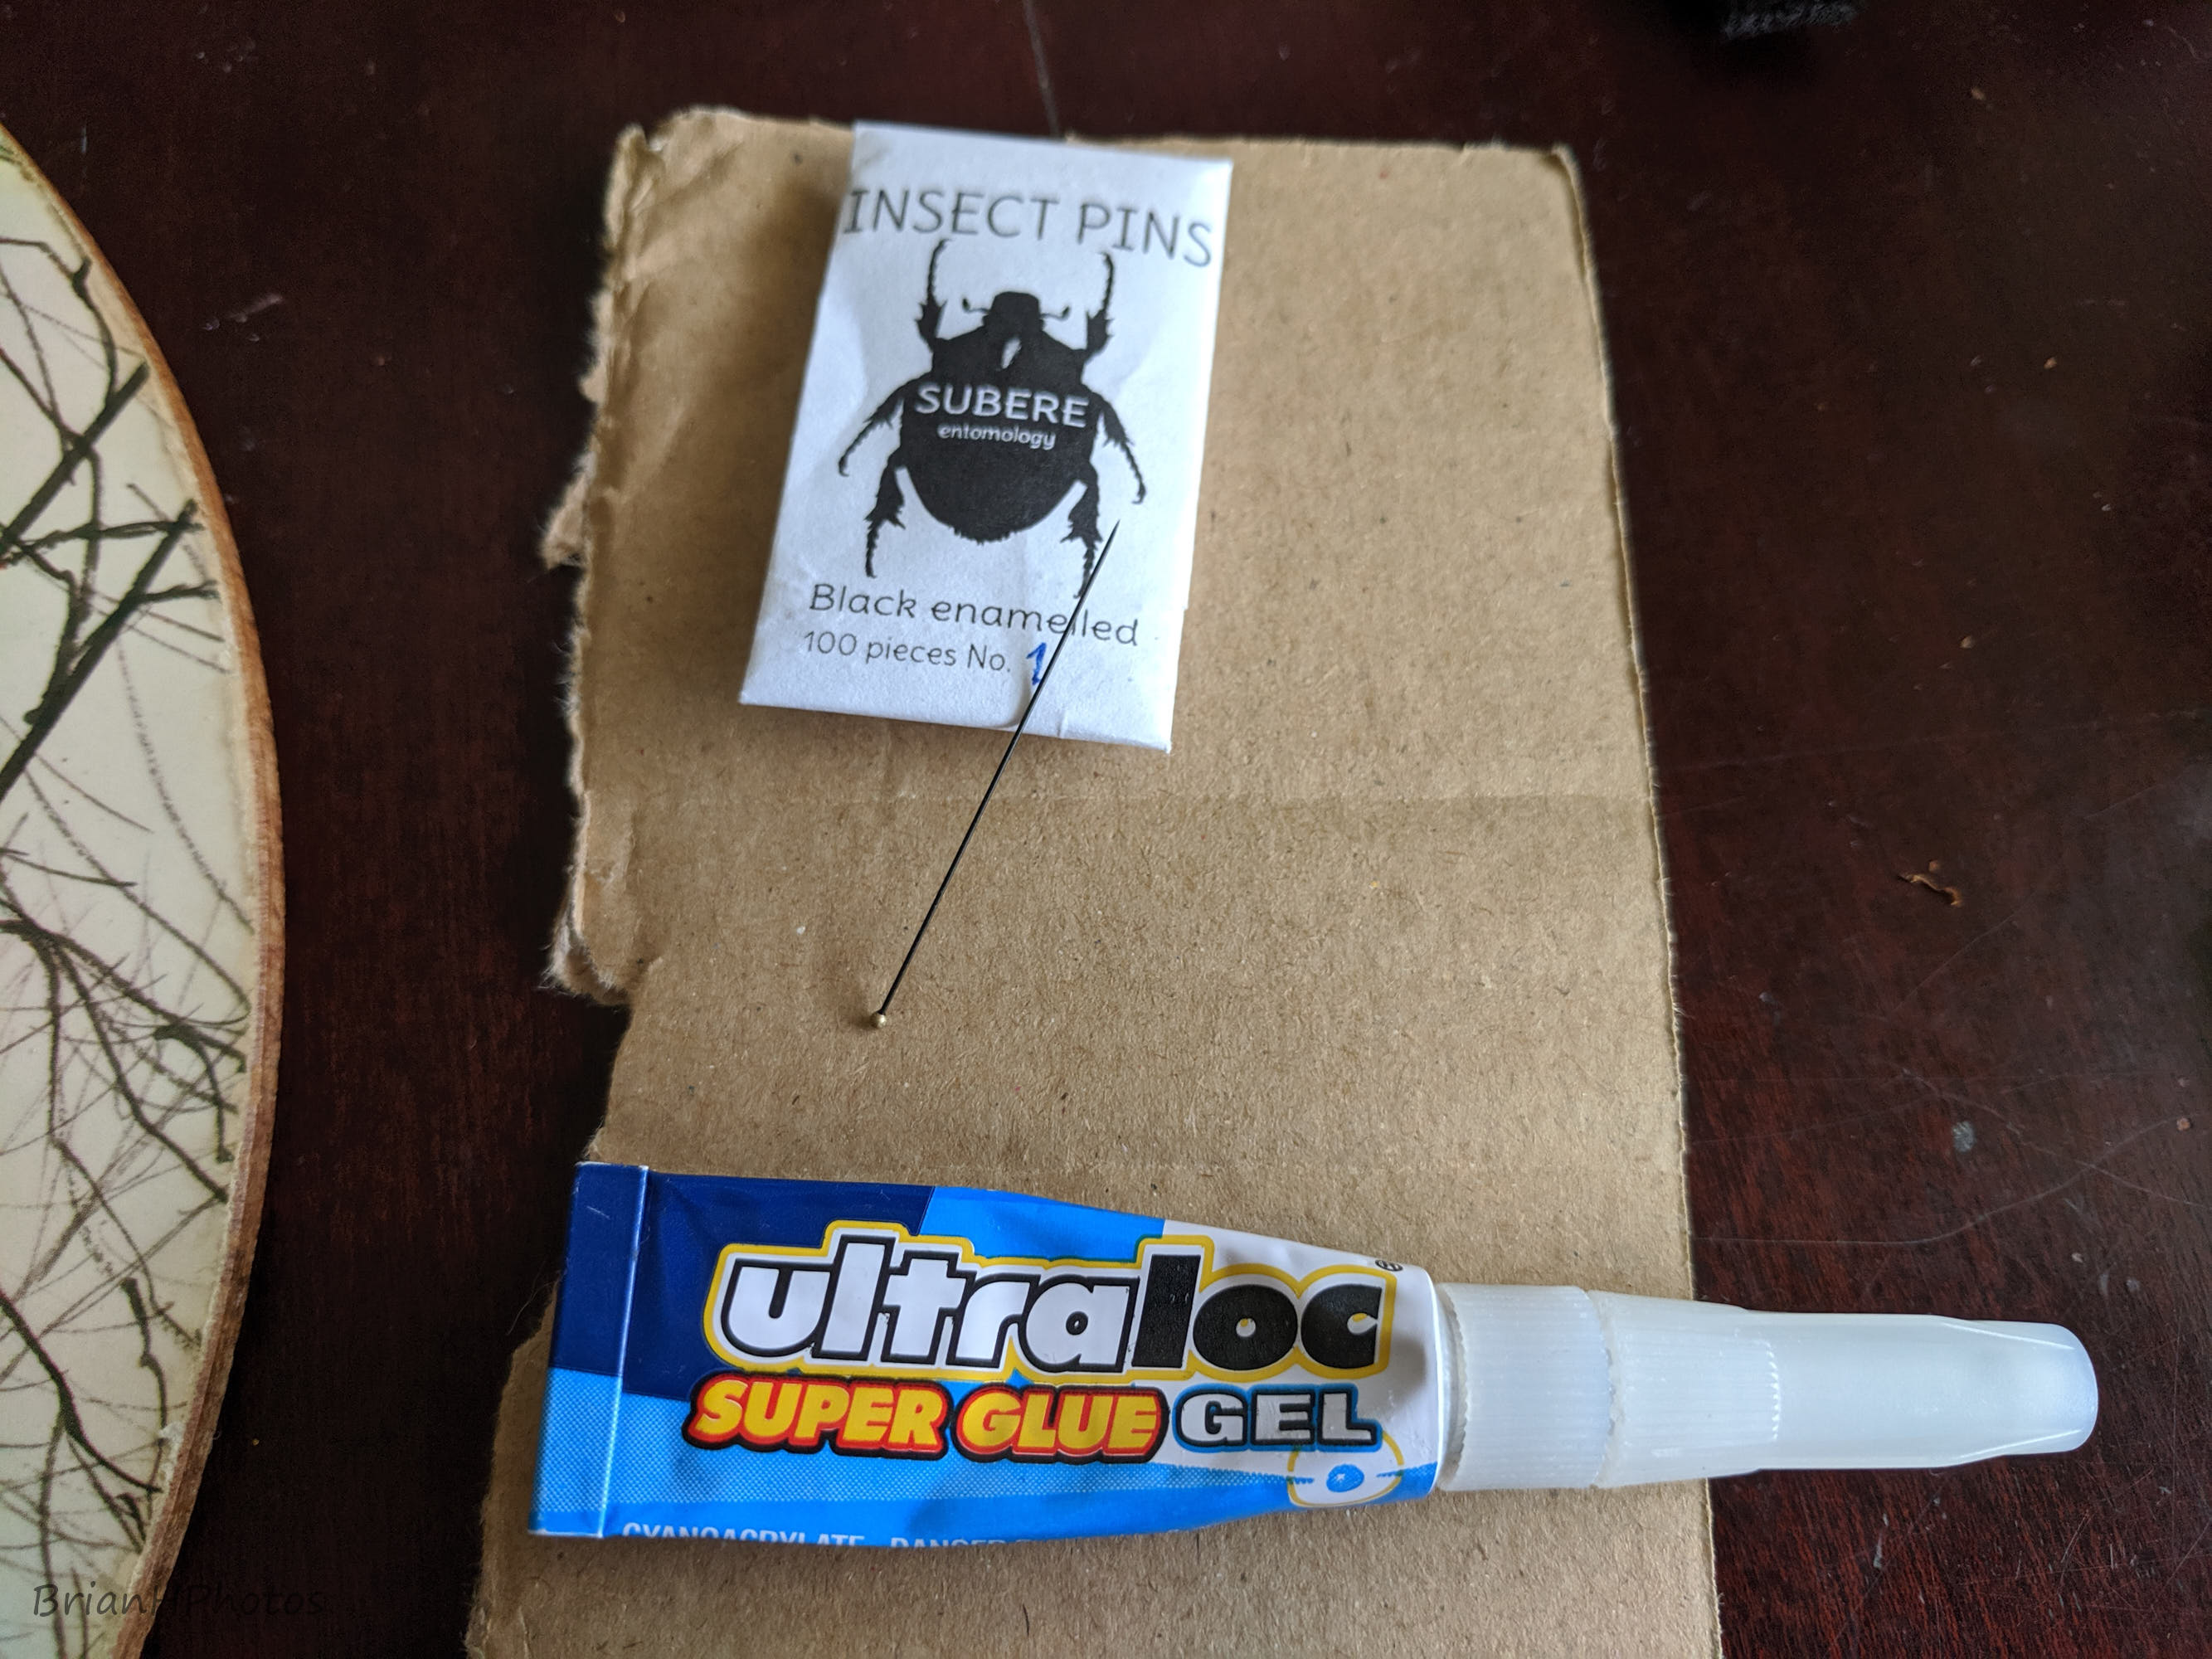
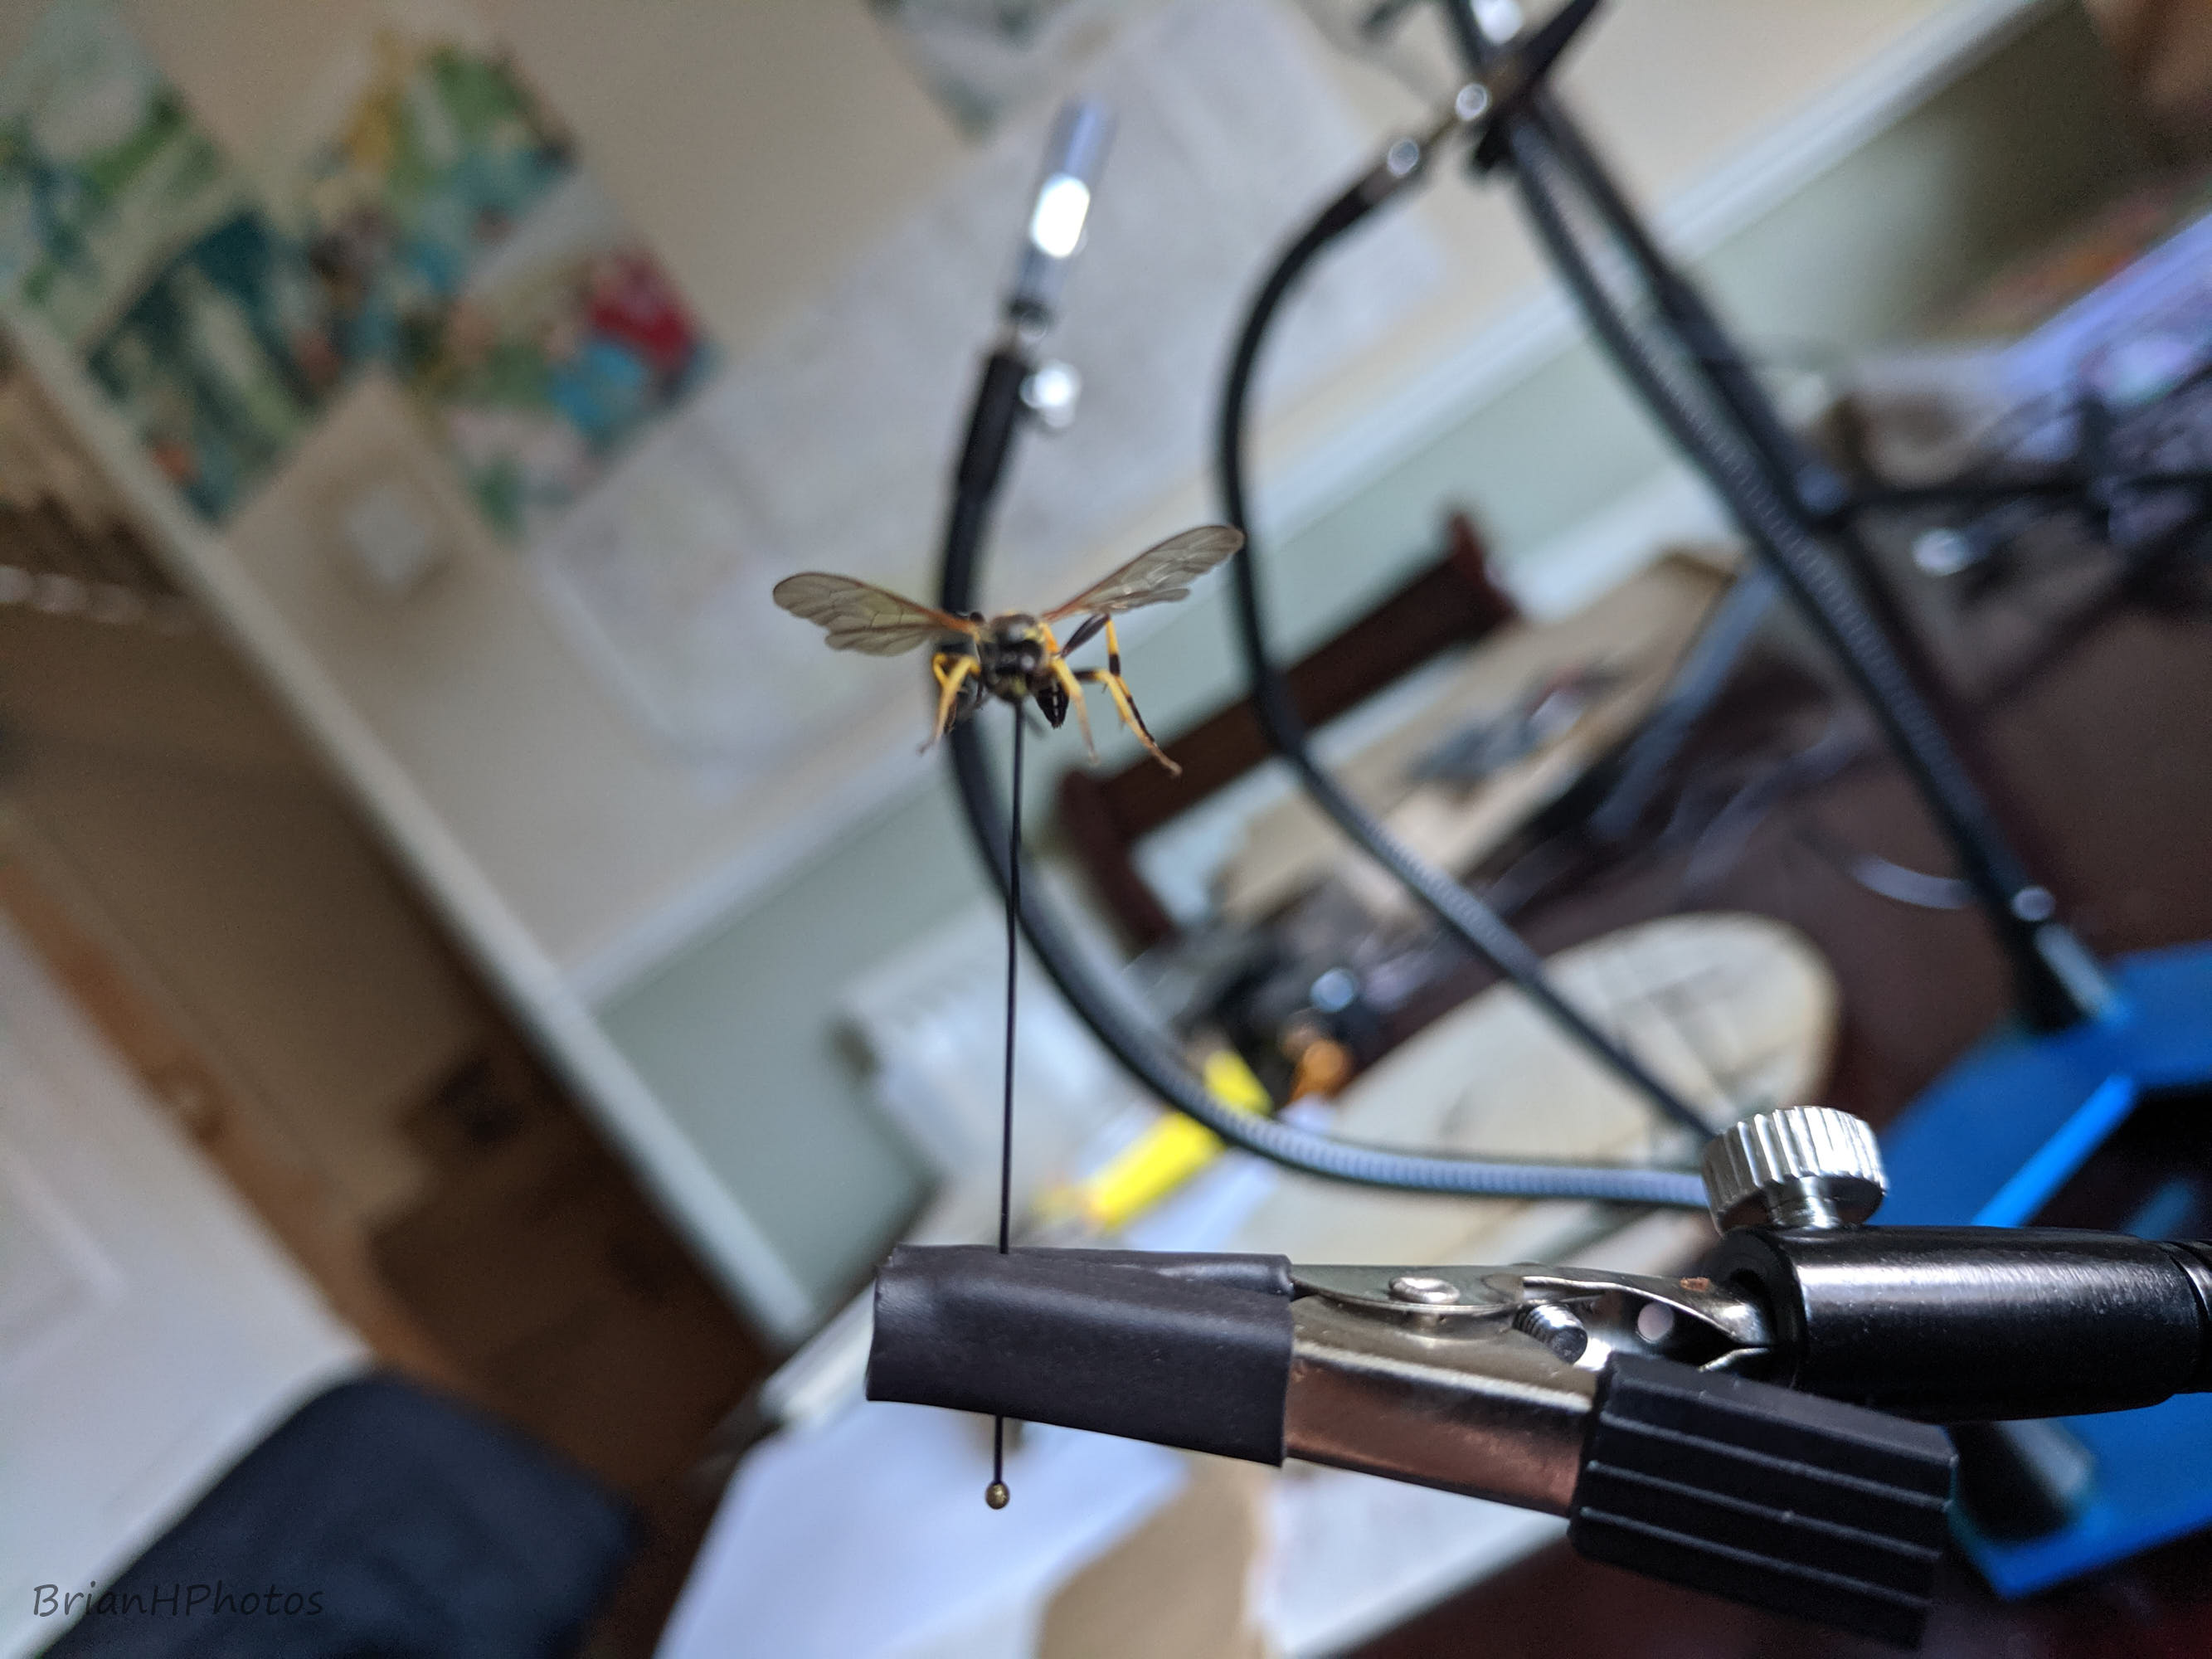
The insect can now be pinned and put into position, ready for photographing. I use black enamel coated pins which are easier to digitally remove from the final image using image editing software. If you use normal shiny silver pins they are much harder to remove in editing software.
Push a pin through the cardboard and then dip the tip of the pin into some super glue. You only want the smallest drop of super glue to about 1mm of the tip of the pin.
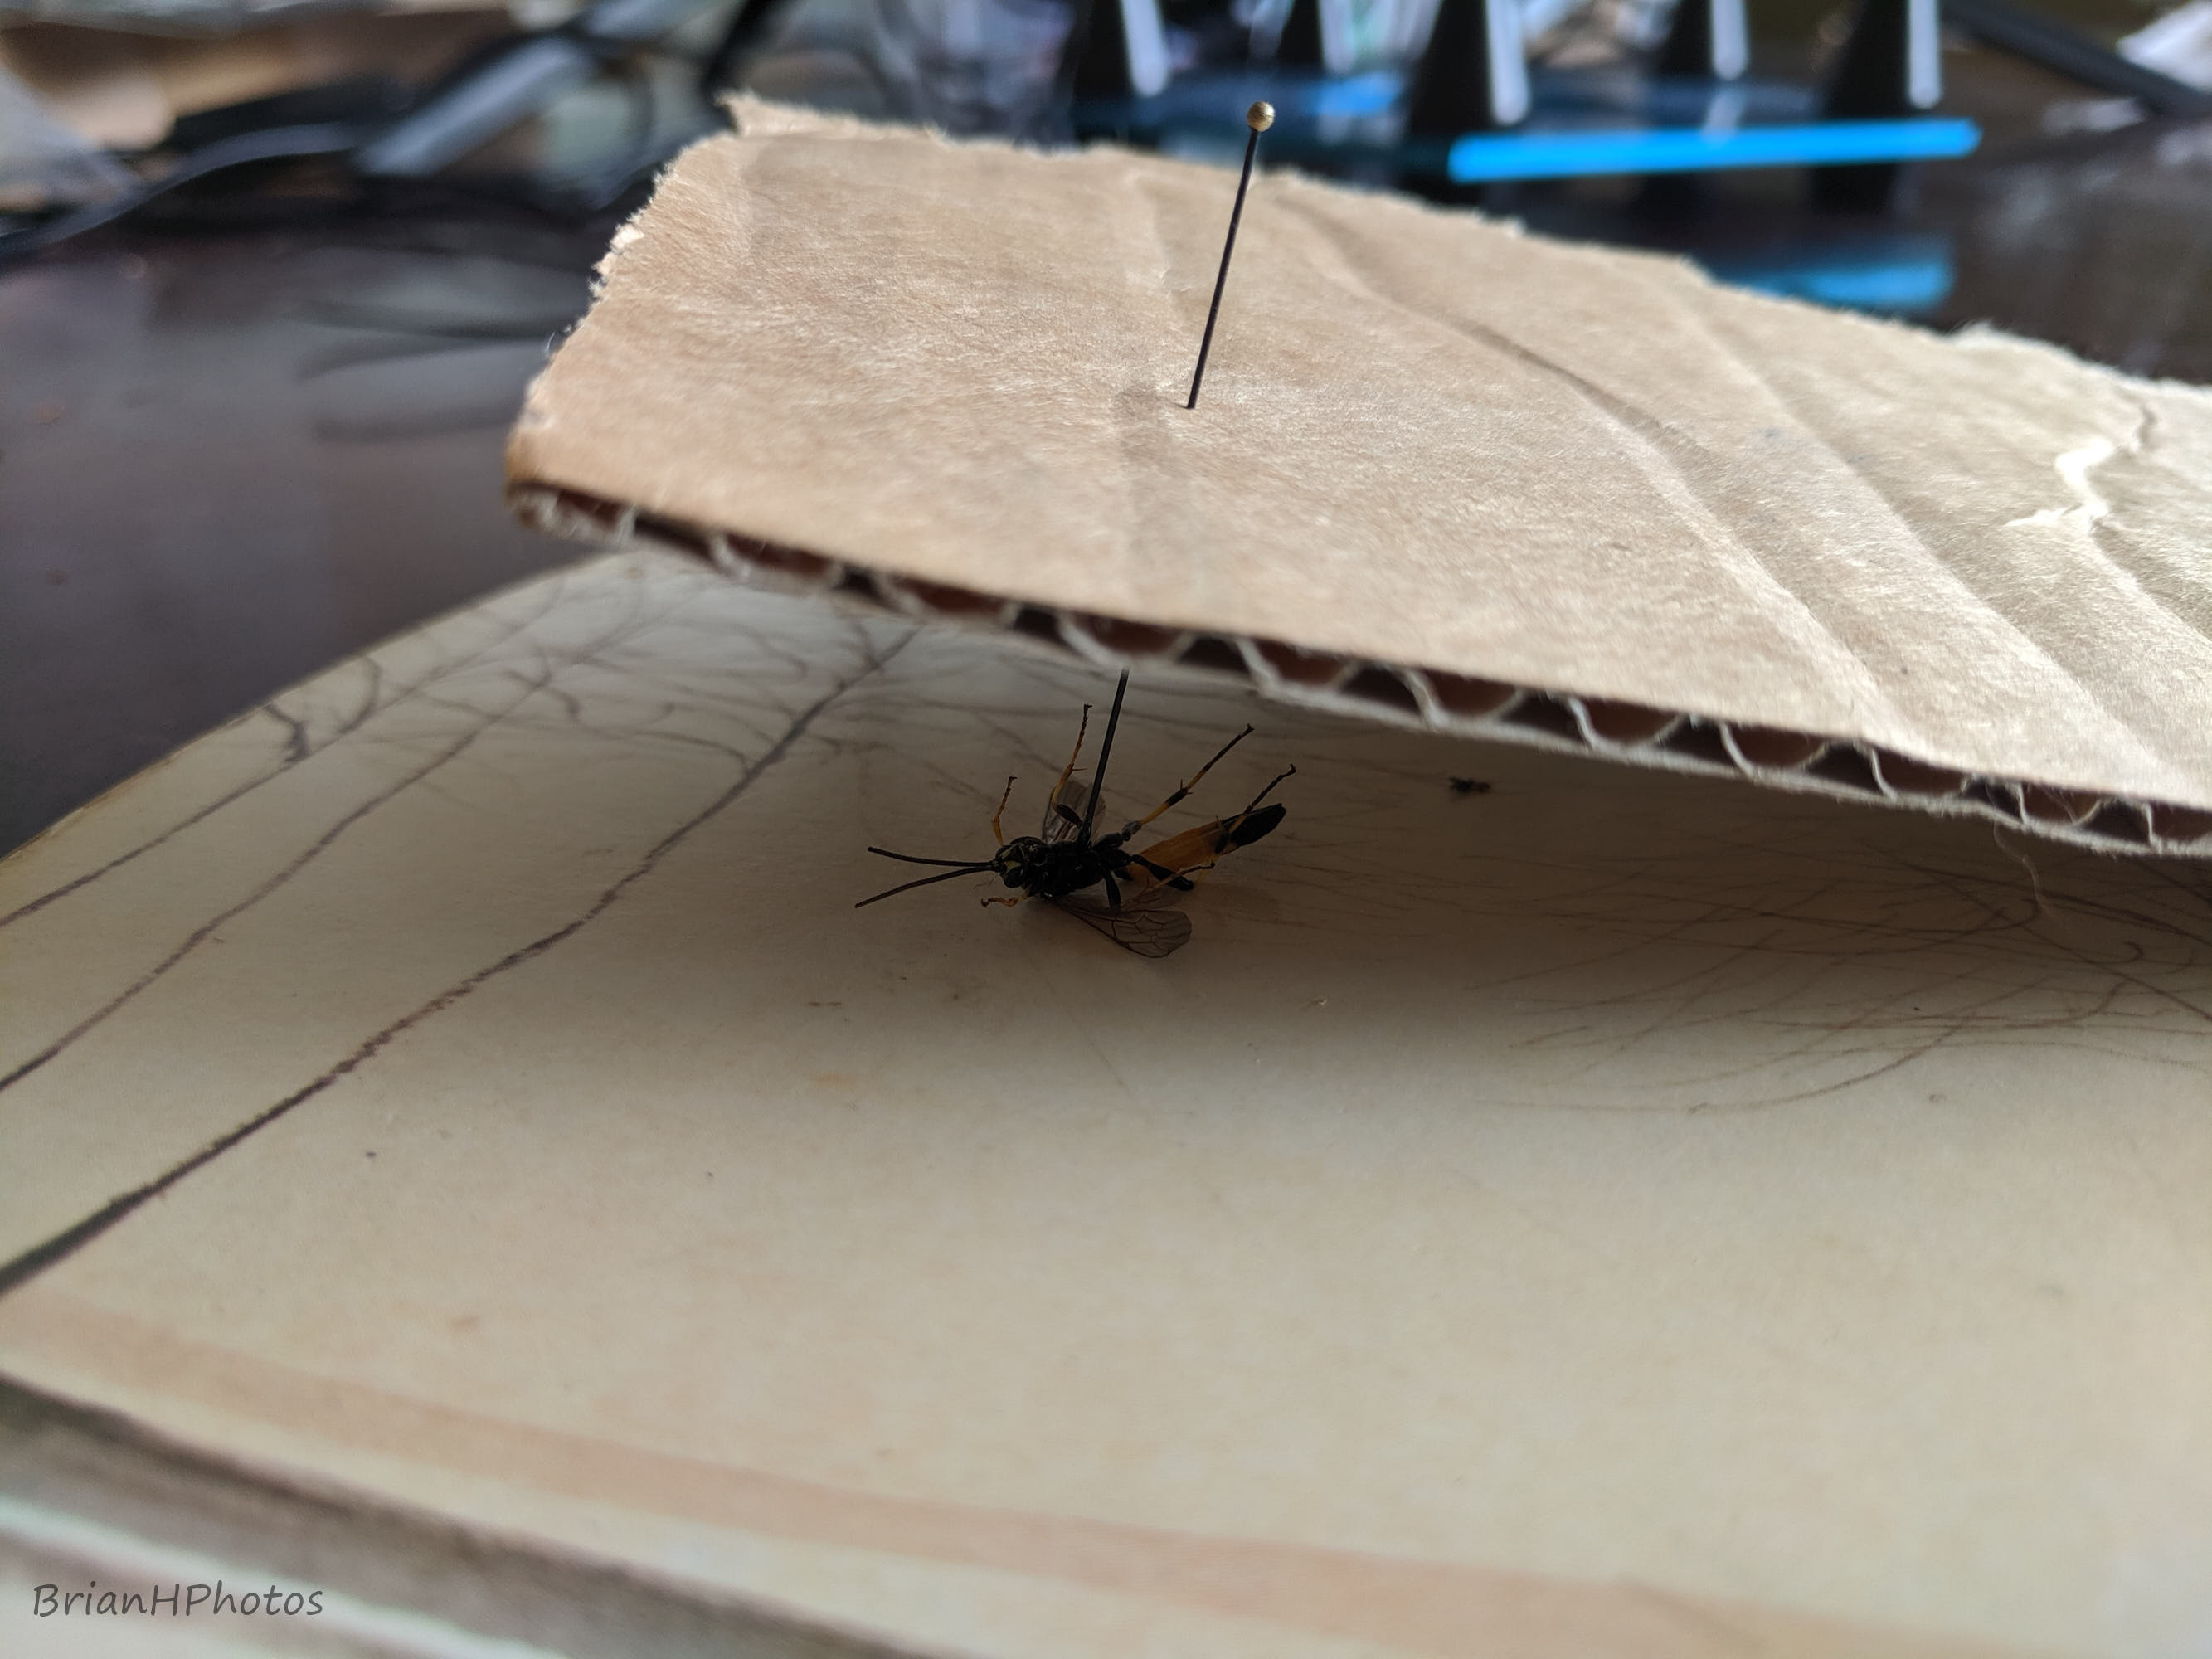
Now place the tip of the pin against the center thorax of the insect as shown in the image above and leave for a minute for the glue to dry. You can now pull the pin back through the cardboard with the insect attached to the pin tip so that the insect’s legs are now touching the cardboard.
When the insect dies their legs normally go into unnatural positions, either curled up or too straight, so the next step is to very carefully position the insect’s legs into a natural looking position. I use a pin in each hand and try and position the insect’s legs naturally. This can take some time and you may want to use a magnifying glass so that you can see what you are doing better. If the insect is very small I use my camera’s magnify feature so that I can get better magnification to see what I am doing.
This insect was quite clean but when you are looking at the magnified image you may see specs of dust and tiny bits of fluff on the insect. If you can, try and remove these with the tip of a pin or very fine tipped bush. It may be easier to do this now, rather than later in editing.
If the insect is very dirty you may want to very carefully wash the insect in a container of water with a few drops of washing up liquid in it. Very gently swish the insect around in the washing water for a while, then again in clean water. Then you can very carefully dry the insect with a lens blower and then repeat the leg positioning stage mentioned above.
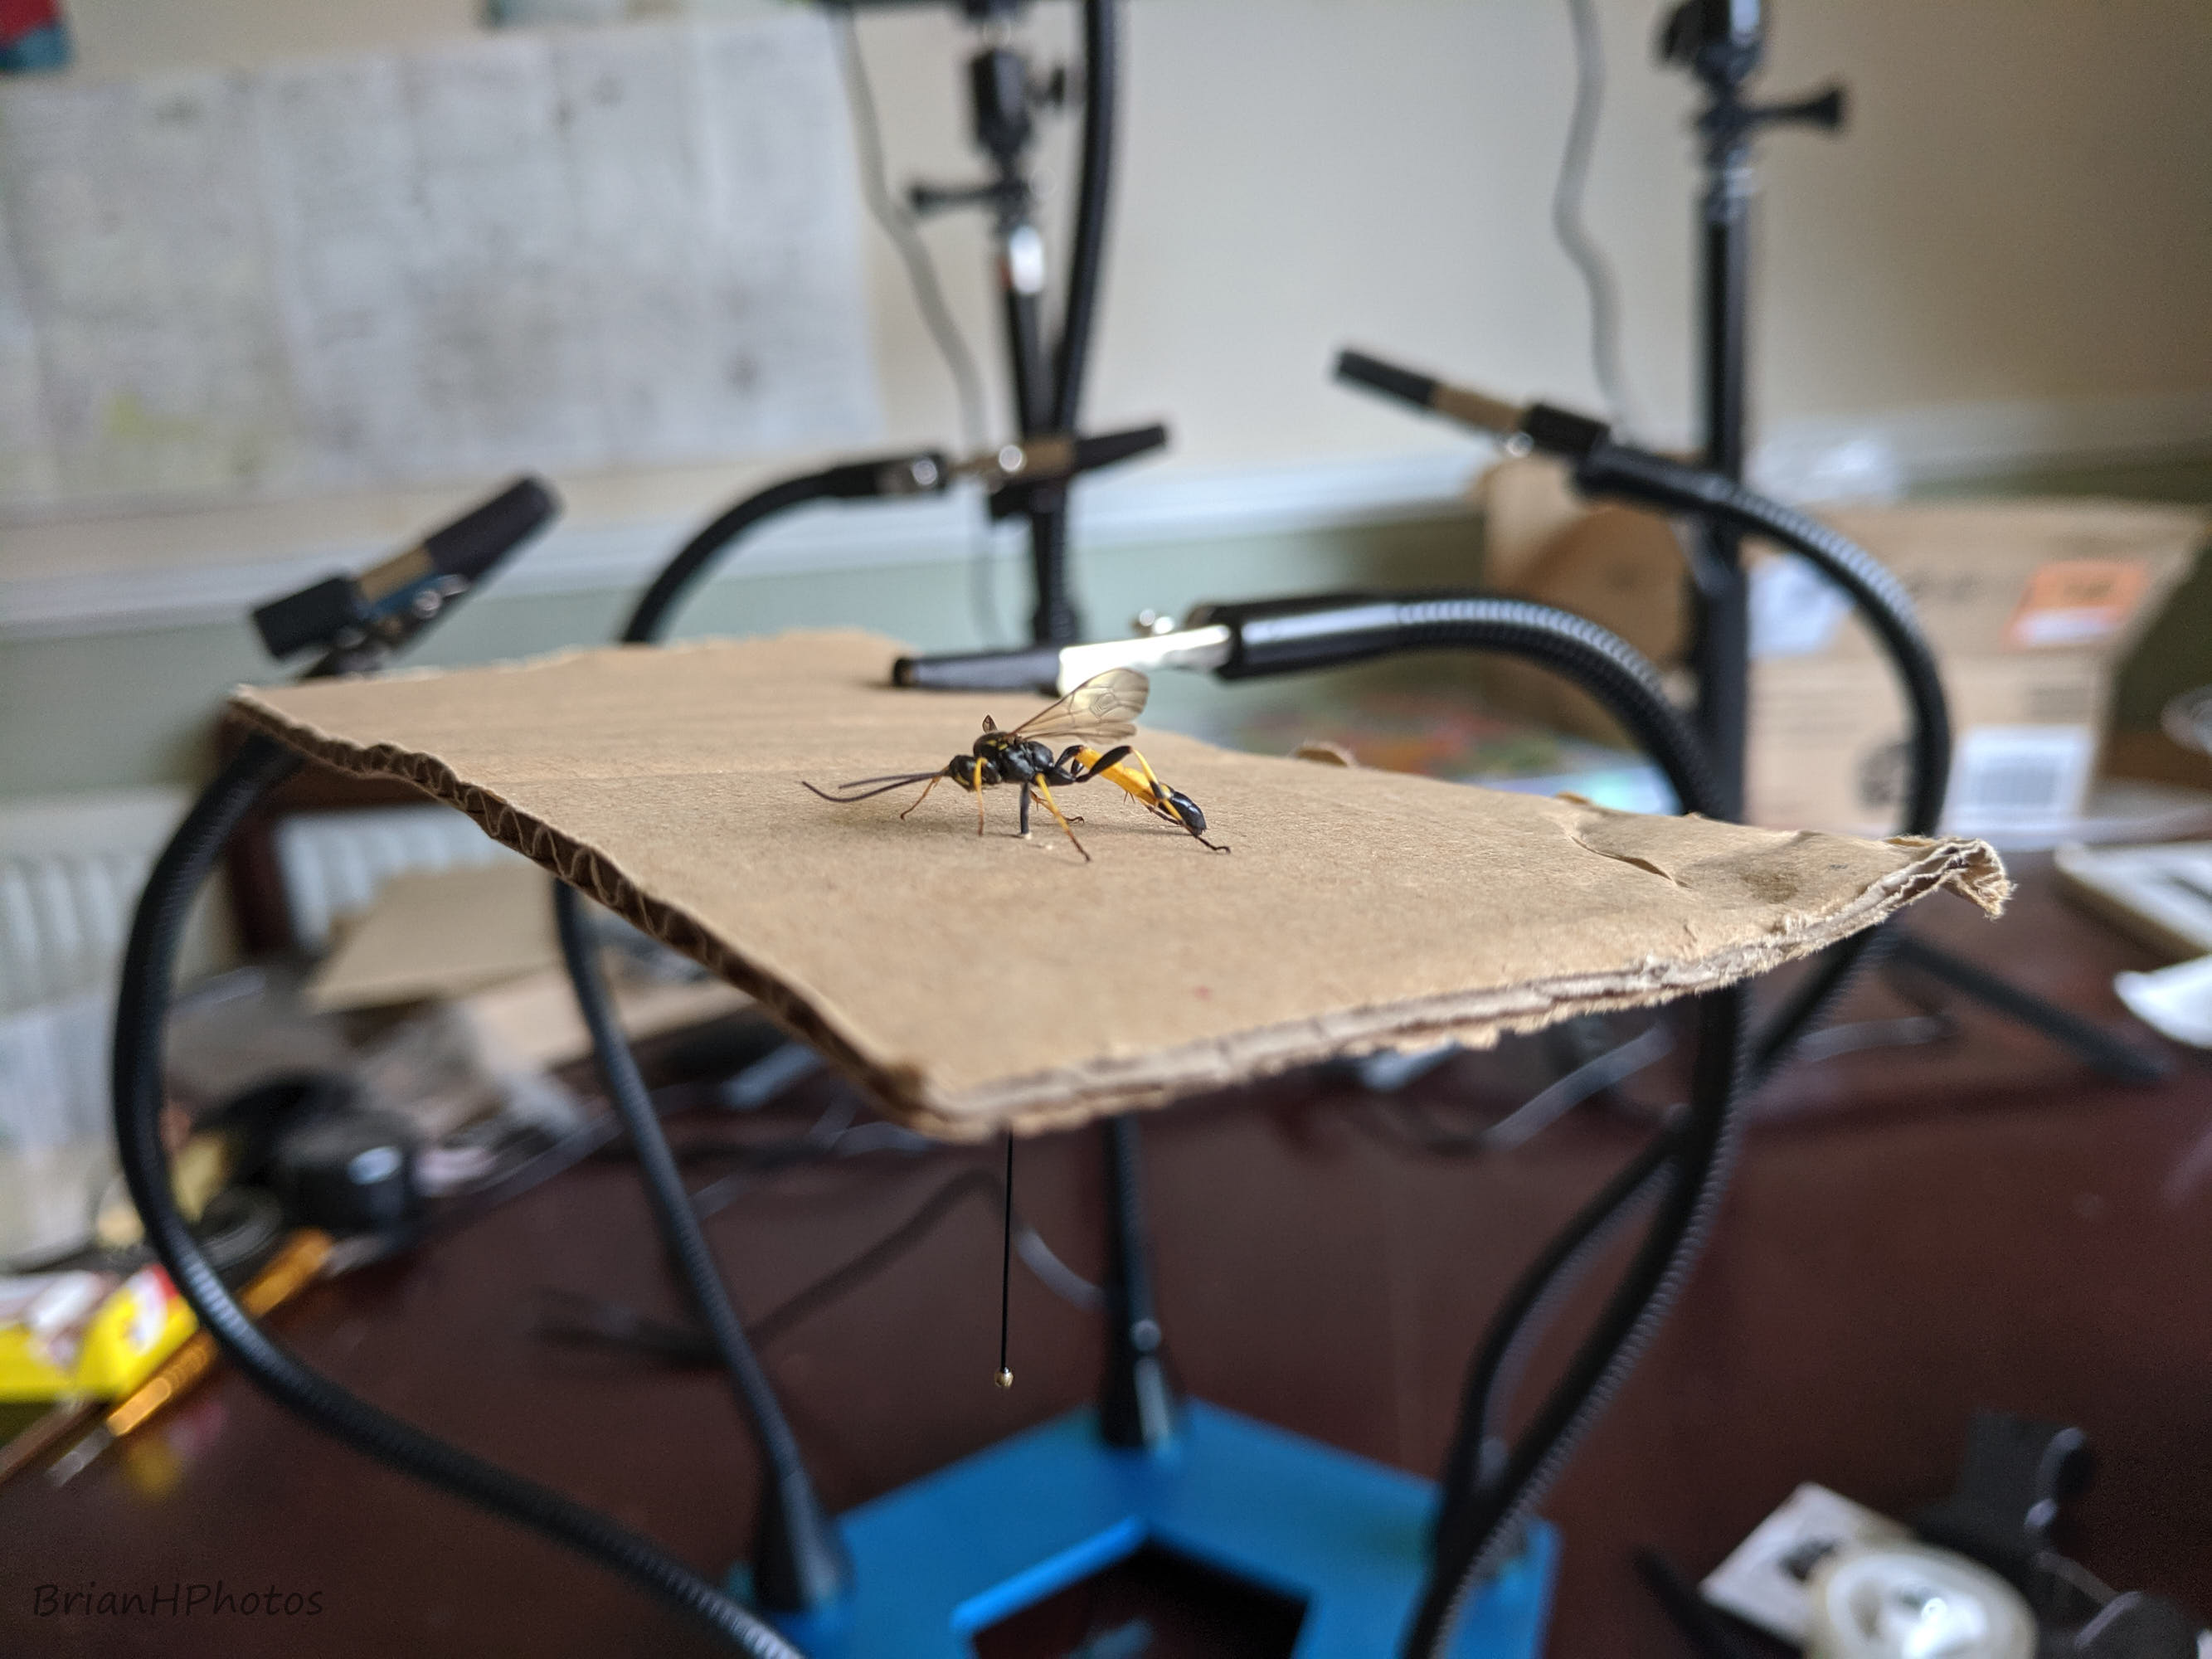
You are now ready to take any number of macro stacks of the insect on the cardboard.
Tear the cardboard towards where the pin goes through and remove the pin with the insect still glued to the tip and take more macro stacks.
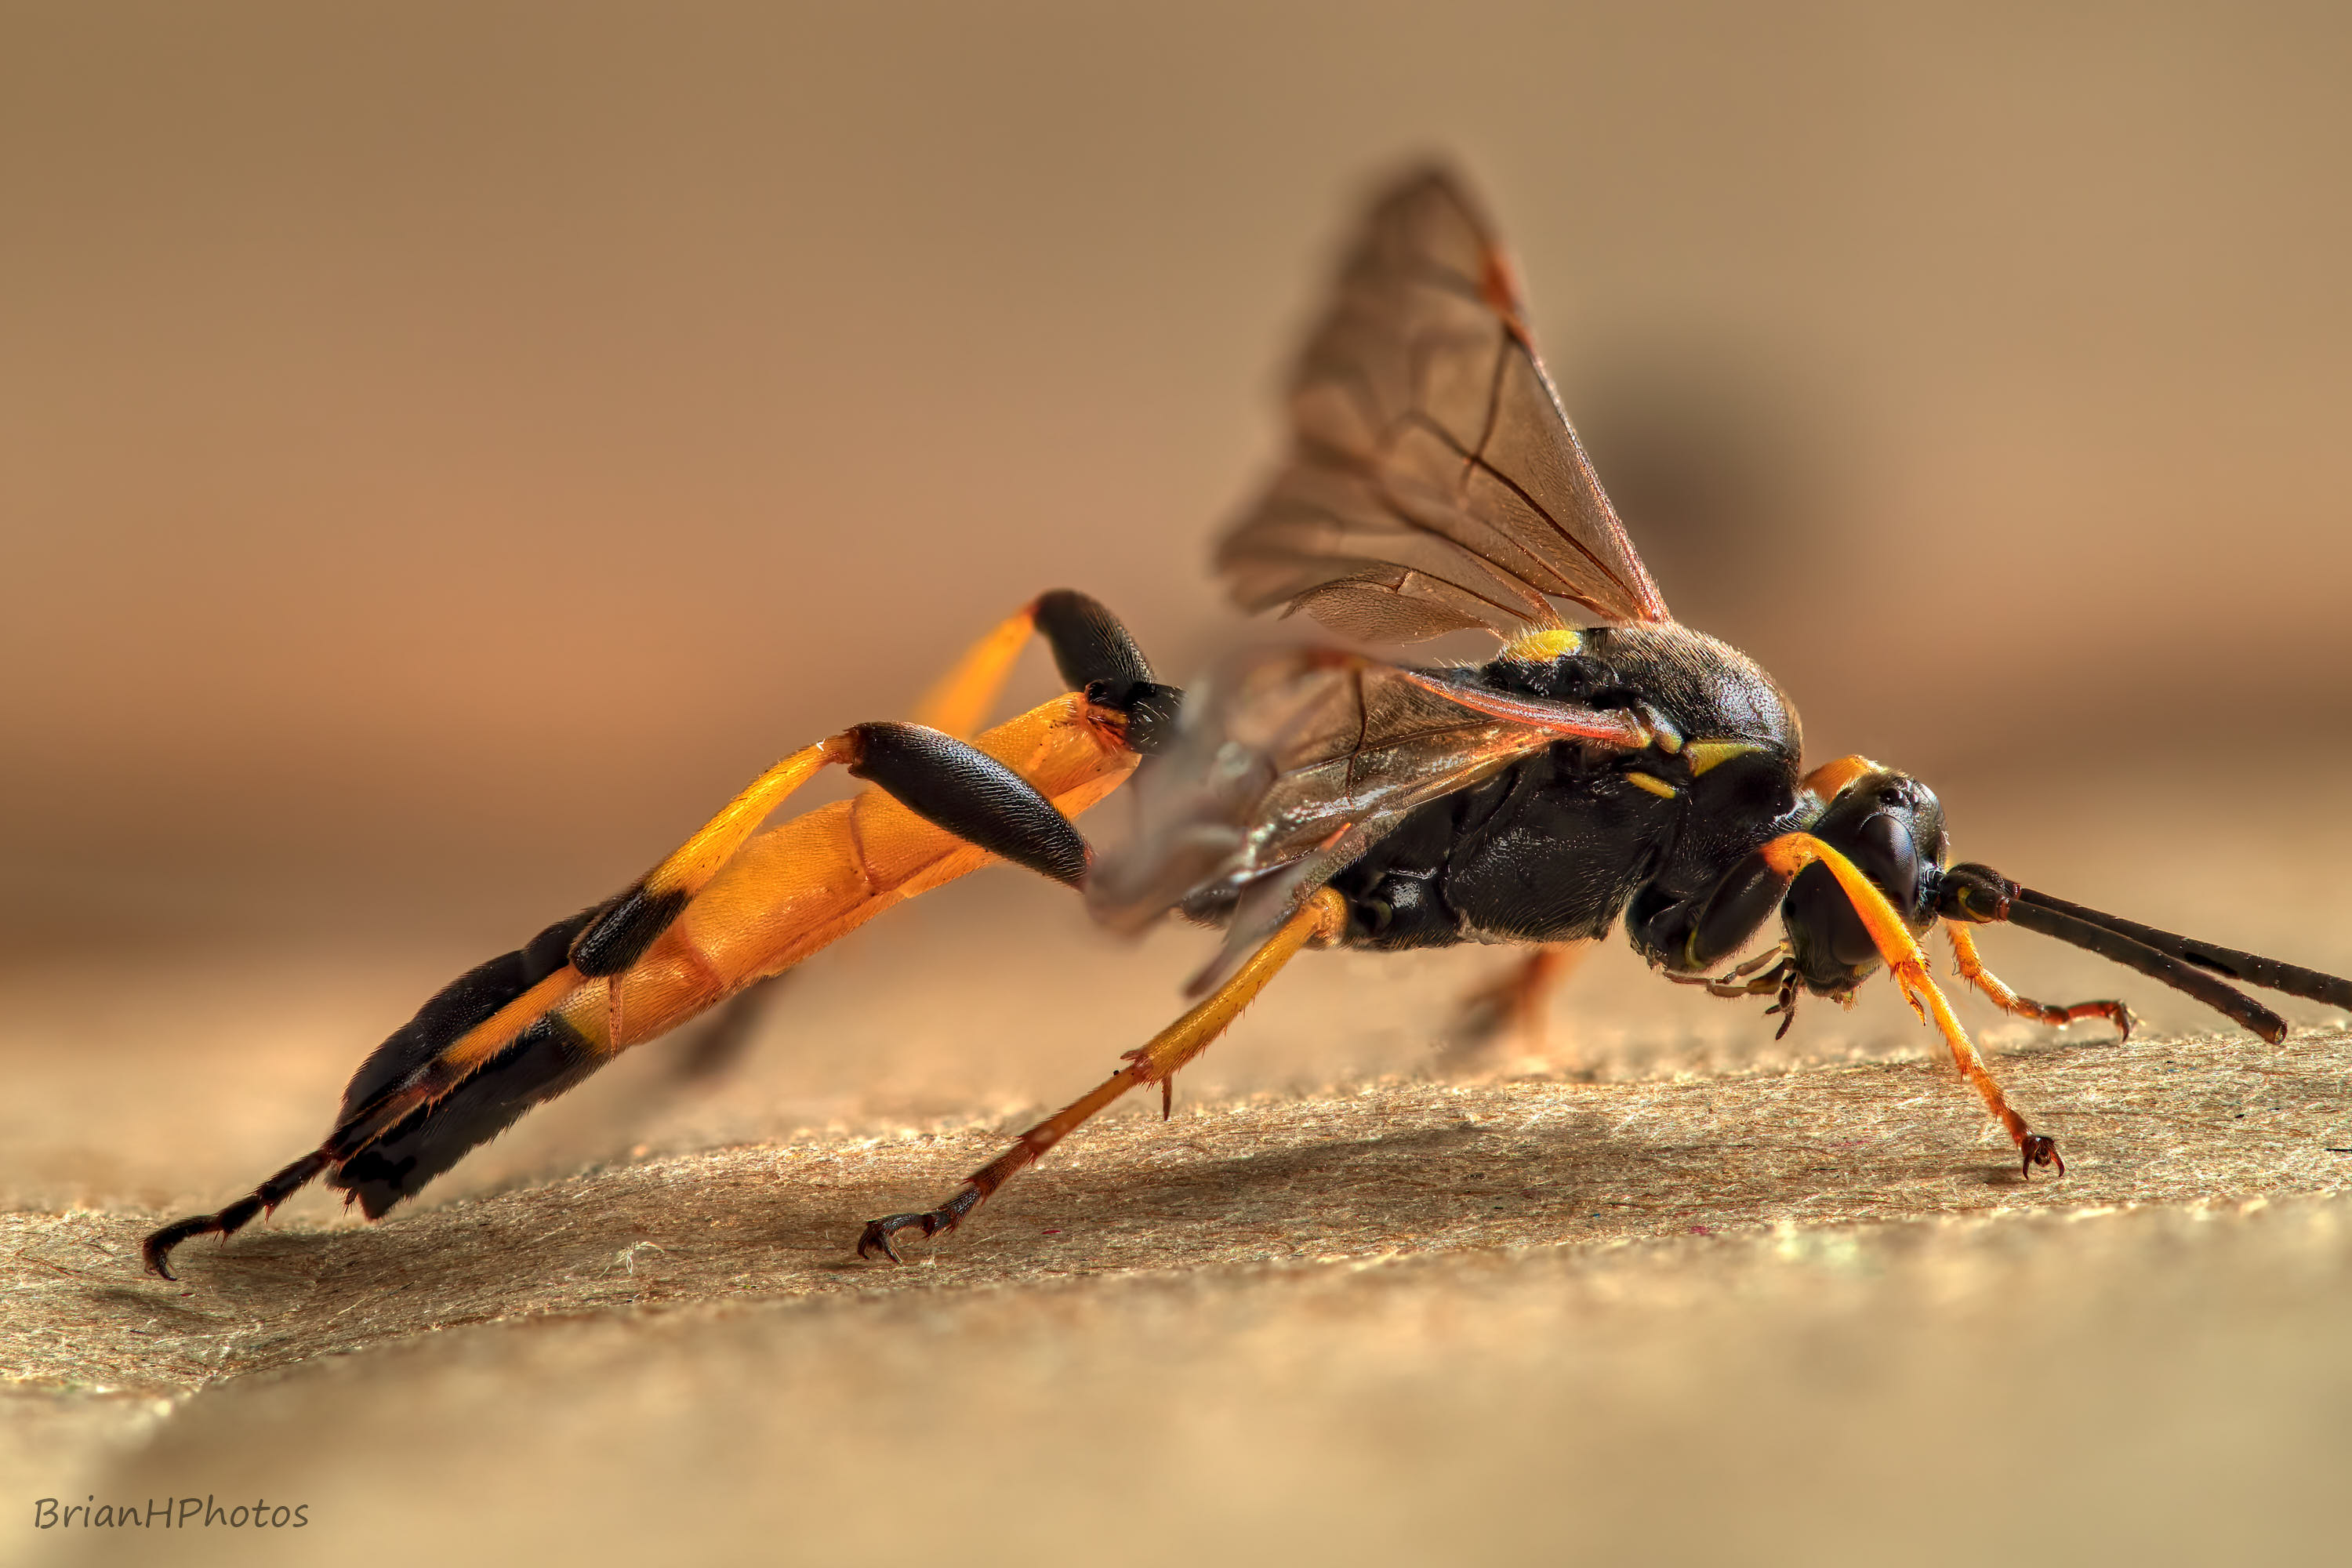
Here are some more focused stacked macro images I made of the same insect.
Thanks for taking a look at my photography
@brianhphotos.
Hi Brian,
That is very interesting post, I have never thought that the whole process is so complex. I can imagine that sometimes it is difficult to kill an insect and of course when flinging the dead one they are probably already dry too.
Actually me and my hubby were wondering how you manage to get such lively examples and now it is clear.
I agree that spiders sit still sometimes for hours and that is the easy model. By the why talking about spiders, I remember my mother and grandmothers were saying that finding spider at home will bring wealth. Therefore it was not allowed to kill them. When I married and told my hubby he just laughed. Of course he did not kill for some time but hten reminded me saying that despite of that the spiders have not brought us wealth :)
It was also really interesting to read:
"If the insect is very dirty you may want to very carefully wash the insect in a container of water with a few drops of washing up liquid in it."
I told you that my hubby was fascinated with your pictures, now he bought a camera too and trying his first steps in Focus stacking :)
Thank you for this wonderful post really love it :)
Thank you.
What camera and lens has your husband bought?
I hope he is enjoying using it and focus stacking. If he has any questions about focus stacking please ask and I will do my best answer.
Hi Brian,
I bought a used Olympus E-M1 I and a used Zuiko ED30mm f3,5 Macro. ....small budget :-)
Now I'm still testing the right software (Helicon Focus, Zerene Stacker), but for the rest I use Adobe Photoshop and Lightroom. In the beginning I will try flowers and objects, the insects will come later.
Stefan
Hi Stefan,
You made a good choice with Olympus. As you probably already know the E-M1 I has focus bracketing which you will find really useful for focus stacking.
As for stacking software you could try CombineZP which is free and from which I have recently seen some really impressive results. I did try it myself a number of years ago, but for me it crashed with anything more than about ten shots. Then I discovered Zerene Stacker which I think is the best.
Good luck and hope to see some of your images soon.
Cheers Brian
I think I would be finding some dead insects if I decide to follow your tutorial, not because I would never kill an insect, because it seems really complex process to "preserve" them!! :O After all, the photography is also a way to get knowledge and admiration for nature. Great post!!
Thanks for share on the World of Xpilar!!
Thank you.
Focus stacking is time consuming however you do it but the results are worth it I feel.
Your post is manually rewarded by the
World of Xpilar Community Curation Trail
join the World of Xpilar Curation Trail, info can be found here
Thank You.