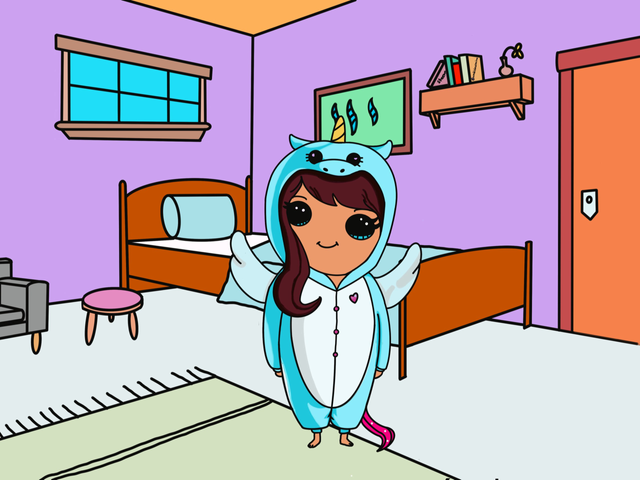
Drawing a Charming Onesie Girl with a Stunning Perspective Background
Open Procreate and create a new canvas by tapping the "+" icon in the top-right corner of the screen. Choose a canvas size and resolution that you are comfortable with. For this tutorial, we will be using a 4000 x 4000 pixel canvas.
First, create the background for the onesie girl. We will be creating a perspective background for this tutorial. Choose a brush that you like to use for the background.
First, create a new layer for the background. Then, draw a horizon line at the top of the canvas. Next, draw two vanishing points on either side of the canvas. These vanishing points will be used to create the perspective lines.
Use the brush to draw perspective lines from the vanishing points to the horizon line. These lines will create the perspective for the background. Once you have the perspective lines in place, you can start filling in the background with colors.
Once you have your background ready, it's time to start sketching the onesie girl. Choose a brush from the brush library that you prefer to sketch with. I recommend using a pencil or a sketching brush.
Sketch the outline of the onesie girl using light strokes. Make sure to sketch lightly so that you can easily make adjustments later on. When sketching the girl, keep in mind the proportions of the body and the placement of the features.
Once you have the basic outline of the onesie girl, it's time to add more details. Start by adding the facial features such as the eyes, nose, mouth, and ears. You can also add some hair and accessories to the girl.
Next, add the details to the onesie. You can add some buttons, pockets, and other design elements to make it more interesting.
After adding the details, it's time to add colors to the onesie girl. Choose a color palette that you like and start filling in the colors using a brush. You can use the eyedropper tool to pick colors from the reference image or from the color palette.
Once you have added the colors, it's time to add shadows and highlights to the onesie girl. Create a new layer and set it to "Multiply" or "Overlay" blend mode. Then, choose a darker color for the shadows and a lighter color for the highlights. Use a brush to add the shadows and highlights to the appropriate areas of the girl.
After filling in the background with colors, you can add more details to make it more interesting. You can also add other things such as buildings, trees, and other elements to the background. Use the brush to add these details and make sure to adjust the size and position of the elements according to the perspective.
Finally, it's time to add the final touches to the drawing. You can add some texture to the onesie girl or the background to make it look more realistic. You can also add some highlights to the background elements to make them stand out.
Here is the full video of my Tutorial, and I am founder of this Channel