Scratch building a Tau Riptide. Really from scratch!
I am not one for taking the easy road, well maybe I am in many situations , but not when it comes to modelling.
This post is about a project for warhammer 40K . if you are not a 40k player you may find some of the references obscure, but hopefully you can still appreciate the modelling aspect of it.
When the tau army was launched for warhammer 40k i was instantly sold. I really loved the mechalike feel they had. It has been mentioned that they do not fit very well with the gritty universe of 40k and I agree, but i still love them.
I bought a few models but I never had enough money for a full army, and anyways I always enjoyed making scratch built models. I had a grav-tank that i got as a birthday present , but I wanted one of the iconic mega-robotsuits that was the centerpiece for any selfrespecting Tau army. A Riptide.
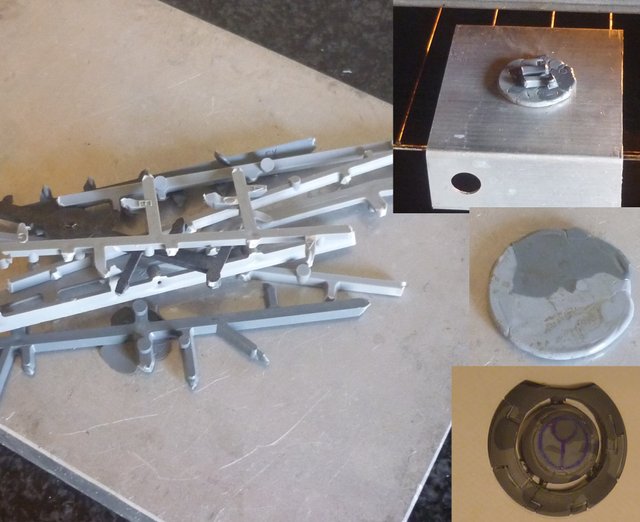
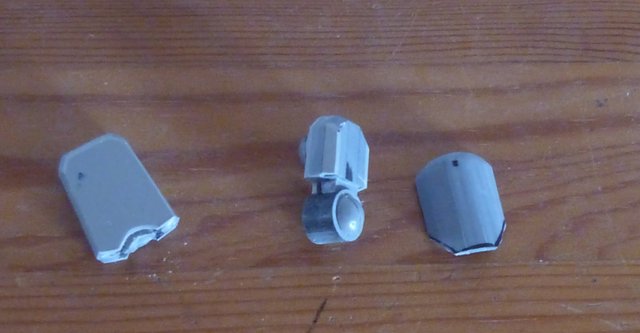
I started from scratch with only sprues and some plasticard. When I needed bigger pieces I either glued sprues together, or i melted some sprues in my oven and mushed them into different simple molds, to create tubes or spheres. These where combined into more elaborate parts , but the basic buildingbolcks was always sprues and spheres from melted sprues.
This way I managed to build up the legs. I took my time and filed and carved the surfaces as exactly as possible. Plastic is actually quite forgiving when you are used to making stuff in Metal.
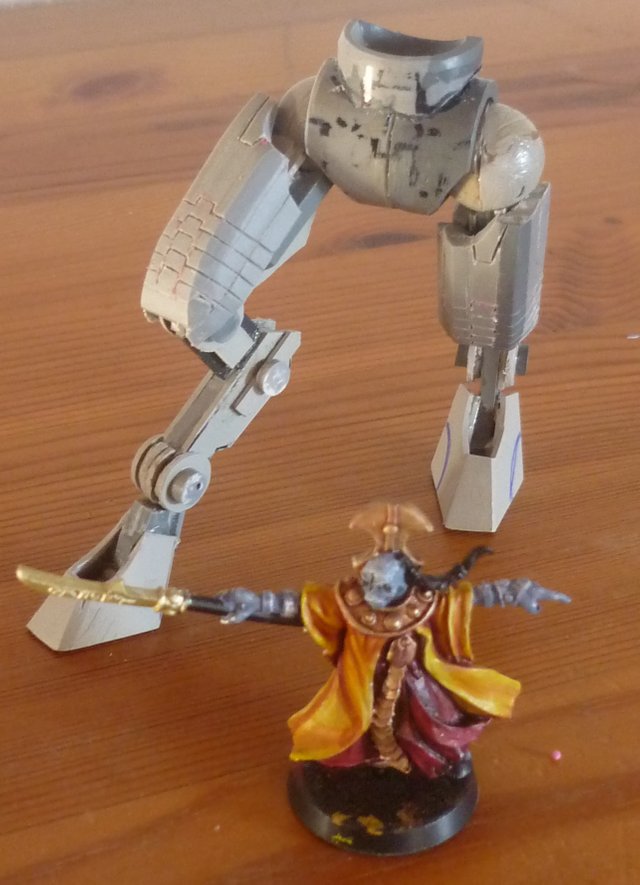
Next up was the body. To keep the weight down and save on materials(not that they was expensive, being a waste product and all) I started by building an empty box. Then I cut off corners etc where needed to round the shape, and glued on more plates to get some depth and some details.
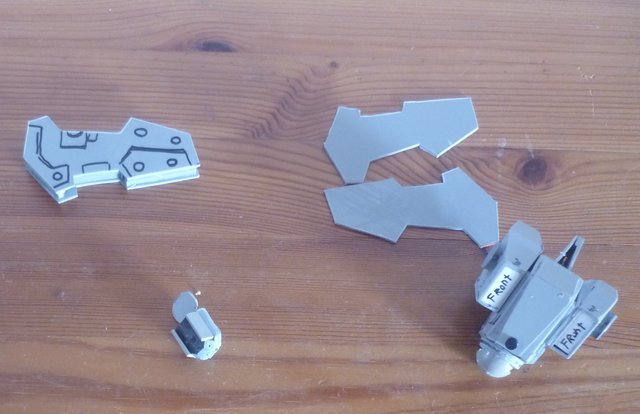
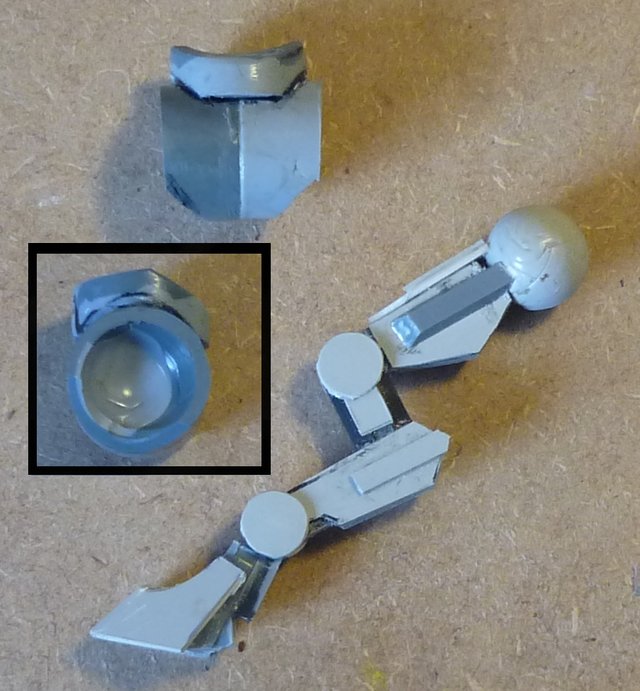
The arms was a bit more elaborate since they had some more rounded features. i basiccaly made these by gluing a large lump of sprues together and then filing the shape out with a file, much as you would do with wood.
I used magnets to fit the body to the legs, as well as the arms to the body. That way I could easily take the whole thing apart for storage or transport. Magnetising was a fairly new idea at the time (at least I had only just heard about it) and it really made switching weapons much easier.

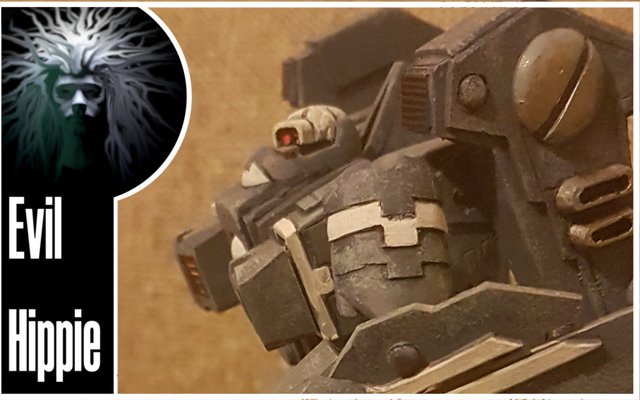
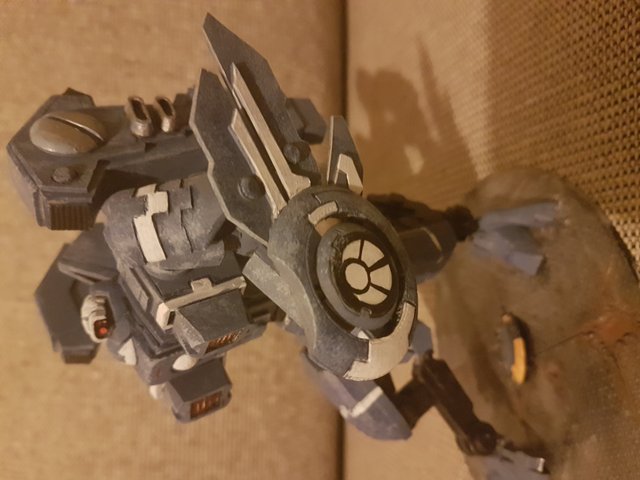
Finally I could mount the shield and paint the model. I was never much of a figure painter and especially on big models like this one I tend to get bored before I finish, but I had spent a lot of time modelling this and I was determined to get the paintjob good enough to do this huge modelling task justice.
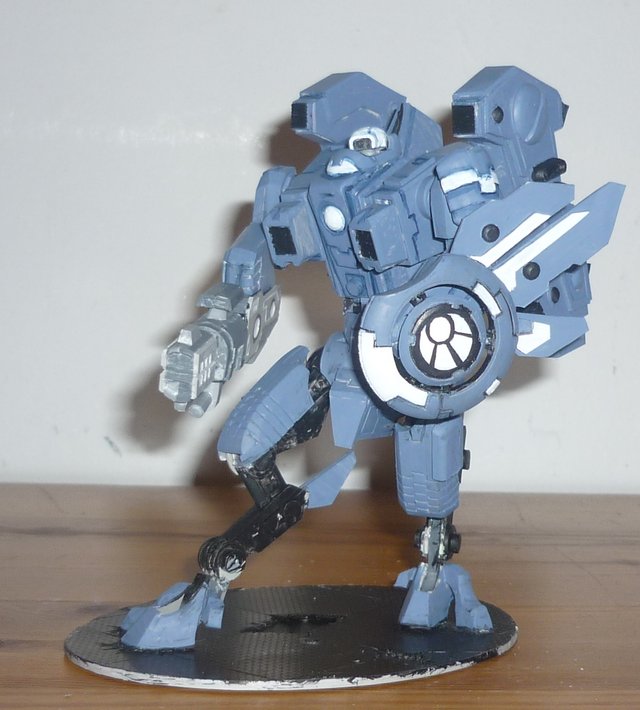
Even so, I never finished the paint job. Looking at it today, I can see several places that I have neglected. I can also see how much easier this project would have been , had I owned a 3dprinter at the time. I think I will repair it with 3d printed parts, and get the painting finished. It deserves that.

Im EvilHippie, a compulsive creative and jack o' trades. If you want to know more about me, check out my introduction post here
If you like what you see, feel free to upvote, follow and resteem
or you can check out these recent posts
flowers to the left of me horses to the right
diorama
Anemones
This is just fantastic. Paint jobb could need some work but its an easy fix.
When do we see the Next project???
I put magnets in joints long before i ever heard of anyone else doing it. To bad i didn't have a blog to write about it, or even had the idea that it was novel. To me, it was just an obvious way to do it.
Yeah it is a pretty obvious idea I guess. We may have discussed it in my club, but I think I just assumed the magnets would be too weak to hold anything.
I used the telescoping J&S brass tubes for the actual joint connection. The magnet was just to hold it in.
Since this was back in the days of only metal figures.
I found my biggest problem was pieces being balanced around the pivot point. There just wasn't enough friction from the magnet to pose any piece that wasn't balanced.
You are a fine plastic-smith!
Thanks.
Great work! And I admire your patience as well.
Re magnets: I have made small joints using two buckyballs that almost touch, glued into the pivoting centre of a circular joint with two round flanges that fit together. It allows circular movement in one plane, the arm or leg can easily be removed and things don't break when you drop them, they just come apart.
Thanks , it doesnt feel like patience when you are having fun.
Yes one of the major advantages of magnets are that you get a little bit of poseability and the added advantage of them not breaking (as much) when dropped.
yeah...in the legs.. you really messed up the paint. I never played 40k.. Now i am gonna look for it.
@evilhippie You have earned a random upvote from @botreporter because this post did not use any bidbots.