Effects | Double Exposure Effect | GIMP #4
Effects | Double Exposure Effect | GIMP #4
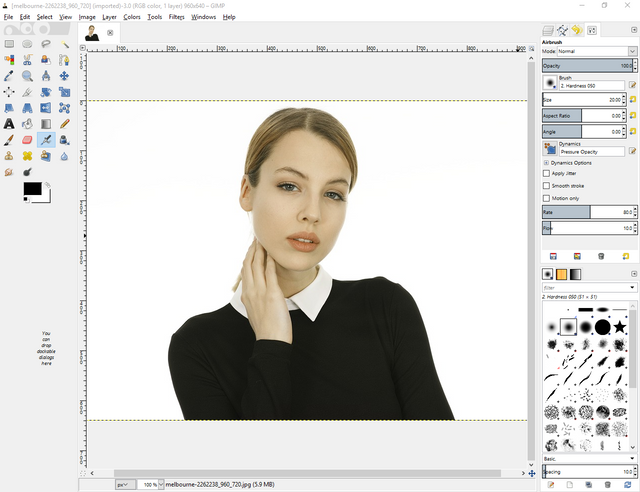
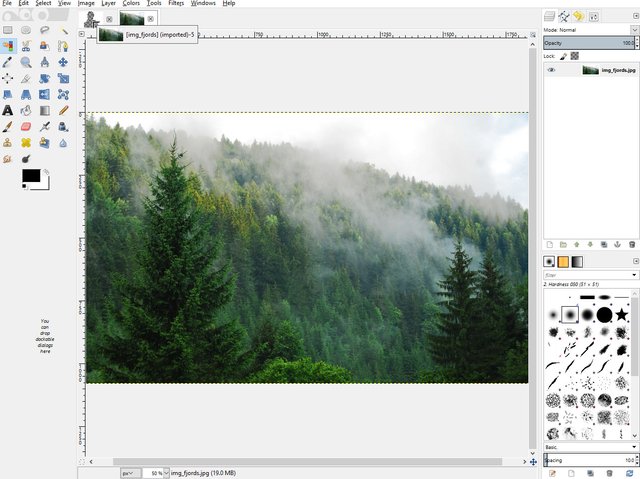
In this part, I will be telling a new effect which is know as Double Exposure effect. It is also one of the easiest and coolest effects you can do in GIMP. I am using GIMP v2.8, you can use any version near to that to be able to follow me. The image I am gonna use it this one.
You should have basic understanding of GIMP and how it works to fully understand this tutorial
Tutorial
First of open the image. You can do this clicking on file then in drop down menu click open, select the image and you're ready to go.
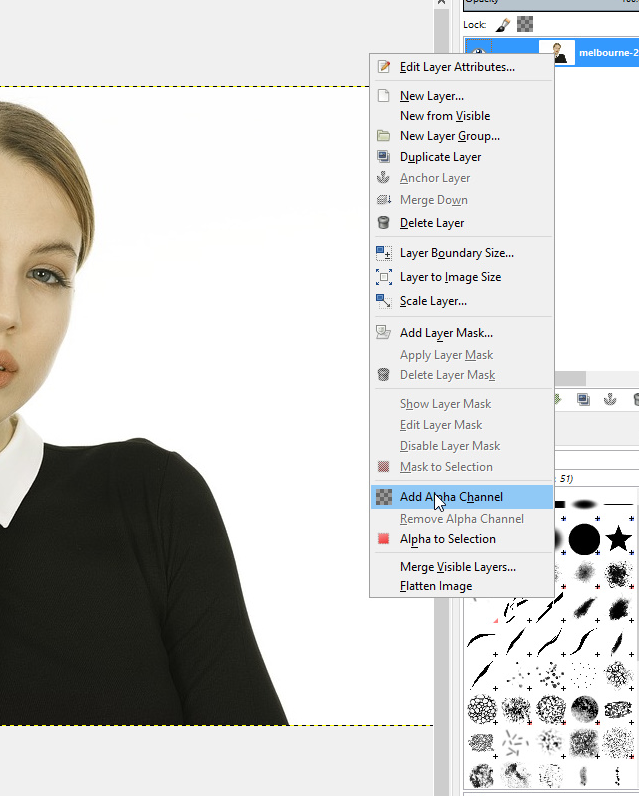
We need to separate the subject from the background to do this, first of all right click on layer and then click "add alpha channel".
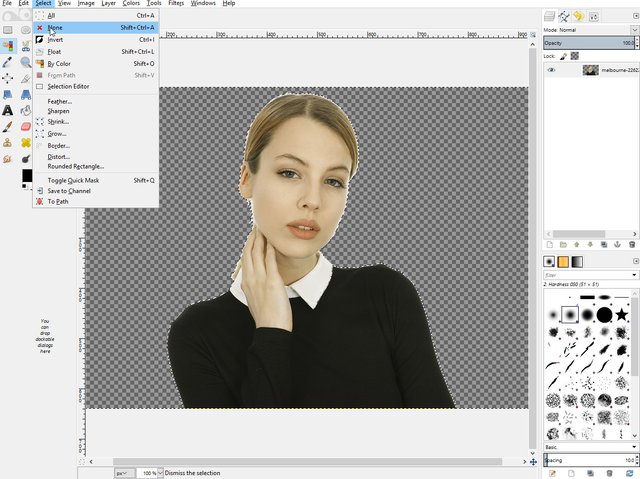
Now click on "Select By Color Tool" and click on white background and delete it by pressing delete button, if you are on mac you can go to drop download menu of edit and then click clear. That will give us only the subject. Subject won't be "perfect" but it doesn't matter that much because we won't be seeing white part in final result.

After deleting the white background you can deselect section by going to drop down menu of select and then clicking on none.
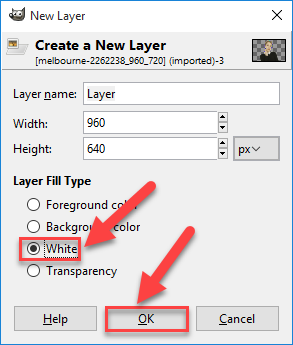
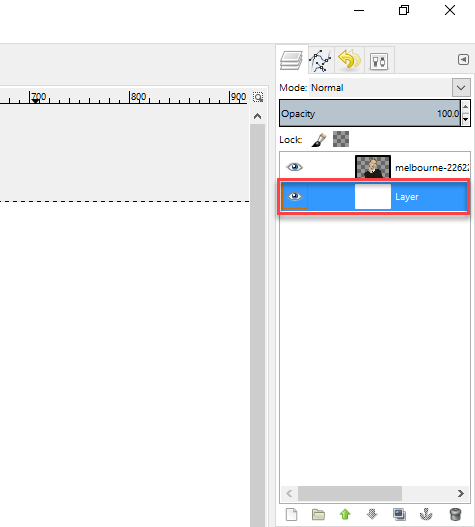
Click on add new layer and select layer fill type as white. Leave the width and height as is and click OK.
Click and drag the layer you made under the first layer so the white layer will be under the picture of the model.
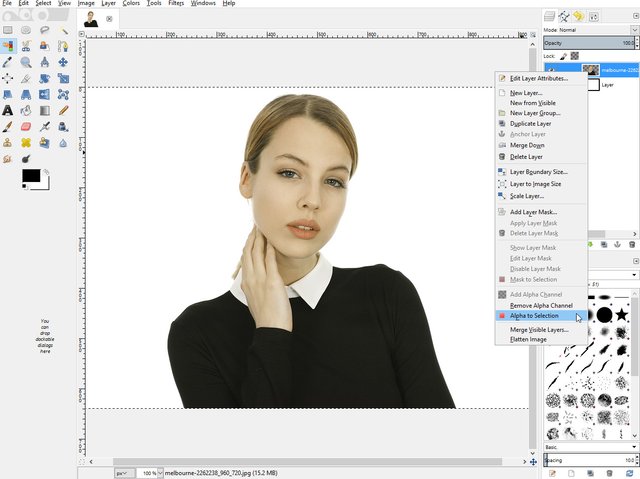
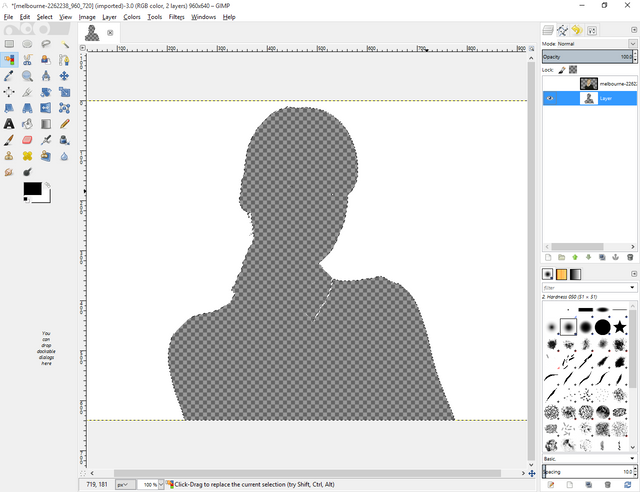
This step is really important and somewhat difficult but if you have little experience you can do this without any problem, if you somehow get stuck at any step be sure to inform me about it it in comments. Select the layer with model and click on "alpha to selection", you will have selection around your subject.
Go to the white layer and change visibility of previous layer so you can see the full white layer with the selection and press "delete" to punch a hole in white layer, like this
Now open the second image you want to use, I'll be using this rainforest image. Drag the second image to the you opened to the existing document.
Now put the layer of second image at the last.
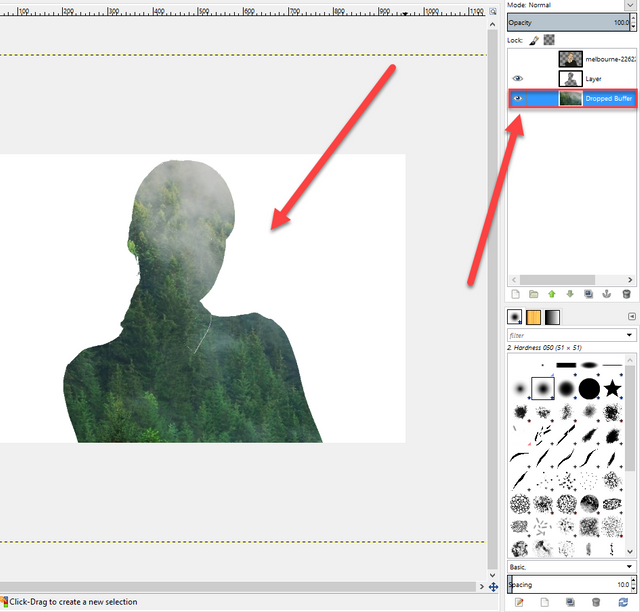
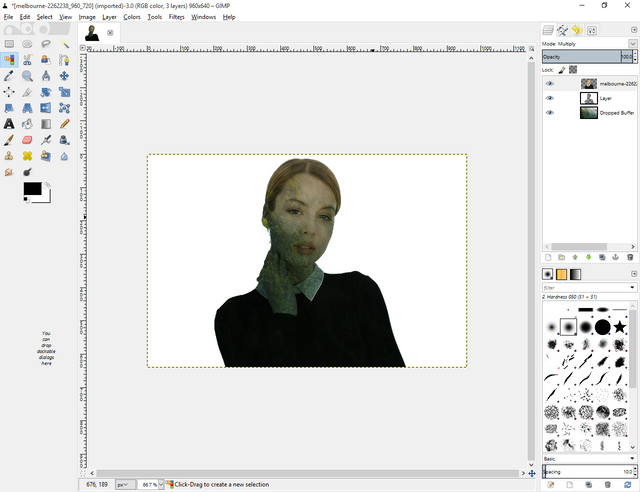
Go to the first layer and change visibility mode to multiply.
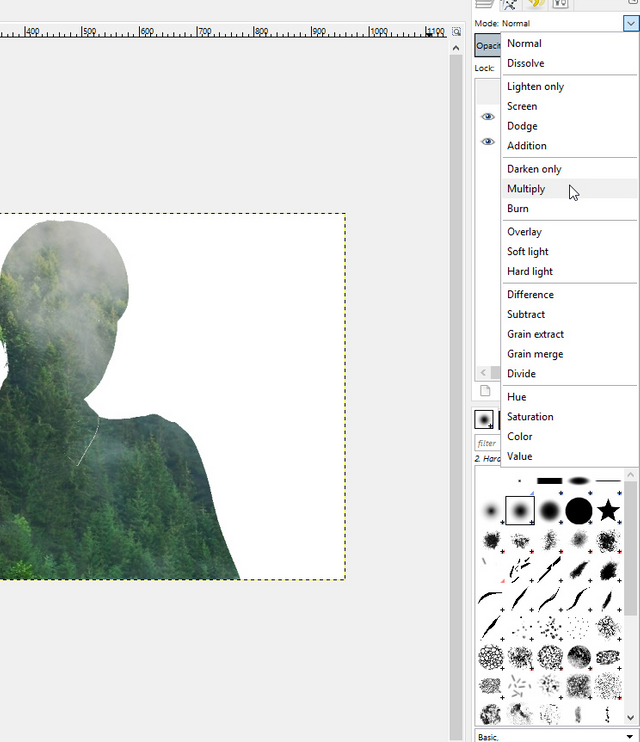
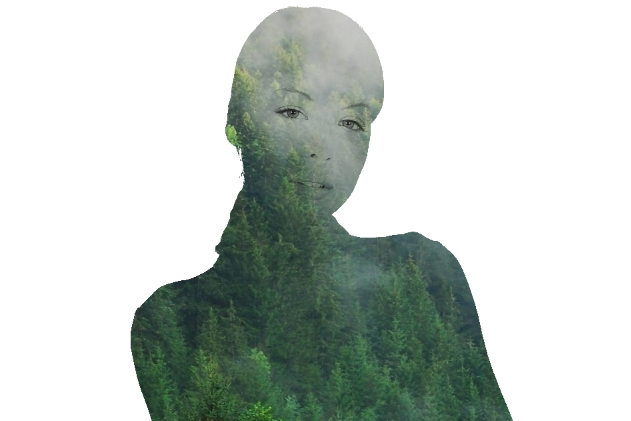
Turn on visibility of the first layer. Now you can see that we are slowly getting towards last part of the tutorials, anyway it will look something like this.
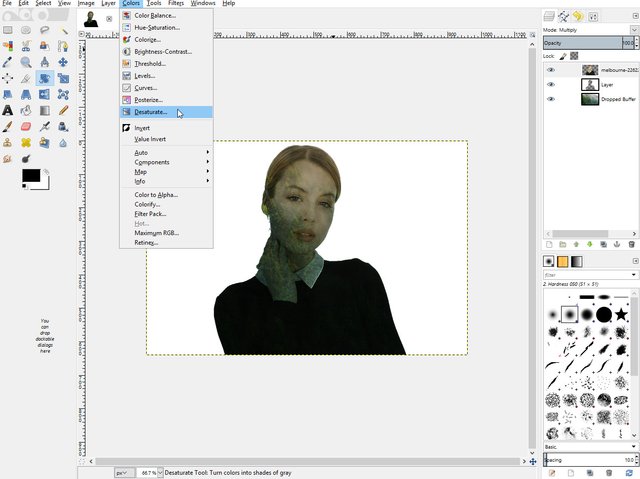
Let's desaturate the image you make it look more awesome. You can do this by going to drop down menu of colors and clicking desaturate. Select lightness as desaturating method.
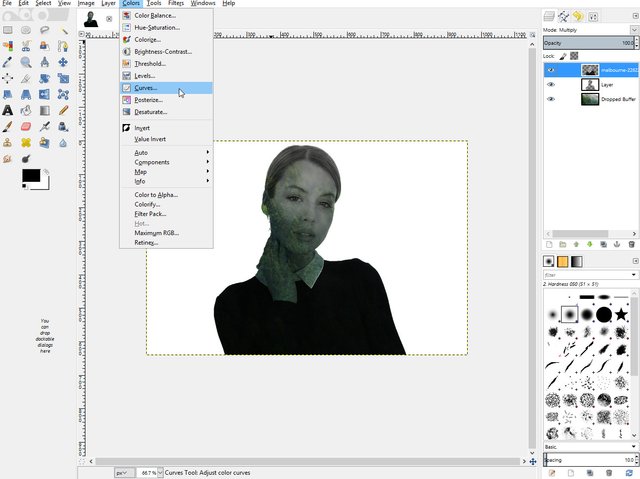
Now we need to adjust the brightness of the image. Open the Color Curves, which you can open by going to drop down menu Colors and then click Curves.
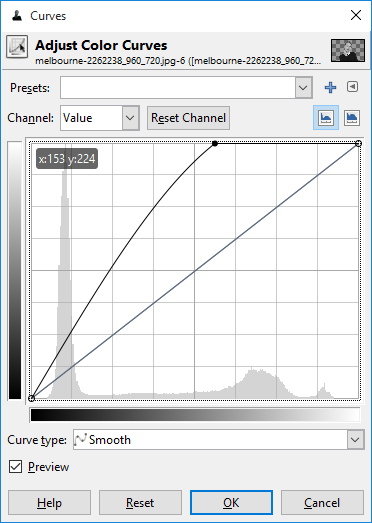
Change the curves to something like the image below or you can play around with it till you get the settings you want. After getting what you want click "OK".
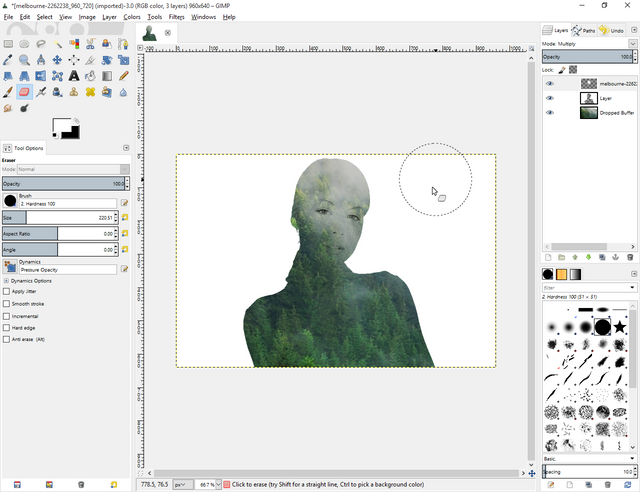
Select the first layer and choose eraser tool. Set size as per need.
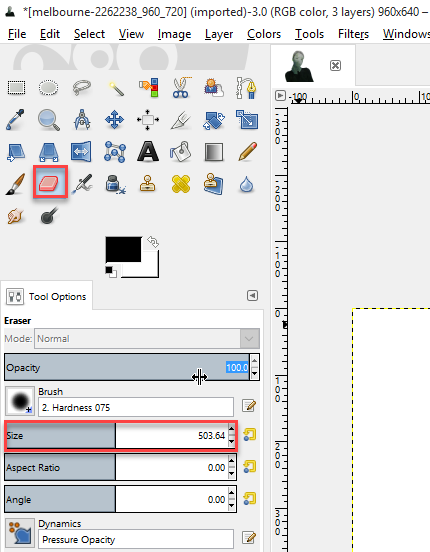
Now start erasing the parts you don't want, like I don't want black shirt. Once you have done erasing you will have final product!
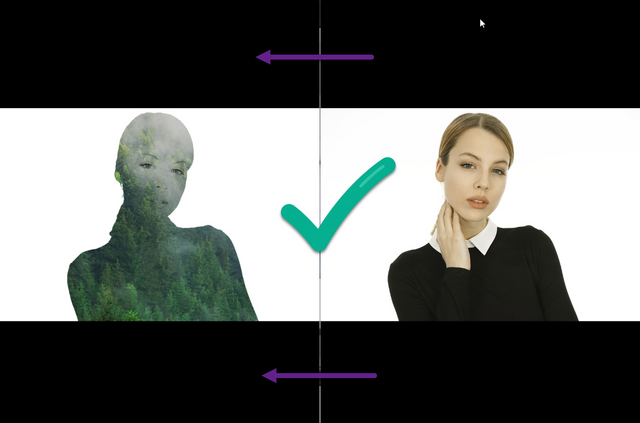
Before And After
Hope you have learned something new in this part, stay tuned for the next one. Remember if you have any confusion state them in comments. I'll be more than happy to help.
Cya! Next Time
Posted on Utopian.io - Rewarding Open Source Contributors
Thank you for the contribution. It has been approved.
You can contact us on Discord.
[utopian-moderator]
Congratulations! This post has been upvoted from the communal account, @minnowsupport, by Umais from the Minnow Support Project. It's a witness project run by aggroed, ausbitbank, teamsteem, theprophet0, someguy123, neoxian, followbtcnews/crimsonclad, and netuoso. The goal is to help Steemit grow by supporting Minnows and creating a social network. Please find us in the Peace, Abundance, and Liberty Network (PALnet) Discord Channel. It's a completely public and open space to all members of the Steemit community who voluntarily choose to be there.
If you would like to delegate to the Minnow Support Project you can do so by clicking on the following links: 50SP, 100SP, 250SP, 500SP, 1000SP, 5000SP. Be sure to leave at least 50SP undelegated on your account.
beautiful work Umais ! :)
Thanks! See ya soon with more awesome work.
Hey @umais I am @utopian-io. I have just upvoted you!
Achievements
Suggestions
Get Noticed!
Community-Driven Witness!
I am the first and only Steem Community-Driven Witness. Participate on Discord. Lets GROW TOGETHER!
Up-vote this comment to grow my power and help Open Source contributions like this one. Want to chat? Join me on Discord https://discord.gg/Pc8HG9x