Learn about Loomio - A decison making tool
Loomio is a user-friendly online tool which helps to make decisions together wherever the people are. It saves valuable time, gives clear result of the decision and continues everything in one place. It is the safe and accessible document of your discussion, decisions, and files. This web application helps us to come together, discuss any topic, propose a solution about that discussion and make the proper decision without being present face to face which is very much useful for working in team or group.
What Will I Learn?
- How to create an account in loomio
- How to start a group
- How to discuss any topic and propose a solution
- How to make the decision
Requirements
- Internet connection
- Web browser
Difficulty
- Basic
Tutorial Contents
Creating an account in Loomio is the easiest thing. To create an account, first of all, we have to go to the given link - https://www.loomio.org .
Step-1:
In the website, you will see their homepage .
We cannot create any group without having an account in loomio. So, at first, we have to create an account through login. We can see a login option marked on the image

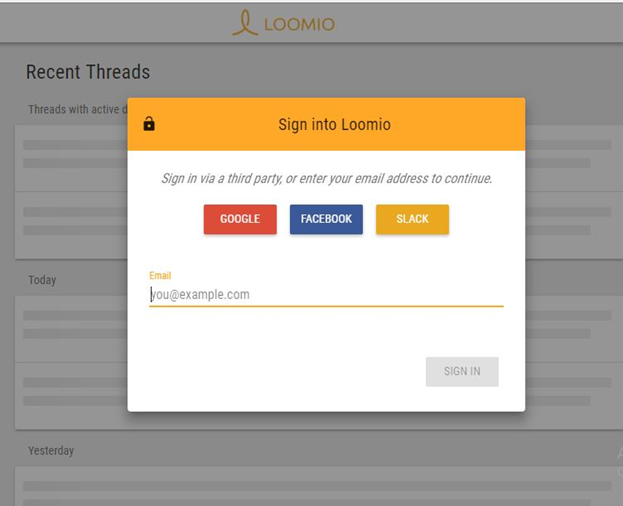
Step-2:After clicking on login option we will be redirected to the sign into Loomio page as we can see in below image
We can be able to sign into the loomio via Google, facebook and slack account. Or simply you can sign into this through any other email address you have.
When you will type your email address or give any of the options (Google, Facebook or Slack account), you will be able to Sign in.
Step-3:
Clicking on Sign in button you will see another window shown in below image and here you have to assign a name to your account. Through this name, you will be known to your loomio group members.
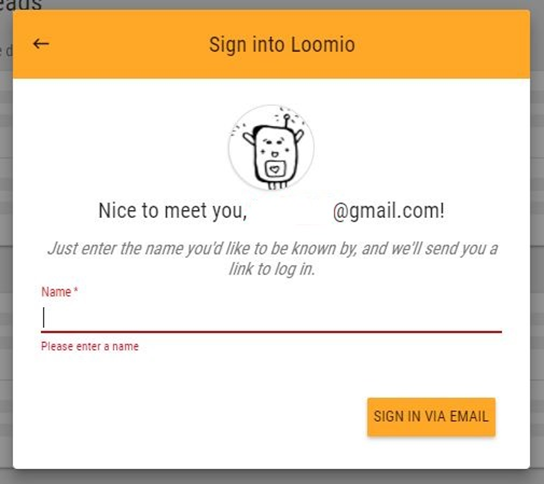
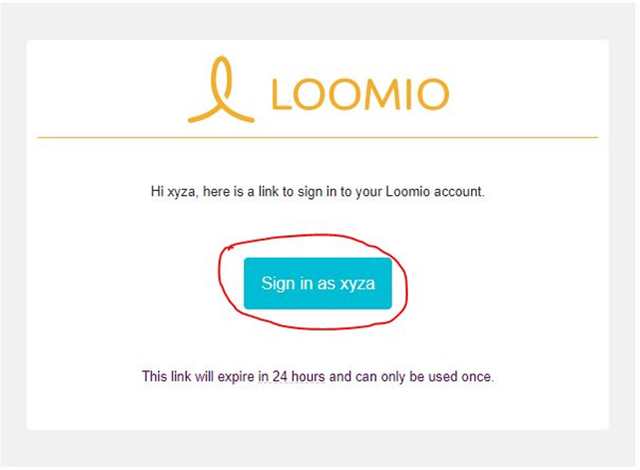
They will send you an email with a link which will log in you instantly. You have to log in to your account every time via email. They will send you a link to sign in.
Step-4:
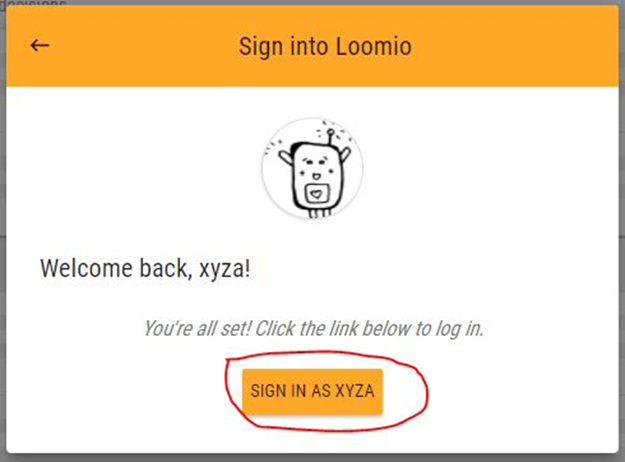
When you will tap that sign in button from the mail they will redirect you to the loomio sign in page and show you a window. After clicking on the marked button you will be finally signed into the loomio successfully.
After successful sign in into the account, you will see a interface of your account. As we don’t have any threads created, the “Recent threads” is empty. If we mute any of our threads then that will be shown in “Muted threads”. Now for starting a group you have to click on start marked or if you have already a group and you want to join with them then you have to just click on the join option. You will get notification of member’s activity by tapping the Bell icon on the top bar.

Step-5 (Come together) :
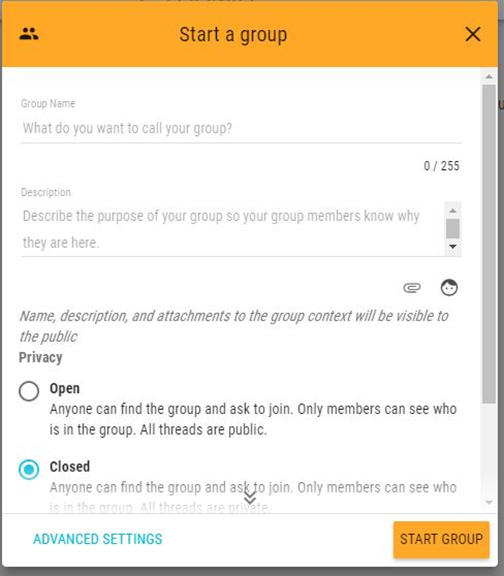
Now we have to do the main job. For using loomio, you have to join a group or start a group. When we will select the start option we will see a window inserted below. Now we have to give a group name, description about the group that’s mean, the purpose of this group or to give the idea about this group to your group members.
After that, you can attach files to the description. You can make this group public by selecting the Open option or make it Private through Closed option.
After clicking on the Start Group button you will be able to create group.
Step-6:
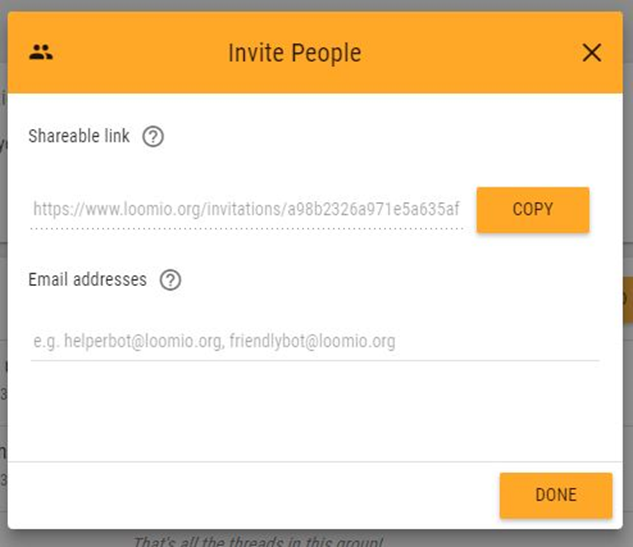
For inviting people you can get shareable link through selecting copy button and then send it to invite members through email or you can simply add Email address of a loomio member to add him/her in your group. Then just press DONE and that member will get an invitation email.
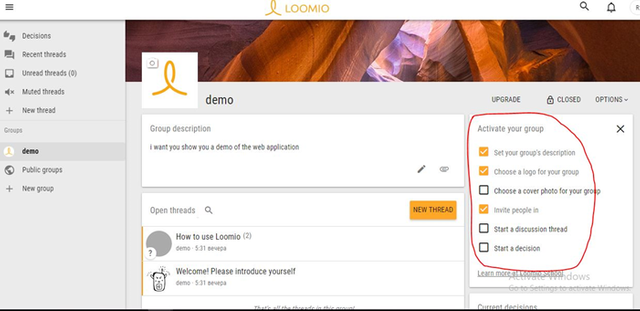
You will see your group page as shown in bellow image. But to activate your group you have to fulfill those conditions, I have marked into the screenshot As you have created the group you can edit this group through The OPTIONS above the marked portion on the screenshot. We can find our groups from the left side bar.
Step-7 (Discuss a topic) :
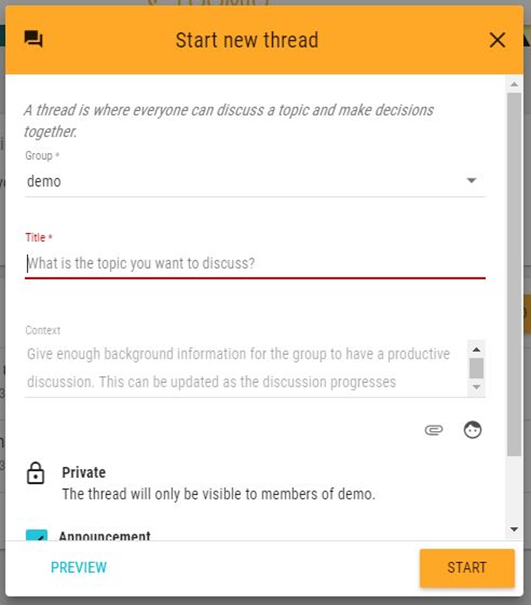
To start a discussion we have to create a new thread. We have to give a title of the discussion then we have to give information to have a productive discussion, for this we can attach files.
After creating a thread you will be able to comment here give feedbacks here. Below image (Fig-11) is the admin view.
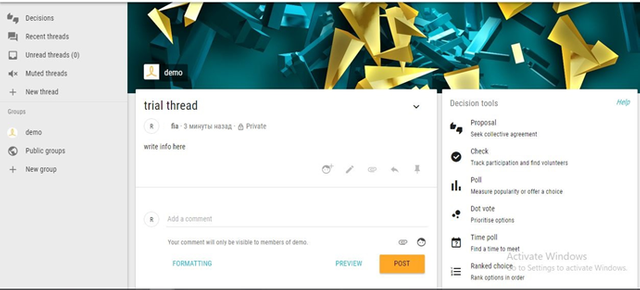
You can mute this thread or dismiss this thread. For this, you have to put your mouse on the thread (marked).
When you will open that thread you will be able to see how many members have seen that, other members’ comments and you can also comment on that.
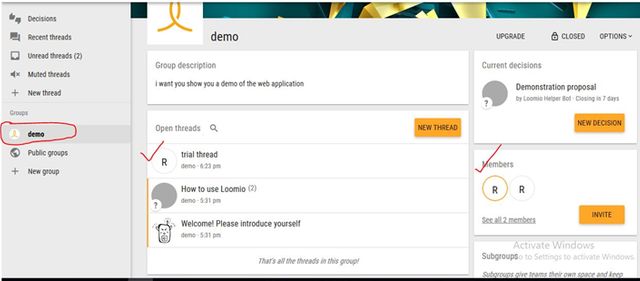
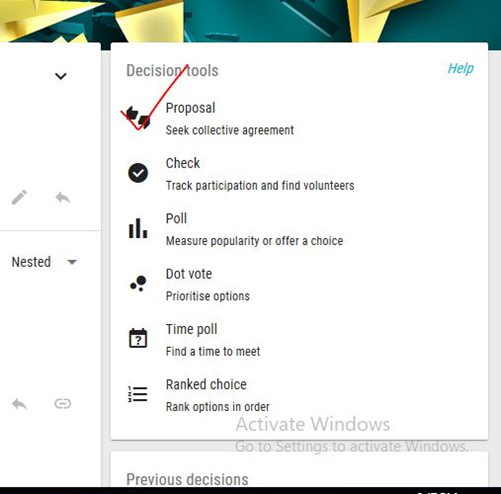
Step-8: (Propose solutions)
To create a proposal you have to click on the Proposal option.
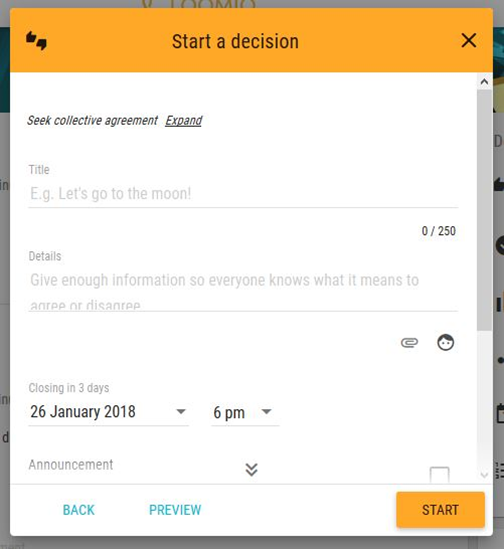
To start the discussion, at first create a proposal. Afterwards, we have to fill up empty fields, give a closing date and time. You can make announcement also. Then just hit the start button.
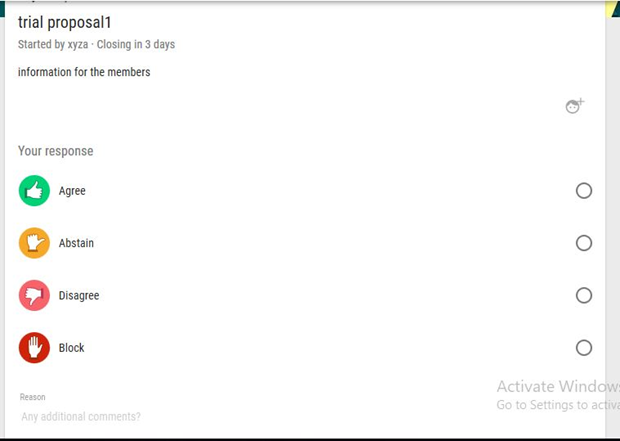
Here you can see a proposal has created. Now you can respond to the proposal by selecting those options and hit the Vote button shown in screenshot
Step-9 (Make Decisions) :
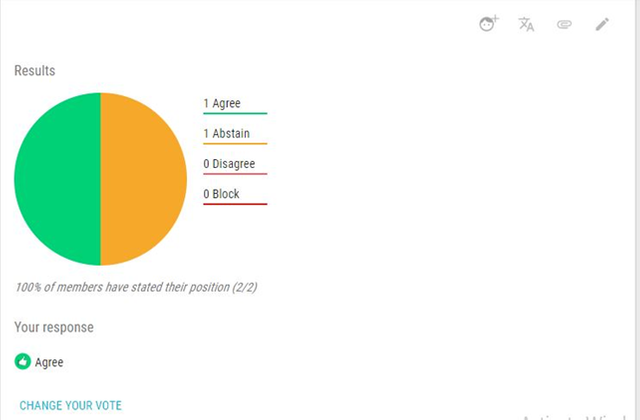
After giving votes we will be able to see a result of the proposal which is the decision about the proposal. If you want to change your vote then just select the “Change your vote” option (Fig-16) and you will be able to change your decision.
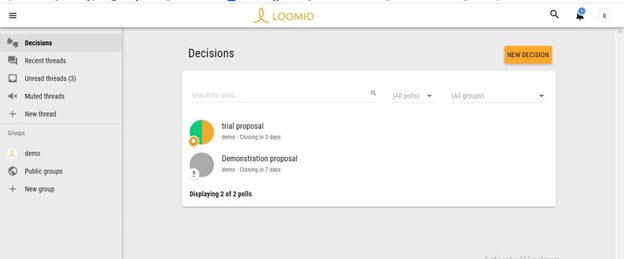
At last, we can see from the screenshot, in the Decision bar our decisions are given as a pie chart. We can also create new decision by the “New Decision” button given in the Decision bar.
Hereby, I finish this tutorial of a web application which is the most popular and important for any project team or group for making any decision because a project’s success depends mainly on the decision. I hope this might be helpful for the beginners.
Posted on Utopian.io - Rewarding Open Source Contributors
Thank you for the contribution. It has been approved.
You can contact us on Discord.
[utopian-moderator]
Thanks a lot........ :)
I always try to support who contribute to open source project, upvote you.
Thanks a lot.....
Hey @tanvirrahman I am @utopian-io. I have just upvoted you!
Achievements
Suggestions
Get Noticed!
Community-Driven Witness!
I am the first and only Steem Community-Driven Witness. Participate on Discord. Lets GROW TOGETHER!
Up-vote this comment to grow my power and help Open Source contributions like this one. Want to chat? Join me on Discord https://discord.gg/Pc8HG9x