Tutorial : How to design a calendar using Inkscape Software
Goodnight everyone! hopefully you are always in a healthy condition and can perform daily activities and routines as usual and hopefully today is better than yesterday.
On this occasion I want to share again a graphic design tutorial, and of course still use our flagship software Inkscape. tutorials that I will share on this occasion how to design calendars using inkscape.
As usual, before we go into the tutorial session we read first a little explanation about inkscape. To make it easier we use the software inkscape completely.
Inkscape

Inkscape is an open source software that is almost equivalent to corel draw, although not as famous as the corel draw itself. But this software already meets the standard XML, SVG and inkscape CSS can also run on windows operating system, so this graphic device is really friendly with you who have talent graphic designer. The main goal of inkscape is presented is to be one of the current cutting-edge graphics tools. Okay, that's a glimpse of information about this inkscape, now we go into tutorial session.
Tutorial
How to design a calendar using Inkscape Software
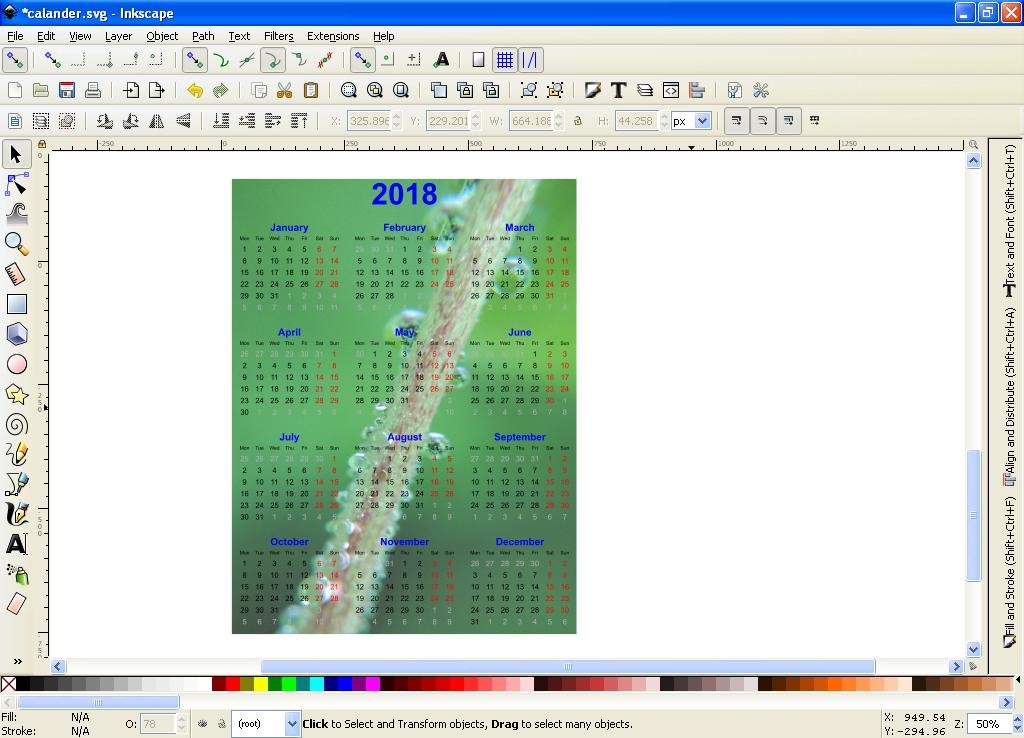
For the first step, provide a photo or picture for us to make as background on this calendar design. Here I use the collection from my own photos.

The second step we set the first work page on the screen inkscape. click the file on the menu bar, select document properties and then uncheck show page border on the settings screen of the document properties and make sure all units are in pixel units. Then click view on the menu bar as well and select zoom and zoom 1: 1. last click the align and distribute object button and fill and stroke button on the menu bar to execute screen color settings and object layout.


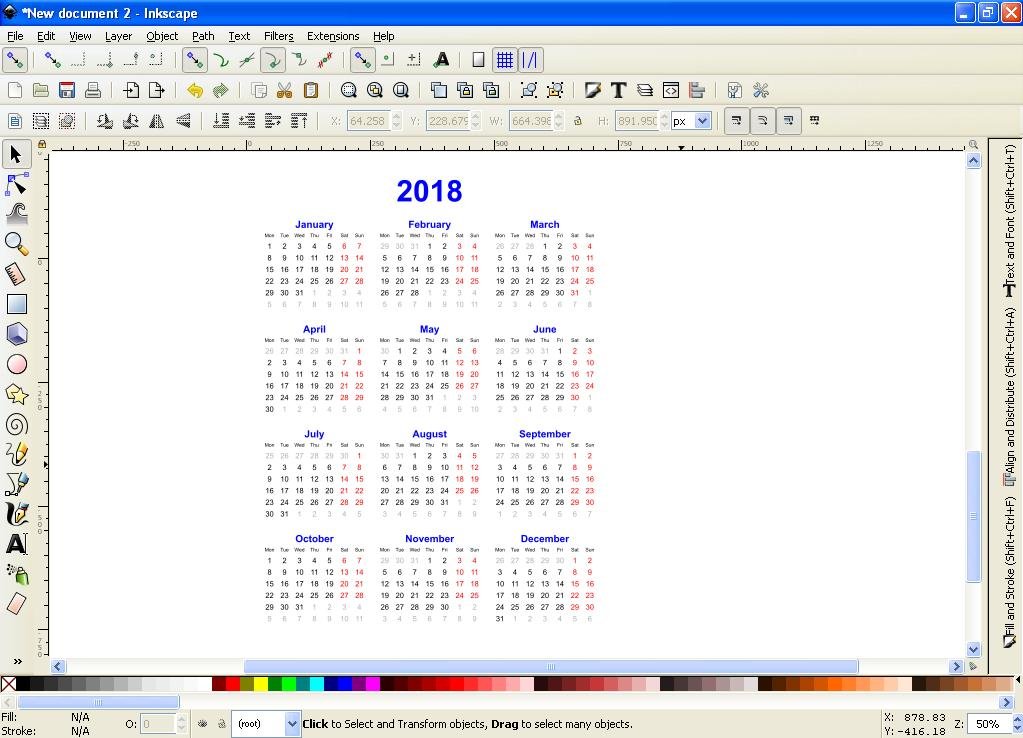
The third step, click Extensions on the menu bar, select Render and select Calendar, then the calendar settings screen will exit. Click on the configuration column then fill in the column of the year according to the current year, then check the Fill Empty day boxes, because we have prepared the background so we select the empty field only. then fill in Week start day column, here there are only two choices, Sunday and Monday, I choose Monday as the first day of each month. Then fill in the Week End column here there are three choices of days, first Saturday and Monday, second only Saturday, and third Monday only. I chose Saturday and Monday, because on that day I did not come to work because it was a day off.


Then in the column layout select Automatically set size and position and then on Month per line contents in accordance with the wishes of each, here I use the number 4, my calendar means there are four rows and three columns.

In the color column, leave it as it already exists, because the column follows the day that we have set in the configuration column earlier, then just click apply


In the fourth step, we will give background to the calendar, click the file on the menu bar, select import, then select the image file or image we have prepared, click open, click embed and click OK. After that click the select and transform object on the tool bar, then select both objects, then click the path on the menu bar and select the object to the path, then click


For the fifth step, right click on the calendar object only and select copy, then click on the object image or image that we imported earlier, then click edit on the menu bar, select paste size and paste size. After that click on the photo object again and subtract the opacity object to be 70 or 80%.


In the sixth step, click on the image or image object and hold SHIFT on the keyboard then click on the calendar object, then click center on vertical and horizontal axis button on the align and distribute object setting screen. Next select both objects and click the group button on the menu bar.


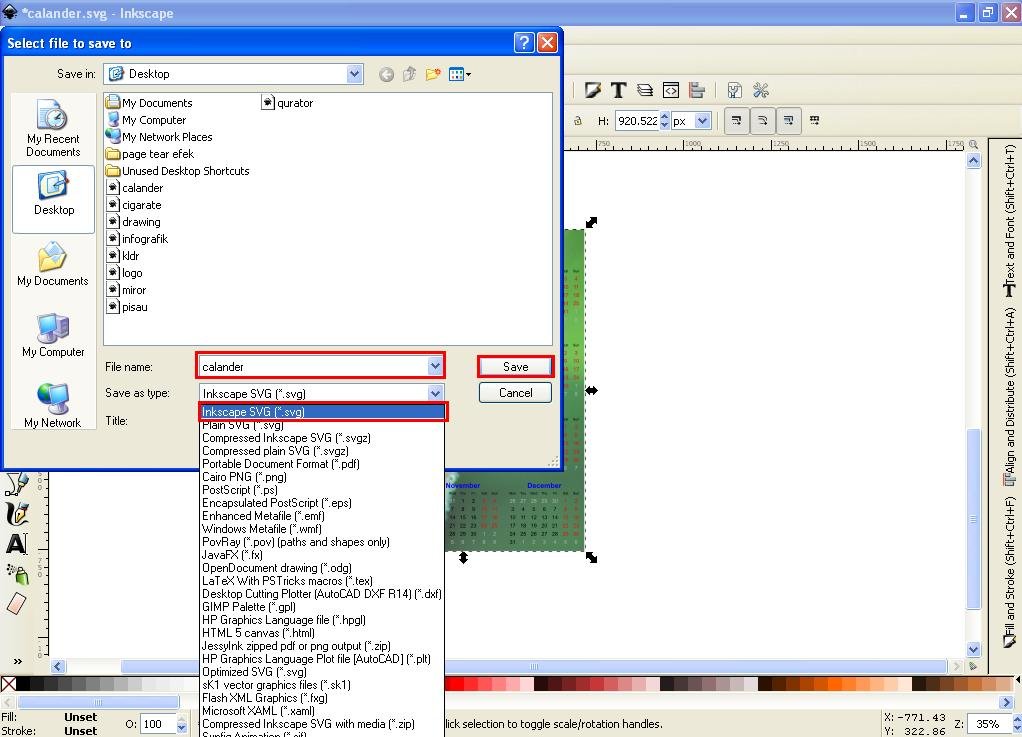
The last step, save the object into a file. There are two ways to save files in inkscape software.
First, click the file on the menu bar and select export bitmap then click Export or Export As button, give the file name, click save and click Export.


The second way, click on the file also on the menu bar, select Save As, then give the file name and then select the desired file format, here are many types of file formats to choose from, I suggest to save the file in SVG format one of them, to facilitate we edit the file back if necessary.

That's the process of calendar design using inkscape software, good luck to create your own calendar this new year. that's all I can share on this occasion may be useful to us. Thank you for reading the tutorial from me and see you in the next tutorial, of course still with inkscape software.
And this is the result of my design in this tutorial and this will be my new calendar for 2018. please save if interested.

Best Regards @saini88
Posted on Utopian.io - Rewarding Open Source Contributors
Thank you for showing us how to do it ourselves! I haven´t tried this program yet, in fact, I didn´t know it. But with this guide I think this will be easier for me. Have a nice day and keep showing us how to do things!
ok. I will!
Your contribution cannot be approved because it does not follow the Utopian Rules.
There are too many quality contributions related to Inkscape.
Your contribution is very simple for Inkscape
You can contact us on Discord.
[utopian-moderator]
Thanks @necrosahin #utopian-moderator