Simulating Water Sensors in Arduino Nano. Step by step tutorial how to program Arduino Nano for Water Sensors.
Water Sensor(Arduino Application)

What is Water Sensors?
Water sensors or Water detectors is an electronic device that is designed to detect presence of water and provide an alert in time to allow the prevention of water leakage. A common design is a small cable or device that lies flat on a floor and relies on the electrical conductivity of water to decrease the resistance across two contacts.
The device then sounds an audible alarm together with providing onward signalling in the presence of enough water to bridge the contacts.
Water sensors are level sensing device that is designed to measure the level of flow substances including liquids, slurries and granular materials. There are also continuous level sensors; however these sensing modules can only detect the level of flow of a substance with a specific range.
Credits Definition: https://www.azosensors.com/article.aspx?ArticleID=225
Credits Definition: https://en.wikipedia.org/wiki/Water_detector
Pin Configuration

What Will I Learn?
- How to simulate and use water sensors for Arduino Nano
- How to program water sensors in Arduino IDE
- How to connect water sensors to Arduino Nano
Requirements/Materials Needed
- Water Sensors
- Arduino Nano
- Breadboard
- Connecting wires
- Laptop/Desktop PC w/ Arduino IDE installed
Difficulty
- Intermediate
Water Sensors for Arduino Nano
Tutorial Contents
Let's Start!
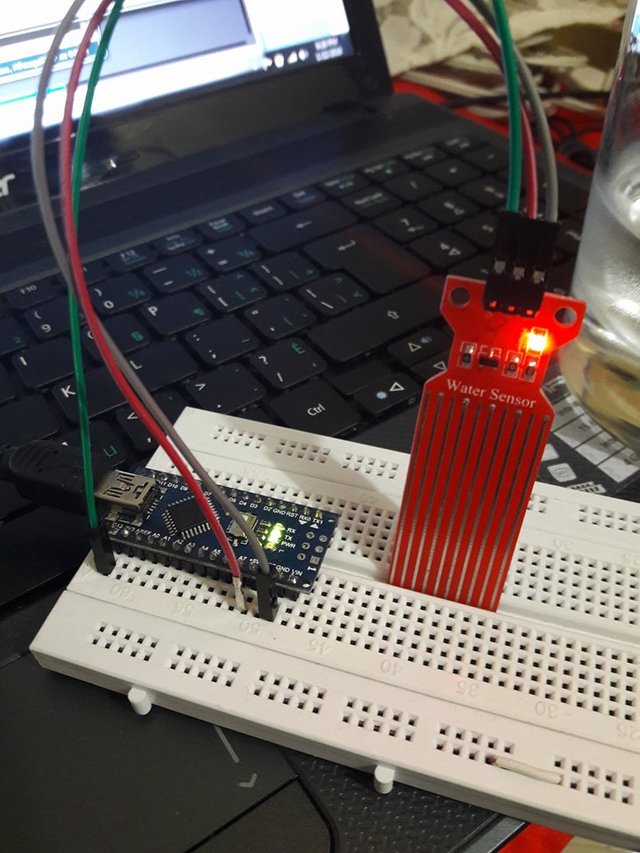
Step 1: Physical Connection of the Water Sensor to Arduino Nano


Connect the following:
- Water sensor(DataIn) to Arduino Nano(DGPin13)
- Water sensor(5v/VCC) to Arduino Nano(+5v)
- Water sensor(GND) to Arduino Nano(GND)
- Arduino to your laptop using the USB cable
Step 2: Software Connection from Arduino Nano to Water Sensors
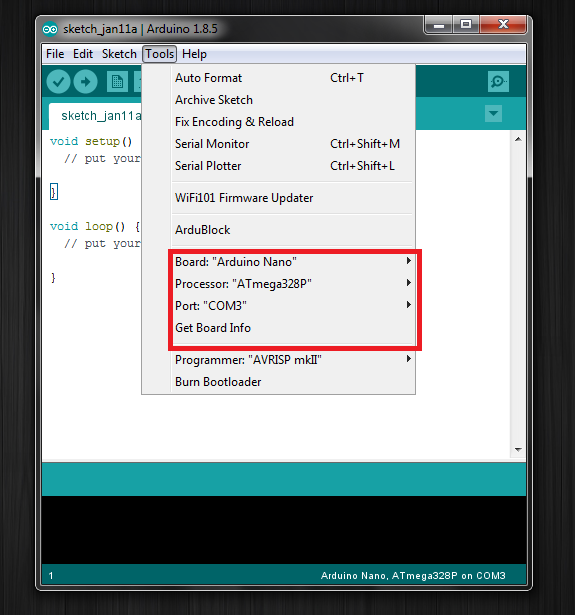
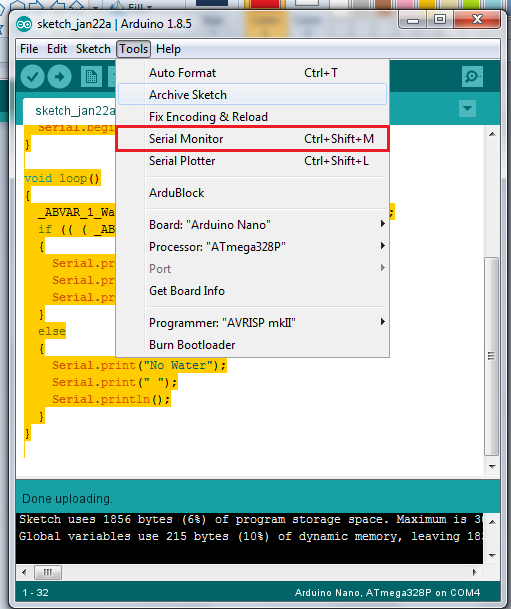
- Open your Arduino IDE. Go to Tools and change your Board to Arduino Nano. Next, change your port where Arduino Nano is connected on your computer. Go to Port and select port for your Arduino Nano.
- Paste the given code below on your Arduino IDE.

bool _ABVAR_1_WaterSensor= false ;
boolean __ardublockDigitalRead(int pinNumber)
{
  pinMode(pinNumber, INPUT);
  return digitalRead(pinNumber);
}
void setup()
{
  Serial.begin(9600);
}
void loop()
{
  _ABVAR_1_WaterSensor = __ardublockDigitalRead(13) ;
  if (( ( _ABVAR_1_WaterSensor ) == ( true ) ))
  {
    Serial.print("Water Detected");
    Serial.print(" ");
    Serial.println();
  }
  else
  {
    Serial.print("No Water");
    Serial.print(" ");
    Serial.println();
  }
}
- When your done programming the Arduino Nano, just click on the Upload button to upload the code from Arduino IDE to your Arduino Nano.


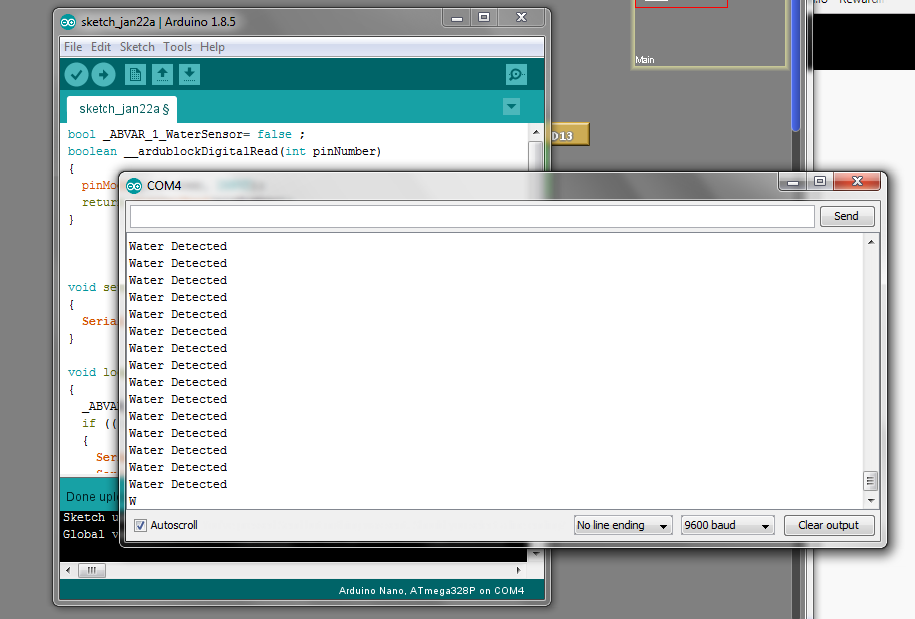
Step 3: Testing the Water Sensor
- Click on Serial monitor button to see the output of your program.

- Testing with no water


Output of the Serial Monitor

- Testing with water

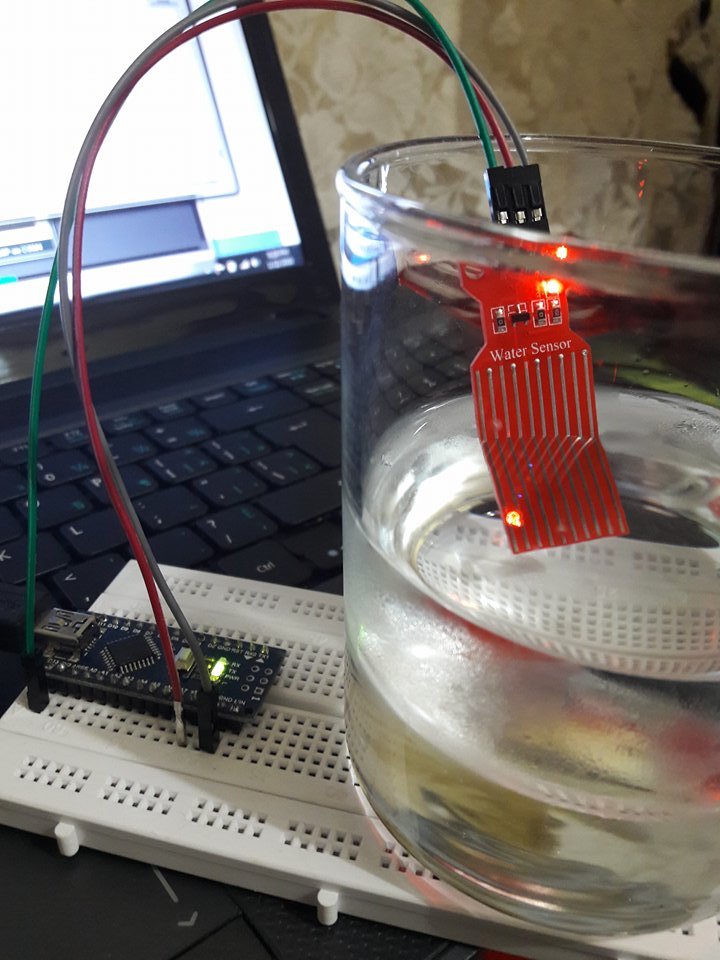
Output of the Serial Monitor
Curriculum
Other Arduino projects/contribution:
- https://utopian.io/utopian-io/@jbeguna04/ardubblock-tool-for-easy-programming-in-arduino-ide-lighting-up-led-application
- https://utopian.io/utopian-io/@jbeguna04/obstacle-sensing-with-ultrasonic-sensor-on-arduino
- https://utopian.io/utopian-io/@jbeguna04/simulating-servo-motors-in-arduino-nano-step-by-step-tutorial-how-to-program-arduino-nano-for-servo-motor
That's All! Hope you learn something with this tutorial.
Thank You!
Posted on Utopian.io - Rewarding Open Source Contributors
Thank you for the contribution. It has been approved.
You can contact us on Discord.
[utopian-moderator]
thank you @rufans!
Hey @rufans, I just gave you a tip for your hard work on moderation. Upvote this comment to support the utopian moderators and increase your future rewards!
Wow its nice to see this post! More power @utopian-io!!
familiar lage ni hahahahaha
Your contribution cannot be approved because it does not follow the Utopian Rules.
You can contact us on Discord.
[utopian-moderator]
Hey @jbeguna04 I am @utopian-io. I have just upvoted you!
Achievements
Suggestions
Get Noticed!
Community-Driven Witness!
I am the first and only Steem Community-Driven Witness. Participate on Discord. Lets GROW TOGETHER!
Up-vote this comment to grow my power and help Open Source contributions like this one. Want to chat? Join me on Discord https://discord.gg/Pc8HG9x