Steem Dunk is now Open Source - Automated Curation Platform - Hosted version is FREE for EVERYONE
Steem Dunk is an automated curation platform. Being built from the ground up for ease-of-use and reliability, it is now open source as of now with the support of Utopian to keep the servers running. This means the cloud hosted version will now be free to use for everyone! ...Or you can self host the service for yourself if you'd like.
Of course we don't have an infinite amount of resources, so all users will receive the bronze plan for free upon signing up, which allows for curating up to 20 authors, if you have a need for more authors, ask us in Discord. Upgrading is still possible to further support the project.
The hosted version will always be available at https://steemdunk.xyz
The service account is @steemdunk
Setting up a self hosted version
Still feeling adventurous? Keep on reading...
We will cover how to setup the service from cloning the repository to automatically upvoting content. It is assumed you are familiar with the command line and git.
Requirements
- Node.js (v8.0 or greater)
- Arangodb (v3.2 or greater)
1. Get the source
First things first, we need to clone the git repository into a subdirectory. The subdirectory is important as the configuration will be held in the parent directory to make updates easy. Make sure you are currently in an empty directory.
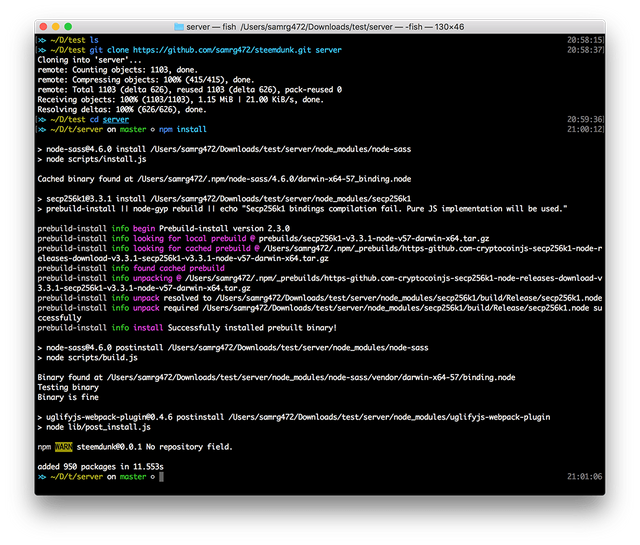
$ mkdir test
$ git clone https://github.com/samrg472/steemdunk.git server
$ cd server
2. Install the dependencies
Install all the dependencies with NPM. This may take a while to complete, so give it time.
$ npm install
3. Build the project
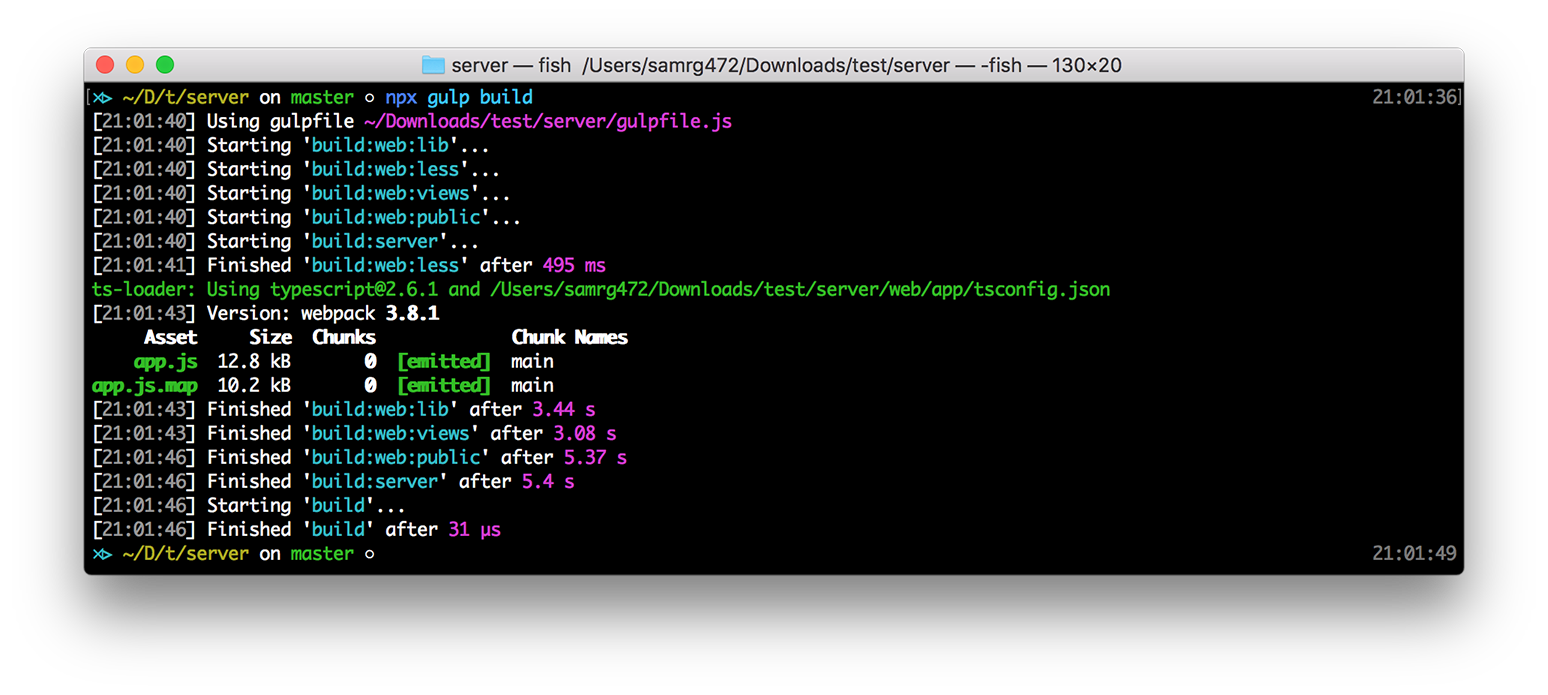
We assume you have npx available on the command line. If you do not then install gulp globally with npm i -g gulp and don't type the npx part below.
$ npx gulp build
4. Configuring everything
The server has many configuration options, ranging from the Steem network to the email server used. Steemdunk has all the options neatly categorized in a YAML file for ease of setting up.
4.1 The configuration file
By default, config.yml will be read on startup of the server. By default the official Steem network is configured for use. For testing purposes, we will be using a test network. Copy the config.default.yaml to the parent directory as config.yml.
4.2 Let's setup the network
For all intent and purposes, let's get things running as quickly as possible without polluting the main network. We'll be using the live Steem network. You are free to setup a test network for testing upvotes, don't pollute the main blockchain with spam posts for testing!
@almost-digital hosts a network on https://testnet.steem.vc/ for testing purposes. Use this if you want to make test posts for upvoting!
Default configuration options:
steem_net:
  node: 'https://api.steemit.com'
  address_prefix: 'STM'
  chain_id: '0000000000000000000000000000000000000000000000000000000000000000'
4.3 Setup Arangodb
Make sure Arangodb has a fresh database and new user specifically to run Steemdunk.
Here are the sample configuration options:
db:
  host: localhost:8529
  use_ssl: false
  cert_path: ''
  user: dev
  password: dev
  database: sv_dev
The options are self explanatory, it provides the necessary information for Steemdunk to make a successful connection to the database. The database is what stores all the state for the server to disk.
Extra security
Optionally, the database can run over a secure connection for more security. Simply set use_ssl to true and make sure to point the cert_path to your Arangodb certificate location, otherwise all connections to the database will fail.
4.4 Optional step - setup email
Email is used to send verification codes to users to validate their Steemdunk account. For your self hosted setup, this is unnecessary and can remain disabled. By default, when this feature is disabled, all accounts will have their email set as verified automatically.
Here are the sample configuration options:
email:
  enabled: false
  host: smtp.zoho.com
  port: 465
  secure: true
  user: [email protected]
  pass: 12345678
4.5 Setup the HTTP server
Steemdunk does not support HTTP, rather it forces the use of HTTPS. You need to have a certificate and private key, in PEM format, ready for use. The Steemdunk official website uses a certificate and key generated by Cloudflare, configured in strict SSL mode for high security.
Configuration options:
server:
  https:
    host: 127.0.0.1
    port: 8443
    ssl_cert_path: 'cert.pem' # Path to server certificate
    ssl_key_path: 'key.pem' # Path to private certificate key
By default, only localhost will accept connections. To allow connections from everywhere set the bind host to 0.0.0.0 instead of the default 127.0.0.1.
5. Up and running
At this point, everything is configured and ready to go.
In your terminal, run:
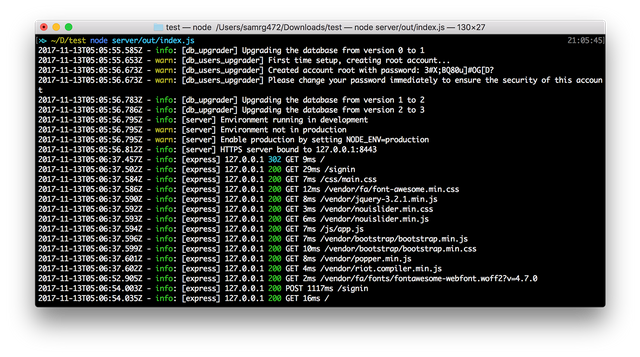
$ node server/out/index.js
The database will be created and a root user will be created, the username can be changed by going into the database and editing the document. A default password will be given to you.
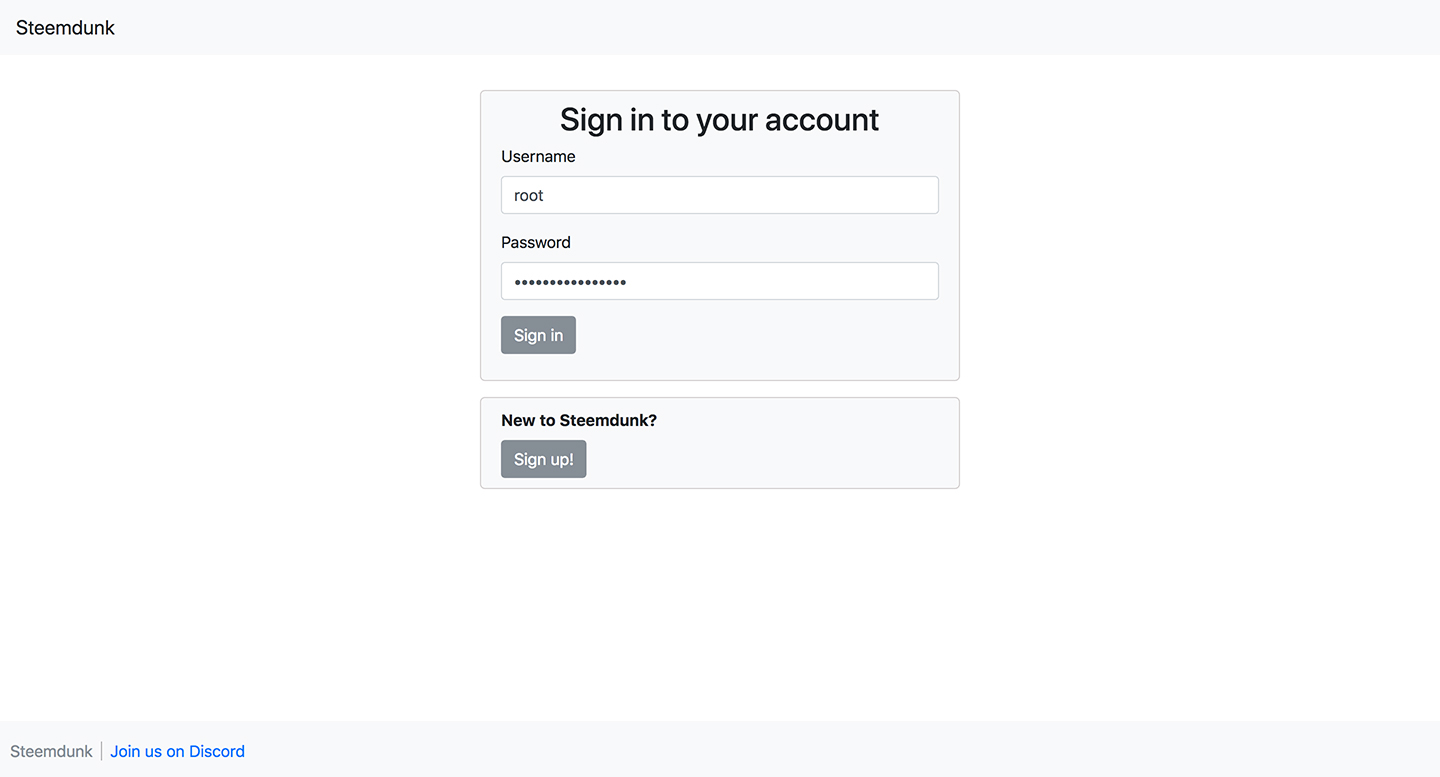
Once the server is running, go to https://localhost:8443. Log into the server with your credentials and change your password to something secret under the profile page.
Sign in:
Profile page:

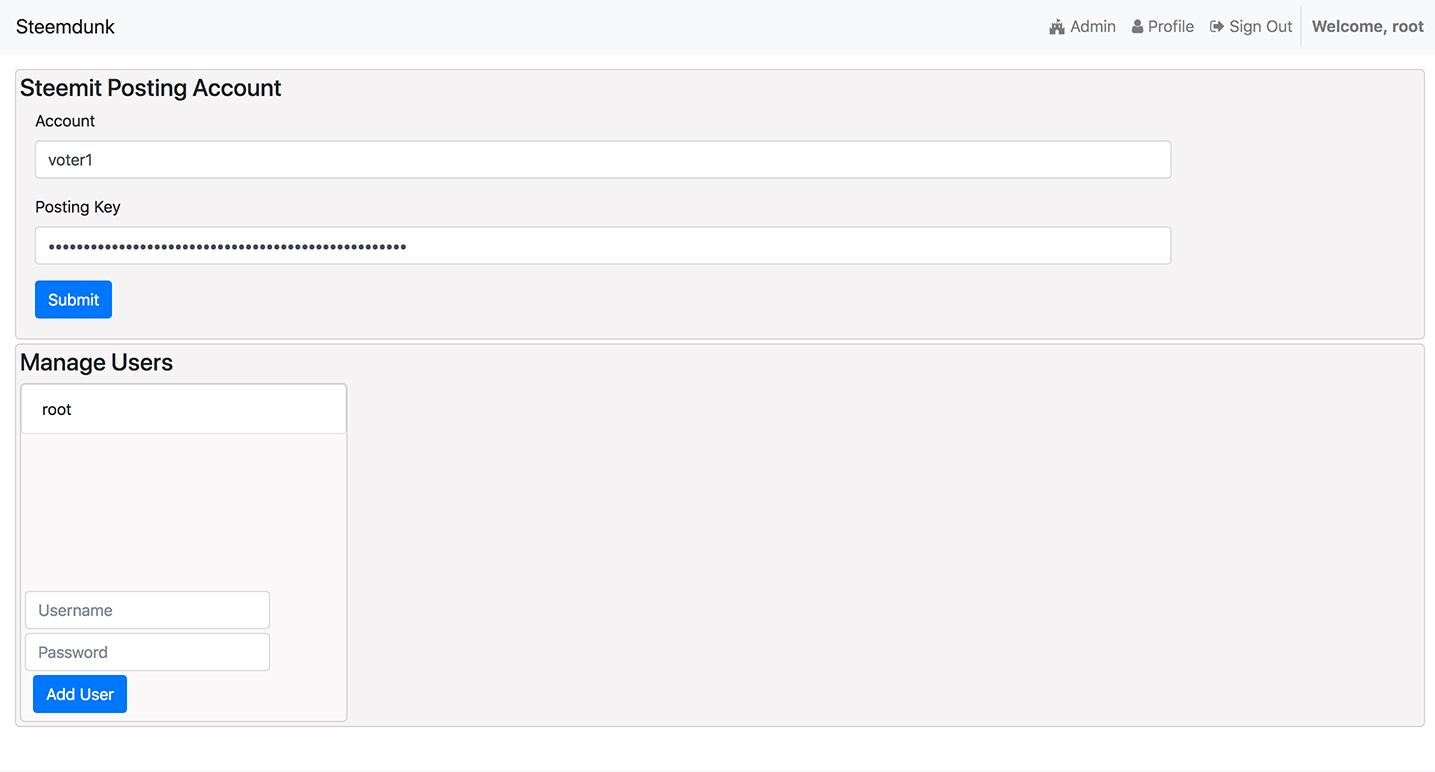
Admin configuration
Under the admin page, configure your Steem account that will be doing the voting and make sure to use the private posting key otherwise it will not work.
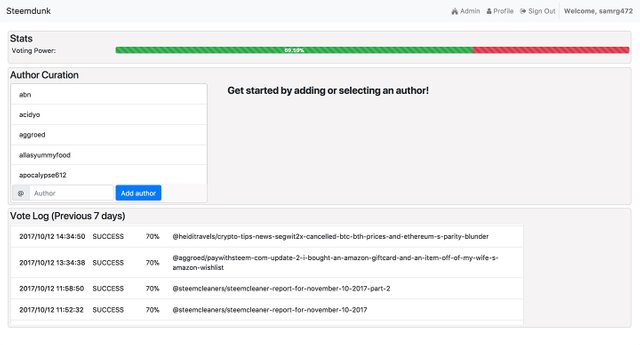
Add authors on the homepage
Add any authors you wish to the author curation list. These authors will be automatically upvoting any author you wish!
Here's a live sample taken from my personal account showing Steemdunk in action:
Open Source Contribution posted via Utopian.io
Great service by @samrg472
I have been using @steemdunk since its inception and is highly recommended.
Good alternative for Steemvoter and Streemian.
Amazing service fraind thanks....
righ
s great, i like the fact that we can run a server of it.
Thank you for the contribution. It has been approved.
[utopian-moderator]
Congratulations! This post has been upvoted from the communal account, @minnowsupport, by samrg472 from the Minnow Support Project. It's a witness project run by aggroed, ausbitbank, teamsteem, theprophet0, someguy123, neoxian, followbtcnews/crimsonclad, and netuoso. The goal is to help Steemit grow by supporting Minnows and creating a social network. Please find us in the Peace, Abundance, and Liberty Network (PALnet) Discord Channel. It's a completely public and open space to all members of the Steemit community who voluntarily choose to be there.
Fantastic service thank you!
Cool... I love learning foreign languages!
But seriously, really stunning work here, and I have already seen great results from using the program.
Awesome! :)
Very informative love it going to give this a shot.Thanks a lot for the tutorial