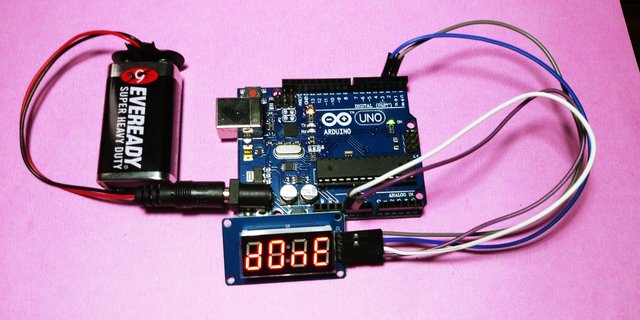
TM1637 4 digit 7-segment display with Arduino
Today i will going to share some of the basic instructable of arduino, i am going to use the 4 digital tube 7 segment display and the TM16374 library.
what you will learn on this tutorial is you may learn a basic arduino project on how to start using the 7 segment display and how to use it, on the first place this process is the first thing you need to know when programming a 7 segment led using arduino before going to next stage. we are going to include a zip library from github so you have to follow steps below.
Requirements
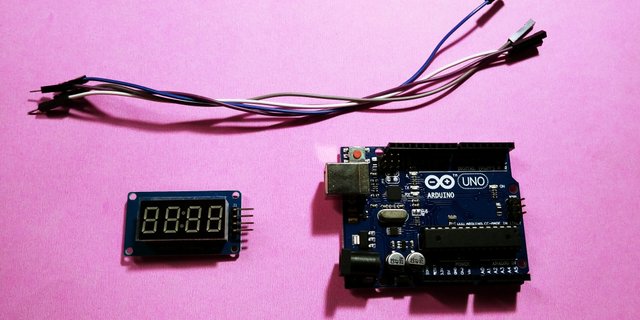
The requirements for this activity is just a basic parts in arduino, what we have are:
Difficulty
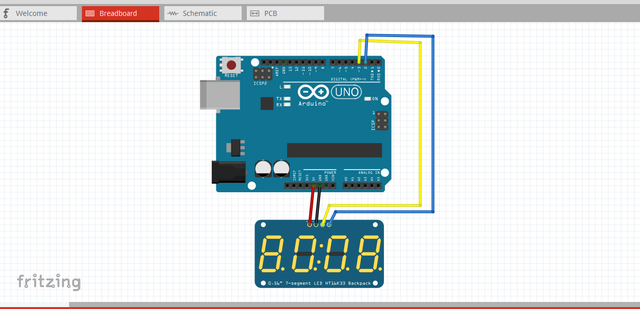
This tutorial is in BASIC difficulty so lets start with the circuit diagram that i made on fritzing.
Circuit Diagram
Tutorial Contents
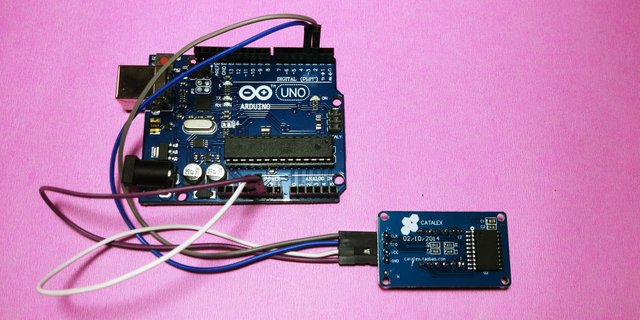
A 4-digit 7-segment LED display has 12 pins. 8 of the pins are for the 8 LEDs on a 7 segment display, which includes A-G and DP (decimal point). The other 4 pins represent each of the 4 digits from D1-D4. in this tutorial i will be using a driver I2c backpack for the seven segment which has only 4 pins. you can see it below.
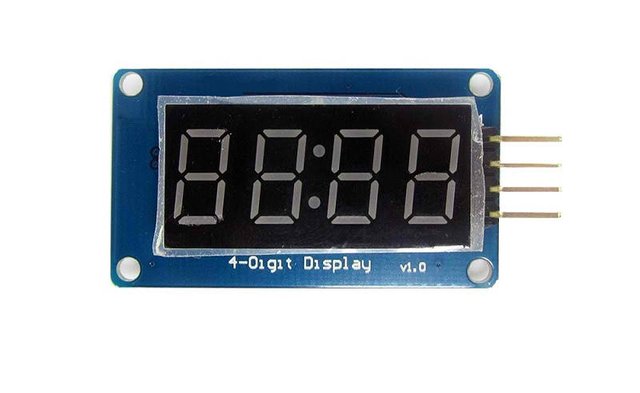
To set the current output from the output pins, which will feed our output device, we connect a 40K resistor to V+. This allows for about 10mA of current outflow. but we are using a i2c board so we can directly connect it to the arduino board pins. the i2c pins are GND, VCC, DIO, and SDA
SOFTWARE
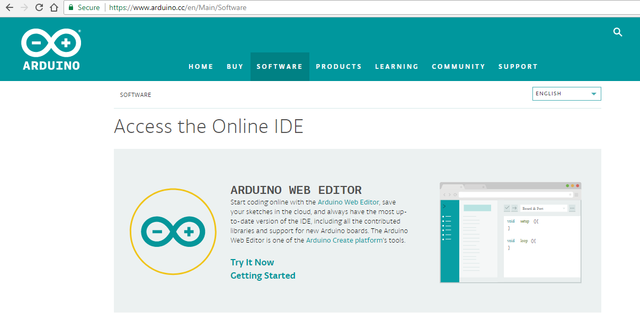
We are done building the circuit so lets start to set up and make a code for this. we are going to use the arduino ide, to set the sketch for this, if you dont have make sure to download the Arduino IDE for your specific operating system. I’ll leave a link to where you can download this software: https://www.arduino.cc/en/Main/Software
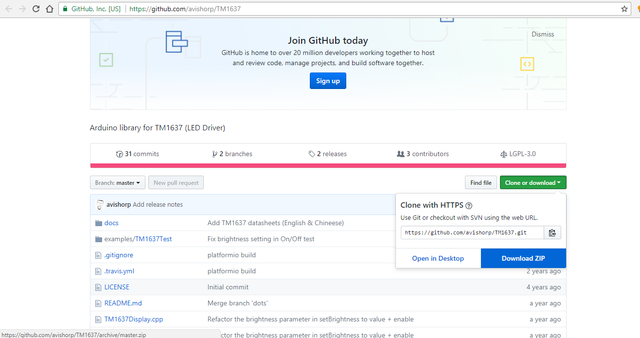
To get the code we need to download the zip file library from github you can download it directly here: https://github.com/avishorp/TM1637 just click on the <<clone/download then download zip>>
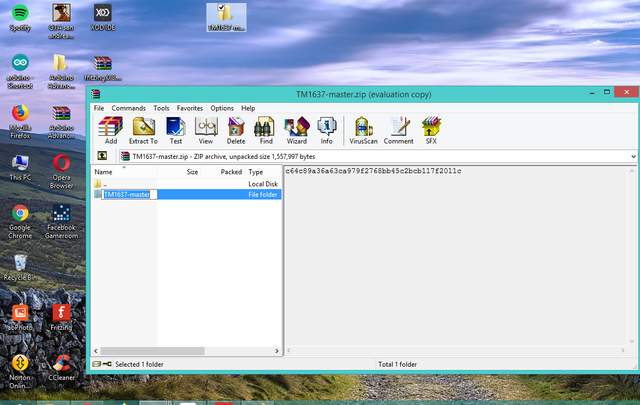
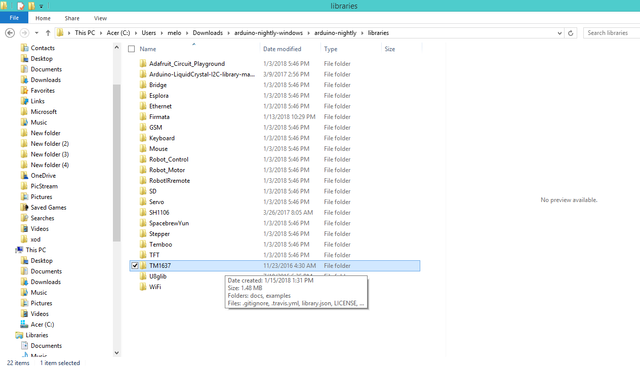
when the download is finished open the zip file then copy the folder name TM1637-master on your desktop you can rename it as well.
Cut the folder in your desktop then go to your folders then locate the arduino folder>> libraries then paste it there. and now the folder TM1637 is already in the ide libraries.
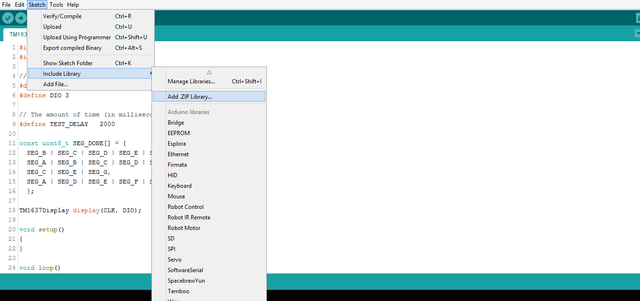
You can also use the ise to add the zip file, just click on the botton sketch>> include libraries>> then click add zip libraries<<
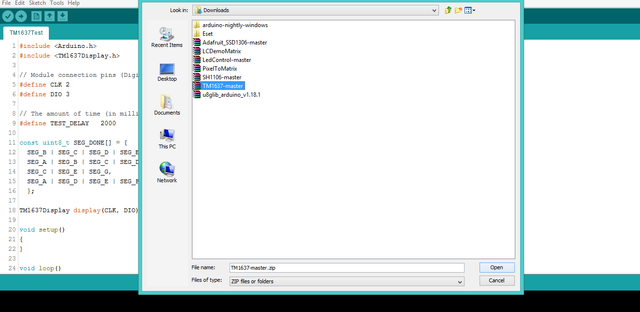
Locate the folder where the TM1637-master is downloaded then click on the zip file then wait until its added to the libraries
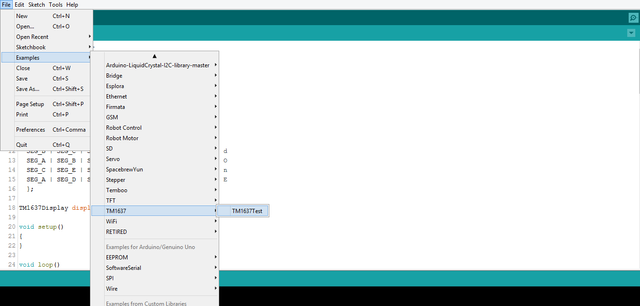
Let us work on the code now, on the arduino ide click the FILE tab>>examples>>then locate the for the TM16374 library . then click TM16374test
Upload the sketch code on your arduino board;

you can copy the sketch code here:
#include
#include
// Module connection pins (Digital Pins)
#define CLK 2
#define DIO 3
// The amount of time (in milliseconds) between tests
#define TEST_DELAY   2000
const uint8_t SEG_DONE[] = {
    SEG_B | SEG_C | SEG_D | SEG_E | SEG_G,           // d
    SEG_A | SEG_B | SEG_C | SEG_D | SEG_E | SEG_F,   // O
    SEG_C | SEG_E | SEG_G,                           // n
    SEG_A | SEG_D | SEG_E | SEG_F | SEG_G            // E
    };
TM1637Display display(CLK, DIO);
void setup()
{
}
void loop()
{
  int k;
  uint8_t data[] = { 0xff, 0xff, 0xff, 0xff };
  display.setBrightness(0x0f);
  // All segments on
  display.setSegments(data);
  delay(TEST_DELAY);
  // Selectively set different digits
  data[0] = 0b01001001;
  data[1] = display.encodeDigit(1);
  data[2] = display.encodeDigit(2);
  data[3] = display.encodeDigit(3);
  for(k = 3; k >= 0; k--) {
    display.setSegments(data, 1, k);
    delay(TEST_DELAY);
    }
  display.setSegments(data+2, 2, 2);
  delay(TEST_DELAY);
  display.setSegments(data+2, 2, 1);
  delay(TEST_DELAY);
  display.setSegments(data+1, 3, 1);
  delay(TEST_DELAY);
  // Show decimal numbers with/without leading zeros
  bool lz = false;
  for (uint8_t z = 0; z < 2; z++) {
    for(k = 0; k < 10000; k += k*4 + 7) {
        display.showNumberDec(k, lz);
        delay(TEST_DELAY);
    }
    lz = true;
  }
  // Show decimal number whose length is smaller than 4
  for(k = 0; k < 4; k++)
    data[k] = 0;
  display.setSegments(data);
    // Run through all the dots
    for(k=0; k <= 4; k++) {
        display.showNumberDecEx(0, (0x80 >> k), true);
        delay(TEST_DELAY);
    }
  display.showNumberDec(153, false, 3, 1);
  delay(TEST_DELAY);
  display.showNumberDec(22, false, 2, 2);
  delay(TEST_DELAY);
  display.showNumberDec(0, true, 1, 3);
  delay(TEST_DELAY);
  display.showNumberDec(0, true, 1, 2);
  delay(TEST_DELAY);
  display.showNumberDec(0, true, 1, 1);
  delay(TEST_DELAY);
  display.showNumberDec(0, true, 1, 0);
  delay(TEST_DELAY);
  // Brightness Test
  for(k = 0; k < 4; k++)
    data[k] = 0xff;
  for(k = 0; k < 7; k++) {
    display.setBrightness(k);
    display.setSegments(data);
    delay(TEST_DELAY);
  }
  // On/Off test
  for(k = 0; k < 4; k++) {
    display.setBrightness(7, false);  // Turn off
    display.setSegments(data);
    delay(TEST_DELAY);
    display.setBrightness(7, true); // Turn on
    display.setSegments(data);
    delay(TEST_DELAY);
  }
  // Done!
  display.setSegments(SEG_DONE);
  while(1);
}
So lets upload it to the board and lets see how its works,
You see it, this is my first activity using 7 segment 4 tube so i hope you enjoy this actitvity if want to learn how arduino works, and how to make a sketch, then maybe this blog might help you, i was inspired by robojax for this wonderful stuff. so thats it, if you want to know and see my future activity follow me! thank you.
You can also check my previous posts:
How to adjust LED brightness using potentiometer/ visual programming XOD
How to make 12 LED chaser without shift
Control LED using Push Buttons/ Visual programming using XOD
Control Servo motor using Joystick
Stepper motor + Driver Uln2003 in arduino
Control Servo motor using potentiometer - arduino
Posted on Utopian.io - Rewarding Open Source Contributors
Thank you for the contribution. It has been approved.
You can contact us on Discord.
[utopian-moderator]
Hey @pakganern I am @utopian-io. I have just upvoted you!
Achievements
Suggestions
Get Noticed!
Community-Driven Witness!
I am the first and only Steem Community-Driven Witness. Participate on Discord. Lets GROW TOGETHER!
Up-vote this comment to grow my power and help Open Source contributions like this one. Want to chat? Join me on Discord https://discord.gg/Pc8HG9x