Java Fx Programming - Creating Java Fx Application with FXML
Repository
https://github.com/dmlloyd/openjdk
What Will I Learn?
- You will learn to biuld an application with Java FXML
- You will learn to apply css styles in Java Fx Apllication
- You will learn to Validate Login, Connect to database and Validate login details from Database.
Requirements
- Basic Knowlege of Java programming
- IntelliJ IDE or any Other IDE that supports scene builder
- SQLite Studio for Database Management and API to drive database connection.
Difficulty
- Intermediate
Tutorial Contents
To create an application with FXML, First we create a new project.
Step 1: Click on the File menu
Step 2: Select JavaFX from the List of Apllication Types provided
Step 3: Input project name of your choice, and Click finish.
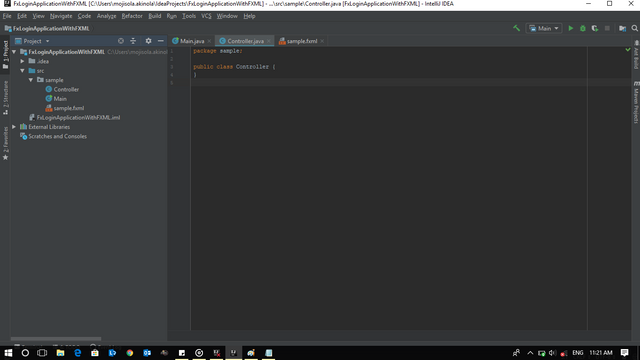
You have succesfully created a new JavFx application project.
In the screenshot below, you will see the screen is divided into two parts, to the Right - the Code section [Editor] and on the Left the project files where we have the packages and source files (i.e Controller, Main, sample.fxml e.t.c).
Creating the UI(User Interface) using FXML
To create the UI
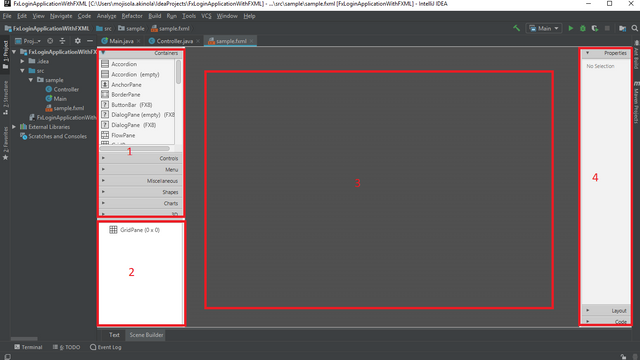
Step 1: Click on the sample.fxml tab to access the scene builder for FXML.
The scene builder is divided into four segments, the segment labelled 1 - Holds all items usable for the interface development.
Segment 2 - Shows the currently added items, I.e Items in the Interface currently.
Segment 3 - Here you drag and drop items from segment one to build the interface to your feel.
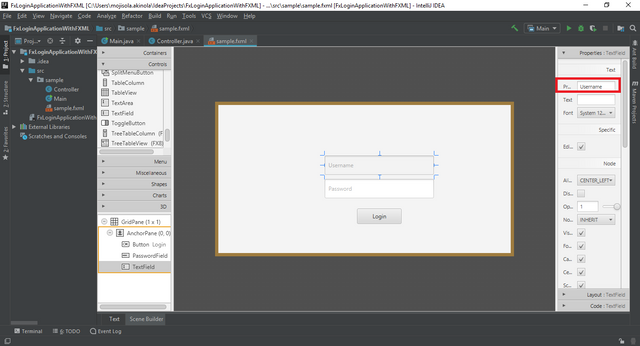
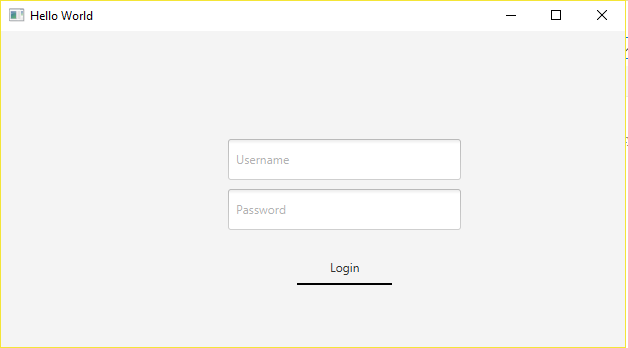
Step 2: Add an anchor pane from the containers, in the anchor pane add a text fied, a password field, a button to handle the login action and a label to display result of the login.
Step 3: Click on the textfield and password field to add prompt text in the properties section as seen in the screenshot below.
Adding CSS Style Sheet to the UI
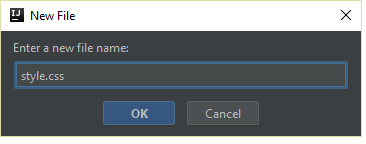
Step 1: Right click the package and select new.
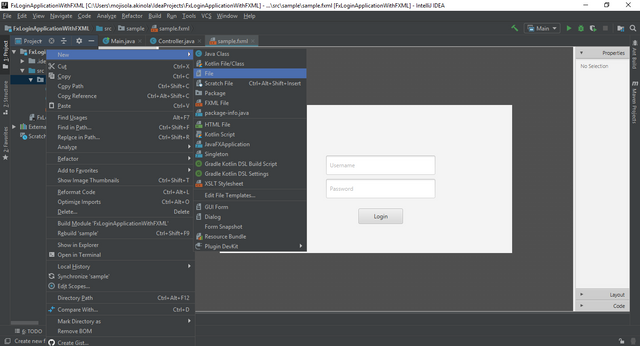
Step 2: In the new menu options, select file and enter style.css as the file name in the dialog box as seen in the screenshot below.
Step 3: In the css file, input the code below.
.button{
    -fx-background-color: transparent; //This will set the background color of buttons in the component to transparent.

    -fx-border-color: black; // This makes the border of buttons in the component to white
    -fx-border-width:  0px 0px 2px 0px; // This makes the border of buttons in the component visible at the bottom only.

}
Step 4: Go to the sample.fxml tab, select the anchor pane you have inserted previously and click on stylesheet to add the stylesheet.
Step 5: In the file explorer/browser, go to the location of your project files and select the style sheet, then click ok.
The button in the UI will automatically use the design we have placed, you can get more css styles from Here.
If we run the main file now we should get this:
Setting up Validation
Step 1: Go to the controller class, here we will create four Identities one for each of the components in our UI.
Input:
 @FXML
    private Button loginbtn; //For the button in the interface


    @FXML
    private TextField usernamefield; //For the username textfield


    @FXML
    private PasswordField passwordfield; //For the password field


    @FXML
    private Label outputlabel; //For the output label
The required imports for these are;
import javafx.fxml.FXML;
import javafx.scene.control.*;
The imports should be placed directly under the package name, while the identifiers should be placed inside the class.
Step 2:
Create two String variables username and password, these would be used to hold a username and password for the validation.
String username = "Official-Hord";
String password = "Official-Hord";
Step 3:
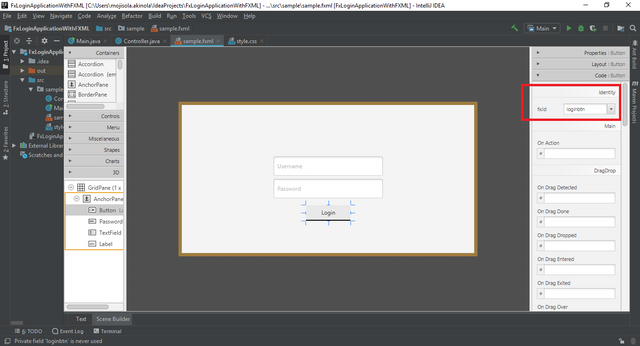
Add the identifiers created to the Fx:id of the components in the sample.fxml file as seen in the screenshot below.
Step 4:
Now we create an event handler method in the controller class, this will be added to the login button to make it perform the action of validation as specified in the method. Go to the controller class and add the method:
public void LoginbtnAct(ActionEvent event){ //LoginbtnAct here is the name of the method we have created.
String user = usernamefield.getText(); // String user pulls the username entered from the username field.
String pass = passwordfield.getText(); // String pass pulls the username entered from the username field.
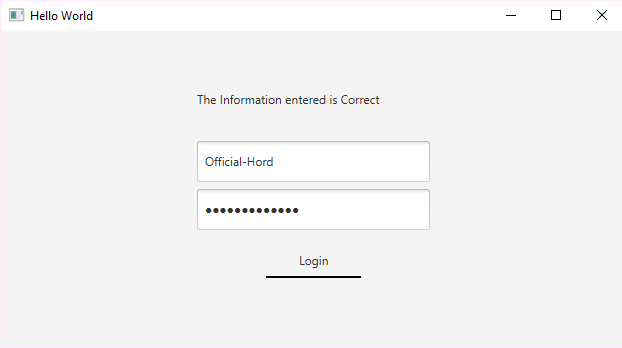
if (user.equals(username) && pass.equals(password)) { //The if statement tests if the values entered are same as declared.
outputlabel.setText("The Information entered is Correct"); //Here the system tells the user that the information is correct by displaying on the output label in the UI.
}
else{
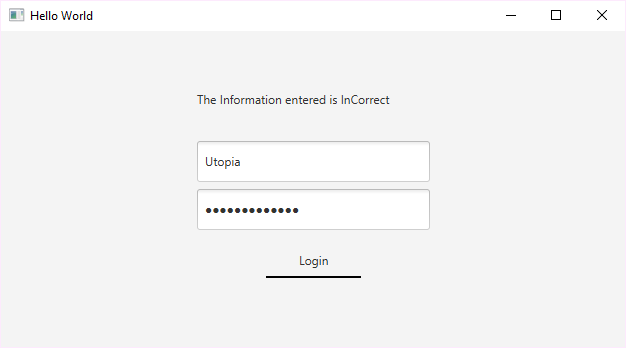
outputlabel.setText("The Information entered is InCorrect"); //Here the system tells the user that the information is incorrect by displaying on the output label in the UI.
}
}
The Import required for this is: import javafx.event.ActionEvent;
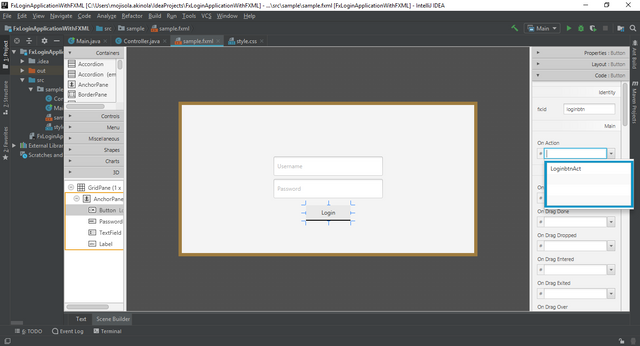
Step 5: Go to the sample.fxml file and add the method to the login button on action field under the code section as in the screenshot below.
Now if we run the main class and enter the right information we will have our output label saying information is correct as in the screenshot below.
And if we enter something else, it says incorrect.
We have succefully done the login validation.
Setting Up database Connection:
To connect to a database, we will need to add a library to handle the connection to the project, in this tutorial we will be making use of SQLite for the database.
Step 1: Download the Jar File Here
Step 2: Add the Jar file to the libraries in the pogram
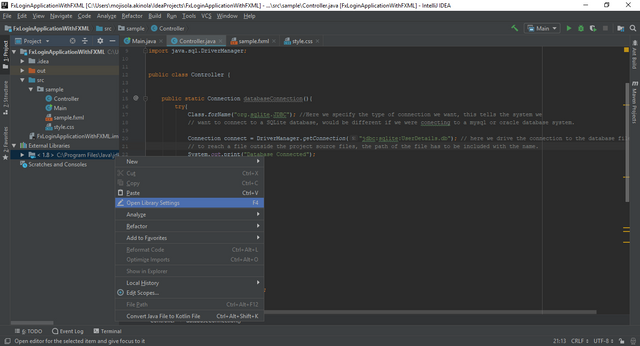
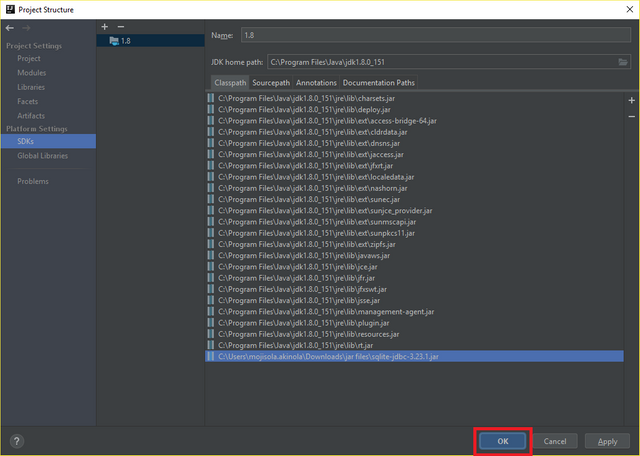
a. Right Click on any of the external libraries and select open library settings
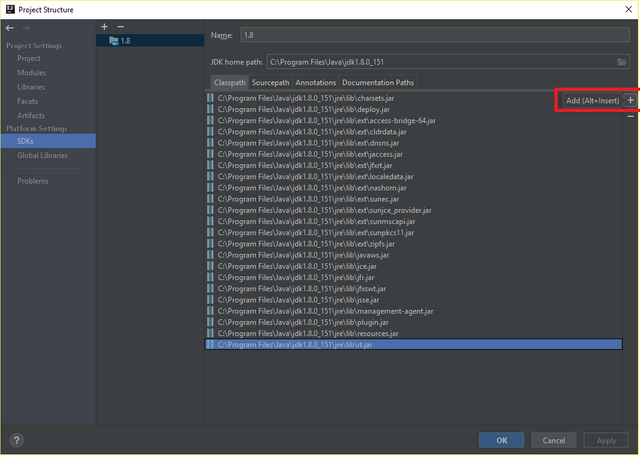
b. Click add as seen in the screenshot below.
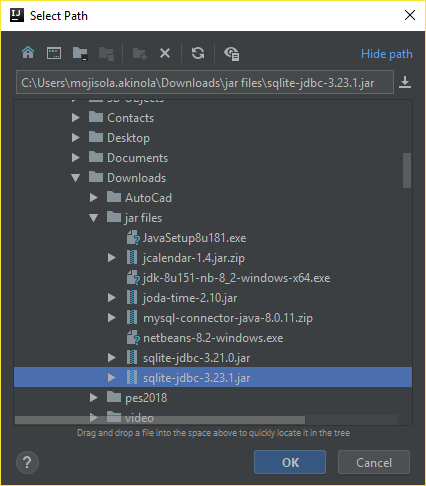
c. Go to the location of the jar file you have downloaded, select the file and click ok, Click Ok again to add the file to the libraries and proceed to step 3.
Step 3: Now we create a method to handle the connection in the controller class, this will carry out the function of driving the connection.
  public static Connection databaseConnection(){    //databaseConnection here is the name of the method
        try{
            Class.forName("org.sqlite.JDBC");   //Here we specify the type of connection we want, this tells the system we want to connect to a SQLite database, would be different if we were conecting to a mysql or oracle database system.
            Connection connect = DriverManager.getConnection("jdbc:sqlite:UserDetails.db"); // here we drive the connection to the database file, to reach a file outside the project source files, the path of the file has to be included with the name.
            System.out.print("Database Connected");
            return connect;


        }catch(Exception e){

            e.printStackTrace();
            return null;
        }
    }
This method will require the import import java.sql.*;.
Validating from Database
We have previously done the login validation with data from the program itself, now we will be validating with data from the databas which is outside the program. we will add a tru and catch block in the validation method, this will carry out a sql select query for the data to be validated.
//These are global variables, declared outside the method.
Connection connect = null;
PreparedStatement pst = null;
ResultSet rst =null;

//This section is inside the validation method.
try{

    String sql = "Select * from Login where Username = ? and Password =?";  //sql statement to check for the username and password in the datatbase.
    pst = connect.prepareStatement(sql); // This prepares the statement and converts it from the regular string to a query, passes it to the database also.
    pst.setString(1, user);  //This adds the username entered to the query as a string property.
    pst.setString(2, pass);  //This adds the password entered to the query as a string property.
    rst = pst.executeQuery(); //This runs the query and collects the result passed from the query into a result set.
    if(rst.next()){  //here the test if the data entered is found or not is carried out.

        outputlabel.setText("User details are correct");

    }
else{
outputlabel.setText("User details are incorrect");
}
Run the main file and try different data for username and password to test the system.
Setting up delay timer for Maximum number of attempts reached
To set up a delay timer, first we create two variables
    private final static IntegerProperty loginattempts = new SimpleIntegerProperty();
    private int maxattempts = 5;
These two would be used to control the timer, and the number of attempts before the timer is set off.
Next we create the timer method.
 private void timer(){

        long start = System.currentTimeMillis(); //The long variable here gets the current millisecond of the system as the start point
       long end = start + maxattempts *1000;  //Here the end point is set to multiply the maximum attempts by 1000 and add it to the start point, so if the start point was 1000 milsec and the maxmum attempt is 5, the end point is 6000milsec.

        while(System.currentTimeMillis()<end){
  usernamefield.setEditable(false);
            passwordField.setEditable(false);
        }
    }
In the validation method LoginbtnAct, inside the else segment, add
loginattempts.set(loginattempts.add(1).get());

//Here the system increases the number of attempts by 1 if the attempt is wrong.
        if(loginattempts.get()>5){

//when the number of atempts is above 5, the system runs the timer method, sending the program into a 6 second pause.

            timer();
            outputlabel.setText("Please try again");
            usernamefield.setEditable(true);
            passwordField.setEditable(true);

        }
Run your main file and test for the maximum login failed trials to see the timer effect.
Curriculum
Proof of Work Done
https://github.com/officialhord/JavaFxTutorial/tree/master/FxLoginApplicationWithFXML
Thank you for your contribution.
We've been reviewing your tutorial and suggest the following:
The difficulty level of the tutorial is basic, because it explains basic java functionalities.
Improve the structure of your tutorial to be better at reading it. Spaces between steps becomes more readable.
There are already many tutorials explaining how to make a login system, please in the next tutorial try to bring content that is important to the open source community.
Thanks for your hard work, we are looking forward to a more innovative tutorial on Java Fx.
Your contribution has been evaluated according to Utopian policies and guidelines, as well as a predefined set of questions pertaining to the category.
To view those questions and the relevant answers related to your post, click here.
Need help? Write a ticket on https://support.utopian.io/.
Chat with us on Discord.
[utopian-moderator]
Thanks boss, will do that.
Thank you for your review, @portugalcoin!
So far this week you've reviewed 7 contributions. Keep up the good work!
Hi @official-hord!
Your post was upvoted by @steem-ua, new Steem dApp, using UserAuthority for algorithmic post curation!
Your post is eligible for our upvote, thanks to our collaboration with @utopian-io!
Feel free to join our @steem-ua Discord server
Hey, @official-hord!
Thanks for contributing on Utopian.
We’re already looking forward to your next contribution!
Get higher incentives and support Utopian.io!
Simply set @utopian.pay as a 5% (or higher) payout beneficiary on your contribution post (via SteemPlus or Steeditor).
Want to chat? Join us on Discord https://discord.gg/h52nFrV.
Vote for Utopian Witness!