🔗️ How to develop on EOS local Testnet with docker / docker-compose (Part 1)
The development on EOS blockchain isn't immediate, because several non-obvious components are needed and they need to be configured and work together.
nodeos: the block producer daemonkeosd: the wallet daemon, where the private keys are storedeosio-cpp: the smart contract compilereosio.token: the reference token for the platformcleos: the CLI to remotely interact with EOS blockchain
In VIDEO part 2:
scatter: the EOS wallet configured for local Testnet
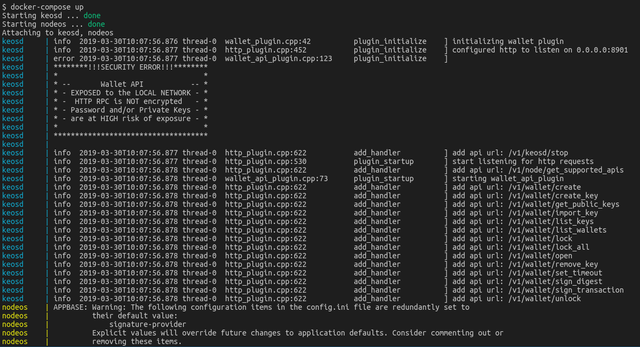
Isn't so sweet to see nodeos and keosd logs grouped and colored?
The full reference code is here.
What Will I Learn?
- How to run and initialize an EOS local Testnet
- How to compile and run an EOS smart contract
- How to make an EOS transaction via cleos
Requirements
To follow this tutorial you need this software
- Ubuntu Linux (suggested)
- docker / docker-compose
Difficulty
- Intermediate
Tutorial Contents
- Dockerfile (the software you need)
- docker-compose.yml (how the software should run)
- cleos, the command line EOS wallet
- Deploy eosio.token, the EOS currency system smart contract
Dockerfile (the software you need)
You could install the components below directly on your Linux operating system, but in this way you keep your development environment more clean and easier to maintain and test.
All the files below are official and released by EOSIO
FROM ubuntu:18.04

RUN apt-get update && apt-get install -y curl libicu60 libusb-1.0-0 libcurl3-gnutls

RUN curl -LO https://github.com/EOSIO/eos/releases/download/v1.7.0/eosio_1.7.0-1-ubuntu-18.04_amd64.deb \
    && dpkg -i eosio_1.7.0-1-ubuntu-18.04_amd64.deb

RUN curl -LO https://github.com/EOSIO/eosio.cdt/releases/download/v1.6.1/eosio.cdt_1.6.1-1_amd64.deb \
    && dpkg -i eosio.cdt_1.6.1-1_amd64.deb

RUN curl -LO https://github.com/EOSIO/eosio.cdt/archive/v1.6.1.tar.gz && tar -xvzf v1.6.1.tar.gz --one-top-level=eosio.cdt --strip-components 1

RUN cd /eosio.cdt/ && curl -LO https://github.com/EOSIO/eosio.contracts/archive/v1.6.0-rc3.tar.gz && tar -xvzf v1.6.0-rc3.tar.gz --one-top-level=eosio.contracts --strip-components 1
You can generate your bundled image sandbox with the command below
docker build -t my/eos .
docker-compose.yml (how the software should run)
As I sayd, some configurations are needed to make talk each other all the pieces required.
default.walletis a preconfigured wallet with private keys for testingconfig.iniis the file for the Block Producer (BP), in EOS Mainnet you won't/can't change it
version: '3'

services:

  nodeos:
    container_name: nodeos
    image: my/eos
    command: nodeos -e -p eosio --plugin eosio::producer_plugin --plugin eosio::history_plugin --plugin eosio::chain_api_plugin --plugin eosio::history_api_plugin --plugin eosio::http_plugin --http-server-address=0.0.0.0:8888 --access-control-allow-origin=* --contracts-console --http-validate-host=false --filter-on="*"
    stop_grace_period: 3m0s
    volumes:
      - ./:/eosio.cdt/contract
      - ./config.ini:/root/.local/share/eosio/nodeos/config/config.ini
    ports:
      - '8888:8888'
      - '9830:9876'
    depends_on:
      - keosd

  keosd:
    container_name: keosd
    hostname: keosd
    image: my/eos
    command: keosd --http-server-address=0.0.0.0:8901 --http-validate-host 0 --verbose-http-errors --unlock-timeout=9999999
    volumes:
      - ./default.wallet:/root/eosio-wallet/default.wallet
    expose:
      - 8901
    ports:
      - '8901:8901'
Run it!
In a new terminal run the command below
docker-compose up
Congratulation! You are producing blocks in your EOS Localnet!
The initialization fun isn't over yet, because you still need to deploy the smart contract to have the EOS token currency!
cleos, the command line EOS wallet
Ok, the EOS blockchain is running, but now we need another terminal to interact with it.
alias cleos="docker exec -it nodeos cleos --url http://127.0.0.1:8888 --wallet-url http://keosd:8901"

cleos get info
{
  "server_version": "686f0deb",
  "chain_id": "cf057bbfb72640471fd910bcb67639c22df9f92470936cddc1ade0e2f2e7dc4f",
  "head_block_num": 85,
  "last_irreversible_block_num": 84,
  "last_irreversible_block_id": "000000541c75df656485edb9fb71e898db933c78f685fc7a8d883544d141350d",
  "head_block_id": "0000005580f8983a211e4dcddbb783d6bc962726ef271beeee54b63bd906b5a0",
  "head_block_time": "2019-03-30T09:37:33.500",
  "head_block_producer": "eosio",
  "virtual_block_cpu_limit": 217493,
  "virtual_block_net_limit": 1140464,
  "block_cpu_limit": 199900,
  "block_net_limit": 1048576,
  "server_version_string": "v1.7.0"
}
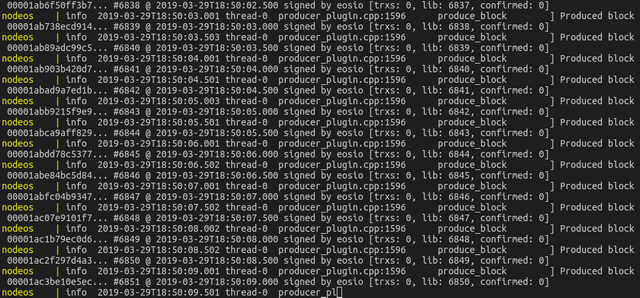
As you can see in the output latest block is 85 and the chain_is is the one used in the testnet.
Deploy eosio.token, the EOS currency system smart contract
Currently there is no EOS token so let's add them
Compile them
docker exec -it nodeos bash -c "cd /eosio.cdt/eosio.contracts/contracts/ && eosio-cpp -I eosio.token/include/ -abigen -o eosio.token/src/eosio.token.wasm eosio.token/src/eosio.token.cpp"
Create the eosio.token account and publish the smart contract
cleos create account eosio eosio.token EOS6MRyAjQq8ud7hVNYcfnVPJqcVpscN5So8BhtHuGYqET5GDW5CV EOS6MRyAjQq8ud7hVNYcfnVPJqcVpscN5So8BhtHuGYqET5GDW5CV
executed transaction: d196c673f38085e34815900dd47de8ba030d14ed9d7311a1a173df131281e66a  200 bytes  2568 us
#         eosio <= eosio::newaccount            {"creator":"eosio","name":"eosio.token","owner":{"threshold":1,"keys":[{"key":"EOS6MRyAjQq8ud7hVNYcf...
warning: transaction executed locally, but may not be confirmed by the network yet         ]

cleos set contract eosio.token /eosio.cdt/eosio.contracts/contracts/eosio.token/src eosio.token.wasm eosio.token.abi -p eosio.token@active
Reading WASM from /eosio.cdt/eosio.contracts/contracts/eosio.token/src/eosio.token.wasm...
Publishing contract...
executed transaction: 1b4b532337035ad4cd985d1cb63c844b84671ed574251a85519fc51c8fb4f290  9592 bytes  10523 us
#         eosio <= eosio::setcode               {"account":"eosio.token","vmtype":0,"vmversion":0,"code":"0061736d0100000001bb011f60000060037f7e7f00...
#         eosio <= eosio::setabi                {"account":"eosio.token","abi":"0e656f73696f3a3a6162692f312e310008076163636f756e7400010762616c616e63...
warning: transaction executed locally, but may not be confirmed by the network yet         ]
Create your testuser account and give you some FREE money!!! :D
cleos create account eosio testuser EOS6K42yrrMETmx2rXFJeKtaGrQAwgCDBYUVY7PGCVfhWFykqvhVR EOS6K42yrrMETmx2rXFJeKtaGrQAwgCDBYUVY7PGCVfhWFykqvhVR
cleos push action eosio.token create '[ "eosio", "1000000000.0000 EOS"]' -p eosio.token@active
cleos push action eosio.token issue '[ "testuser", "100000.0000 EOS", "m" ]' -p eosio@active
Congrats again, now you are rich!
cleos get currency balance eosio.token testuser
100000.0000 EOS

cleos get table eosio.token testuser accounts
{
  "rows": [{
      "balance": "100000.0000 EOS"
    }
  ],
  "more": false
}
Your first transaction
cleos push action eosio.token transfer '["testuser","eosio.token","10.0000 EOS",
  "BUY LAMBOOO!!!"]' -p testuser@active

cleos get currency balance eosio.token testuser
99990.0000 EOS
As you can see after you buy a lambo, the EOS balance has been reduced an you used your testuser permissions to make it.
All these cleos steps can be automated, grouped and executed sequentially everytime you initialize an EOS Blockchain.
Conclusion
We have seen briefly how to set up a local EOS Testnet with docker and some basic tests. The beauty of cleos and docker is that we can automatize ad have a clean new working EOS environment in minutes. All the commands don't need to be executed manually we can put them in a custom bootstrap.sh to recreate the desidered environment when we need it.
In the Part 2, how to integrate EOS local testnet in Scatter (EOS wallet with UI).
Thank you for your contribution @luigi-tecnologo.
After reviewing your tutorial we suggest the following points listed below:
Very interesting tutorial for anyone who wants to learn how to develop in EOS local Testnet with docker.
It would be interesting to be putting the commands on the console and presenting the results in a GIF during your tutorial.
Is it necessary to have Scatter and Docker installed on your computer to run these tests? If yes, the ideal is to place the links where you can download so the reader doesn't need to do research to find the software.
Thank you for your work in developing this tutorial.
Looking forward to your upcoming tutorials.
Your contribution has been evaluated according to Utopian policies and guidelines, as well as a predefined set of questions pertaining to the category.
To view those questions and the relevant answers related to your post, click here.
Need help? Chat with us on Discord.
[utopian-moderator]
Thanks, Scatter isn't required but I'll talk about its config in part 2
Posted using Partiko Android
Thank you for your review, @portugalcoin! Keep up the good work!
Hi @luigi-tecnologo!
Your post was upvoted by @steem-ua, new Steem dApp, using UserAuthority for algorithmic post curation!
Your post is eligible for our upvote, thanks to our collaboration with @utopian-io!
Feel free to join our @steem-ua Discord server
Hey, @luigi-tecnologo!
Thanks for contributing on Utopian.
We’re already looking forward to your next contribution!
Get higher incentives and support Utopian.io!
Simply set @utopian.pay as a 5% (or higher) payout beneficiary on your contribution post (via SteemPlus or Steeditor).
Want to chat? Join us on Discord https://discord.gg/h52nFrV.
Vote for Utopian Witness!