Interfacing GSM and GPS Module using Arduino: A step-by-step guide tutorial for tracking
Finding someone is hard, especially if you have no idea where he/she is. But with the use of tracking device it eases the problem. You can now easily monitor the person, your car and etc. whenever it's lost. So now, let's build our own tracking device as easy as counting 1 2 3.
Materials Needed:
- Arduino Uno
- GPS Module
- GSM Module
- Connecting Wires
- USB - type connector connected to a computer with Arduino IDE
- Breadboard is optional
GPS Module
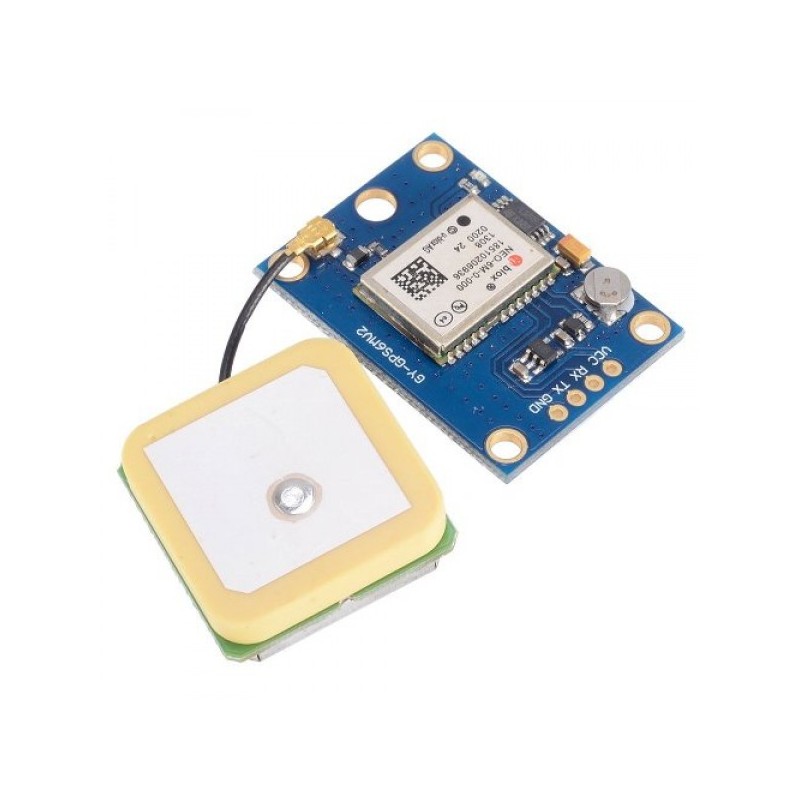
photo credits
GPS stands for Global Positioning System and used to detect the Latitude and Longitude of any location on the Earth, with exact UTC time (Universal Time Coordinated). This device receives the coordinates from the satellite for each and every second, with time and date. GPS offers great accuracy and also provides other data besides position coordinates which we can use later on.
I'm using the NEO-6MV2 because it's very small in size(1.5"x1.0").
GSM Module
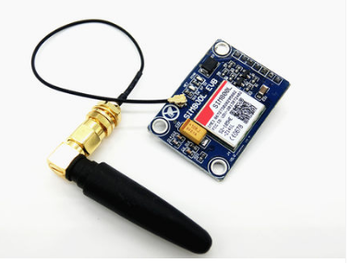
photo credits
GSM is a mobile communication modem; it stands for *Global System for Mobile Communication (GSM). It was created to describe the protocols for second-generation (2G) digital cellular networks used by mobile phones and is now the default global standard for mobile communications. We will use this in order to send the coordinates that we can receive from the GPS Module to the third party whom will receive the message.
I'm using the GSM 800l Module because just like the GPS Module it's small. We will use a micro sim on this, and take note that the sim must have load.
Step 1: Connecting GSM and GPS Module to the Arduino
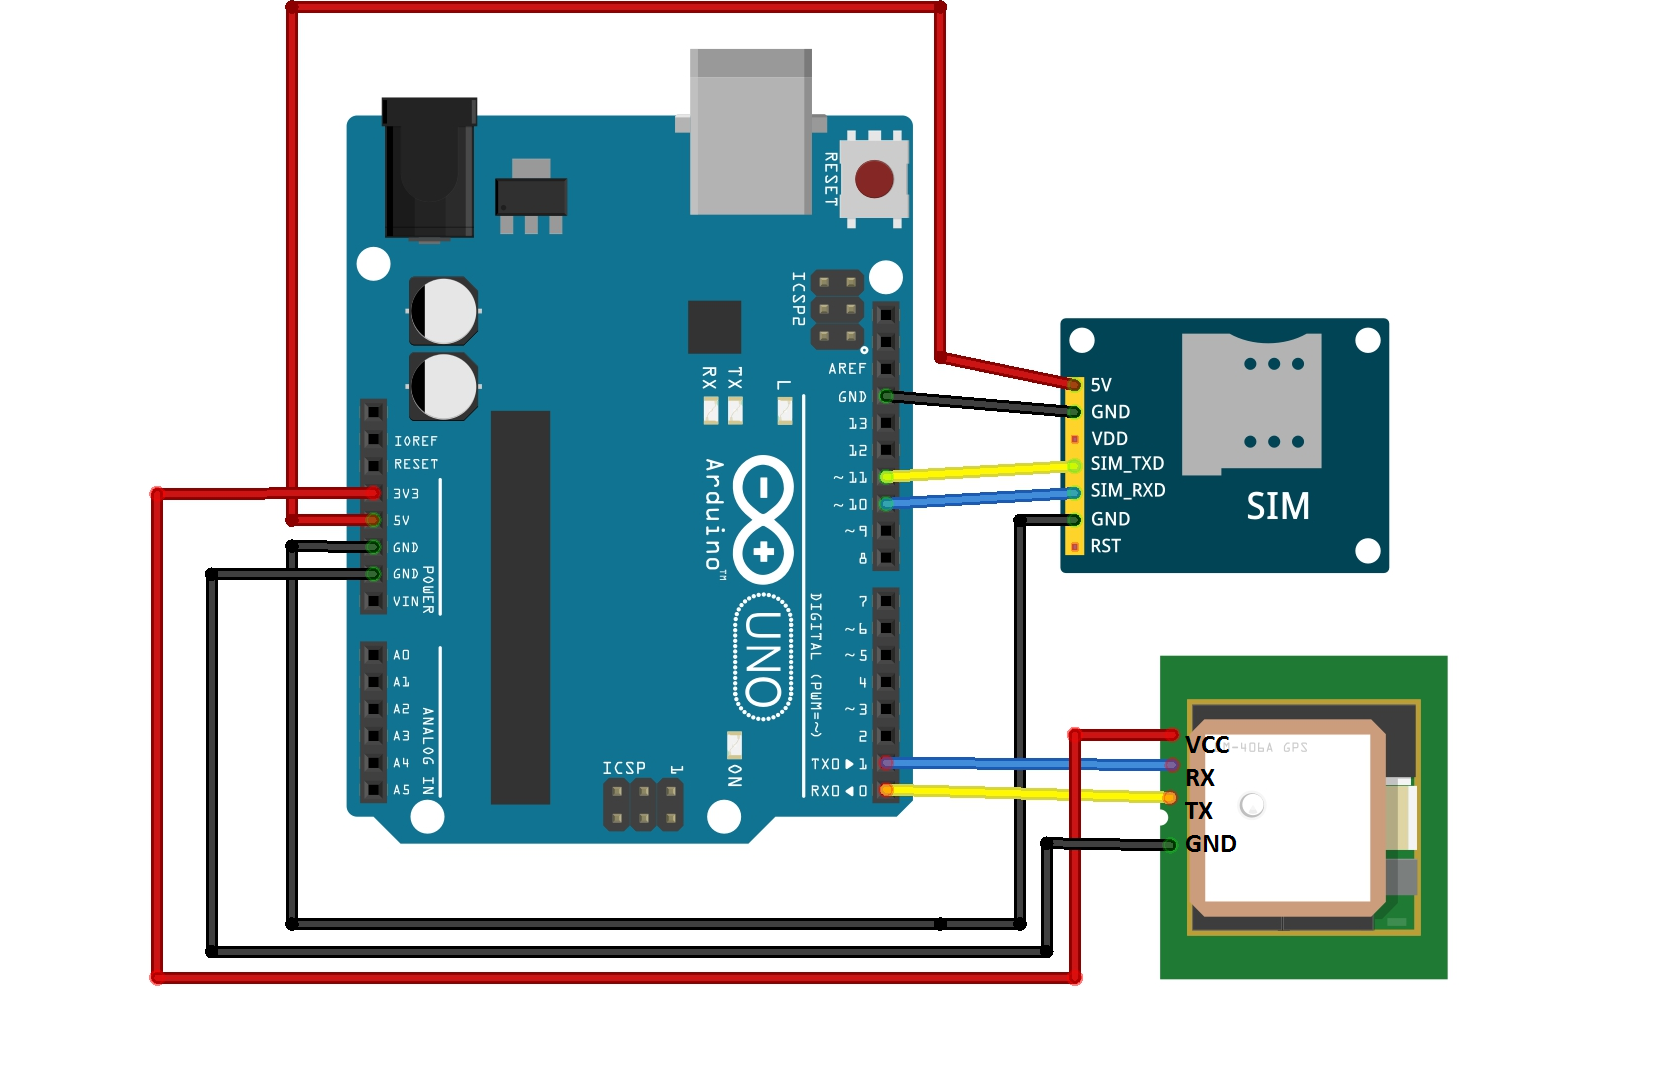
GSM Module to Arduino
- TX connected to pin 11
- RX connected to pin 10
- 5V from the module to 5V of Arduino
- two Grounds from the module to the Ground to Arduino
GPS Module to Arduino
- Vcc connected to 5V of Arduino
- RX from the module to the TX of Arduino (pin 1)
- TX from the module to the RX of Arduino (pin 2)
- GND to GND
Step 2: Software Connection
Connect the USB Cable to a PC or Laptop
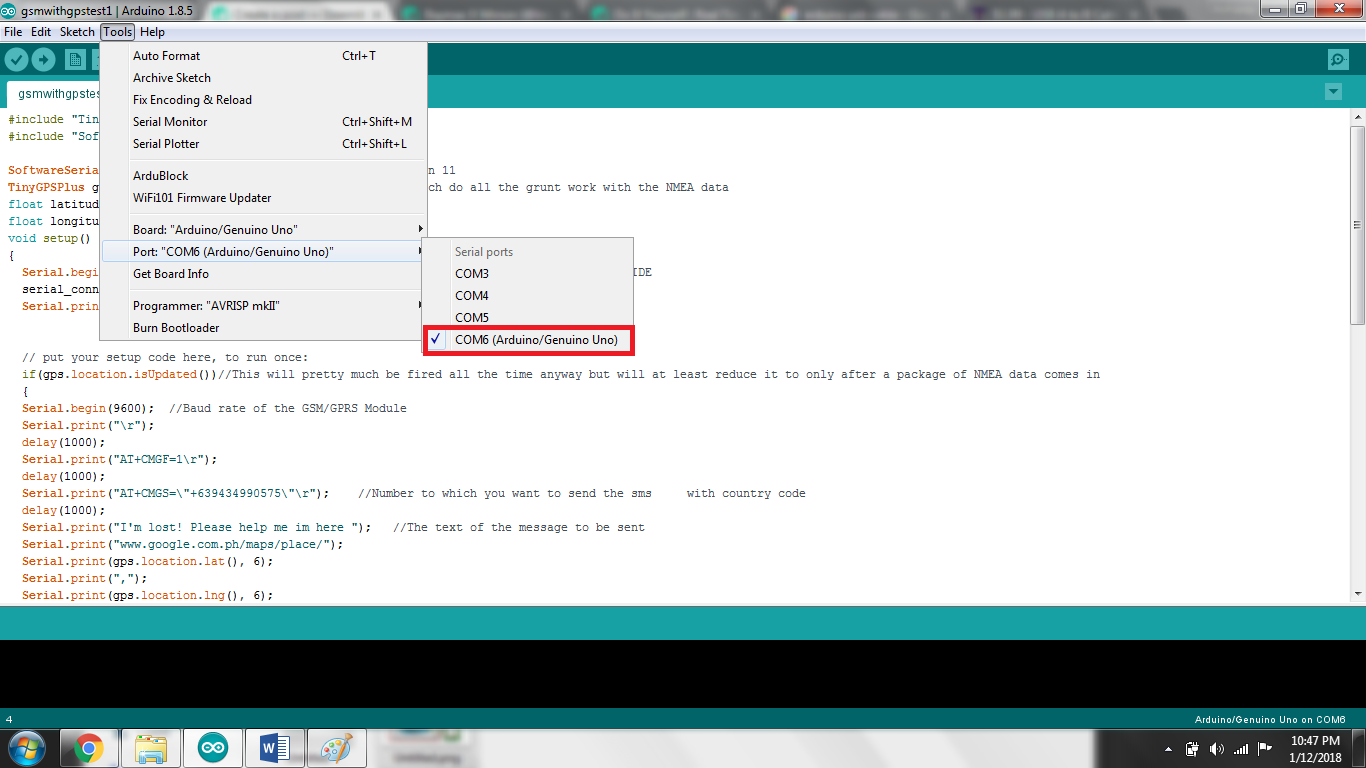
Open Arduino IDE, change your board to Arduino Uno: Go to Tools > Board: > Arduino/Genuino Uno
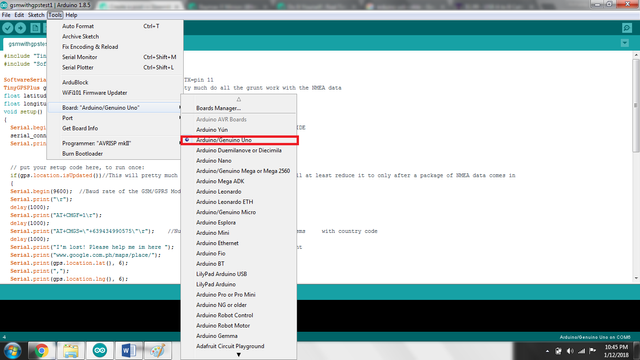
Also change the Port settings: Go to Tools > Port: > COM6 (Arduino/ Genuino Uno)
Then, download the library TinyGPS++ this will be used for later purposes. After which, extract the file and copy the folder then Go to your Program Files and find the Arduino Folder > libraries then paste the folder of TinyGPS++.
Step 3: The Code

Copy the code then compile. If it has no error then you can now upload the code but before that make sure that the TX and RX (pin 0 and pin 1) in the Arduino Uno are disconnected to the GPS Module so that it won't give you errors while uploading the code. And if it's done uploading you can re-connect it again.
Step 4: Viewing the Result
- You will receive a message from the sim you inserted to the GSM Module

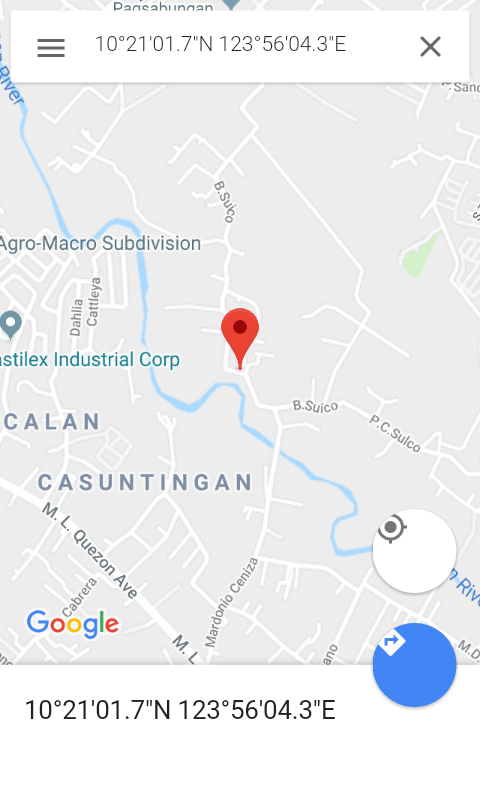
Click the link on the message. And take note that you must have to be connected to the internet so that you can view the location.
- You can now see the location where he/she is.
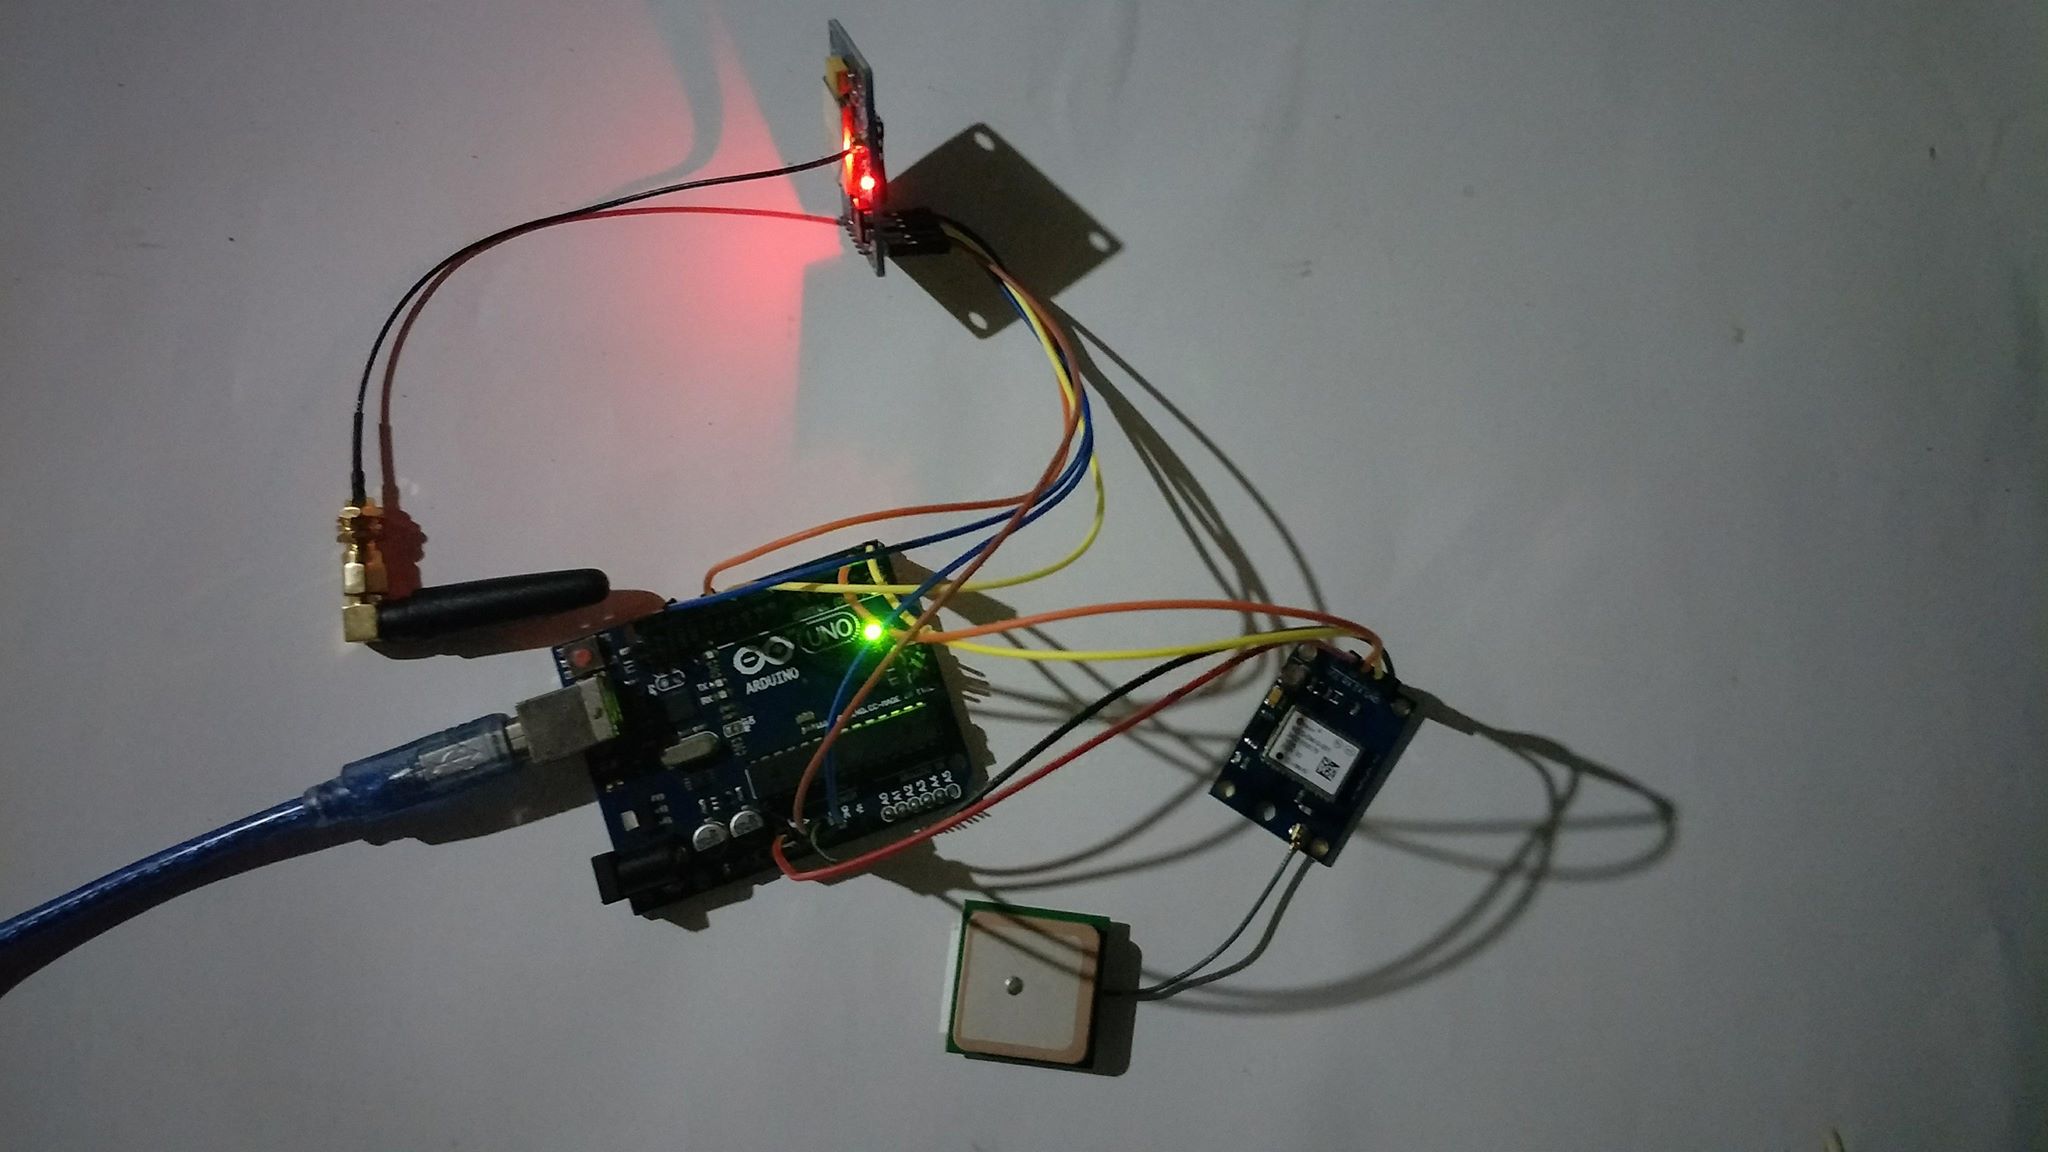
My Circuit:
Tip to remember: The GPS Module will take time to receive data to the satellite if you can see a green amber blinking it means it's receiving the data. And it is more convenient to go outside so that the module can receive the data faster.
Posted on Utopian.io - Rewarding Open Source Contributors
Your contribution cannot be approved because it does not follow the Utopian Rules.
You can contact us on Discord.
[utopian-moderator]
Hi sir! is it okay to edit this and repost it again? 🙂
No
w0w!!!
Upvoted.
thank you sir!
where can i find the code sir
Wow! this is exceptional @kimp0gi! This is a complete step-by-step procedure of a project. It is very helpful to the community. Truly, engineering makes our life easier.
i’m blushing 😊 hahaha thanks @japh hope this will help to a lot of engineering student. kay usa pod kos naglisod ani sauna pero sus easy rajud diay hahaha
Hi thanks for this post vry good step b step proc
Could send us the entire code ?
Thank you for sharing!
I will definitely use it.
i know it had been long time but sir i need the code i don't know from where i can get
where can i find the code
where can i find the code
Where is the code?