CBAC#2 /At the beginning there was chaos/
The goal of this article is to provide you the necessary knowledge to build simple applications with a chaotic code structure that nobody will want to work with. Nope, I'm not drunk.
Wait, what?
Well, maybe it wasn't the best description of purposes of this article. Yes, this tutorial won't make you a master of Angular who writes beautiful code and structures project using a wide range of tools, but the goal of this part of the course is to give you just enough knowledge to start playing with Angular and Firestore (btw. if you haven't read the previous part, I highly recommend doing that).
The deeper explanation of the stuff you find here will be covered in next CBAC parts (Community-Based Angular Course; why community-based?; again, check the first part).
But before we move to our ToDo list app code, we have to take a look at a programming language that we will be using.
TypeScript
What is TypeScript?
Think of it as more powerful JavaScript that you will be using in Angular. At the end, it compiles to JS, because it is just its superset. Why would we even use it? The most important difference is that TypeScript is strongly typed, so we can set fixed a type (for example number or string) to a variable or to result of a function. However, this is optional but recommended to do, thought strong typing helps us avoid bugs at the time of writing code.
What you need to know about TypeScript
To be honest - not much. TypeScript is a powerful tool, but in this course we will use only a few its solutions. If you want to learn more - check the references section.
So, what exactly do you have to know?
- types
as I mentioned before, we can define variable with fixed type, for example if we want numberOfTasks to be number we can define it like that:

- classes
they are the building blocks of our Angular apps. Classes in TypeScript look simillarly to classes in any other object-oriented programming language, like C#:
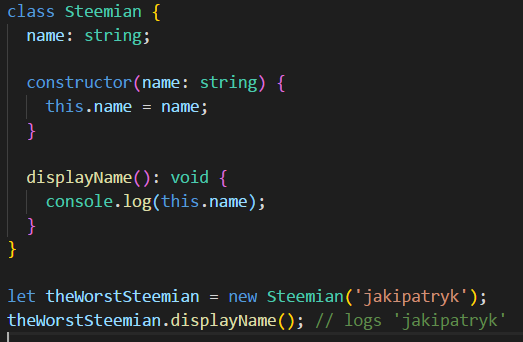
there are some tricks we will use, for example, instead of writing constructor like in the above example, we can simply shorten it and it will work exactly the same, but you won't have to write a body of the constructor and a public property name on your own:

- interfaces
strong typing is a powerfull feature, but what if we wanted a variable to accept only a custom types of objects? We can declare an interface of that custom object:
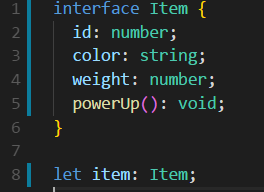
interfaces are limited compared to classes - they can't be instantiated, they can't implement any logic. They only define how an object/class has to look like.
Angular fundamentals
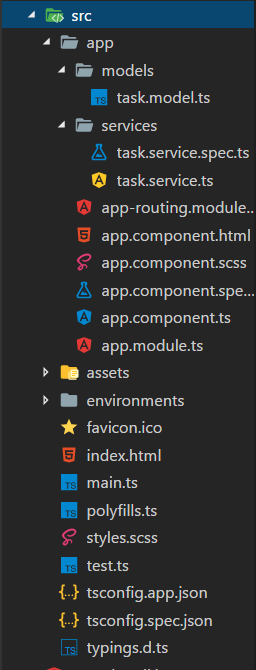
Let's take a look at the project structure (the code is available on Github):
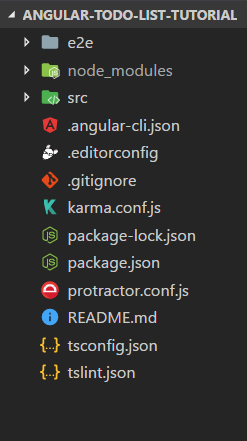
A lot of stuff, huh? Fortunately, you don't have to care about most of them, at least now. The files you have to get to know are in the src folder:
- what is the first page that is served when someone visits your website? Yes, index.html:
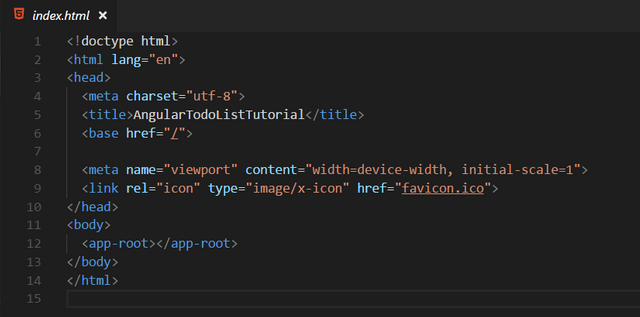
however, as Angular CLI users, we can just sit under a palm tree and enjoy writing logic and views for our app - CLI will add all JS and CSS at the time of building our app. Not much to be changed here then. - again, you probably won't be surprised that styles.scss is used to define the style of our app. You just have to remember that any styles added there are global:
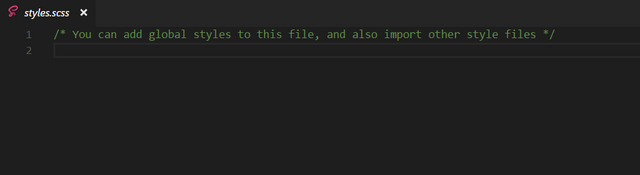
if you don't know the difference between global and local styles, you will understand it later, when I introduce components. - another important file for the CLI and useless for a novice is main.ts:
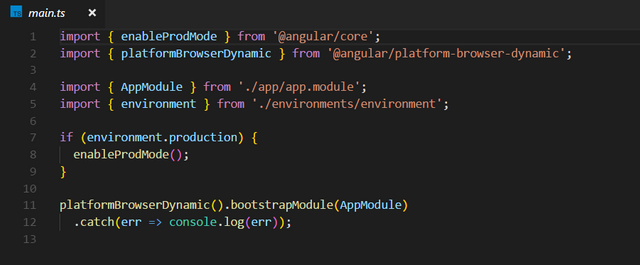
this is the entry point for every Angular-based app. It bootstraps the root module (AppModule). Again, at the moment you don't have to change anything there. - assets is a folder where you should store images etc.
- environments is a folder that stores files with configuration variables like firebaseConfig that we have added in the previous part of the course
- app is a folder we will be working on. It contains all modules, components, services, directives, pipes, etc. There's where we will have a lot of fun.
Components

A component is an Angular element that you will be probably using the most frequently. It controls a view, so basicly the part of an app responsible for interaction with the user.
Each component consists of a few elements:
@Component()decorator - you use it to tell Angular that class defined after that is a component. In addition, this decorator as an argument takes some configuration options:selector- this option tells Angular when to insert our component. Our AppComponent selector is app-root , so whenever Angular finds<app-root></app-root>in the parent HTML, it inserts AppComponent there. Btw. we have already seen this selector in index.html. Indeed, AppComponent is the root component and later in this course we will add other components to it.templateUrl- path to component's HTML template.styleUrls- an array of paths to comopnent's .scss styles (local styles)
export class ComponentNameComponent {}- here you put component's logic. You can define properties and methods that can be used, for example, by template.
However, using component without a template doesn't make much sense - we are building a view. And that's where magic happens:
Data flow
User-application interaction is the fundamental aspect of any modern web app. How do we achieve this in Angular? There are a plenty of methods:
- displaying data (from class to template):
let's say we have a propertynamein component class. To display its value via template, you simply have to type{{ name }}(this is called string interpolation) and Angular will find the propertynameand fill the space in template where you typed this with its value. - property binding (from class to template):
what if we wanted to, for example, display an HTML element only if variabledisplayin our class has a value true? Property hidden seems to be the right choice, but how do we bind a value from a variable to HTML property? Angular makes it simple, all you have to do is in your template add the following element:
<some-element [hidden]="display">If display value is equail false, I'm hidden!</some-element>
We can bind not only to native HTML properties, but also to, for example, directives. - event binding (from template to class):
both above methods were used to one-way data flow, from TypeScript class to HTML template. To pass data in the opposite direction, we can use event binding:
<button (click)="deleteAccount('jakipatryk')">Delete your account</ button>
here we call function deleteAccount() and pass a parameter "jakipatryk" to it each time user clicks at the button. - two-way data binding
sometimes we want to combine data flow from both directions. To do so let's consider the following example:

it turns out that when typing a text into input, it also updates the text in {{itemName}}.
*ngFor directive
Let's say that you have an array of Items called itemsArray. Each item has name and type properties. How can we display this array in the template? Thanks to built-in NgFor directive it is easy to achieve:
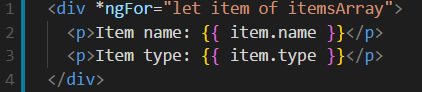
as you can see, we iterate through itemsArray and we call each element of the array item. Angular will render as many div's as there are items in itemsArray and fill each div with a particular item info via string interpolation.
Services
Component classes should be lean. They don't fetch data from the server, validate user input, or log directly to the console. They delegate such tasks to services.
source: Angular docs
Services are really powerful. Although you can do most of their job in component class, this is not recommended and is very limited. Angular uses dependency injection to give a component an instance of service it needs.
We will dive deeper into services and dependency injection in the next part of the course.
Modules
You have already heard of modules - main.ts defines which module should be the root module - module that is being bootstrapped when launching an app. Our root module is, of course, AppModule:

Our @NgModule() decorator takes some configuration options:
declarations- here you declare all components, custom directives and custom pipes you want to use in your appimports- here you put all modules you need in your appproviders- a perfect place to put your servicesbootstrap- Angular must know which component is the root component - here you add it
Adding all of these elements to module seems like a lot of work that can be automaticated. Again, CLI is our best friend while working with Angular. Properly used saves us a lot of time. But you have to be careful. For example, when you generate a component by CLI, it automatically is added to declarations section of AppModule, but if want to create a service, you either add it to providers section of module manually or use --module ModuleYouWantAddServiceTo flag when you generate a service using CLI.
At the moment we have only one module in our app, but modules are getting more powerful when you want to organize more complex apps.
AngularFire2
The coding part of this tutorial is done, but even if you copy-pasted whole app's code, it wouldn't be working. First of all you have to install some dependencies:
npm install angularfire2 firebase --save
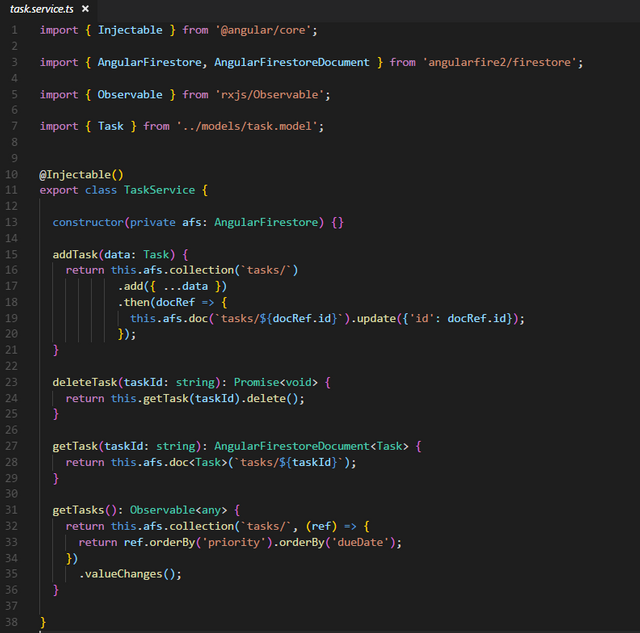
AngularFire2 is an official Angular library for Firebase. We have already use its features in TaskService - all of operations on Firestore were handed by AF2.
Now we have all dependencies, but... We don't have database (Firestore). So, let's create one!
- Go to Firebase Console and open your project.
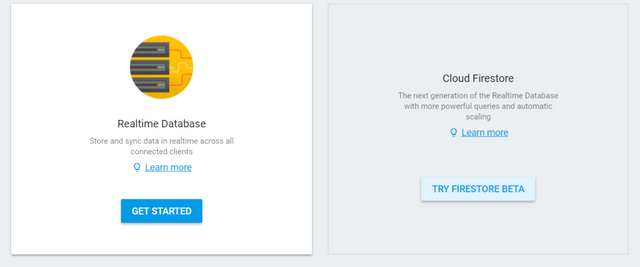
- Navigate to Database.
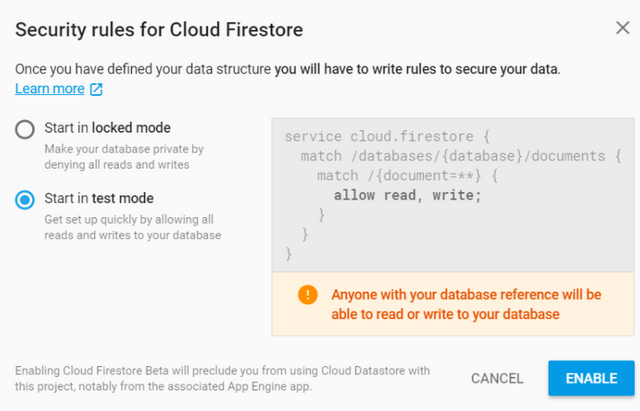
- Click TRY FIRESTORE BETA:
- Select Start in test mode and click enable:
We are almost done. Now try to ng serve your project. You will get an error in the console:
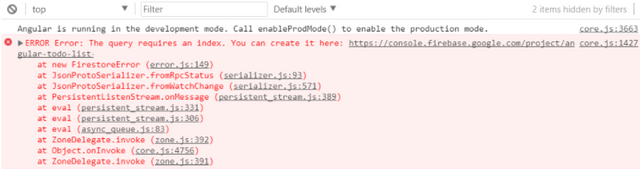
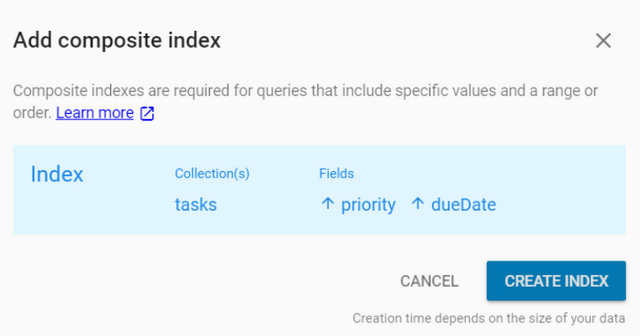
Fortunatly, AngularFire2 has some useful tools and all you have to do is to click on the link provided in console to create a custom index in the Firestore:
Summary
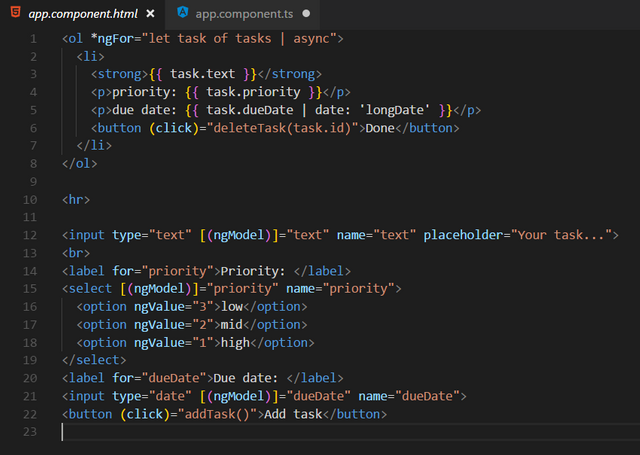
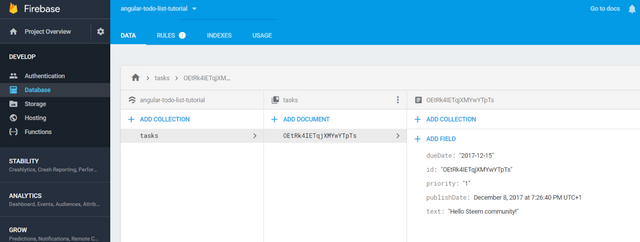
In this part of Community-Based Angular Course I introduced TypeScript, Angular and Firestore fundamentals which were used to build an app to manage tasks:
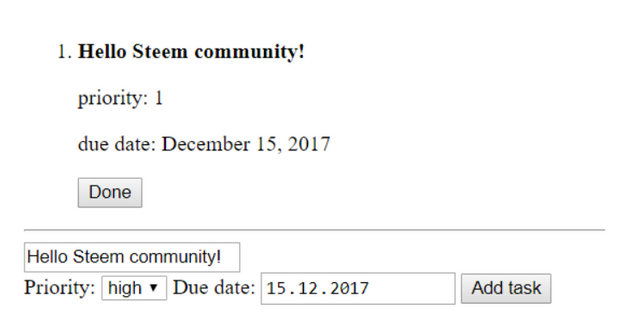
all of the tasks sync with Google Cloud Firestore:
After reading this tutorial and the references section articles, you should be able to make some changes in this app or even to make a simple app from scratch.
References
- TypeScript:
- Classes vs interfaces by Todd Motto
- TypeScript docs
- Angular: Why TypeScript? by Victor Savkin
- Angular:
- fundamentals of Angular in official documentation
- Reactive Programming in Angular by Victor Savkin
- The Missing Introduction to Angular and Modern Design Patterns by sinedied
- Firebase
- great talk by James Daniels and Erik Haddad
- AngularFire2 docs on Firestore
- Firestore with AngularFire tutorial
Posted on Utopian.io - Rewarding Open Source Contributors
Thank you for the contribution. It has been approved.
You can contact us on Discord.
[utopian-moderator]
you are a beast, sir.
Nie przyda mi sie, ale doceniam tytaniczną prace
Great guidance....thanks for posting
Hey @jakipatryk I am @utopian-io. I have just upvoted you!
Achievements
Suggestions
Get Noticed!
Community-Driven Witness!
I am the first and only Steem Community-Driven Witness. Participate on Discord. Lets GROW TOGETHER!
Up-vote this comment to grow my power and help Open Source contributions like this one. Want to chat? Join me on Discord https://discord.gg/Pc8HG9x