Implement a Nested Recycler view Android
Repository:
https://github.com/enyason/NestedRV

Repository
https://github.com/enyason/NestedRV
What Will I Learn?
How to create a Nested Recycler View
How to make network request with Retrofit
Requirements
- System Requirements : Java JDK, Android Studio
- OS Support for Java : Windows, mac OS, Linux
- Required Knowledge : A fair knowledge of Java ,OOP and Android Studio
Resources for Java and this tutorial
- Oracle Website - https://www.oracle.com/index.html
- Java Docs - http://www.oracle.com/technetwork/java/javase/documentation/api-jsp-136079.html
- Retrofit - https://square.github.io/retrofit/
- Singleton Pattern - https://en.wikipedia.org/wiki/Singleton_pattern
Difficulty
Intermediate
Tutorial Duration 35- 40 Minutes
Tutorial Content
In this tutorial we are going to implement a nested RecyclerView like that present in the google playstore. We will be using data i hosted here for this implementaion. With this said, lets get our hands dirty.
STEP 1 : Add all the required dependencies
In the app level gradle.build file, add the following dependencies
// for displaying items in a list view
implementation 'com.android.support:recyclerview-v7:27.1.1'
// for displaying items on a card view
implementation 'com.android.support:cardview-v7:27.1.1'
// library for loading images into imageviews
implementation 'com.squareup.picasso:picasso:2.5.2'
//retrofit library for making network calls
implementation 'com.squareup.retrofit2:retrofit:2.4.0'
implementation 'com.squareup.retrofit2:converter-gson:2.4.0'
STEP 2 : CREATE ALL XML LAYOUT FILES REQUIRED
Before we dive into the back-end aspect , we are going to define the layout file in the XML.
Main Activty Layout
XML Code
<?xml version="1.0" encoding="utf-8"?>
<RelativeLayout xmlns:android="http://schemas.android.com/apk/res/android"
    xmlns:tools="http://schemas.android.com/tools"
    android:layout_width="match_parent"
    android:layout_height="match_parent"
    tools:context="com.nexdev.enyason.nestedrv.MainActivity">

    <android.support.v7.widget.RecyclerView
        android:id="@+id/rv_main"
        android:layout_width="match_parent"
        android:layout_height="match_parent">

    </android.support.v7.widget.RecyclerView>

    <ProgressBar
        android:id="@+id/pb_home"
        android:layout_width="wrap_content"
        android:layout_height="wrap_content"
        android:layout_centerInParent="true" />

</RelativeLayout>
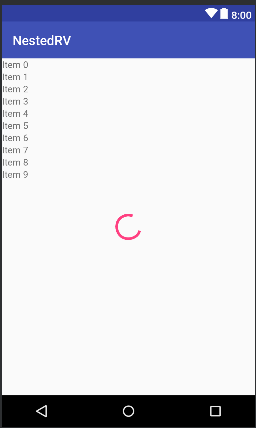
Basically i just defined the main List widget using the Recyclerview component.This Recyler view will house the inner recycler view.
image output of the xml should be this
Main Activity Row Layout
This layout will handle the layout structure for each item in the Main Activity Layout.
xml code
<?xml version="1.0" encoding="utf-8"?>
<RelativeLayout xmlns:android="http://schemas.android.com/apk/res/android"
    android:id="@+id/relativeLayout"
    android:layout_width="match_parent"
    android:layout_height="wrap_content">

    <TextView
        android:id="@+id/tv_movie_category"
        android:layout_width="wrap_content"
        android:layout_height="wrap_content"
        android:layout_marginLeft="10dp"
        android:layout_marginTop="10dp"
        android:layout_marginBottom="10dp"
        android:text="Movie Category"
        android:textSize="14sp"
        android:textStyle="bold" />

    <android.support.v7.widget.RecyclerView
        android:id="@+id/home_recycler_view_horizontal"
        android:layout_width="match_parent"
        android:layout_height="wrap_content"
        android:layout_below="@id/tv_movie_category"
        android:layout_marginLeft="10dp"
        android:layout_marginBottom="15dp"
        android:orientation="horizontal" />

    <View
        android:id="@+id/activityMainDivider"
        android:layout_width="match_parent"
        android:layout_height="1dp"
        android:layout_below="@+id/home_recycler_view_horizontal"
        android:layout_marginBottom="5dp"
        android:background="#31C7C7CC" />


</RelativeLayout>
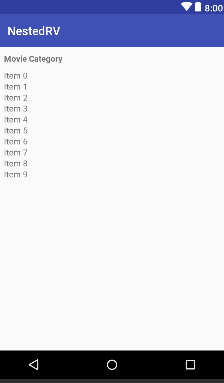
The xml contains a label for the movie genre and a RecyclerView for the horizontal scrolling. After doing this, you should have something similar to the image below
Inner RecyclerView RowLayout
This layout will handle the layout structure for each item of the horizontal RecyclerView which is the inner recyclerview.
xml code
<?xml version="1.0" encoding="utf-8"?>

<RelativeLayout xmlns:android="http://schemas.android.com/apk/res/android"

    android:layout_width="wrap_content"
    android:layout_height="wrap_content">

    <android.support.v7.widget.CardView xmlns:app="http://schemas.android.com/apk/res-auto"
        android:id="@+id/card_view_home"
        android:layout_width="130dp"
        android:layout_height="wrap_content"
        android:layout_centerHorizontal="true"
        android:elevation="5dp"
        app:cardUseCompatPadding="true">


        <RelativeLayout
            android:layout_width="match_parent"
            android:layout_height="wrap_content">


            <ImageView

                android:id="@+id/image_view_movie"
                android:layout_width="130dp"
                android:layout_height="170dp"
                android:scaleType="fitXY"
                />


            <LinearLayout
                android:id="@+id/layout_mov"
                android:layout_width="wrap_content"
                android:layout_height="wrap_content"
                android:layout_below="@id/image_view_movie"
                android:layout_margin="1dp"
                android:orientation="vertical">

                <TextView
                    android:id="@+id/tv_title"
                    android:layout_width="wrap_content"
                    android:layout_height="wrap_content"

                    android:maxLines="1"
                    android:text="Mission Impossible"
                    android:textSize="12sp" />

                <TextView
                    android:id="@+id/tv_genre"
                    android:layout_width="wrap_content"
                    android:layout_height="wrap_content"
                    android:ellipsize="end"
                    android:fontFamily="sans-serif"
                    android:maxLines="1"
                    android:text="Action,Comedy..."
                    android:textSize="12sp" />


            </LinearLayout>

        </RelativeLayout>

    </android.support.v7.widget.CardView>


</RelativeLayout>
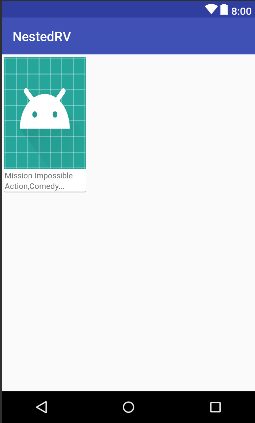
The xml contains a label for the movie title and genre and an image view for the horizontal scrolling.
STEP 3 : Create Model Classes For Retrofit
We are going structures our model classes, to depict the data structure returned from the response
Response
HomeBodyResponse.java
public class HomeBodyResponse {

    String status;
    HomeData data;

    public HomeBodyResponse(String status, HomeData data) {
        this.status = status;
        this.data = data;
    }

    public String getStatus() {
        return status;
    }

    public HomeData getData() {
        return data;
    }
}
HomeData.java
public class HomeData {


    List<Data> data;

    public HomeData(List<Data> data) {
        this.data = data;
    }

    public List<Data> getData() {
        return data;
    }
}
Data.java
public class Data {

    List<Movie> list;
    String genre;
    String type;

    public Data(List<Movie> list, String genre, String type) {
        this.list = list;
        this.genre = genre;
        this.type = type;
    }

    public List<Movie> getList() {
        return list;
    }

    public String getGenre() {
        return genre;
    }

    public String getType() {
        return type;
    }
}
Movie.java
public class Movie {

    String id;
    String name;
    String poster;
    String genre;


    public Movie(String id, String name, String poster, String genre) {
        this.id = id;
        this.name = name;
        this.poster = poster;
        this.genre = genre;
    }

    public String getId() {
        return id;
    }

    public String getName() {
        return name;
    }

    public String getPoster() {
        return poster;
    }


    public String getGenre() {
        return genre;
    }

}
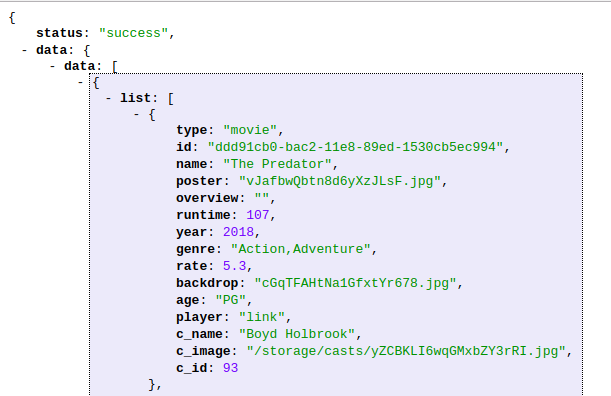
From the HomeBodyResponse class down to the Movie class, there is a relationship binding all four classes, which in turn maps perfectly to our JSON response. HomeBodyResponse stands top in the model hierarchy with others as children. The structure looks like this
HomeBodyResponse -> HomeData -> Data -> Movie
With HomeBodyResponse we can gain access to other model objects when we get a successful response from our network call using retrofit.
STEP 4 : IMPLEMENT NETWORK REQUEST WITH RETROFIT
Before we proceed, lets understand what retrofit is. Retrofit is a networking library ....
**Create RetrofitApiClient interface **
public interface RetrofitApiClient {

    @GET("/test/response.json")
    Call<HomeBodyResponse> getMovieByCategory();
}
Basically we create an interface with only one method getMovieByCategory(). This method is annotated with GET, to specify the type of request we want to make. Also the return type of HomeBodyResponse is wrapped in a call object. In retrofit, the Call object basically sends a request to the web server and returns a response. Calls may be executed synchronously with execute, or asynchronously with enqueue as we will see later in the tutorial.
**Create a Retrofit Object **
The Retrofit object will help us create an implementation of the Api endpoint we defined in RetrofitApiClient above. This app demo doesn't require much network operations, but in a situation where much networking is involved, creating multiple instances of the retrofit object is a bad idea.
One workaround to this is Singleton. A Singleton implementation ensures only one instance of an object is created in a program. So whenever we want to make network calls, if the retrofit object is null, it will create an instance of it, otherwise use the already created one.
public class RetrofitSingleton {

...

//constructor
private RetrofitSingleton() {
        gson = new GsonBuilder()
                .create();

        retrofit = new Retrofit.Builder()
                .baseUrl(BASE_URL)
                .addConverterFactory(GsonConverterFactory.create(gson))
                .build();
    }

    public static synchronized RetrofitSingleton getInstance() {

        if (retrofitSingletonInstance == null) {
            retrofitSingletonInstance = new RetrofitSingleton();
        }

        return retrofitSingletonInstance;
    }

  ...
 }
The constructor does the initialization of the retrofit object only when the retrofitSingletonInstance is null . Note : the constructor is private so it cannot be accessed from outside the class. The synchronized keyword ensures only one access to the method at a particular time, in cases where multiple requests are made to use the object
 public RetrofitApiClient getApi() {

 // creates an implemntation of the Api client
 return retrofit.create(RetrofitApiClient.class);

    }
This will be called to get access to the methods of in RetrofitApiClient.class . In our case we have just one method which is getMovieByCategory()
STEP 5 : CREATE THE RECYCLER VIEW ADAPTERS
We will need two adapters to achieve our nested recycler view. The First adpater for the outer Recycler view and the second for the inner horizontal recycler view. This adapters are responsible for populating the recyclerview with data.
First Adapter - HomeAdapter.java
public class HomeAdapter extends RecyclerView.Adapter<HomeAdapter.HomeViewHolder> {

...

    @NonNull
    @Override
    public HomeViewHolder onCreateViewHolder(@NonNull ViewGroup parent, int viewType) {

// the custom layout for the first recycler view is inflated here
        View theView = LayoutInflater.from(context).inflate(R.layout.row_layout_home, parent, false);

        // returns a view holder with the view as a parameter
        return new HomeViewHolder(theView);
    }

    @Override
    public void onBindViewHolder(@NonNull HomeViewHolder holder, final int position) {

        //display genre type
        holder.textViewCategory.setText(data.get(position).getGenre());

        //bind the inner recycler view to an adapter

        horizontalAdapter = new MovieAdapter(data.get(position).getList(), context);
        holder.recyclerViewHorizontal.setAdapter(horizontalAdapter);

    }


    @Override
    public int getItemCount() {
        returns size of the list
        return data.size();

    }

}
Second Adapter - MovieAdapter.java
public class MovieAdapter extends RecyclerView.Adapter<MovieAdapter.MovieViewHolder> {

...

    @NonNull
    @Override
    public MovieViewHolder onCreateViewHolder(@NonNull ViewGroup parent, int viewType) {

        return new MovieViewHolder(LayoutInflater.from(context).inflate(R.layout.row_layout_movie, parent, false));
    }

    @Override
    public void onBindViewHolder(@NonNull final MovieViewHolder holder, final int position) {

        Movie movie = movieList.get(position);

        holder.textViewTitle.setText(movie.getName());
        holder.textViewGenre.setText(movie.getGenre());

// load images using picasso
        Picasso.with(context).
                load(context.getResources().getString(R.string.image_url) + movie.getPoster())
                .into(holder.imageViewMovie);


    }

    @Override
    public int getItemCount() {

        return movieList.size();

    }


    public class MovieViewHolder extends RecyclerView.ViewHolder {

        private TextView textViewTitle;
        private TextView textViewGenre;
        private ImageView imageViewMovie;


        public MovieViewHolder(View itemView) {
            super(itemView);
            textViewTitle = itemView.findViewById(R.id.tv_title);
            textViewGenre = itemView.findViewById(R.id.tv_genre);
            imageViewMovie = itemView.findViewById(R.id.image_view_movie);

        }


    }
From these two adapters, we see that MovieAdapter is part of the HomeAdapter. The HomeAdapter binds the inner recycler view to the MovieAdapter and in turn the MovieAdapter populates the inner recycler view with the data it received from the HomeAdapter.
STEP 6 : TYING ALL TOGETHER
We will finish up by making a network call with retrofit to the server in the main activity. The response from the request will be used to update the UI via the adapters. The code block below shows what happens in the main activity.
MainActivity.java
public class MainActivity extends AppCompatActivity {
...
    @Override
    protected void onCreate(Bundle savedInstanceState) {
        super.onCreate(savedInstanceState);
        setContentView(R.layout.activity_main);

        //initialize the list
        dataList = new ArrayList<>();

        // initialize the home adapter passing the list and the context
        adapter = new HomeAdapter(dataList, this);

        // defining the layout manager for the recycler view
        layoutManager = new LinearLayoutManager(this, LinearLayoutManager.VERTICAL, false);

        //get reference to android views
        recyclerView = findViewById(R.id.rv_main);
        progressBar = findViewById(R.id.pb_home);

        //set up main recvycler view
        recyclerView.setHasFixedSize(true);
        recyclerView.setLayoutManager(layoutManager);
        recyclerView.setAdapter(adapter);


        // make network call
        Call<HomeBodyResponse> responseCall = RetrofitSingleton.getInstance().getApi().getMovieByCategory();

        responseCall.enqueue(new Callback<HomeBodyResponse>() {
            @Override
            public void onResponse(Call<HomeBodyResponse> call, Response<HomeBodyResponse> response) {
                progressBar.setVisibility(View.GONE);

                //load list with response
                for (Data data : response.body().getData().getData()) {

                    dataList.add(data);
                }

                //update ui
                adapter.notifyDataSetChanged();

            }

            @Override
            public void onFailure(Call<HomeBodyResponse> call, Throwable t) {

                progressBar.setVisibility(View.GONE);

            }
        });
    }
}
RetrofitSingleton.getInstance().getApi().getMovieByCategory(); : this statement gets the retrofit object from the singleton which in turns calls the getMovieByCategory of the Api client returning a Call object of type HomeBodyResponse.
With the Call object, we call enqueue. Enqueue Asynchronously send the request and notify callback of its response. With the response, we load the data into the adapter and update the UI.
Our UI should look like the image below after following these steps
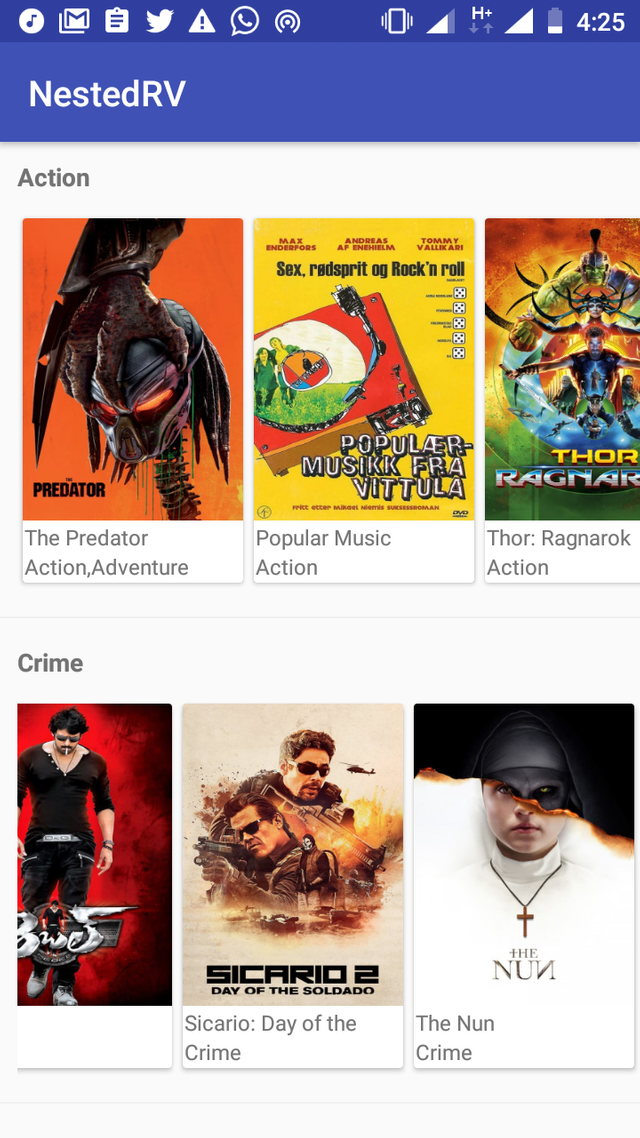
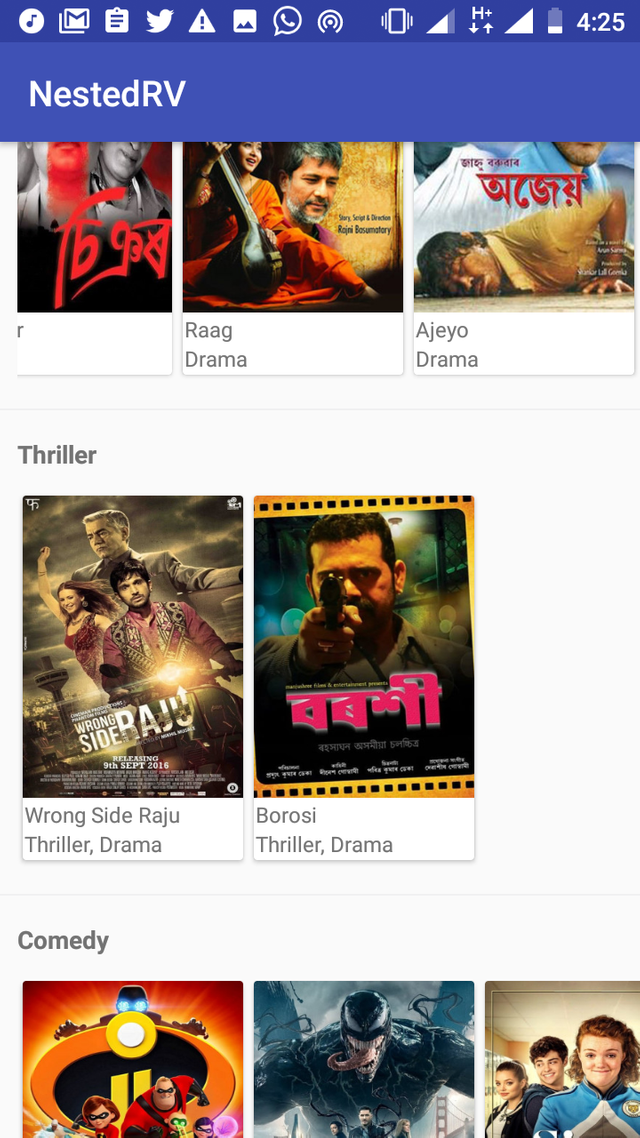
A simple demo of the app
Proof of Work The complete source code can be found on gitHub https://github.com/enyason/NestedRV
Thank you for your contribution @ideba.
After analyzing your tutorial we suggest the following points below:
We suggest you detail your tutorial in explanation of the code.
It would be interesting to use more theory in your tutorial. Explain for example what Recyclerview is.
Enter the indented code. The blank lines in almost every line of code doesn't look good and makes the code disorganized.
We are waiting for more of your tutorials. Good Job!
Your contribution has been evaluated according to Utopian policies and guidelines, as well as a predefined set of questions pertaining to the category.
To view those questions and the relevant answers related to your post, click here.
Need help? Chat with us on Discord.
[utopian-moderator]
Thank you for your review, @portugalcoin! Keep up the good work!
Hey, @ideba!
Thanks for contributing on Utopian.
We’re already looking forward to your next contribution!
Get higher incentives and support Utopian.io!
Simply set @utopian.pay as a 5% (or higher) payout beneficiary on your contribution post (via SteemPlus or Steeditor).
Want to chat? Join us on Discord https://discord.gg/h52nFrV.
Vote for Utopian Witness!
Hi, @ideba!
You just got a 0.57% upvote from SteemPlus!
To get higher upvotes, earn more SteemPlus Points (SPP). On your Steemit wallet, check your SPP balance and click on "How to earn SPP?" to find out all the ways to earn.
If you're not using SteemPlus yet, please check our last posts in here to see the many ways in which SteemPlus can improve your Steem experience on Steemit and Busy.
Congratulations @ideba! You have completed the following achievement on the Steem blockchain and have been rewarded with new badge(s) :
Click here to view your Board
If you no longer want to receive notifications, reply to this comment with the word
STOPHi @ideba!
Your post was upvoted by @steem-ua, new Steem dApp, using UserAuthority for algorithmic post curation!
Your post is eligible for our upvote, thanks to our collaboration with @utopian-io!
Feel free to join our @steem-ua Discord server