DS3232 Real Time Clock Module Setup, Arduino Library Use Shown With an Example Project - Tutorial
Introduction
This is a tutorial of an open source Arduino library, which lets you turn your Arduino to a “Clock”, with a Maxim Integrated DS3232 Real Time Clock module. I will show you how to install the library to Arduino IDE and make an example project with the library, throughout this tutorial while giving information digital clocks and their working principle.
What Will I Learn?
In this tutorial you will learn:
- General knowledge about digital clocks.
- How to install DS3232RTC library to Arduino IDE.
- How to use DS3232RTC library and how to use It’s functions.
- How to apply Arduino real time clock project using the library functions.
Requirements
This tutorials requirements are:
- Arduino UNO or equivalent microprocessor.
- Arduino IDE (Download here)
- DS3232RTC Arduino library (Download here
- Maxim Integrated DS3232 or DS3231 Real-Time Clock module, Breadboard, 4 Jumper cables.
Difficulty
This tutorials difficulty is:
- Basic
Tutorial Contents
What is a Digital Clock and How It Works
A digital clock is a clock consisting of a power supply, a circuit consisting of an crystal oscillator and a display to show the time, which shows the time digitally unlike traditional analog clocks. First digital clock is made by an Austrian engineer named Josef Pallweber using a jump hour mechanism. Digital clocks have the same fundamental working principle as the analog clocks. They need a source of power to run the clock, which is the power supply, a battery or AC power, a display which can be a LED, LCD display or a seven segment display, and a time base that keeps track of the time which is the time circuit consisting of an crystal oscillator and a counter. The crystal oscillator creates a steady 60 or 50 Hertz signal. Then created signal is divided down using a counter circuit in order to create a binary number. Then this number is converted to the time format desired (12 hour or 24 hour format) and sent to the display. Digital clocks are used in nearly everywhere in our lives, such as ovens, cars, phones, televisions, computers, radios, industrial timers.
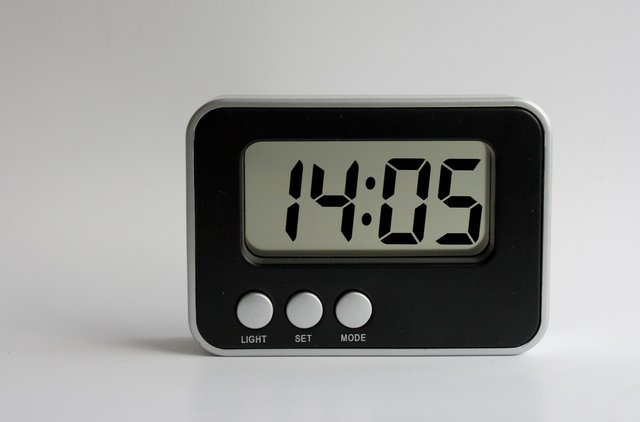
A digital clock. Image Source (Royalty free)
How to Install DS3232RTC Library to Arduino IDE
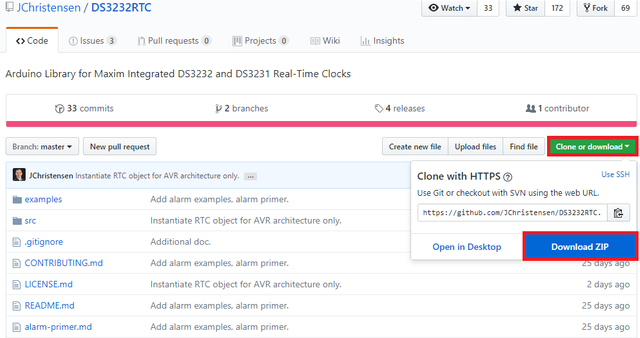
1. Download the library from https://github.com/JChristensen/DS3232RTC.
2. Open Arduino IDE. Then go to and select Sketch->Include Library->Add .ZIP Library.
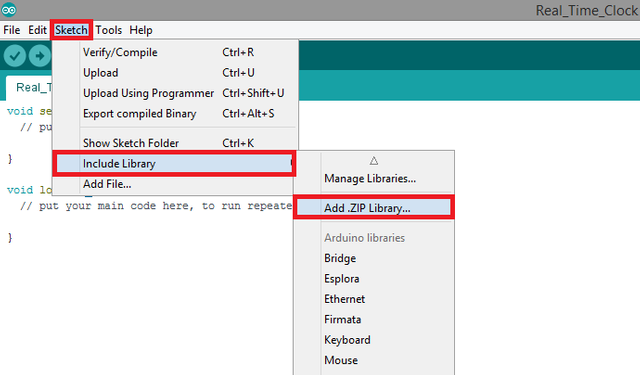
3. Choose DS3232RTC-master.zip file and click to Open.
An Example Project Using DS3232RTC Arduino Library
I'll show you step by step how to use the DS3232RTC Arduino library with a simple example. In this example project, we will make a real time digital clock with an Arduino microcontroller, and a Maxim Integrated DS3232 or DS3231 Real-Time Clock module. In order to make a real time digital clock with an Arduino, first we’ll have to get the time from the real time clock module. Then we need to print the time in certain intervals to the serial monitor screen. Connections for DS3232 real time clock module to Arduino is shown below.
If you use this library in your other projects please tell in the comments.
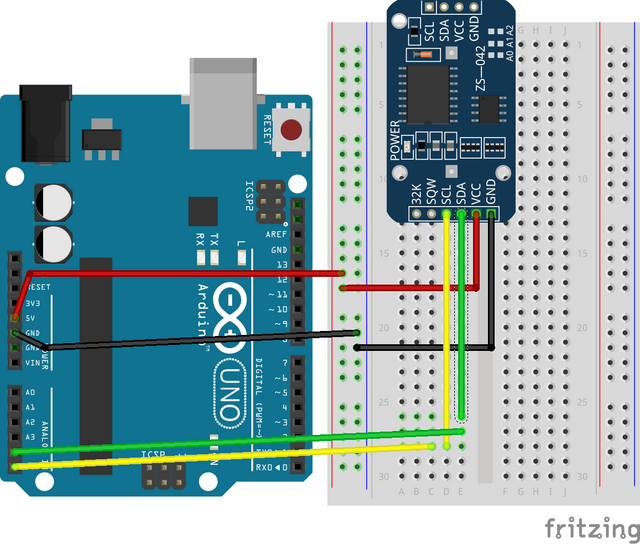
Connection diagram for DS3232 real time clock module to Arduino. Made with Fritzing.
1. Open a new sketch and save it as "Real_Time_Clock”.
2. To add our library to our sketch, type #include <DS3232RTC.h> at the beginning of the code.

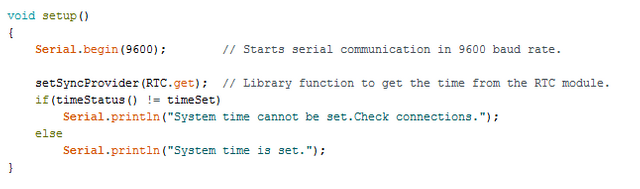
3. First we need to add the setup commands. In the void setup() function, add the code that starts serial communication in 9600 baud rate. Then type the library function to get the time from the RTC module. Add an if statement afterwards, which will trigger if the Arduino cannot sync up with the real time clock module and prints the situation to serial monitor. Add an else statement and make it print that the system time is set.
4. After setup is done, we need to create a function that returns the time and prints the time to serial monitor. Name the void returning function “displayTime”. Add the codes below which prints the time to serial monitor.

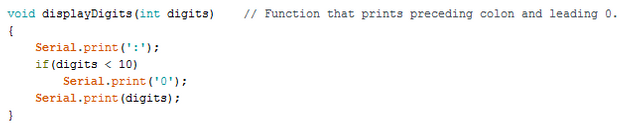
5. Then we need to add the digit function that that prints preceding colon and leading 0, as used in the “displayTime” function. Add the codes below.
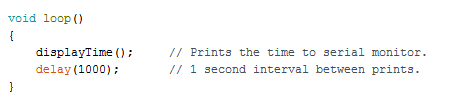
6. In the void loop() function, add the function that we created in order to print the real world time to serial monitor. Then add an 1 second interval between the time printings using delay command. You can change the interval as desired.
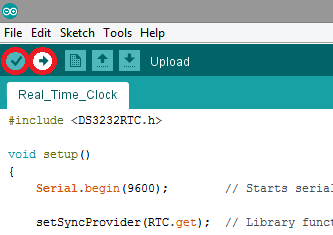
7. Click “Verify” and then “Upload” in order to compile and execute your codes. You should get a readings screen like this. Make sure your COM port and board setting is set right.
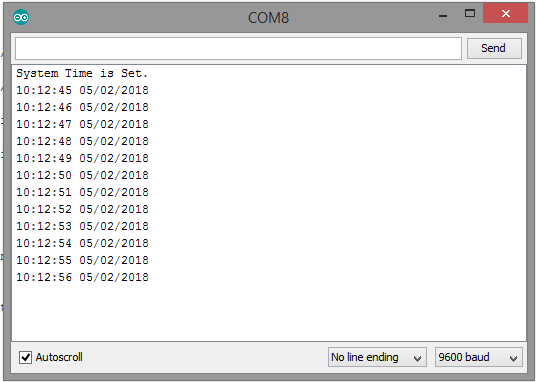
Serial monitor screen showing real time.
Conclusion
In this tutorial I’ve shown how to install “DS3232RTC” Arduino library, written by GitHub user “JChristensen” to Arduino IDE, showing how to use the library functions with an example, while giving information about what digital clocks are and their working principle.
I hope that you enjoyed this tutorial and the information that I’ve given. Thank you for reading.
If you want more information about the library and the source use the link below.
Github: https://github.com/JChristensen/DS3232RTC
Code
#include <DS3232RTC.h>

void setup()
{
    Serial.begin(9600);        // Starts serial communication in 9600 baud rate.

    setSyncProvider(RTC.get);  // Library function to get the time from the RTC module.
    if(timeStatus() != timeSet)
        Serial.println("System Time Cannot be Set. Check Connections.");
    else
        Serial.println("System Time is Set.");
}

void loop()
{
    displayTime();     // Prints the time to serial monitor.
    delay(1000);       // 1 second interval between prints.
}

void displayTime()  // Function that prints the time to serial monitor.
{
    Serial.print(hour());
    displayDigits(minute());
    displayDigits(second());
    Serial.print('/');
    Serial.print(day());
    Serial.print('/');
    Serial.print(month());
    Serial.print('/');
    Serial.print(year());
    Serial.println();
}

void displayDigits(int digits)    // Function that prints preceding colon and leading 0.
{
    Serial.print(':');
    if(digits < 10)
        Serial.print('0');
    Serial.print(digits);
}
Posted on Utopian.io - Rewarding Open Source Contributors
@drencolha, Approve is not my ability, but I can upvote you.
It's a powerfull..
Thank you for the contribution. It has been approved.
You can contact us on Discord.
[utopian-moderator]
Hey @drencolha I am @utopian-io. I have just upvoted you!
Achievements
Suggestions
Get Noticed!
Community-Driven Witness!
I am the first and only Steem Community-Driven Witness. Participate on Discord. Lets GROW TOGETHER!
Up-vote this comment to grow my power and help Open Source contributions like this one. Want to chat? Join me on Discord https://discord.gg/Pc8HG9x