[Tutorial]: Running ReactOS inside Windows on your Computer
I've been translating ReactOS (thanks to @utopian-io and @davinci.witness for this) in Greek language for some time now, and I thought I should give you a tutorial on how to run and test this Operating System yourselves!
Repositories
https://github.com/qemu/qemu
https://github.com/reactos/reactos
Introduction & Some Questions you might have
What is ReactOS? [0][1]
ReactOS is a free and open source operating system written from scratch. It's design is based on Windows in the same way Linux is based on Unix, however ReactOS is not linux. ReactOS looks and feels like Windows, is able to your run Windows software and your Windows drivers, and is familiar for Windows users.
Development began in 1996, as a Windows 95 clone project, and was continued as ReactOS in 1998, with the incremental addition of features of later Windows versions.
As of July 2018, ReactOS is considered alpha software, feature-incomplete but with many Windows applications already working (e.g. Adobe Reader 6.0, OpenOffice, etc) and therefore recommended by the developers only for evaluation and testing purposes.
ReactOS is released under GNU GPLv2 Open Source license, with some parts released under LGPL and BSD licenses.
What is QEMU?[2][3]
QEMU is a generic, free and open source machine emulator and virtualizer.
QEMU is a hosted virtual machine monitor: it emulates the machine's processor through dynamic binary translation and provides a set of different hardware and device models for the machine, enabling it to run a variety of guest operating systems. It also can be used with KVM to run virtual machines at near-native speed (by taking advantage of hardware extensions such as IntelVT). QEMU can also do emulation for user-level processes, allowing applications compiled for one architecture to run on another.
Why not a different solution, such as VMWare or Oracle's VirtualBox?
QEMU, apart from being free and open source, is also lightweight. It means, we don't have to install a hundred extra components with it, to our computer, and it won't mess up with any settings, as (for example) VirtualBox would do.
It is not as user-friendly as the other solutions, but it is free, unbloated, fast and it does the job sufficiently enough to be used as a virtualisation method for servers. Why not use it to give an Open Source Operating System a try?
Why not install ReactOS directly to our computer?
You could do that, of course. However, you'll have to back up your data first (a thing you should do regularly though), format your disk, install ReactOS and if it doesn't fit your needs, then re-install Windows.
I got tired of the work involved just by thinking about it!
System Requirements [4]
500MB of FAT32-formatted Disk Space
256MB of RAM (minimum is 64MB, but we want to play with it!)
A keyboard, a mouse and our virtual machine!
QEMU requires an extra 600mb to get installed to our computer, and we also need some 200MB to download the files. So, make sure you have at least 2-3GB of empty space before starting this tutorial.
Download our required software
Disclaimer
While all the links and downloads have been tested for viruses, I accept no responsibility if anything happens to your computer. Sites can get infected, so do your own virus check before running anything you download! I guarantee that the links were clean while writing this post.
Downloading QEMU
QEMU for Windows is provided by Stefan Weil. You can either download a version you want by clicking here, or click this link to directly download the latest (at the time of writing this) version.
When the file downloads, just install QEMU as usual (run the executable, click Next > Read the License Agreement > Agree with it > Next > Install > Wait for the installation to complete > Finish)
It shouldn't take more than 2-3 minutes to install.
Downloading ReactOS
Open up the ReactOS download page and click Download BootCD. Make a donation if you feel like it, or click "No, thanks. Let's proceed with the download" if you are cheap. You'll be redirected to ReactOS'es Sourceforge page, where your download will start in a couple of seconds.
The current version of ReactOS, as of writing this, is v0.4.9.
Preparing our Computer for the installation [5]
No, we don't have to do a huge-ass backup of our files etc. We just need to create a virtual drive. Open up cmd and go to a folder you want to have your ReactOS installation. For this tutorial, I'll be using D:\ReactOS as a base folder. Here are the cmd command:
mkdir D:\ReactOS
Or, you can do it as usual from Windows Explorer. Unzip the ReactOS ISO from the zip file we downloaded, and move it to our D:\ReactOS folder.
After that, locate your QEMU installation. If you are using 64-bit flavor of Windows, it will be in C:\Program Files (x86)\qemu. If you are using 32-bit, it will be in C:\Program Files\qemu. I'm using 64-bit Windows, so adjust everything accordingly.
Now we have to run a few CMD commands. I will be explaining exactly what each command is, so you'll know what you are doing (even if you are a complete noob):
cd "C:\Program Files (x86)\qemu" - Navigate to the QEMU installation folder (if you are running 32-bit Windows, change the path inside the quotes accordingly)
qemu-img create D:\ReactOS\ReactOS.img 2000M - Creates a 2000MB virtual drive image, where we will install our ReactOS copy.
The second command might take a couple of seconds to complete, as it will create and format a virtual disk inside that image file. You should get something like this as a reply:
Formatting 'D:\ReactOS\ReactOS.img', fmt=raw size=2097152000
and when it finishes, you will be able to enter a command again. This time, we will start our Virtual Machine with QEMU.
Starting the installation of ReactOS [5] ^1
qemu-system-i386 -L D:\ReactOS\ -m 512 -cdrom D:\ReactOS\ReactOS-X.X.X.iso -hda D:\ReactOS\ReactOS.img -boot d -rtc base=localtime -serial file:D:\ReactOS\ReactOS.log
NOTICE! ReactOS-X.X.X.iso is a generic filename, that will change in each version that gets released. Make sure you change this part accordingly!
Some quick explanation about the command we just used:
-L sets the directory we'll use for the VM's BIOS
-m sets the amount of RAM we will use, in Megabytes
-cdrom sets the image we will mount as a CD (an ISO disk with ReactOS in this tutorial)
-hda sets the virtual disk we will use to save our data
-boot d will force the VM to boot from the CD
-rtc base=localtime sets the time of our VM to the local computer's time
-serial file:.... sets the file our serial console's log will be saved to (useful for troubleshooting)
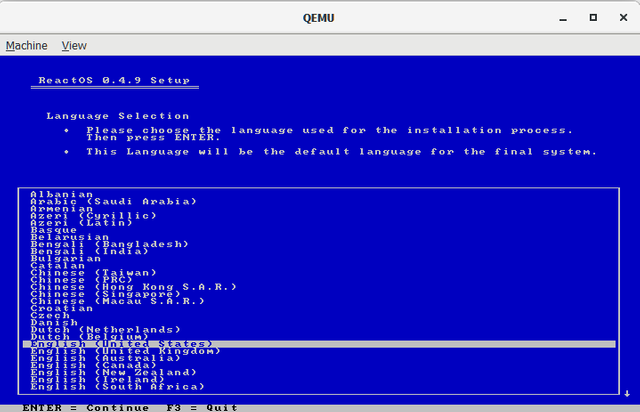
A QEMU window will open up and you'll get prompted to choose your language. The pre-selected is English (United States), and that's what we'll use for this tutorial. Press the ENTER key when you are ready!
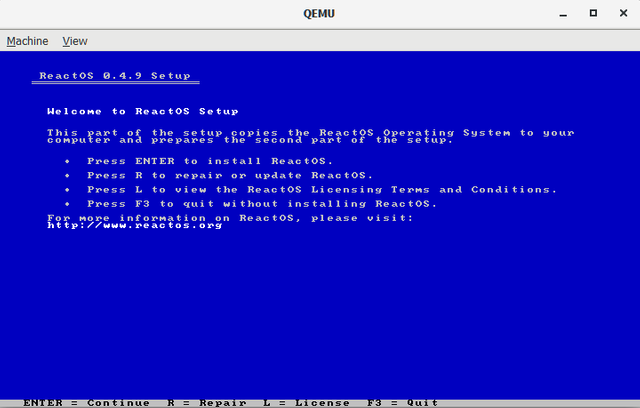
The next screen will ask you to choose what type of installation you'll want to do! We want to install ReactOS, so just press the ENTER key. We'll also get a warning that ReactOS is in development mode. Just press ENTER again.
Next up, we'll be asked for device settings. I left the preselected values, and just pressed ENTER on "Accept these device settings"
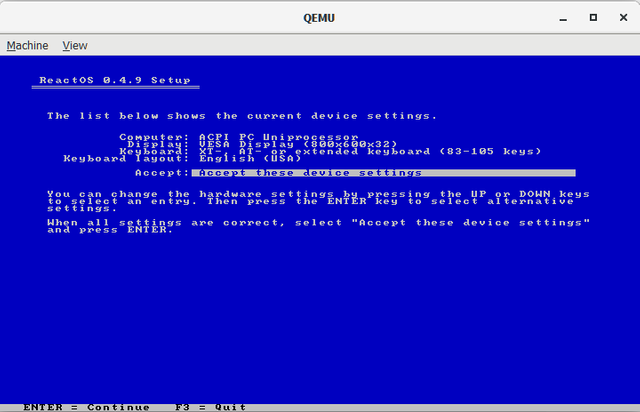
If you want to change a setting, use the up & down arrow keys to navigate, and the ENTER key to confirm your selection. In the next screen, we will be asked to choose a partition to install ReactOS on.
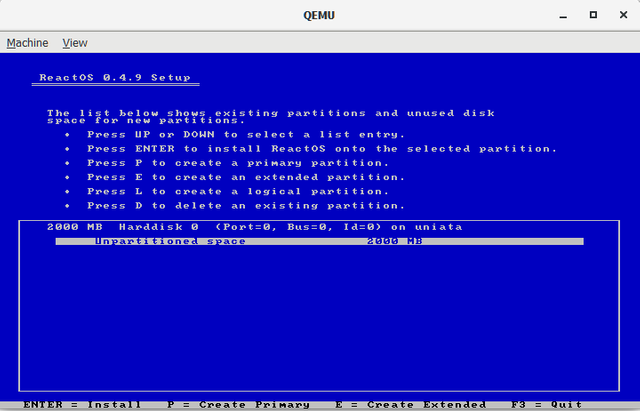
"But we don't have any partitions," I hear you say, "just an 'Unpartitioned space' entry". Yes, that's true, but just press "Enter", and choose "Format partition as FAT file system (quick format)". We will get notified that ReactOS will now format the selected partition. Just press ENTER.
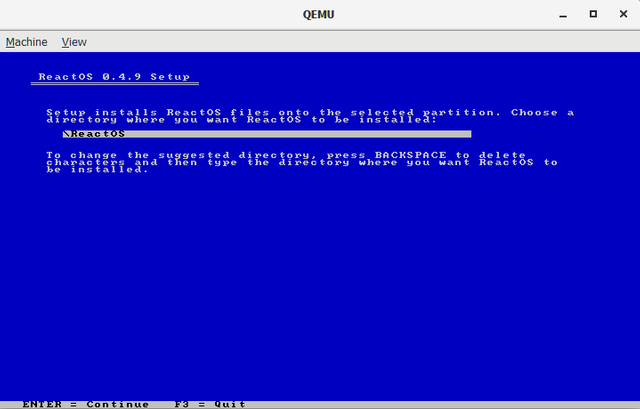
In the next screen we will be asked for the folder were ReactOS will be installed. Keep it as-is, and press ENTER.
This will take a while, as it will copy all the files of the Operating System to our virtual drive. It shouldn't take more than 5 minutes in an average computer.

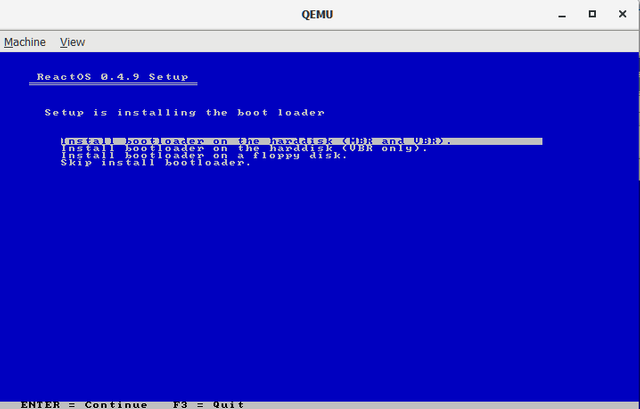
Then it will update & save the system configuration. We will also be asked where to save the bootloader. Choose "Install bootloader on the harddisk (MBR and VBR)" and press ENTER:
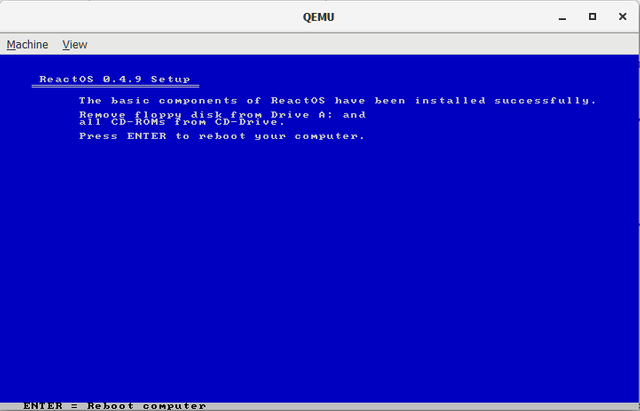
Our basic system installation has just finished. We are asked to remove the CD and reboot our computer by pressing ENTER. Just press ENTER, as there is no CD to remove ;)
Post-reboot steps
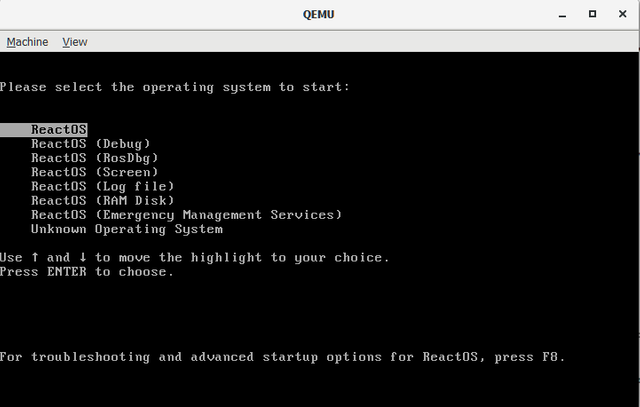
At the first reboot of our VM, we will see the following screen. Just press ENTER (or wait it out) to boot ReactOS
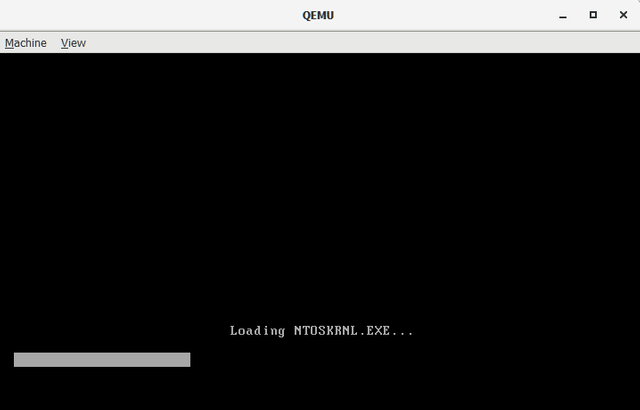
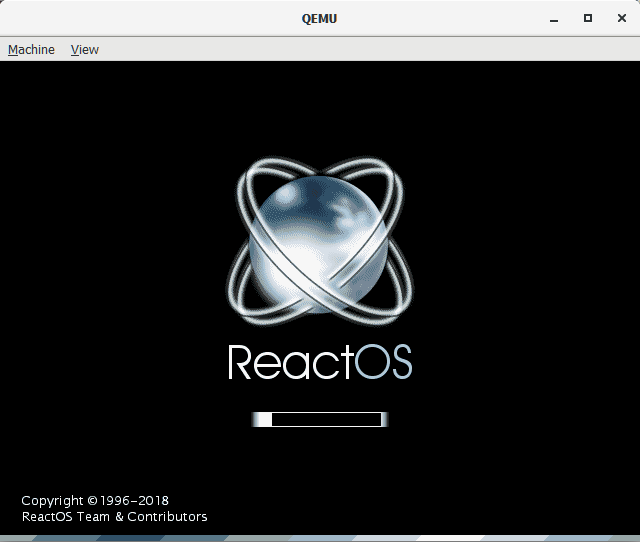
and the ReactOS GUI will start booting for the first time!
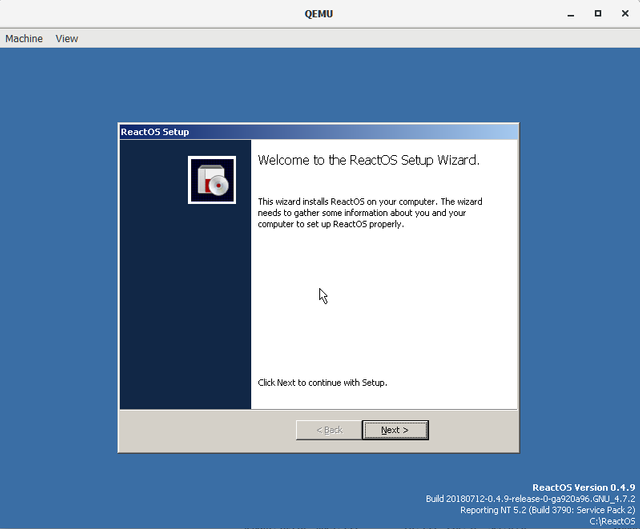
A few seconds later, it will do a first-time configuration, and the graphical installer will open up:
from now on, I will limit the screenshots to "as needed", as the whole thing is just like installing a program in Windows and the post has already gotten ridiculously huge
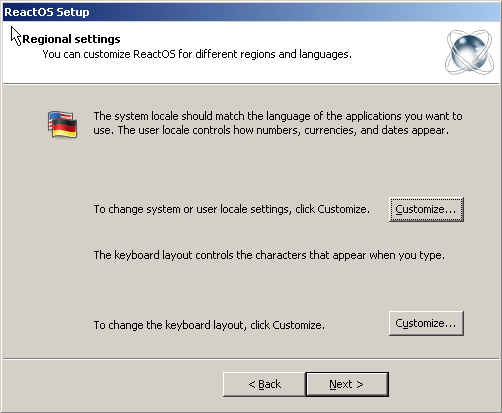
Just press "Next", read the Acknowledgement page and press "Next". On the next screen we will be asked if we want to change our locale & keyboard settings. If you want to do so, press "Customize..." on the respective button:
In the next screen we are asked for our Name and our organisation. Fill them up, press next and then you can set a name for your computer (or leave the pre-filled one), set a password for the Administrator account (this is optional).
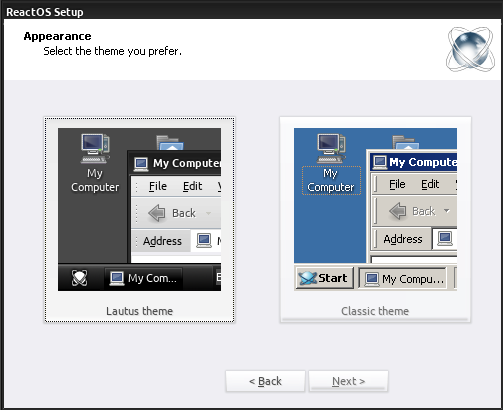
Press next, to adjust the Time/Date and Timezone of your computer. When you press Next for another time, you will be asked to choose a theme. I went with Lautus (the Dark one). When I clicked on it, everything took a turn for the Dark side:
In the next screen, we have a chance to use the Typical network settings, or customise them. Go with typical. We will be asked, in the next screen, if we are going to be in a domain. We won't be, so leave "No, this computer will be part of a workgroup" and press Next.
The setup will do some final hocus-pocus, and we will be asked to reboot again:
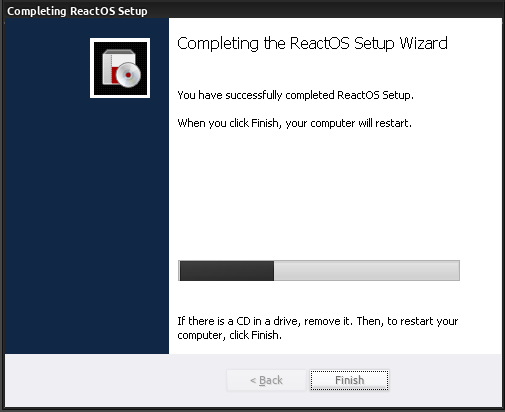
Our installation is now complete, and you will notice that we don't have internet in our VM! We will take care of this, in the next part, as this tutorial is already too huge! I plan to release the next part later this week...
Sources List:
[0] Wikipedia/ReactOS
[1] ReactOS Official Website
[2] Wikipedia/QEMU
[3] QEMU Official Website
[4] ReactOS Official Wiki
[5] ReactOS Official Wiki ^1
^1 The instructions on the wiki are outdated, however they are good to be used as a base 😉
Thank you for your contribution.
After reviewing your tutorial we suggest the following:
The utopian tutorials are specifically to be used in a technical way to help the open source community learn new content.
Avoid installation steps which are already well documented such as in here.
Try to come up with new and more useful ways to utilize ReactOS.
Even with the above points your tutorial is very complete and very well explained.
We suggest that the next tutorial be more technical.
Thank you for your good work.
Your contribution has been evaluated according to Utopian policies and guidelines, as well as a predefined set of questions pertaining to the category.
To view those questions and the relevant answers related to your post, click here.
Need help? Write a ticket on https://support.utopian.io/.
Chat with us on Discord.
[utopian-moderator]
Thank you for your review. The installation part was minor, compared to the preparation steps, which were completely explained and with examples. It might seem huge because of the screenshots.
The whole point of the contribution was the preparation steps, the installation part however was a bonus for the curious ones who won't give it a try to install it themselves.
Again, thank your kind words :)
Thank you for your review, @portugalcoin!
So far this week you've reviewed 10 contributions. Keep up the good work!
I have bunch of points for your tutorial.
Overall the post is pretty good, and there is already a mod comment so i recommend go for it to understand more technicalities about your post and way of presenting tutorial :)
You could dual-boot Windows/Linux with ReactOS. However, as it is still in Alpha (meaning it lacks a lot of features, may not be stable etc) I would recommend against using it on a daily basis, and that's why I wrote this tutorial ;)
Thank you for your feedback!
Hey @genievot
Here's a tip for your valuable feedback! @Utopian-io loves and incentivises informative comments.
Contributing on Utopian
Learn how to contribute on our website.
Want to chat? Join us on Discord https://discord.gg/h52nFrV.
Vote for Utopian Witness!
Oh ho ho ho! I will definitely be checking out QEMU! I have been slogging with Virtualbox when I needed to, but it was never a pleasant experience.
I love the idea of an opensource windows-esque OS! Of course open source is beautiful, but the times I have tried to go full linux, usually my wife blames me for making the computer unuseable. A middle ground product is fantastic :)
This tutorial seems very complete! A real boon for the project to have such a complete tutorial; next time I want to see what you can do with it c;
It might take a while before it is ready for every day use, as not all Windows software is running correctly (or at all) right now. However, I hope that one day it will be this. A drop-in replacement for Windows that is Open Source ;)
Linux is great, only if you can/want to change your way of working your computer.
Thank you for your comment :)
Yeah, linux almost seemed life a lifestyle change, but I did learn enough useful bash that I can get around on linux servers.
I seems that open source development would have to outpace the paid development to 'catch up'; windows has nearly daily updates to its windows 10 OS, or at least it seems that way sometimes.
Is there a middle ground that could be reached for running windows software?
Windows' Updates will be issued in a more distant manner from now on (at least that's what Microsoft announced).
Linux is a complete lifestyle change, in a sense it is like leaving a company that you were employed by, to form your own!
Depends on what software you run, WINE may suit you, but it won't work with all software. Care to share some software you use to help you see if it can suit you?
Hey @ecoinstant
Here's a tip for your valuable feedback! @Utopian-io loves and incentivises informative comments.
Contributing on Utopian
Learn how to contribute on our website.
Want to chat? Join us on Discord https://discord.gg/h52nFrV.
Vote for Utopian Witness!
Congratulations @dimitrisp! You have completed the following achievement on the Steem blockchain and have been rewarded with new badge(s) :
Click on the badge to view your Board of Honor.
If you no longer want to receive notifications, reply to this comment with the word
STOPDo not miss the last post from @steemitboard:
Hi @dimitrisp!
Your post was upvoted by @steem-ua, new Steem dApp, using UserAuthority for algorithmic post curation!
Your post is eligible for our upvote, thanks to our collaboration with @utopian-io!
Feel free to join our @steem-ua Discord server
Hey, @dimitrisp!
Thanks for contributing on Utopian.
We’re already looking forward to your next contribution!
Get higher incentives and support Utopian.io!
Simply set @utopian.pay as a 5% (or higher) payout beneficiary on your contribution post (via SteemPlus or Steeditor).
Want to chat? Join us on Discord https://discord.gg/h52nFrV.
Vote for Utopian Witness!
Congratulationhttps://steemit.com/@dimitrisp for your [Tutorial]: Running ReactOS inside Windows on your Computer is very nice