SUBRION, powerful cms that you should try...Why choose Subrion and how do we start? #1
Repository
https://github.com/intelliants/subrion
Introduction
The objective that I pursue in this publication is to let you know this content manager for websites, subrion, totally open source, powerful and complete, which very few know but is quite efficient.
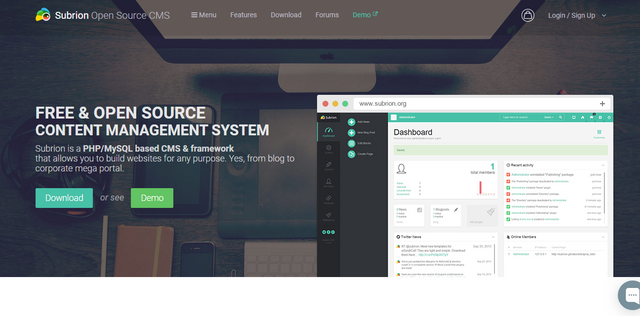
Subrion is a content management system for websites written in PHP open source that has always aimed to be as complete as possible in terms of functionality, to try to make life easier for web programmers, is open source easy to use built in the LAMP or LEMP stack that allows you to create websites for any purpose with a few clicks.
The Subrion CMS has an aesthetically pleasing and intuitive working interface that is easy to see. The click buttons offer visual comments and when clicking on cells, trying to facilitate the task, columns and rows also offer visual comments.
By using "Blocks" within the CMS, work is minimized for the user when a new section must be entered on the site.
Instead of examining the files and copying and pasting code/text, the user can simply define a "Block" on the "Manage Blocks" page and specify where exactly the "Block" should appear on the site, thus improving the programming stages and reducing the work by making it more organized.
The latest version of Subrion also features a new iaBootstrap template frame, which is based on Twitter Bootstrap 2. The framework simplifies the development of new templates for Subrion CMS, providing all templates with a responsive nature.
Subrion has used a template engine based on Smarty, which is extremely easy to use, and allows the separation of logic and presentation software.
In summary we can list a number of features that make Subrion an excellent choice when making a website and managing it effectively.
Why choose Subrion and how do we start?
For every web developer is evident the benefit that we bring CMS, if in doubt is fundamental for a better performance making us the work easier, when you use a cms on your website you have total control over the design and web content.
On many occasions it is true that you need to know a little about the platform you are using and that if you do not know what you're doing you can make a mess with your website, that's why I have dedicated myself to perform a certain amount of tests to Subrion before being able to talk a little about it and know better its operation and performance.
One of the outstanding aspects of the use of CMS and in articulating of subrion is that when using a Subrion in your web page facilitates you to have renewed content in the measure in which you have a very friendly panel of administration with which you can make yourself quickly and a system of entries of articles or news very easy to use, you will be able to write with the frequency that you need, accompanying your articles of videos, photographies, infographics, etc.
You can have all the users you want and also with different types of roles that will be associated with different permissions to limit access or options for each user.
One of the biggest advantages of using Subrion on your website is that if you need some kind of functionality, you don't have to program it (almost always). Just look for what we need and install it in our CMS. This can be applied to a multitude of things. For example, dissemination through social networks, integration and creation of contact forms, automatic image galleries and much, much more.
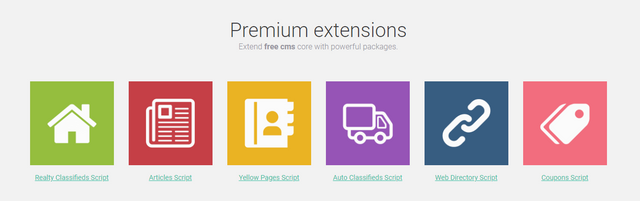
When you have many less things to program, when a CMS comes already with a more than interesting number of functionalities, in the price we also notice it, it is about saving time and in this time is money, in addition, subrion presents us a series of quite efficient complements whose operation is simple but fulfills the task, in the site wen of Subrion you can see some of these that offer for free, as the one to create a page of classifieds, directory wen, pages amrillas among others.
In my particular case I have used it to create a simple news site to prove that it works and is very simple, requires a little knowledge at the time of installing and configuring, but once this is done, is very easy to use.
Below I will briefly explain how to install Subrion, in my case I normally use ubuntu, but you can use any operating system where you can install the Apache2 server, as this is necessary.
Step 1: Install Apache2 HTTP Server On Ubuntu
The Apache2 HTTP server is the most popular web server in use ... so install it, as Subrion needs it.
To install Apache2 HTTP on the Ubuntu server, run the commands below ...
sudo apt update
sudo apt install apache2
After installing Apache2, the following commands can be used to stop, start, and enable the Apache2 service so that it always starts with the start of the server.
sudo systemctl stop apache2.service
sudo systemctl start apache2.service
sudo systemctl enable apache2.service>
.
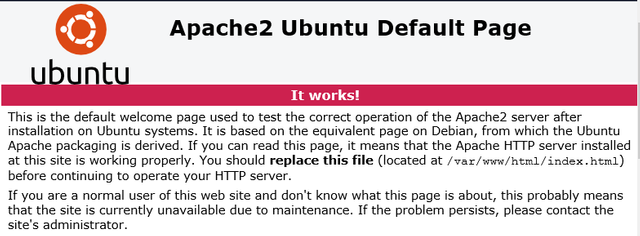
To test Apache2's configuration, open your browser and look for the server's host name or IP address, and you should see Apache2's default test page as shown below. When you see that, Apache2 will be working as expected.
http: // localhost
apache2 ubuntu install
Step 2
The MariaDB database server is a great place to start when looking for open source database servers to use with Magento ... To install MariaDB, run the commands below ...
sudo apt-get install mariadb-server mariadb-client
After installing MariaDB, the following commands can be used to stop, start and enable the MariaDB service so that it always starts when the server starts.
Run these on Ubuntu 16.04 LTS
sudo systemctl stop mysql.service
sudo systemctl start mysql.service
sudo systemctl enable mysql.service
Run these on Ubuntu 17.10 y 18.04 LTS
sudo systemctl stop mariadb.service
sudo systemctl start mariadb.service
sudo systemctl enable mariadb.service
After that, run the commands below to secure the MariaDB server by creating a root password and not allowing remote access to the root.
sudo mysql_secure_installation
When prompted, answer the questions below following the guide.
Enter the current password for the root (enter for none): Simply press Enter
Set the root password? S / n]: S
New password: enter the password
Re-enter the new password: Repeat the password
Delete anonymous users? S / n]: S
Disable root login remotely? S / n]: S
Delete the test database and access it? S / n]: S
Reload privilege tables now? S / n]: S
Restart MariaDB server
To check if MariaDB is installed, type the following commands to log on to the MariaDB server
sudo mysql -u root -p
Then type the password you created above to login ... if successful, you should see the welcome message from MariaDB
mariadb welcome
Step 3: Install PHP 7.2 and Related Modules
PHP 7.2 may not be available in Ubuntu's default repositories ... to install it, you must obtain it from third-party repositories.
Run the following commands to add the third party repository below to upgrade to PHP 7.2
sudo apt-get install software-properties-common
sudo add-apt-repository ppa: ondrej / php
Then upgrade and update to PHP 7.2
sudo apt update
Then run the commands below to install PHP 7.2 and related modules.
sudo apt install php7.2 libapache2-mod-php7.2 php7.2-common php7.2-sqlite php7.2-curl php7.2-intl php7.2-mbstring php7.2-xmlrpc php7.2-mysql php7.2-gd php7.2-xml php7.2-cli php7.2-zip
After installing PHP 7.2, run the following commands to open the default PHP configuration file for Apache2 ..
sudo nano / etc / php / 7.2 /apache2/php.ini
Then make the changes to the following lines below in the file and save them. The following value is an excellent setting to apply in your environments.
file_uploads = starter
allow_url_fopen = On
short_open_tag = starter
memory_limit = 256M
upload_max_filesize = 100M
max_execution_time = 360
date.timezone = America / Chicago
After making the previous change, save the file and close.
Step 4: Restart Apache2
Step 5: Create Magento Database
Now that you have installed all the necessary packages for Subrion CMS to work, continue below to start configuring the servers. First run the commands below to create a blank Magento database.
To log in to the MariaDB database server, run the commands below.
sudo mysql -u root -p
Then create a database called subrion
CREATE DATABASE subrion;
Create a database user named subrionuser with new password
CREATE USER 'subrionuser'@'localhost' IDENTIFIED BY 'new_password_here';
Then give the user full access to the database.
GRANT ALL ON subrion.* TO 'subrionuser'@'localhost' IDENTIFIED BY 'user_password_here' WITH GRANT OPTION;
Finally, save your changes and exit.
FLUSH PRIVILEGES;
EXIT;
Step 6: Download and Install Subrion
Execute the following commands to download the content of Subrion ...
cd / tmp && wget https://tools.subrion.org/get/latest.zip
sudo mkdir / var / www / html / subrion
sudo decompress latest.zip -d / var / www / html / subrion
Then run the following commands to change the permissions of the root folder ..
sudo chown -R www-data: www-data / var / www / html / subrion /
sudo chmod -R 755 / var / www / html / subrion /
Step 7: Configure The Apache2 Subrion Site
Finally, configure the Apache2 configuration file for Subrion. This file will control how users access Subrion content. Run the following commands to create a new configuration file called subrion.conf
sudo nano /etc/apache2/sites-available/subrion.conf
Then copy and paste the content below into the file and save it. Replace the highlighted line with your own domain name and the root location of the directory.
VirtualHost *: 80
ServerAdmin [email protected]
DocumentRoot / var / www / html / subrion
ServerName example.com
 <Directory / var / www / html / subrion />
      FollowSymlinks Options
      AllowOverride All
      Require all granted
 </ Directory>

ErrorLog $ {APACHE_LOG_DIR} /error.log
 CustomLog $ {APACHE_LOG_DIR} /access.log combined
</ VirtualHost>
Save the file and close.
After configuring VirtualHost above, enable it by executing the following commands
Step 8: Enable Subrion Site And Rewriting Module
After configuring VirtualHost above, enable it by executing the following commands, then restart the Apache2 ...
sudo a2ensite subrion.conf
sudo a2enmod rewrite
sudo systemctl restart apache2.service
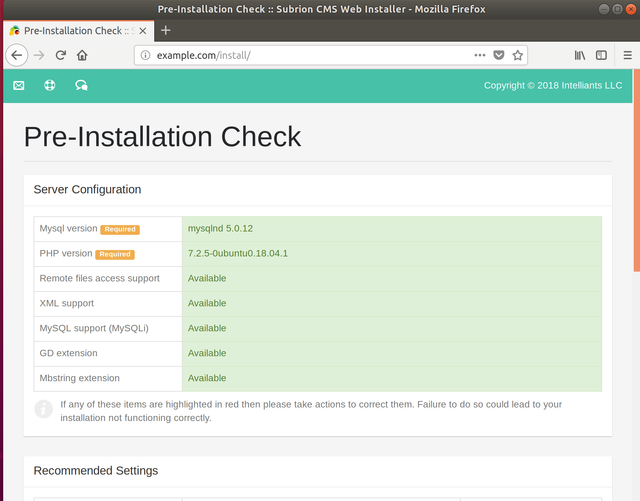
Then open your brwoser and go to the URL ... and continue with the installation ...
http://example.com/install.php
Click Next to continue with the installation wizard ... One of the most prominent features of Subrion CMS is the built-in multilingual support. In step 2, languages are chosen for both front and background. The default language you select in this step is displayed if the Regional Settings module cannot determine the language of the browser.
Subrion ubuntu install
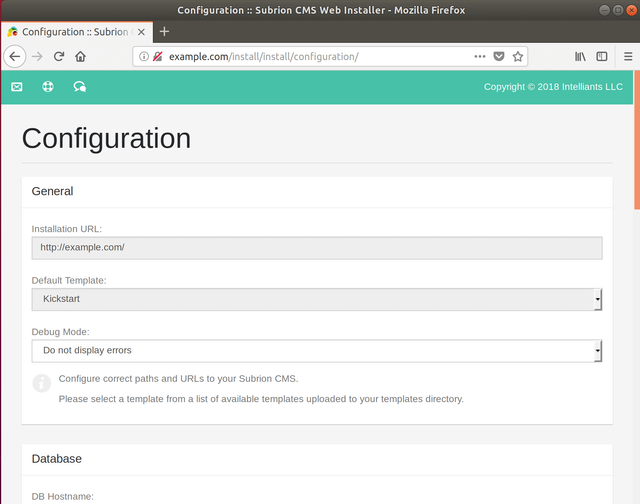
Enter the database connection information and create an administrator account to manage the platform in the back-end ... and continue
Configuration of Ubuntu Subrion
After entering the above information, click Finish installation to install the CMS ...
Ubuntu subrion install
For security reasons, delete the following file ...
sudo rm -rf /var/www/html/subrion/install/modules/module.install.php
Finally we have installed it and it is working perfectly and now we will take care of the aesthetic part of the development of our website with Subrion, I hope to bring another delivery to explain how we continue working with Subrion, and also I would like to encourage you to try it, I'm sure you will like it.
Resources
https://subrion.org/
https://github.com/intelliants/subrion/wiki
https://www.opensourcecms.com/subrion-cms/
https://websiteforstudents.com/install-subrion-cms-on-ubuntu-16-04-17-10-18-04-with-apache2-mariadb-and-php-7-2-support/
Your contribution is a copy of the tutorial found under https://websiteforstudents.com/install-subrion-cms-on-ubuntu-16-04-17-10-18-04-with-apache2-mariadb-and-php-7-2-support/
Copying content as is is considered plagiarism. Plagiarism is a serious offense.
Due to the above, your account has been banned for 30 days from receiving Utopian reviews.
Future plagiarism will result in a full ban of your account
Need help? Write a ticket on https://support.utopian.io/.
Chat with us on Discord.
[utopian-moderator]
Thank you for your review, @mcfarhat!
So far this week you've reviewed 2 contributions. Keep up the good work!