Building an iOS Audio Editor with Swift (#1)-Introduction
Repository
https://github.com/apple/swift
What Will I Learn?
- You will be introduced to building iOS applications using the Swift 4.0 programming language
- You will learn how to set up and run an iOS application on a simulator
- You will be introduced to the MVC architecture (the official architecture for iOS applications)
- You will begin creating an Audio editing application using the steps outlined in this tutorial series.
- You will learn about Autolayout in iOS and also learn how to position views in storyboards.
- You will learn how to connect views to ViewController using @IBAction & @IBOutlet swift syntax
Requirements
- Basic knowledge of the Swift Programming Language
- MAC OSx High Sierra version 10.13 and above
- Xcode version 9.3 Editor
- Ability to navigate through Xcode Editor Environment
Difficulty
- Basic
Tutorial Contents
Before we begin the technical part of this tutorial series, let me give an introduction to the Swift programming language. Swift is the official programming language developed by Apple for developing macOS, iOS, watchOS and tvOS applications. It came on to succeed Objective-C and its latest version is currently swift 4.
If you are however familiar with earlier versions of swift like swift 3, you should easily adapt to this tutorial as swift 4 builds on the strengths of swift 3.
This iOS application will be an audio editor that will record the voice of a user and generate sound effects from the recorded file having different pitch ranges. To get started lets set up our project by setting up our project in xcode
Setting Up Project
- Open Xcode and click on File-->New-->Project
.png)
- Select single view app as this means that we only want our app interactions to be on a single view
-Give your project a name, mine is Audio Editor and fill in other necessary details
.png)
-Finally, create your project after selecting a suitable storage location for the project files.
To finish up, complete the general settings by ensuring that the deployment target is set. The deployment target is the highest targeted version of iOS that your app should run on. Also ensure devices is set to universal to ensure the app can run on both iphone and ipad.
.png)
Introduction to MVC pattern
The MVC pattern (Model-View-Controller) is a software development pattern in which a software is organized by being decoupled into 3 parts;
Model, which stores all the data concerning the app. In our app the model would hold the audio file that is produced when the user records their voice
View, which presents graphics, texts and objects with which the user interacts with such as buttons on the screen that the user can tap to start and stop recording for our application.
Controller, which is a very important part of the architecture and connects the View to the Model. The controller responds to input from the view and modifies the model and also listens to changes in the model and updates the View.
In our app, the controller will receive tap instructions from the user and implement the logic for playing the audio effects on this tap.
To the left of our screen in the above image, we can see our project files initially generated by xcode, these files represent the basic building block of our app and they are what we will build upon. The AppDelegate.swift file represents the entry point class of our app, it extends the UIResponder class and implements the UIApplicationDelegate protocol. It is this class that is first called when our application launches and it has a couple of methods
func application(_ application: UIApplication, didFinishLaunchingWithOptions launchOptions: [UIApplicationLaunchOptionsKey: Any]?) -> Bool {

        return true
    }

    func applicationWillResignActive(_ application: UIApplication) {

    }

    func applicationDidEnterBackground(_ application: UIApplication) {

    }

    func applicationWillEnterForeground(_ application: UIApplication) {

    }

    func applicationDidBecomeActive(_ application: UIApplication) {

    }

    func applicationWillTerminate(_ application: UIApplication) {
        /
    }
The application() function returns a boolean and takes in 2 parameters of type UIApplication and a function, this function is called when the application is first launched. The applicationWillResignActive() function is called after the app launches and before it exits and can be used to save relevant data pertaining to our application.
The applicationDidEnterBackground() and applicationDidEnterForeground() methods are called when our app is hidden by another application that the user launches and when our app is returned to by the user respectively. The applicationDidBecomeActive() method is called to refresh the application if it was relaunched after being in the background initially and finally the applicationWillTerminate() function is called when the application is about to be terminated by the system.
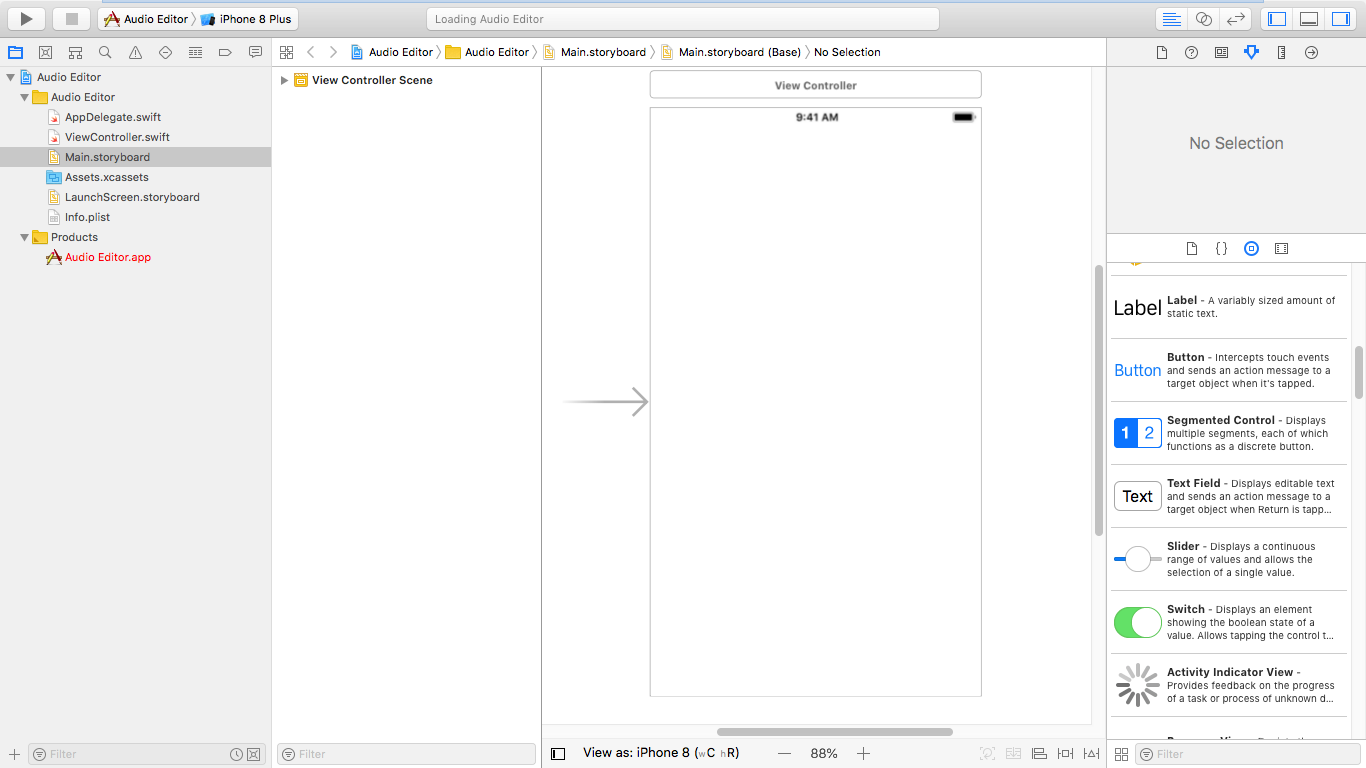
Moving on, our initial application controller is represented by the ViewController.swift class and initial view is the Main.storyboard which represents the first layout a user will see on launching the app. It is worthy to note that the ViewController.swift class will receive input from views in our Main.storyboard and use it to interact with our model which we will be creating very soon.
The Main.storyboard houses the views for interaction by the user in which the user will begin recording his/her audio and also stop recording. It is initially an empty screen and to add views we simply use the utility pane on the right and drag and drop the views onto the board.
.png)
For this app, i will be adding
- A start recording button
- A Tap to record label (static text)
- A stop button
- A Stop label(static text)
- A toolbar to bear the name of our application.
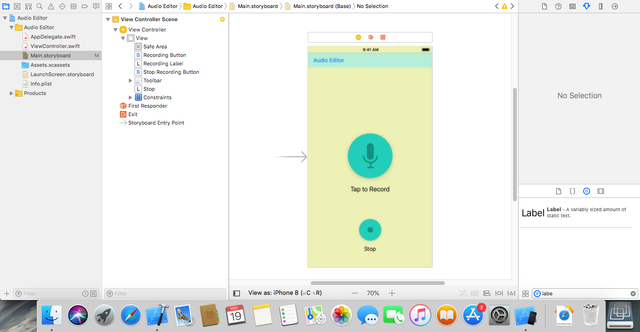
Drag these 5 views onto the screen and position them stacked vertically ontop each other but with the toolbar on the top part of the View. The start Recording button is placed in the center in the application using the blue lines to locate the center of the screen and the other views are constrained to it using the concept of Autolayout.
Autolayout is simply a layout pattern in iOS for positioning views relatively constrained to each other so as to persist the same size of views in different screen devices and in different modes of screen orientation (portrait or landscape). In simple terms it is an iOS layout that tells our views how they should be arranged using constraints to bind them to each other or to the edges of the screen of the device.
After dragging the views, we simply constrain them by selecting each view holding the ctrl button and dragging it diagonally to the view it should be constrained to. This pops up a menu in which you will be asked to select the type of constraint to apply and in our app we simply hold the shift key and select the center horizontally and vertical spacing constraints.
Each view can be labelled by selecting the view and using the attributes inspector panel to edit its various properties as you wish. Depending on your preference, your choice of colours might be different but the layout obtained at the end should closely resemble that shown below. Do not worry about the image backgrounds of the button, they will be explained in the next tutorial, for now simply ensure your views are stacked as in the same position as you can see in the image, vertically ontop each other and centered horizontally.
.png)
Connecting Views to ViewController
To use our views we have to create references to them in our ViewController.swift class. This is quite unique and easy to do in swift as it is simply a matter of dragging them to our code after using the Assistant Editor. To open the assistant editor, simply select the Main.storyboard and click on Navigate-->Open In Assistant Editor which will open the ViewController.swift class side by side with the storyboard. Then click on the view to be connected, hold ctrl and drag to the point on the code you want it to be connected.
A small pop up menu opens which requires you to select an appropriate name for the function to be called and also a connection type. Connection types are can be either Action or Outlet. An action connection implies that the view is to send a signal to the controller when it is tapped while the outlet creates a reference to the view in the code for further use or to create changes in the view when something else happens.
I connected my Start and Stop Recording buttons as outlets and actions to my ViewController, the code is shown below,
class ViewController: UIViewController {

    @IBOutlet weak var recordingButton: UIButton!
    @IBOutlet weak var stopRecordingButton: UIButton!

@IBAction func recordAudio(_ sender: AnyObject) {

    print("Start Record button was pressed")

    }
    @IBAction func stopRecording(_ sender: Any) {
        print("stop recording button was pressed")
    }

}
The reference objects to my views can be seen ontop annotated with an @IBOutlet while the functions recordAudio() and stopRecording() annotated with @IBAction are called when the start recording button and Stop recording button are clicked respectively.
Now let us create an animation effect for our start recording button which animates the button when it is clicked to indicate that recording has begun, add the following lines of code to your ViewController.swift class under the recordAudio() method which is called when the recording button is clicked,
@IBAction func recordAudio(_ sender: AnyObject) {

            self.recordingButton.alpha = 0.0


            UIView.animate(withDuration: 2.0, animations: {
                self.recordingButton.alpha = 0.0
            }) { (finished) in

                UIView.animate(withDuration: 2.0, animations: {
                    self.recordingButton.alpha = 1.0
                })
        }

    }
The alpha of the recordingButton is set to 0 (fade out )by calling the created reference to the start recording button view using self.recordingButton. The animate method from the UIView class based function to animate the view, passing in the animation duration and describing the type of operation to be carried out at the end of the animation which is called in the Completion handler method. The button thus animates by fading out and in when it is clicked indicating the start of the recording.
Now that we are set up with the initial part of our UI, you can test your app on an emulator by clicking the run button, represented by a play icon button on the top. Your app should build successfully and interacting with the buttons should call the methods and print the string to the console.
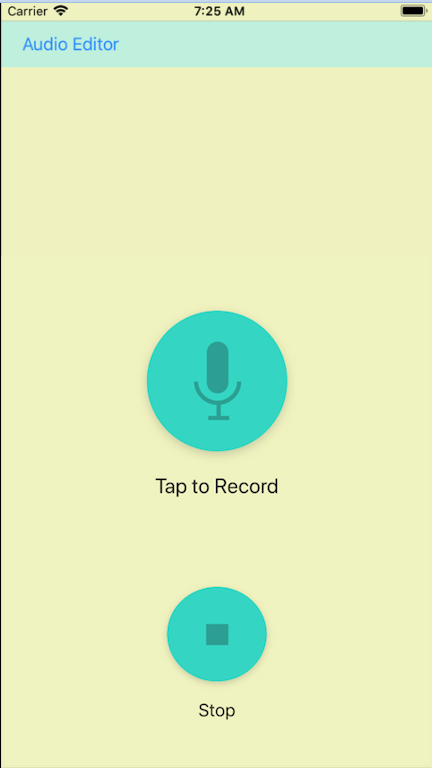.png)
In the next tutorial we will begin to implement the model for the Audio Editor and go into indepth development of the application. Thanks for reading, I hope you keep along.
Thank you for your contribution.
While I liked the content of your contribution, I would still like to extend few advices for your upcoming contributions:
Looking forward to your upcoming tutorials.
Your contribution has been evaluated according to Utopian rules and guidelines, as well as a predefined set of questions pertaining to the category.
To view those questions and the relevant answers related to your post,Click here
Need help? Write a ticket on https://support.utopian.io/.
Chat with us on Discord.
[utopian-moderator]
Thank you very much. I will certainly take note of your advice in the upcoming tutorials.
Hey @davidemi
Thanks for contributing on Utopian.
We’re already looking forward to your next contribution!
Contributing on Utopian
Learn how to contribute on our website or by watching this tutorial on Youtube.
Want to chat? Join us on Discord https://discord.gg/h52nFrV.
Vote for Utopian Witness!