Guide and Introduction to Building a Basic Bot for Discord using Javascript
As someone who is still new to developing and programming, I wanted to document my journey in a series of posts as I learn and get more experienced. For those who are in the same boat as me and are also beginners to programming, hopefully you can follow me throughout my series and learn as we progress.
Along the way, I'm hoping that readers who either have similar experience or more experience can comment, leave feedback, and post suggestions that will help guide me and other various readers to become better coders and programmers. I'm excited to embark on this adventure together.
In this post I wanted to start and focus on 3 basic concepts that I learned and wanted to share:
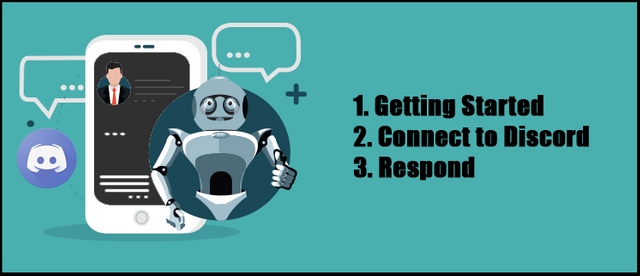
- Getting started and setting up a basic bot
- Connect to an application - In this case a Discord Server
- Have the bot react and respond to simple commands
1. Getting started and setting up a basic bot
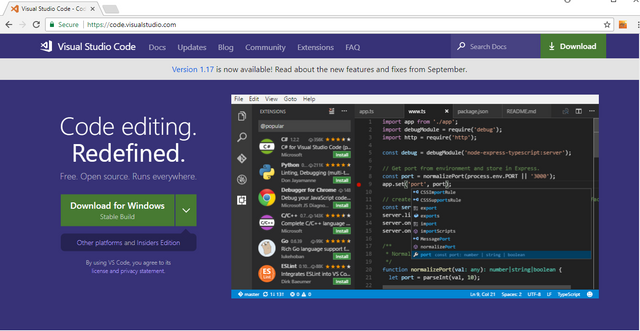
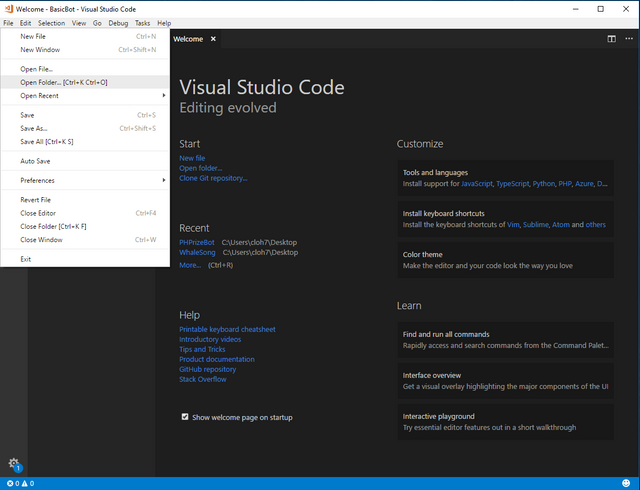
The first thing you will want to do is download and install a coding tool/application such as Virtual Studio Code. You will do a majority of your coding in this editing tool. Although not required, I prefer the nicer interface of VS Code over programming using Notepad. - Most of my screenshots during coding are done within this application. You can download Virtual Studio Code HERE.
Once you have downloaded and installed Virtual Studio Code you need to download node.js which you can download HERE. Download the current version (as of this writing version 9.1.0 is the most current) and install it.

This installation package is a runtime that will allow you to run javascript outside of a browser and is built on Chrome's V8 JavaScript engine.
Once you have both of the above installed, you can create a folder on your desktop to store the files for this particular project. For the sake of simplicity, I am using Windows 10 and storing my files in a folder on the desktop. If you would like me to create an Ubuntu tutorial, please let me know.
Next you will open Visual Studio Code (or the editor of your choice) and Open the Folder that you just created.
Select File->Open Folder->Select the Bot Folder you created
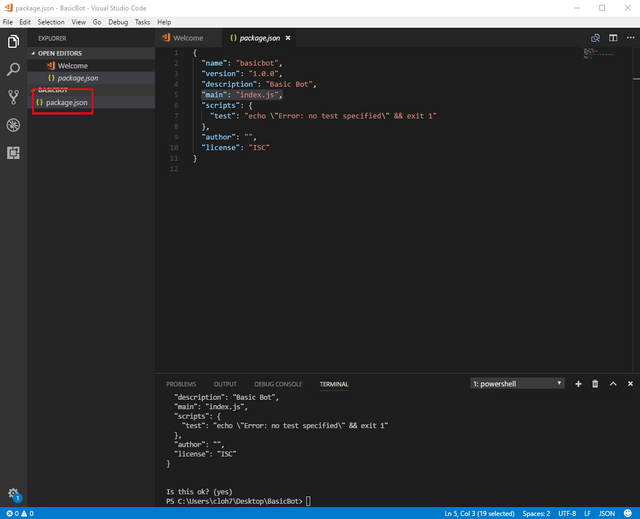
The first thing you will want to do now that you have selected the folder for your bot files is to initialize the node package/project by creating a .json file. To keep this as simple as possible, there is a simple command line piece of code that you can use to have it created for you.
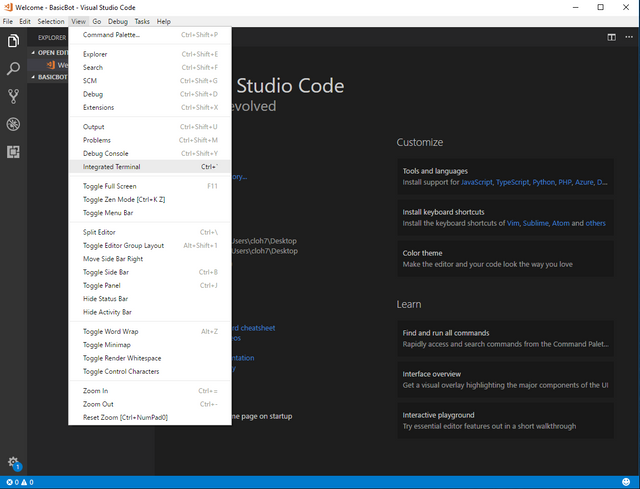
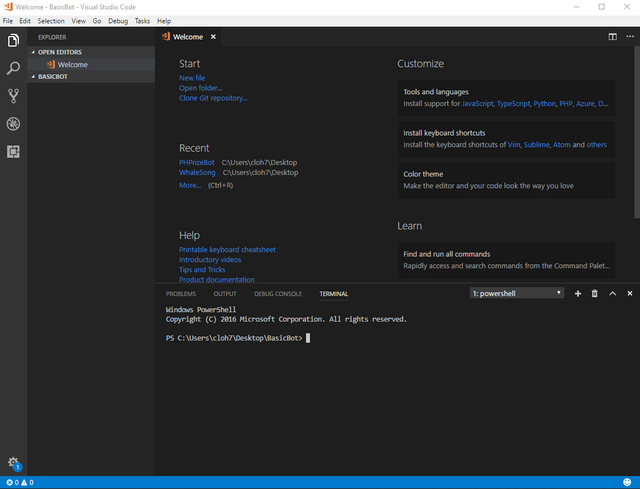
Using the keyboard combination Ctrl ~ or by selecting View->Integrated Terminal, you can pull up a command terminal within VS Code.
At the command line you will type: npm init
and press enter.
You will be asked a series of questions to help create your .json file - You can simply press Enter through all of the prompts until you are asked "Is this ok?" where you can type 'yes' and press Enter.
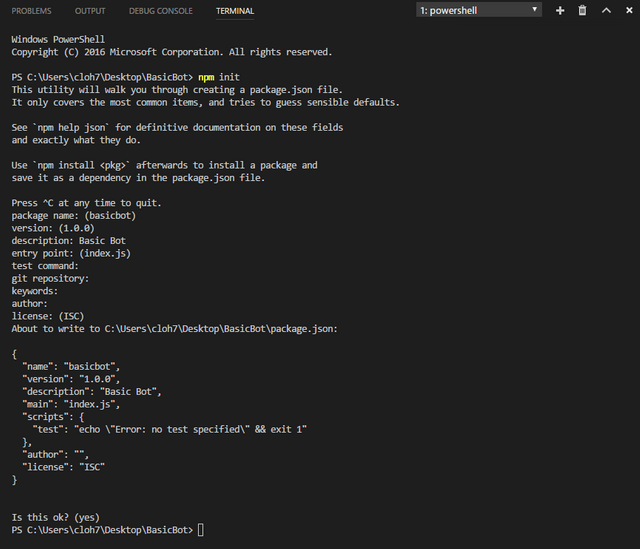
Once complete a new package.json file will be created in your bot folder.
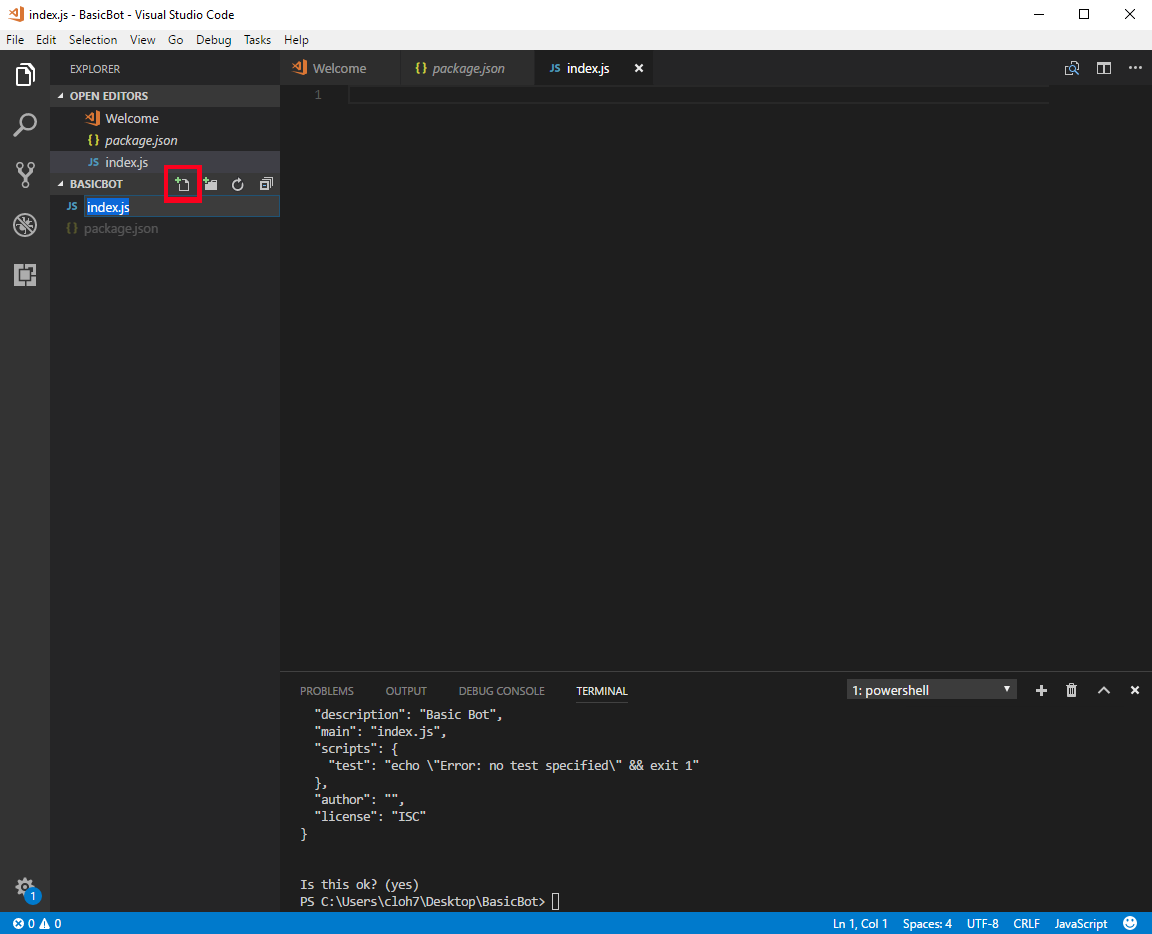
Since we used the default entries during the creation of the .json file by just pressing Enter, your primary javascript file where you will code most of your bot is named index.js as seen in the screenshot above.
Since this file does not yet exist, we must create it. You can do so by clicking on the Create "New File" Icon. Go ahead and name it "index.js"
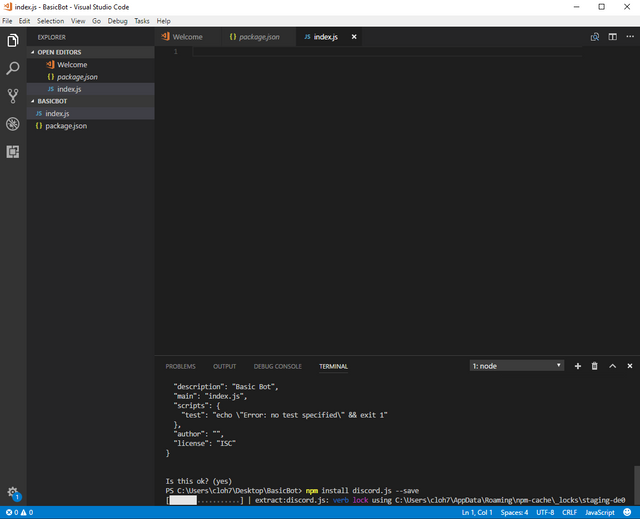
In order for your bot to connect to other applications such as Discord, you will need to download and install libraries/dependencies which will allow you to connect your locally stored bot to the Discord servers. Luckily for us there is a library named discord.js that you can download and install that will do it all for us.
In your Command Terminal Window, type in the command:
npm install discord.js --save and press Enter.
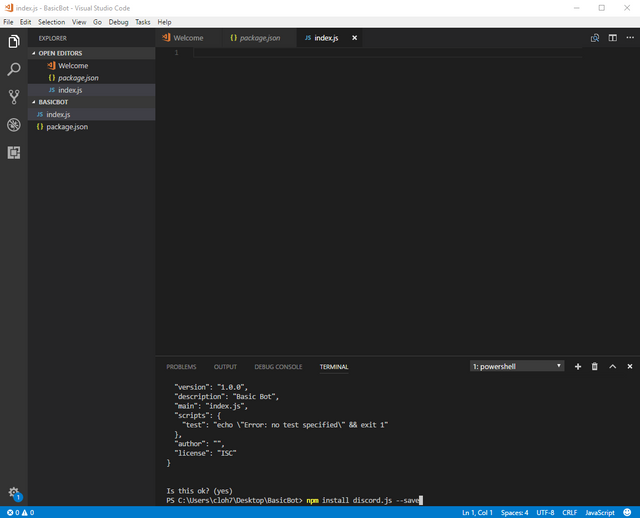
This will initiate the installation of the discord.js library files. You can ignore the  messages.
2. Creating your Bot and Connecting it to Discord
The first step is to create the actual bot itself on Discord.
Open the following link and login using your discord account login information: https://discordapp.com/developers/applications/me
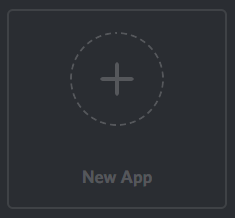
Click on New App to create a new application.
Follow this instruction and Create a new application - Name Your App, Select an Avatar/Icon, and click "Create App."
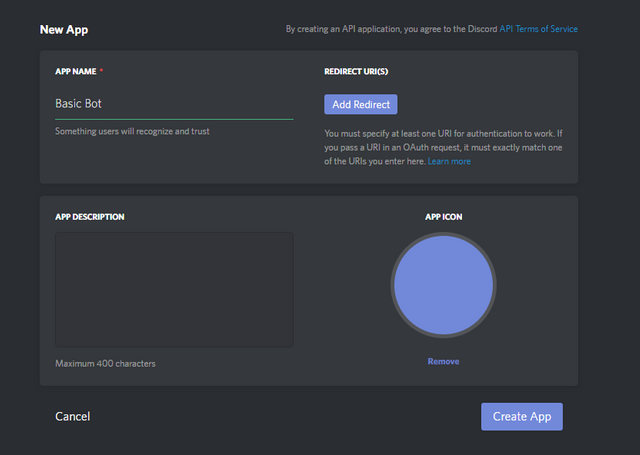
Once the App is created, select it and Click on "Create a Bot User." Confirm and Choose "Yes. Do It!" on the box that pops up.

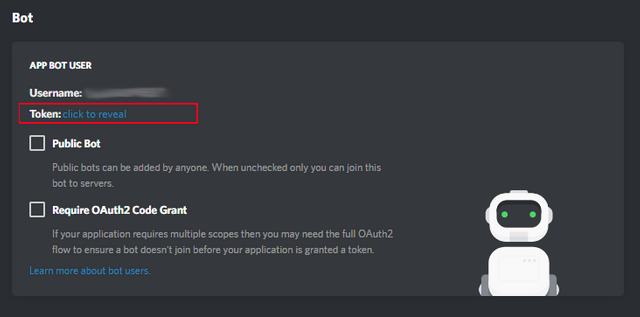
Make sure to take Note of the Client ID and Token. You will need these later when you begin programming your bot. Do not share this information!
You can use the following link to assign Server permissions and rights to your bot before going to the next step and inviting him to your Discord Server:
Discord Permission Calculator
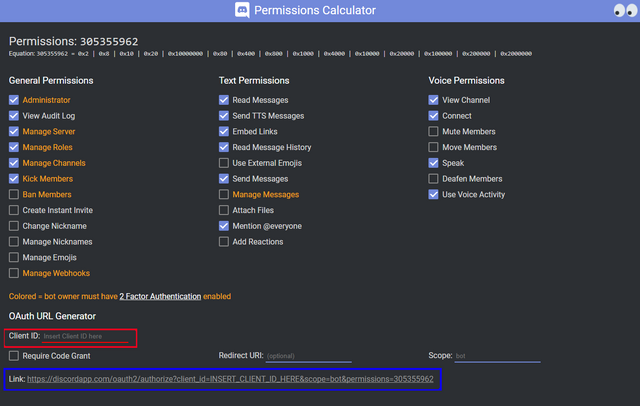
Once you have selected all the permissions you want to grant your bot, Input your Client ID in the section highlighted in RED in the picture above with the Client ID from your created Bot.

The information you select will generate a link for you to click on (highlighted in BLUE in the picture above) which you can use to invite your Bot to your Discord Server.
If you want to skip assigning your bot rights and instead want to invite it to your server using the default and basic permissions, you can use the following link:
https://discordapp.com/oauth2/authorize?&client_id=YOUR_CLIENT_ID_HERE&scope=bot&permissions=0
Replace YOUR_CLIENT_ID_HERE with the Client ID from your created Bot.
You can only invite the bot to Discord Servers that you yourself have 'Manage' Permissions to.
For a detailed walkthrough of this section, you can follow the following link:
Creating a discord bot & getting a token
Once your bot is created on Discord and invited to your Discord server, it's time to start programming your bot.
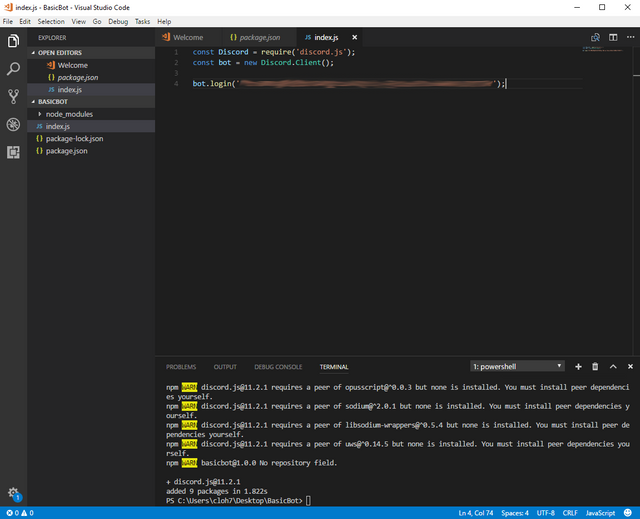
In order to create the bot you need to input the following code into your index.js file using Visual Studio Code:
const Discord = require('discord.js'); - calls on and defines the discord.js library
const bot = new Discord.Client(); - Creates a client that will connect to Discord
You will then need your bot to login to the server by adding the following code:
bot.login('Your Bot Token');
Replace Your Bot Token above with Your Bot Token from your Discord Apps page.
Your code should now look something like this:
Go ahead and Save your work by pressing ctrl-s or by selecting File->Save from the dropdown at the top of the screen.
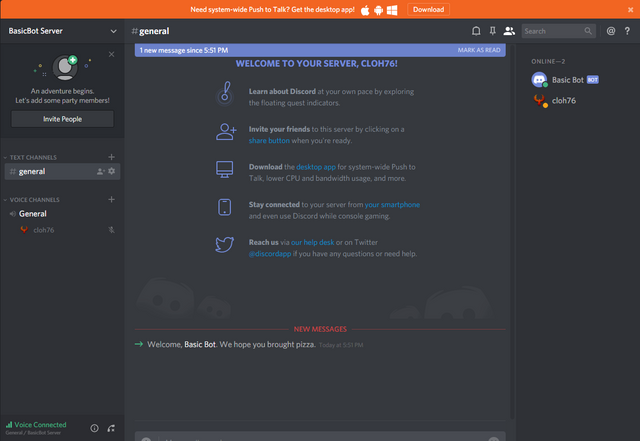
You can test your bot by typing node . in the terminal window and pressing Enter

Open up Discord, go to your server and you should see your Bot online!
3. Program your Bot to Respond
Now that your bot is online (and for the sake of keeping this first guide simple) - let's program your bot to respond to a message that your Channel users can input.
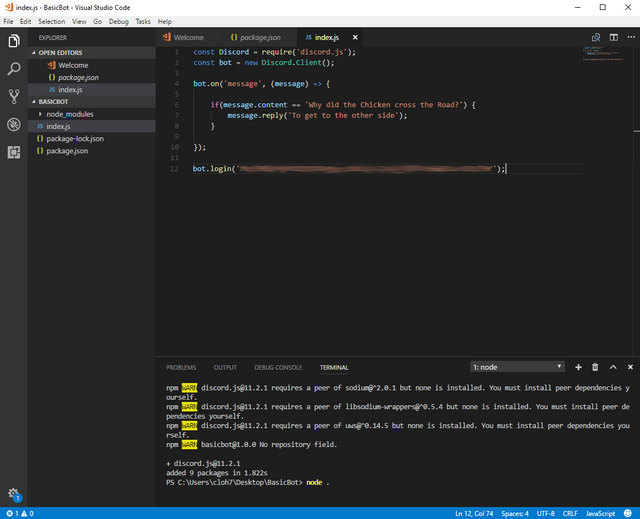
For this we need to add the following code which will tell your bot to respond to a specific message or phrase:
bot.on('message', (message => {

    if(message.content == 'Why did the Chicken cross the Road?') {
        message.reply('To get to the other side');
    }

});
Your updated code should look like this:
Save your work by pressing ctrl-s or by selecting File->Save from the dropdown at the top of the screen.
Because your bot is already running, you need to press ctrl-c to stop your bot so you can run your updated bot with the added code.
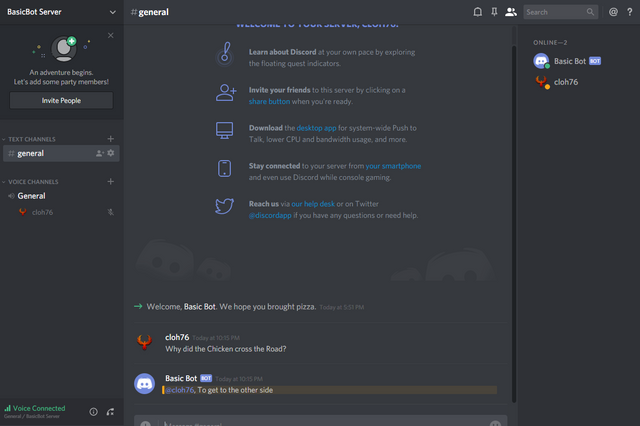
after stopping your bot, again test your bot by typing node . in the terminal window and pressing Enter

Open up Discord, go to your server and Type the phrase: Why did the Chicken cross the Road?
The Bot (if done correctly) should respond to you with: To get to the other side as seen in the screenshot below.
Easy enough right? This is only a small number of things you can do with various commands. As I learn and as we progress in this series of posts, I hope to produce guides for more advanced applications.
I hope you enjoyed this post. If there are any updates, feedback, input, or suggestions - please let me know in the comments below. If you found this helpful, please consider visiting my Steemit profile and upvoting, resteeming, and voting for my witness cloh76.witness. I appreciate the support!
Open Source Contribution posted via Utopian.io
Hey @cloh76 I am @utopian-io. I have just super-voted you at 16% Power!
Suggestions https://utopian.io/rules
Achievements
Up-vote this comment to grow my power and help Open Source contributions like this one. Want to chat? Join me on Discord https://discord.gg/Pc8HG9x
Is there rule about using other bots? I don't see it on that link.
it's a great scrpting languge for web
yes it is. I still have a lot to learn.
Your contribution can't be approved yet. See the Utopian rules. Your documentation is for Discord in general, which is not open source. Can you change the category to development?
If Discord were open source then this piece of work would be really one of the best documentation I have seen here. Actually, it is but as I see it, you picked a closed source project to make the documentation for.
You can contact us on Discord.
[utopian-moderator]
Updated the Category to Development
Approved.
This is a documentation for the bot which is open source. It fits better in the decumentation category. It makes no sense to have a tutorial post on the dev category.
I'm just following the directions from the utopian-moderator's. This is their platform and they are the final approvers so whatever they say goes
Actually, no. Moderator behavior is highly vetted. I talked with the admin about this post and he decide to put it in tutorial category with which I completely agree.
Yep, this is a tutorial--and a good one.
hey cloh76.
I am not a tech at all, but badly want to learn a bit about it. So I will do what you wrote down and see if I can do it too. Because, it is just frustrating to not know anything about computers but living in such a tech world with the cryptos. Didn't expect that to happen :D
So thanks a lot for the nice post.
Cheers
Hey Flurin.
Thanks. Yup it is a tech world and these are all tech based platforms and like most technology can be hard for some to grasp. It's not easy, but anything I can do to help share anything that I learn while Im learning is what I plan to do. Hope my guides are helpful and can make things a little easier to understand since we were all in the same place at one time or another.
Did you listen to the three amigos yesterday? Clif High talking about how in the future there will be so many people coming into the space with no knowledge about how to act in the cryptospace, so there will be a huge demand for people to help, teach and inform. I guess your help will be much appreciated. do you have a youtube channel? I am thinking of starting one, just to help people to get around all this new crazy tech stuff
I do, but I haven't really used it or uploaded anything to it. I plan to though eventually!
Ill let you know when I actually have something uploaded. I have followed you, so maybe we can collaborate on something in the future. You can also reach me on Discord @cloh76
Sweet. I follow you too. I am not a tech at all, so can't help too much other than showing people, how to educate themselves by doing so myself. I go check out discord. Would be fun to collaborate. I think the future will embrace people who can help people get around these crypto thingies... :)
Hello @cloh76, I'm @tdre. This tutorial is very helpful and well written. I'm an experienced developer in languages like js, php, and c#.
But the Discord bot that I'll be starting on soon will be my first venture into this territory.
Thanks for writing something that will be a great help!
P.S.>> If you need any tips later on please feel free to ask.