Using Angular JS to send Ajax request PHP - Part 3: HTML Forms to PHP server
Repository: https://github.com/angularjs
What will I Learn?
In this tutorial, you will learn the following
- Use angular to send Ajax request to PHP scripts
- Perform a live search of on the records
- Implementing a live sorting of the records
- Using the angular display directive
ng-showandng-hide - Edit User records
Requirements
For this tutorial, you will need the following
- A laptop with any operating system such as Windows OS, Mac OSX and Linux
- Your favorite text editor like Atom, Sublime Text and so on.
- A server such as your wampserver or xampserver or mampserver.
- Knowledge of HTML, JavaScript, PHP
- ANGULAR JS script or include it using the cdn link https://ajax.googleapis.com/ajax/libs/angularjs/1.6.10/angular.min.js
Difficulty
- Basic
Link to Resources
- Angular JS documentation here
- Angular cdn link https://ajax.googleapis.com/ajax/libs/angularjs/1.6.10/angular.min.js
- Link to exercise project here
- W3schools Angular JS filters here
- W3schools Angular JS
ng-showlink here
Tutorial Content
Angular JS framework which operates exactly as Javascript, makes coding more simplified and easy to use with other programming languages.
Ajax is sending request from your browser to a server and getting back a response without page reload. It helps to make the website more dynamic and "user-data" friendly.
In my previous tutorials (see links below tutorial) we used Angular JS to send Ajax request to GitHub API to retrieve desired information. Also we decided to implement same using our a localhost server like wampserver where we learnt how to create a database and use PHP for server side scripting with our database. We used Angular JS and PHP to perform the following:
- Add new users record to the database form our forms
- Fetch all user details currently in the database
- Delete unwanted user records.
In this tutorial, we will learn to perform a live search on the records, sort the records by name or email, edit user records in the database. In the process of building this, we will be introduced to new Angular directives. Without wasting much time, let's dig into coding.
Step 1: Getting Started
To begin this tutorial, we need a copy of our previous project as we will begin coding from there to make the application a complete project. You can download the complete project here. The folder structure would like the image below.
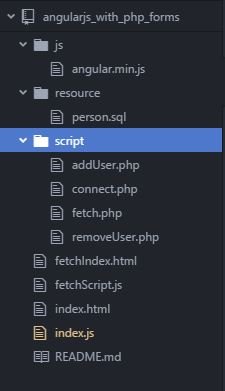
Explanation of the details of some files
index.html: This file contains add for adding new users, a table to display all user details and we used the Angular
ng-repeatdirective to achieve the looping of the records. We also use two angular directives to make the page functional:ng-app="myApp"is an angular directive that triggers angular js to function with the HTML DOM that it covers. It tells angular JS the area of the HTML to take charge of.ng-controller="MainCtrl"is an angular controller created within the angular scriptindex.jsfor manipulation of a particular area of in the html.
index.js: This file handles has one controller called
MainCtrlthat sends thehttprequest to fetch user details -fetch(), add new users -$scope.addUser()and delete selected users -$scope.removeUser().NOTE: The
$scopeparameter can be accessed anywhere within the confines of theMainCtrlcontroller in the html.$httpis an angular service that helps us send request to other script or url and get back response called a promise which is then manipulated based on the response.connect.php: This file contains our connection string to our database using PDO - PHP Data Object and it is required by all other PHP scripts.
addUser.php: This php script recieves the data posted from the form, processes it and reeturns a feedback if the record was successfully added or not.
fetch: this file retrieves all user details in the database and send them as JSON to the angular script to be displayed in the table structure in our
index.htmlfile.removeUser.php: The script receives user id as a parameter and uses the parameter to delete the user from the database.
person.sql: This is our database file that contains some user details which can be imported into our localhost database.
Step 2: Importing the SQL file
Copy the downloaded file and paste in your localhost root folder, your www folder for wampserver users and htdocs for xampserver users. On your browser, type localhost/phpmyadmin in your browser url and create a database called angularjs_php, then select the database your have created and click import on the top-right navigation. Then click on choose file and navigate to where you have the person.sql file. Then click the GO button to import the contents of the file. You can see a preview below.
Then open up the project in your browser to make sure the project is fully functional and then open up the folder in your favorite text-editor to follow this tutorial. After understanding the file structure and the functionality of the project you can begin step three else refer here to understand the code snippet.
Step 3: Performing a live search
Angular JS has filters that can be used to transform data to desired output. You could filter your results into:
- Currency - changes number to currency format
- JSON - change an object to JSON,
- limitTo - filter to limit the result of an array
- lowercase - changes alphabet to lowercase
- uppercase - change alphabet to uppercase, and so on.
Filters are added to our expression by using the pipe | character then followed by the filter. The live search doesn't require you writing any angular script, all you need is to do is create a ng-model on an input box that renders the filter to change as the input box value changes - that's two way data-binding provided by Angular JS. For example if you want to change an expression to lowercase, you can do this:
<h1>Welcome {{ FirstName | lowercase }}</h1>
index.html
Our input box should appear immediately after our form, before the table. For two-way data-binding, we use the ng-model directive and give it a value which we will use as the filter value as well.
<input type="search" ng-model="search" placeholder="Search..." value="">
Then, in our ng-repeat that displays the user details on our page, we need to pass the filter through a pipe | to make our live search functional.
<tr ng-repeat="x in fetch | filter: search">
Check out full code snippet for this step in livesearch.html and livesearch.js.
Step 4: Implementing Live sorting of the table result
The live sort can be implemented in various ways. One of them is using a select box that changes the filter value when its value changes or we could create a ng-click directive that send a value to change the filter when the table head <th> is changed. In this tutorial, I will show you the two I just mentioned earlier.
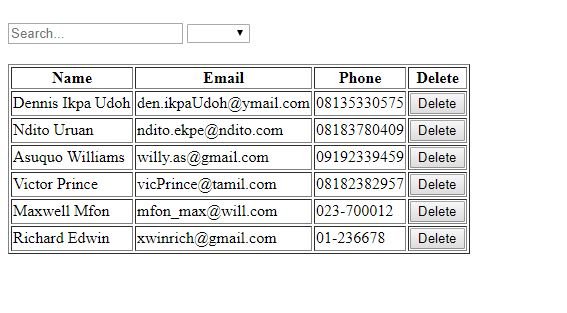
Approach 1: Using select box
First we need to create a select box with the options of our sort values. Angular gives opportunity for us to sort either in Ascending or Descending order by using + or - respectively in front of the sort value.
sort1.html
After our search input box, we add a select box to perform the sorting and we will be using the Angular filter directive.
<select ng-model="sort">
    <option value="+name">Name</option>
    <option value="+email">Email</option>
    <option value="+phone">Phone</option>
</select>
Then we need to bind the data selected within the select input using an Angular filter orderBy. We will include the filter in the ng-repeat directive in the table row which will tell Angular to order the array by the value we select in the select input.
<tr ng-repeat="x in fetch | filter: search | orderBy: sort">
We notice that the select box is empty initially when the page is reloaded, we might need to set a default order. To achieve this, we need to add a simple code snippet to our Angular JS file. We create a $scope variable called sort which we already know can be accessed any where within our MainCtrl controller.
$scope.sort = '+name';
When we reload again, you will notice that the table result is being sorted by User's name. As well you might sort by others: email and phone and you specify if they should in sorted in Ascending or Descending order.
Check out full code snippet for this step in sort1.html and sort1.js.
Approach 2: Click the table head to sort the result
Another method of creating a sort on the table could be by clicking each table head to sort the table by that column. This could make your design a little bit look more stylish unlike using the common select input box. Let's dig into achieving this approach.
sort2.html
We start by adding the Angular JS ng-click directive to our table head that we want to use in sorting the table. We will create an arrange() and pass a parameter which will represent the column name to be sorted.
<tr>
    <th ng-click="arrange('name')">Name</th>
    <th ng-click="arrange('email')">Email</th>
    <th ng-click="arrange('phone')">Phone</th>
    <th>Delete</th>
</tr>
Then we need to pass a filter in our ng-repeat directive through the pipe | symbol. The filter is orderBy and a value which we will call sort which we will define in our sort2.js file.
Note: Every other details of the table remains the same. We only added the
|and theorderByfilter which has a valuesort.
<tr ng-repeat="x in fetch | filter: search | orderBy: sort">
    <td>{{x.name}}</td>
    <td>{{x.email}}</td>
    <td>{{x.phone}}</td>
    <td>
    <input type="button" ng-click="removeUser(x.id)" value="Delete">
    </td>
</tr>
sort2.js
Now, to perform the magic, we use a simple code snippet which triggers the function order() and with the parameter sent to the function, we then define the orderBy filter to be sorted by the value we get.
Note: The
order()would be a$scopevariable which you know that can be accessed anywhere within theMainCtrlcontroller.
$scope.arrange = function (x) {
      $scope.sort = x;
};
Note: You may want to define whether the table result should be sorted based on Ascending or Descending, this can be achieved by adding a
+or-at the beginning of thexthat is assigned to thesortscope variable.
$scope.sort = '+' + x;

OR

$scope.sort = '-' + x;
Check out full code snippet for this step in sort2.html and sort2.js.
Step 5: Understanding the Angular JS ng-show and ng-hide directive
This directive in Angular JS functions the same way the .hide() and .show() function works in JavaScript. It can be applied easily by using different methods depending on what you wan to achieve. But for the purpose of the tutorial, I will be using it to make my project look more UI friendly by showing some areas of the page from a page fully loads and hiding some when an events takes place. You can refer to the Angular documentation on ng-show and ng-hide directives.
In the next step, we want to be able to update user records when we click on the edit button in the table and then a form with that user's details appears and every other content is hidden until the update is completed or canceled.
So we need to make adjustment to our index.html file to achieve this task.
<h1 ng-show="tab == 0" ng-hide="tab == 1" ng-init="tab = 0">Angular JS Users - Add New Record</h1>
<h1 ng-show="tab == 1" ng-hide="tab == 0">Angular JS Users - Update Record</h1>

<form id="form" method="post" ng-submit="addUser(name, email, phone)" ng-show="tab == 0" ng-hide="tab == 1">
    <label>Name:</label>
    <input type="text" ng-model="name" value="" required> <br/><br/>
    <label>Email:</label>
    <input type="text" ng-model="email" required><br/><br/>
    <label>Phone:</label>
    <input type="text" ng-model="phone" value="" required> <br/><br/>
    <input type="submit" value="Add User">
</form>
Note:
- A scope variable
tabis defined to allows elements show or hide when the value is set to 0 or 1.- The first h1 will show itself anytime we set
tab == 0and hide anytimetab == 1.- Since it is the first header we always want to see until the
Editbutton of users are clicked, we need to settab = 1using- The second h1 acts in the reverse order of the first h1, which only shows when
tab == 1and hides whentab == 0.- The
ng-initAngular directive is used to set initial values to scope variables. We will use it to settab = 1so that only elements withng-show = "tab == 1"would be visible until other events makes the value oftabto change.
Then we wrap our search input and table into a div so we can also tell Angular JS when and when not to display the contents of the div. We want this div to be hidden whenever the user wants to edit a record and then display again after the record has been updated or not.
<div ng-hide="tab == 1" ng-show="tab == 0">
    // the search input and table goes within this div
<div>
Note: This div will only display its content when the
tab == 0and hide whentab == 1.
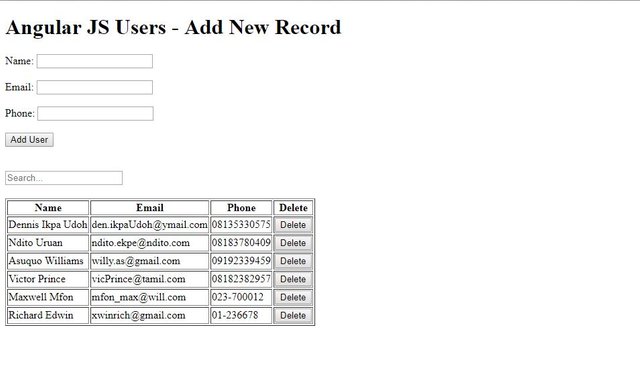
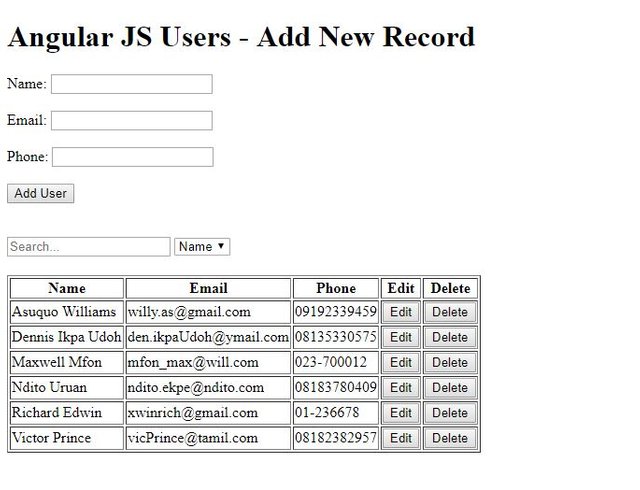
To add the Edit button to our table, we will add another <th> tag within the first <tr> tag and add another <td> tag within the second <tr> tag of the table element.
<table style="margin-top: 20px;" border="1">
    <tr>
        <th>Name</th>
        <th>Email</th>
        <th>Phone</th>
        <th>Edit</th>
        <th>Delete</th>
    </tr>
    <tr ng-repeat="x in fetch | orderBy: order | filter: search">
        <td>{{x.name}}</td>
        <td>{{x.email}}</td>
        <td>{{x.phone}}</td>
        <td>
        <input type="button" ng-click="editUser(x.id)" value="Edit">
        </td>
        <td>
        <input type="button" ng-click="removeUser(x.id)" value="Delete">
        </td>
    </tr>
</table>
Note: The edit button will have an
ng-clickdirective which will trigger theeditUser()function with the user's id as parameter, same way we implemented the delete user button. Your new design should look like this below.
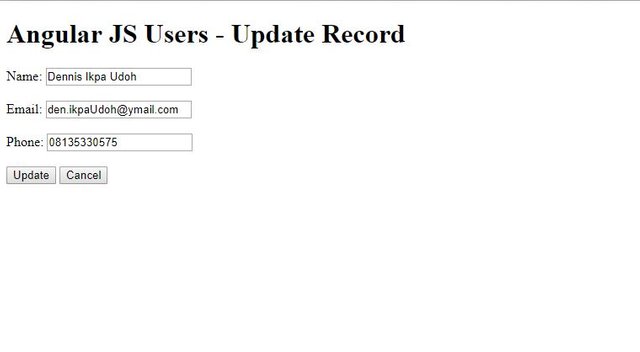
Finally in our index.html file, we need a form that will be displayed to the user, to enable them make changes to the user record. The form will look like the add user form but this time will be used to update user details and as well cancel update.
<form method="post">
    <label>Name:</label>
    <input type="text" required> <br/><br/>
    <label>Email:</label>
    <input type="text" required><br/><br/>
    <label>Phone:</label>
    <input type="text" required> <br/><br/>
    <input type="submit" value="Update">
    <input type="button" value="Cancel">
</form>
We need to make the form display only when the Edit button on the table has been clicked. So we need to use the ng-show and ng-hide directives. So inside the form tag, we add the following code snippet.
<form method="post" ng-show="tab == 1" ng-hide="tab == 0">
Note: To check if every thing is working fine like the video below, copy the code snippet below and paste in your JS file.
  $scope.editUser = function(id) {
      $scope.tab = 1;
  };
We create a $scope variable for editUser() found on the edit button such that when the edit button is clicked, it sets the value of tab to 1 so that the update form can be displayed and when you refresh the page, you get the default page look back.
Step 6: Edit User records
When you are able to get the preview in the video above, then we begin implementation of actually updating the user records. We need to create a PHP script that will fetch user record based on the user id posted by the form. But we can modify our fetch.php script to function based on if an id is given or not.
fetch.php
<?php
  // require our connection file
  require 'connect.php';

  if (isset($_GET['id'])) {

    $id = htmlentities(strip_tags(trim($_GET['id'])));
    // establish our SQL statement for retrieval
    $fetch = $conn->prepare("SELECT * FROM person WHERE id=:id");
    $fetch->bindParam(":id", $id);
    $fetch->execute();
    // get all results found
    $result = $fetch->fetch(PDO::FETCH_OBJ);
    // sends the result in JSON to angular script
    echo json_encode($result);

  } else {

    // establish our SQL statement for retrieval
    $fetch = $conn->prepare("SELECT * FROM person");
    $fetch->execute();
    // get all results found
    $result = $fetch->fetchALL(PDO::FETCH_OBJ);
    // sends the result in JSON to angular script
    echo json_encode($result);

  }

 ?>
Note:
- We required our connection file to the database and then confirm if an user id was posted to the file using the
GETmethod.- If the user id is posted, it searches the database and returns result of the record found
- If no user id was posted, then it fetch all user details and returns the result to the angular script.
index.js
In our index file, we need to modify the editUser scope variable function to send an $http GET service request to the fetch.php file to retrieve the user record.
$scope.editUser = function(id) {
    $scope.tab = 1;
    $promise = $http.get("script/fetch.php?id=" + id);
    $promise.then(onEditSuccess, onEditError);
};

var onEditSuccess = function (response) {
    $scope.edit = response.data;
};

var onEditError = function (response) {
    $scope.editError = response.data;
    console.log($scope.editError);
};
Note:
- Remember, all
$httpservices returns a promise. A successful promise will invoke theonEditSuccess()while a failed promise will invoke theonEditError().- The error message from the failed promise is displayed in the console for debugging.
The success response from the $http is stored to a scope variable edit within the onEditSuccess(). We need to set the values of the update form so that we can edit it and update the record of that user.
<form method="post" ng-submit="updateUser(edit.id, edit.name, edit.email, edit.phone)" ng-show="tab == 1" ng-hide="tab == 0">
        <label>Name:</label>
        <input type="text" ng-model="edit.name" required> <br/><br/>
        <label>Email:</label>
        <input type="text" ng-model="edit.email" required><br/><br/>
        <label>Phone:</label>
        <input type="text" ng-model="edit.phone" required> <br/><br/>
        <input type="submit" value="Update">
        <input type="button" value="Cancel" ng-click="cancel()">
    </form>
Note:
- We used angular
ng-modeldirective to bind the data from the$scope.editvariable to the input fields of the update form.- A
ng-clickdirectivecancel()is equally added to the form to cancel the update operation if the user decides not to update the record again.- When the form is submitted, we will get the new updates on the form using the
ng-modeldirective and pass them as parameters to theupdateUser().
The cancel() requires us to set the tab = 0 and also invoke the fetch() to get update.
$scope.cancel = function () {
    $scope.tab = 0;
    fetch();
};
Then we create the updateUser() that handles the form submit in our update form. It gets the variables in the form and send a $http service request to updateUser.php script which uses the posted values to update the user's records and then returns a promise.
Based on the promise, onUpdateUser() is invoked when it's successful and onErrorUpdate() is invoked if there's an error from the $http service.
Note:
- The PHP script
updateUser.phpalso returns asuccessresponse if the updating was successful andFailed updating recordresponse if the updating failed.
$scope.updateUser = function (id, name, email, phone) {
    $promise = $http({
        method: 'POST',
        url: 'script/updateUser.php',
        data: {id: id, name: name, email: email, phone: phone}
    });
    $promise.then(onUpdateUser, onErrorUpdate);
};

var onUpdateUser = function(response) {
    if (response.data == 'Success') {
        $scope.update = response.data;
        alert('Update successful');
        $scope.tab = 0;
        fetch();
    } else {
        $scope.errorUser = response.data;
        alert('Failed updating record');
    }
};

var onErrorUpdate = function(response) {
    $scope.errorUpdate = response.data;
    alert('Error Updating');
};
Note: When the
$httpresponse is successful, we check if the response from the php script isSuccessor otherwise.
- If the update response from the script is
Success, we alert the user that it was successful usingalert(), then reset the$scope.tab = 0scope variable to default and finally use thefetch()to retrieve the recent update on the database.- Otherwise we will alert the user that the update failed.
updateUser.php
<?php
  // require our connection file
  require 'connect.php';

  $datapost = file_get_contents("php://input"); // gets the posted data from the script

  if (isset($datapost) || !empty($datapost)) { // checks if there is a value in the posted script

    $request = json_decode($datapost);

    $id = $request->id;
    $name = $request->name;
    $email = $request->email;
    $phone = $request->phone;

    $updaterecord = $conn->prepare("UPDATE `person` SET `name`=:name,`email`=:email,`phone`=:phone WHERE id=:id");
    $updaterecord->bindParam(":name", $name);
    $updaterecord->bindParam(":email", $email);
    $updaterecord->bindParam(":phone", $phone);
    $updaterecord->bindParam(":id", $id);
    $success = $updaterecord->execute();

    if ($success) {
      echo "Success";
    } else {
      echo "Failed";
    }

  }

 ?>
Note:
- We first require the connection file
connect.phpto the database.$datapost = file_get_contents("php://input")gets the data posted from the script for processing.- We then decode the result posted and store them to variables which is then used to update the user record in the database.
- If the process is successful, the script echoes Success else Failed.
Check out full code snippet for this step in index.html, fetch.php, updateUser.phpand index.js.
VIDEO OF ENTIRE WORKDONE
Previous Tutorials
- https://steemit.com/utopian-io/@chri5h/consuming-github-api-using-angular-js
- https://steemit.com/utopian-io/@chri5h/using-angular-js-to-send-ajax-request-to-php-part-1
- https://steemit.com/utopian-io/@chri5h/using-angular-js-to-send-ajax-request-php-part-2-html-forms-to-php-server
Proof of Work Done
I hope you find this tutorial very useful and you can access the complete code for this tutorial in the github repo.
Thank you for your contribution.
While I liked the content of your contribution, I would still like to extend one advice for your upcoming contributions:
Looking forward to your upcoming tutorials.
Your contribution has been evaluated according to Utopian policies and guidelines, as well as a predefined set of questions pertaining to the category.
To view those questions and the relevant answers related to your post, click here.
Need help? Write a ticket on https://support.utopian.io/.
Chat with us on Discord.
[utopian-moderator]
Thanks alot for the review and advice @portugalcoin. I will look for better ways of making my tutorials get to the top.
Hey @chri5h
Thanks for contributing on Utopian.
We’re already looking forward to your next contribution!
Contributing on Utopian
Learn how to contribute on our website or by watching this tutorial on Youtube.
Want to chat? Join us on Discord https://discord.gg/h52nFrV.
Vote for Utopian Witness!