Tutorial: How to use ShareX - Screen capture, file sharing and productivity tool
Hi everyone
Today i want to share this super useful open source program that i´ve been using.
At same time i will show you how to use it in an effectively way.
I´m talking about ShareX, an amazing Screen capture, file sharing and productivity tool.
This program allow you to easily share images and screenshots with others through editable hotkeys.
I reduced drasticaly the time spent in my graphic presentations with this program.
Lets start
You can download ShareX from the official site HERE
Download, install and proceed with all the actualizations needed.
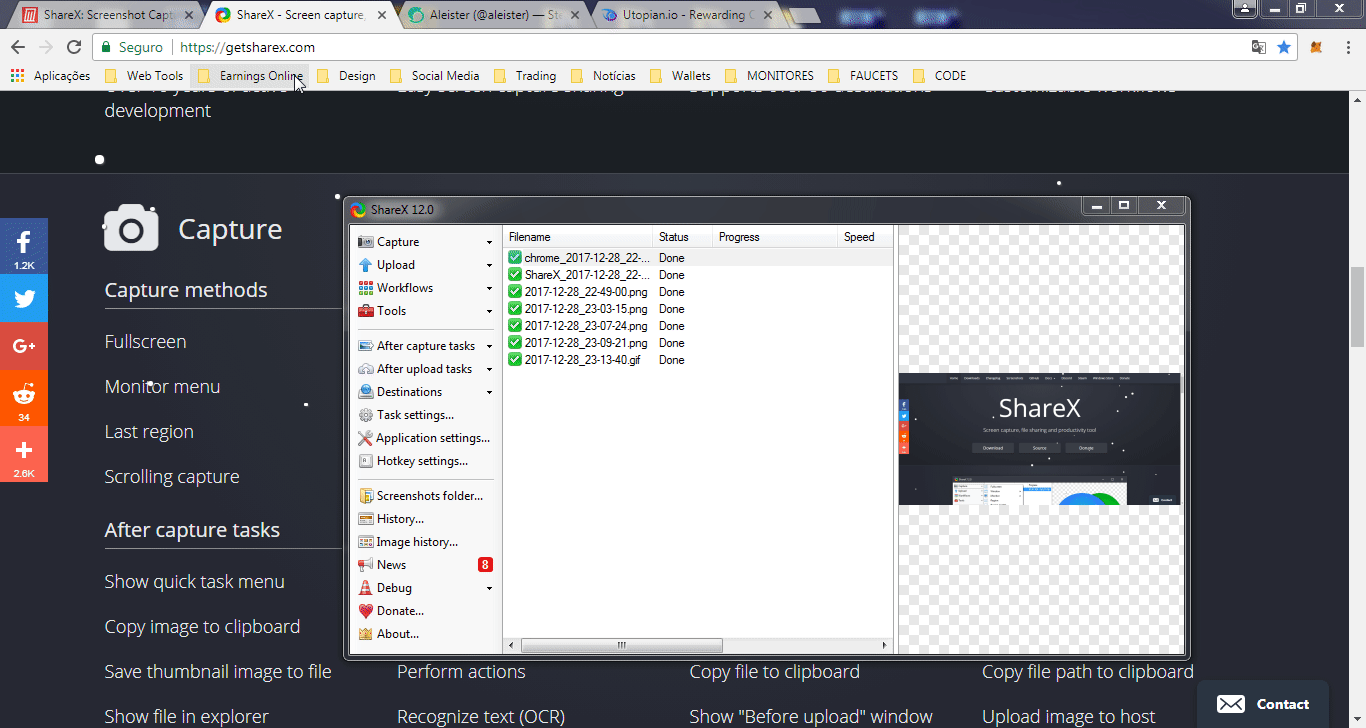
With the program open this will be the dashboard. Along the left side, you’ll see buttons and menus for the core features of the program:
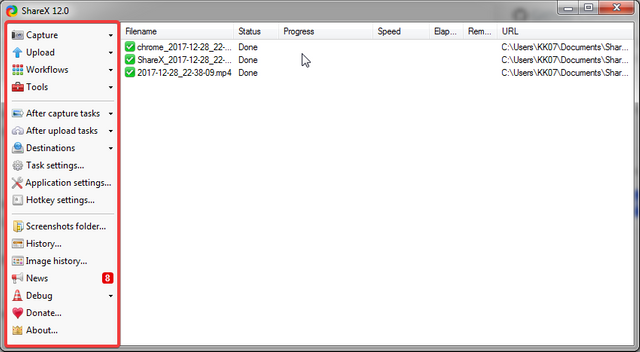
Starting by the main menu:
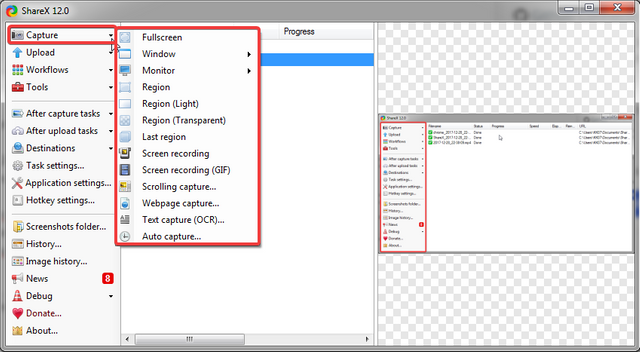
Capture
Here you can find all the features you need, not only can you do a fullscreen capture, as you can capture a selected window or region in the screen, here you can also screen recording to video or Gif and even auto capture, etc.
With auto capture you can take screenshots on a regular interval like a time lapse, is pretty cool.
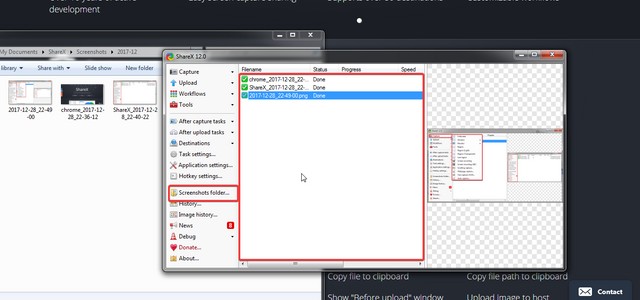
When you capture or record something, it will go to screenshots folder that you can access in the left side menu, or just access those files directly in the work environment.
You can edit any capture or recording immediately without leaving the program by clicking the right button in the mouse and choose the option "Edit image"
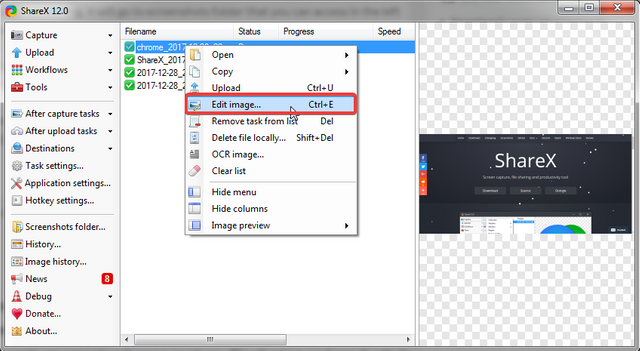
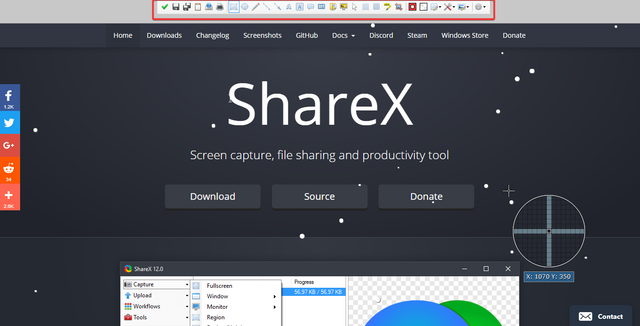
The selected image will open with a Bar on Top with all the options you need to edit the image
Now i will use the option ( Screen recording GIF) to make some editions in an image captured with a "capture region" option. This option is great because like this you can upload here directly and it looks like a video, but remember, you can see some lags because this is a Gif ;)
Pretty easy right? You should try!
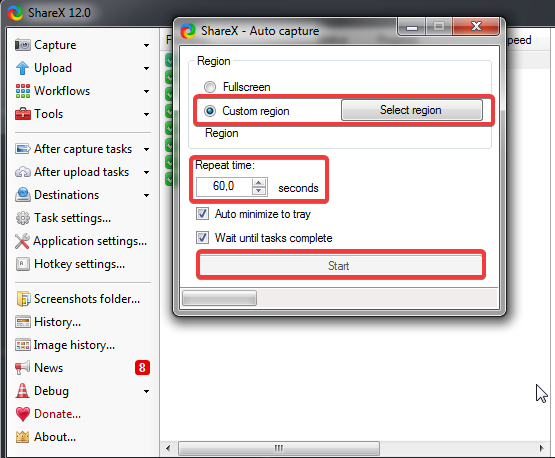
If for some reason you need to do Auto capture, this is what you have to pay attention:
The capture area, full screen or some particular region.
The space time between captures, and you are ready to go, press start and let the program do the rest.
Lets go to the next menu:
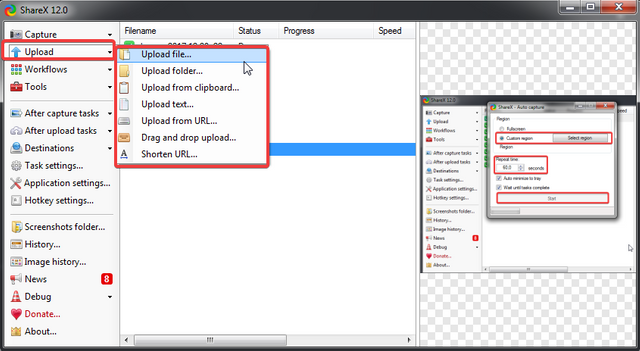
Upload:
Here you can select a file from your computer and upload directly into the program for editing purposes, or just drag and drop.
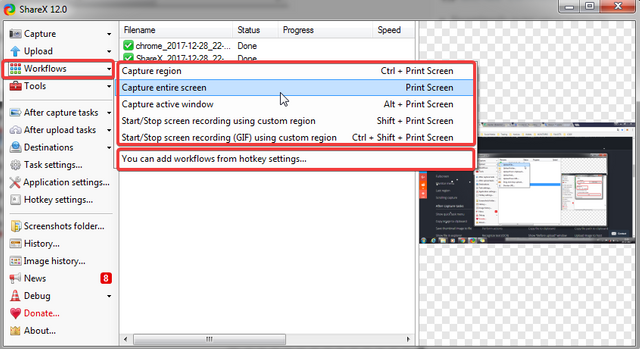
Workflows:
Is the menu where you can edit your hotkeys , very useful to save time

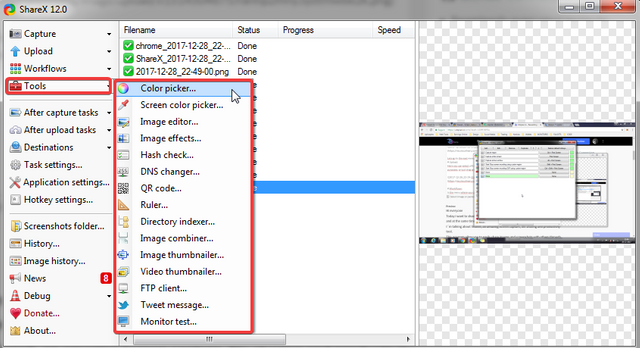
Tools:
As the name implies, where you can find some useful tools, for example:
Color Picker; Image Editor; Image effects; Image thumbnailer; Video thumbnailer between others...
And of course, Image combiner, this one is super useful for my presentations, you select the number of image you want and this option combine all the images.
We are done with the first menu tab.
The remaining menus are comprised of a bunch of toggles that determine what happens directly after you make a screenshot capture.
After capture tasks
Where you can add annotations, shadow, watermark etc...

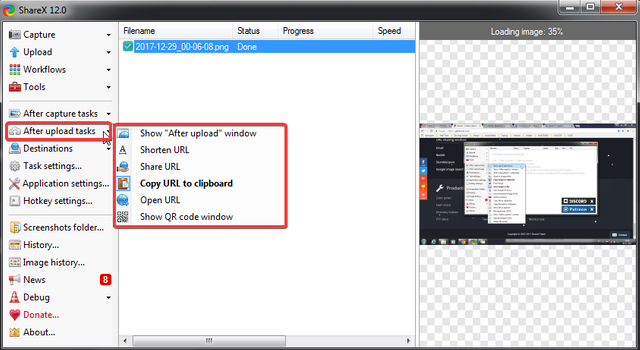
After upload tasks
Here you find actions that occur after a file or capture has been uploaded, like copy URL to Clipboard or shorten URL, etc...
and finally
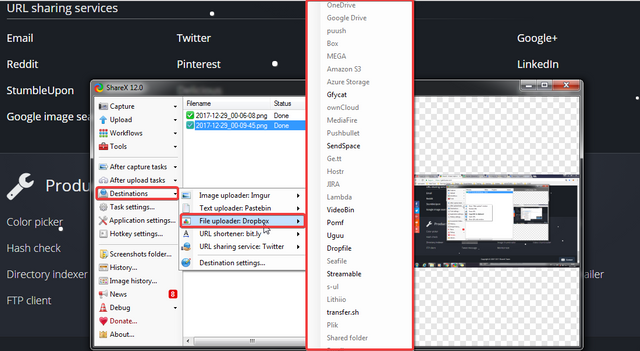
Destinations
Here you can set different destinations for different files based on the file type, such as setting Dropbox for miscellaneous files, Imgur for images while setting Pastebin for text.
Hope this tutorial help you with the bases to use and to abuse of all these functionalities and to start saving time in many of your works.
Download the program in official site Here
Check Github project Here
Thanks
@aleister
Posted on Utopian.io - Rewarding Open Source Contributors
This is indeed a very useful product. I like products which are multi functional, and I guess now I will have to download this one to reduce my time spent on different applications.
Absolutely, for me this is a time saver ;)
Muito interessante amigão!
Dá-me um jeitão ;)
This app seems to be useful for us, thanks for the introduction and tutorial
Super useful indeed, give it a try ;)
Your contribution cannot be approved because it is a duplicate. It is very similar to a contribution that was already accepted here and Here
You can contact us on Discord.
[utopian-moderator]
@manishmike10, oh ok i understand, unfortunately i didn t find those contributions when i made a research before making the tutorial..