Basic Natural Yeast Starter and Sourdough Bread Baking Recipe
It has been some time since I published my first article with you ……unfortunately; life just gets in the way! I have found a lovely house to buy here in Spain which is fantastic and very inexpensive. I just have to sell my car in England and then I can go ahead and buy, and have security again. Trouble though with the purchasers, who keep on trying to reduce the price. These ‘so called’ helpful companies have you over a barrel – and don’t they know it. I will keep you informed.
Back to baking. I left you with my thoughts on Sourdough Bread. Below is a natural yeast starter recipe, it really works. Ignore the ‘experts’, this will over time give you everything you could wish for.
The starter is very easy; it just takes a little time to ‘start’.
Basic Natural Yeast Starter Recipe
You will need:
50g/2ozs/1/2cup Strong Bread Flour
Sufficient Water to make soft dough.
The same quantities of flour and water each time you refresh.
Making a 'natural' yeast starter is easy. All you require is flour - the food, water - moisture, sunlight - warmth, and TIME. Give the above mixture two or three days, (or longer if cold weather). When it has risen and collapsed back down, throw away 4/5ths of the mixture. Add more flour and water to the remaining 1/5th - to replenish the food source, (the same amount as above). Go on repeating this process and before long you will have an active sample of natural yeast.
You will find that as the yeast becomes more active you need to add new flour and water more frequently. When the mixture is very 'bubbly' and quickly achieves twice its volume, it is ready to use. This needs to happen within one day for it to be ready. As long as it is kept warm, fed and given time, you will always have an 'active' natural yeast starter. Keep up this regime saving a portion of your yeast for the next baking, reactivating it as often as you want to. The 'older' your yeast starter is the better it becomes and the quicker it is to reactivate.
The best results though are achieved through using your yeast starter regularly. Commercial bakers produce the best sour dough breads simply because their natural yeast starter is used every day, not reactivated once a week as the home baker has to do. People who live in hot countries are very lucky, they have no problems activating natural yeast and getting a high rise with their sour dough breads. In Britain, to achieve the best results, we have to put the sour dough in a warm place - cold kitchens are not conducive to good sour dough bread! So go for it and give it a try. Do not be intimidated by the 'so called' experts.
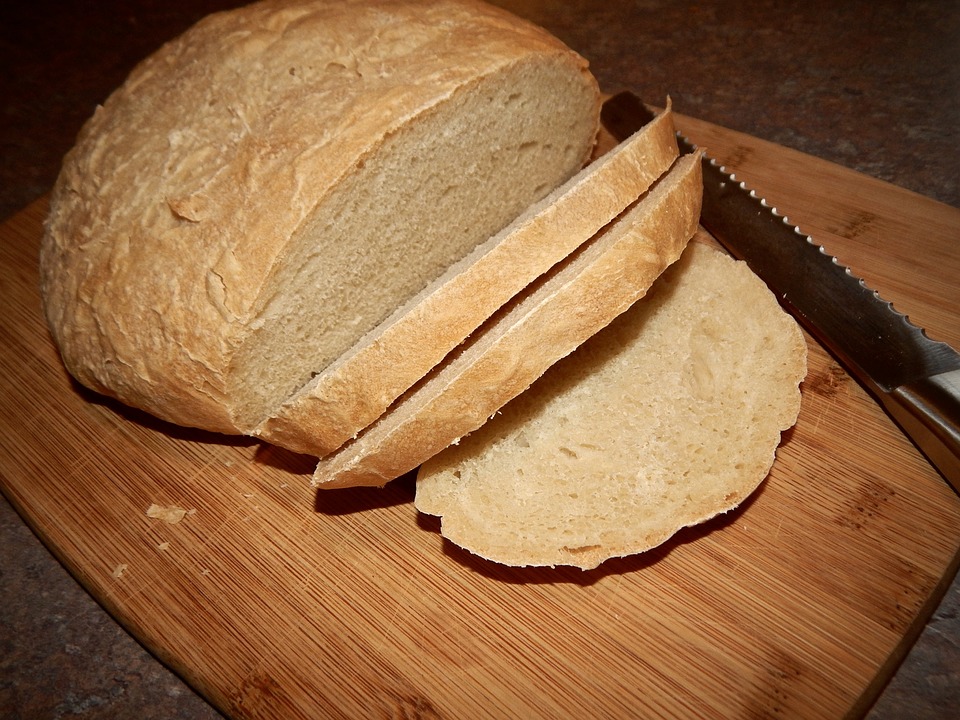
Here is my recipe for a straight forward, simple White Sour Dough Bread recipe. You can easily substitute a part of the white flour for Rye, Wholemeal, or add extras like dried fruit, nuts and seeds. Just keep the dough on the 'softer' side by adding sufficient water. Do though make white sour dough first until you feel happy with the process.
Whatever you do please remember to keep a portion of your natural yeast starter for the next time. I very nearly used my entire starter several times in the past, and only just remembered to scoop a little out at the last minute! You only require a tablespoon of starter to reactivate the process. It is the flavour profile you want initially for your starter, not the leavening action.
This starter will only improve over time. It will last for years if you keep on refreshing it, and can be reactivated easily, (even if it looks a congealed, dry mess). Just give it more food, warmth and moisture. After all, is it not the flavour you want from Sourdough bread?
Ingredients
1 1/2 Cups of Active Starter
300g/10 1/2 ozs/2 Cups White Bread Flour
3 tsp Salt
300 ml/10fl ozs/1 1/4 Cups Warm Water (approx)
Equipment
Scales
Jug
Large Bowl
Electric Mixer (If required)
Baking Sheet
Roasting Tray filled with hot water
Wire Cooling Tray
Sharp Knife for Slashing Oven Clean Cloth/Plastic Wrap
Method
Weigh Out and Mix together the ingredients adding sufficient water to make a soft dough.
Knead until the dough is smooth and elastic - about 5 minutes. This can be done by hand or Electric Mixer with Dough Hook (takes less time).
Cover dough with plastic bag or damp cloth. Place in a warm place.
Allow to prove for about 10 hours until it is well risen and aerated.
Knock the dough back down with your knuckles.
Shape into a firm ball and place inside a well-floured container to prove. (If you don't have a special basket use a plastic bowl lined with a floured cloth.
Cover and allow to prove again for a further 6 hours until well risen.
Turn on oven and heat to 450 degrees F (230 degrees C). Put water tray into bottom of oven to add steam.
Carefully turn out dough ball onto a baking sheet and slash the top into your desired pattern.
When the oven is up to temperature and the water is steaming, Place dough into the oven on the shelf above the water tray. Turn oven down to 400 degrees F (205 degrees C).
Bake for up to one hour, testing for bake after 40 minutes. (sourdough is not an exact science)!
Tap on bottom of the loaf and if a hollow sound is heard the bread will be ready.
Remove the water tray and turn off the oven. Put the loaf back into the oven for a further 5 minutes with the door shut, this will develop the crust further. Remove and cool on wire rack.
Good luck with this!
Just give yourself time and don’t follow the ‘crap’ pontificated by others – have confidence in your own ability.
As Sourdough is a ‘Natural’ Leaven, next time let’s look at ‘Chemical’ Leavens. See you then.
Yes... life is like a box of cookies! Nice posting ! :)
...or a full bread box! Thank you!