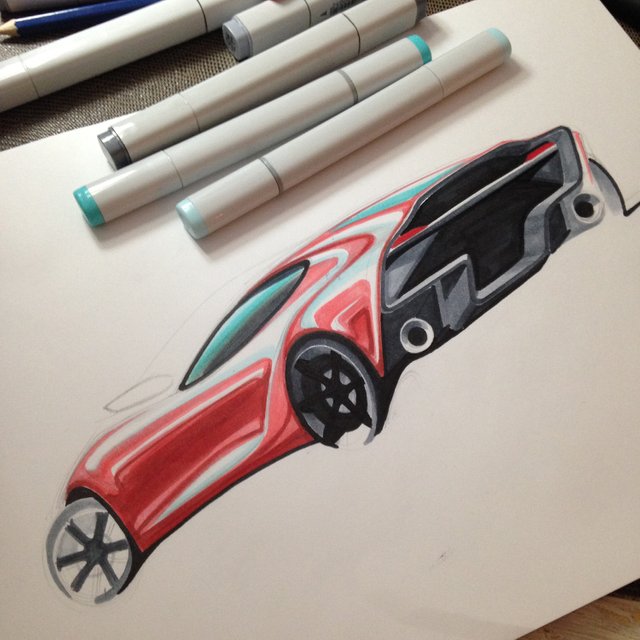
9 Simple Steps to Sketching a Car with Markers
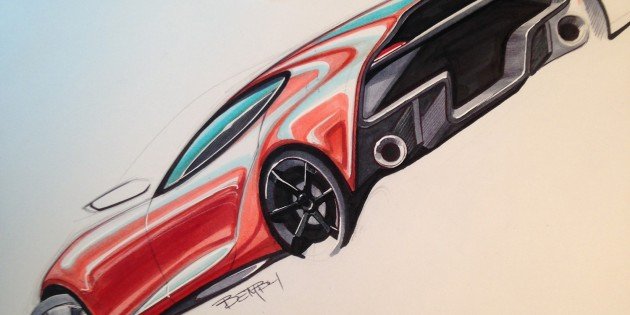
Sketching cars with markers will always be a little bit more special than using Photoshop for me. Here are 9 steps to sketch a car with markers I think you’ll enjoy.
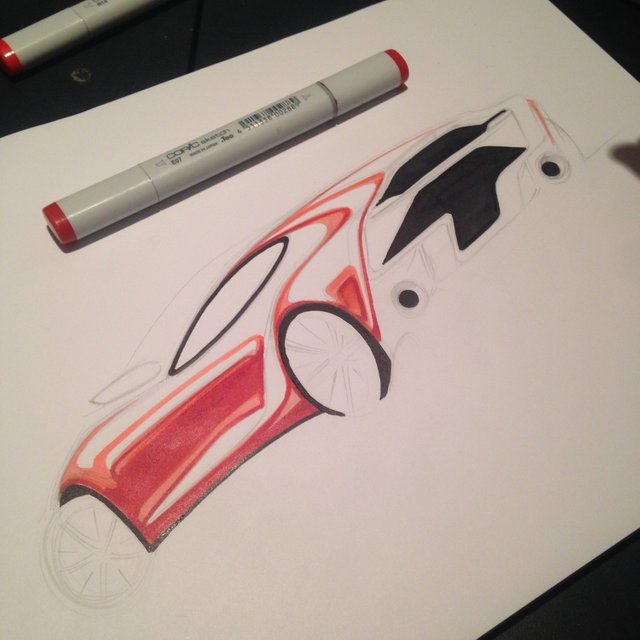
Step 1:
Fill out the outline of the car with a light pencil. Messed up the lines? No worries, they will get buried under layers of markers throughout this render, so we won’t even see those lines once we are done. Once you’re happy with the the lines, start with a light marker, using a color of your choice, to start laying down some sweet reflections.
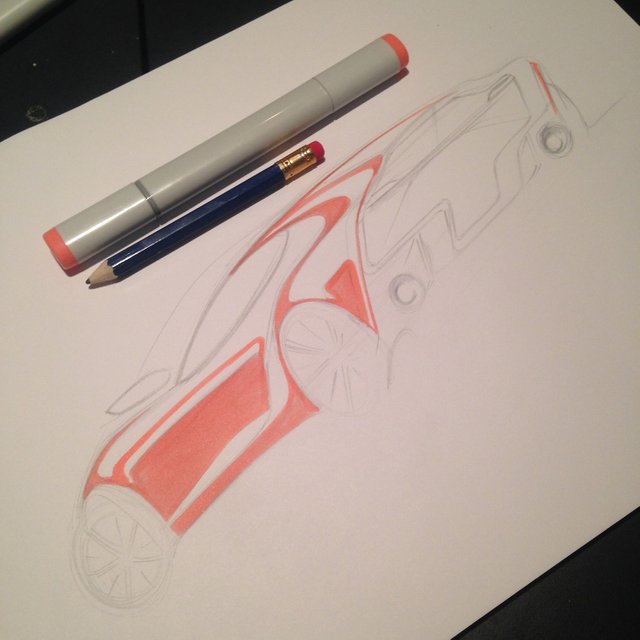
Step 2:
I usually add black pretty early in my sketch to give it some nice “weight” and contrast. I already know what parts will be black, like the tires and rear grille/air outlet for example, so I fill those in with a black marker.
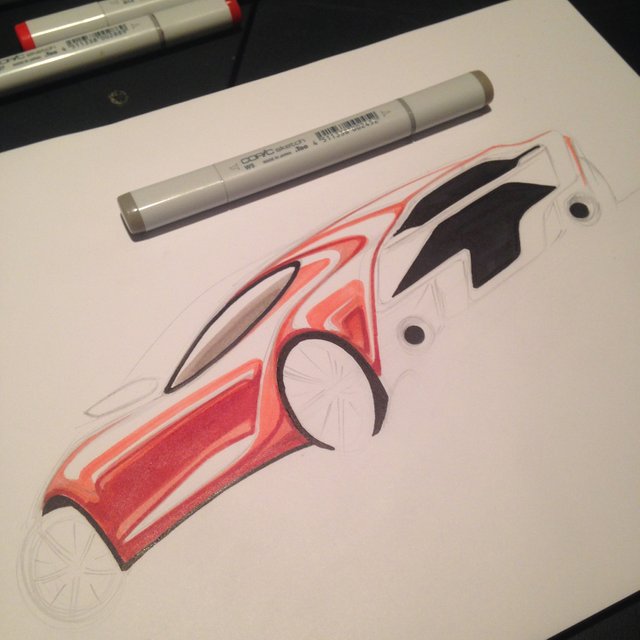
Step 3:
Ok, now it’s time to start working on those reflections. If you’re wondering how to sketch reflections and where to put highlights and shadows and so on, all I can say is it all comes down to practice. Look at real cars and photos and analyze how the reflections are showing on the car, then try and duplicate that in your sketch. Here I’m filling in my first layer of light red with a darker shade of red to get a first layer of “depth” to the shade.
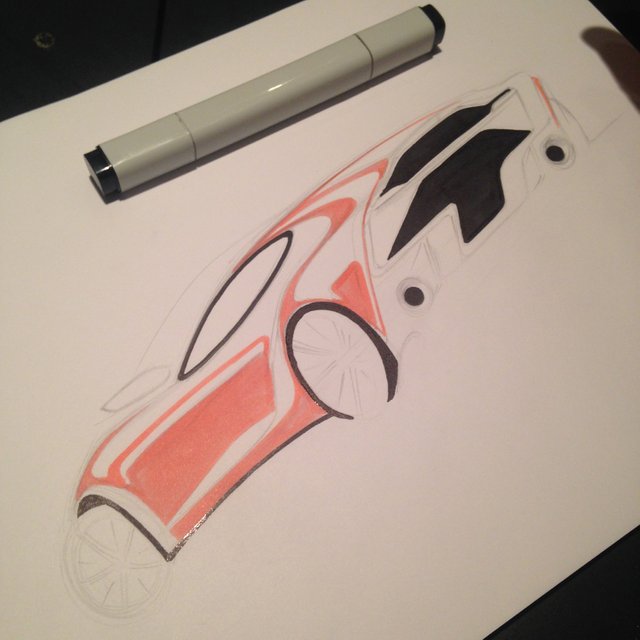
Step 4:
Here I do the same thing as step 3, but using an even darker shade of red in the center of the body to make the reflections come alive.
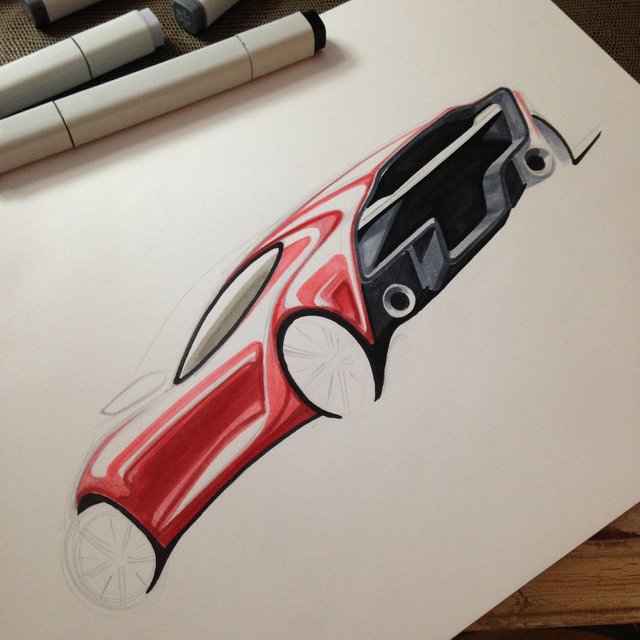
Step 5:
I like to use warm grey for window reflections and cool grey for the rest of the grey body part. It just gives the sketch a bit more contrast. In this step I’m adding a horizon line reflection in the side of the window.
Step 6:
Alright it’s time to start getting into details now! I’m using 3 different cool grey markers here to define the design of the rear. I always keep in mind where the light source is coming from. In this case it’s coming from the top. I try to add more detail to the corner that’s closes to the “camera” or view point. In this case this would be the left rear corner. Why? It just gives the sketch a cool sense of depth and perspective.
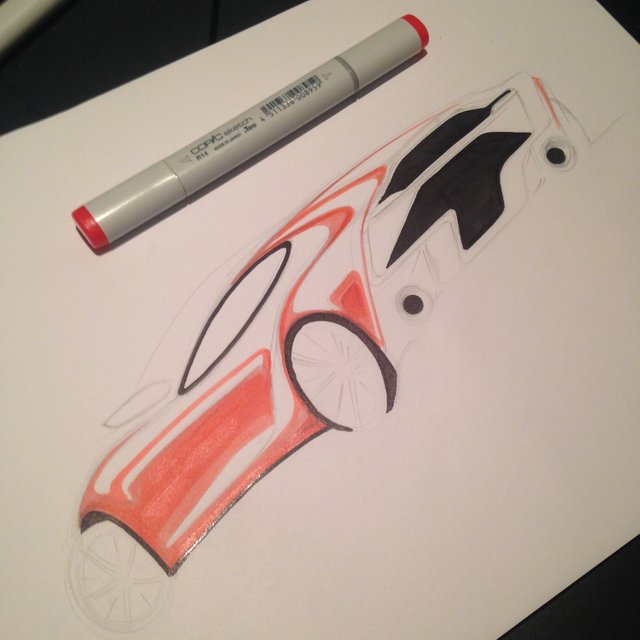
Step 7:
One thing I get impatient with is sketching wheels. It can take a long time to just get one wheel right. So what I did here is using the black marker as much as I can do define the wheel and spokes. It doesn’t matter if it all looks black right now because we are gonna use white ink and a white pencil later on to add some nice shading to the wheel. I’m also leaving out a lot of details for the front wheel, since that is not the focal point of this sketch. I want to keep your eye focused on the rear of the car.
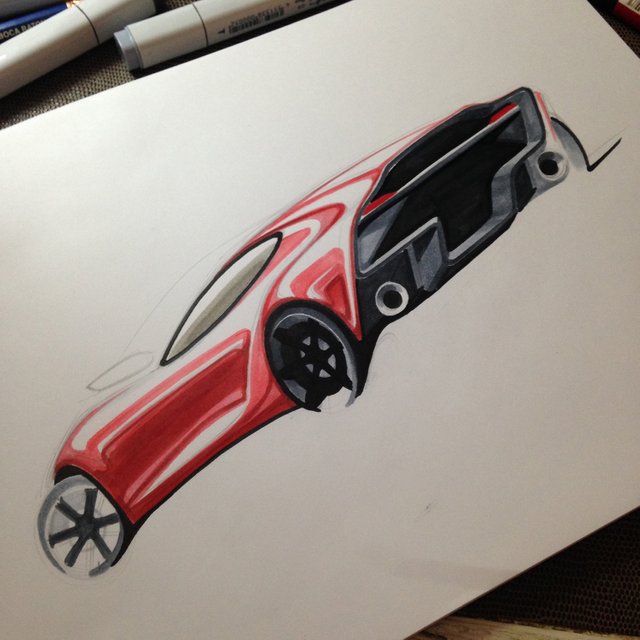
Step 8:
We are almost done with our car sketch here but we still have some fun steps to do before showing this off to mom. In this step I’m adding a shade of light blue. This is to reflect the blue sky from above. So think about what surfaces are facing up and if you like, add some blue to those areas.
Step 9:
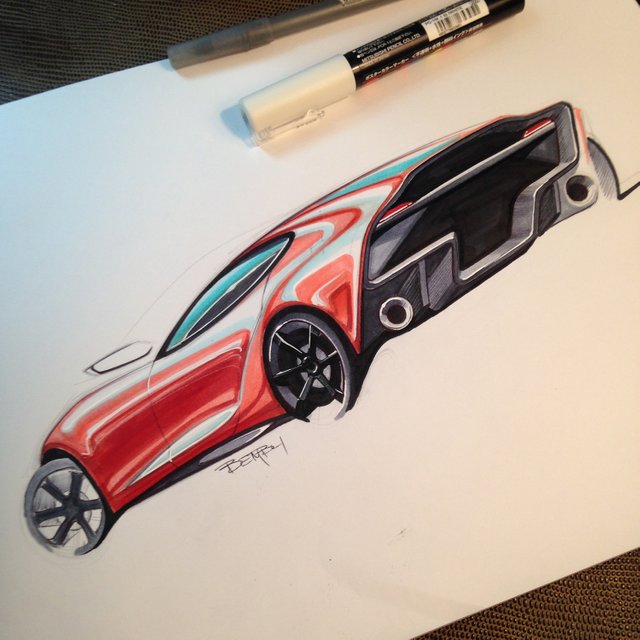
We’re done! Almost… In this final step of the car sketch I want to tighten everything up. I’m using a BiC pen to tighten up the outlines and section lines where the markers might have bled or “melted” into each other. Remember when I said we’ll define the rear wheel design with white ink? Well that’s what I’ve done here. The wheel is still black, but now it makes more sense since we added highlights to it and to the rest of the car. Also, before you’re done, sign your work! Congratulations on finishing an awesome sketch :)
I hope these 9 steps to sketch a car with markers were useful to you and that you learned something.
If you did, please share this with someone you think might enjoy it as well, I’m sure they’ll thank you for it :)
Take care and keep that pen moving :)
Marouane
Amazing information/trick.. Resteemed! :)
thank you!
That's really amazing..
i like it..
Absolutely awesome, I always admired such sketches and seeing now how they come to life is very inspiring. Thank you for sharing this with us.
Excellent process description! More of these! I toi am an artist and really value this kind of content. Followed
Great post, I just love to see the process of this car screeching drawing style. Its so raw and geometrical the way you start tracing lines and producing light and shadow, making the perfect perspective of the shape, its really satisfying to see. Really cool, keep it up!
Congratulations @bembli! You have completed some achievement on Steemit and have been rewarded with new badge(s) :
Click on any badge to view your own Board of Honnor on SteemitBoard.
For more information about SteemitBoard, click here
If you no longer want to receive notifications, reply to this comment with the word
STOPBy upvoting this notification, you can help all Steemit users. Learn how here!
Ohhh thats amazing great work there.
Wow look realistic,nice one^_^
Bytheway, my blog is about drawing too, would you like to visit it sir?
amazing, good job
I'm a big fan of cars and this drawing is so realistic you have a lot of talent my friend