First Steps to recording your music Pt 2 - Mics and mic set up
Hi Steemitarians!!
Its time to look at the next part of our discussion on the things you need to set up for recording in your home or even if you are preparing to record a studio for the first time. If you haven't seen the first part you can link to it here :https://steemit.com/music/@audio-nrg/first-steps-to-recording-your-music-part-1 and you can find a link in that post about my intro as well. Please UPVOTE these posts if you believe they have value for yourself or others to help.
Now lets get started. In the last post we looked at the basic software and hardware to get started recording . The software was called a DAW or Digital Audio Workstation. This software allows you to recording any kind of audio or midi information into your daw and create music. Pretty simple, but things can get a little more complicated when we want to set up everything for recording our first song. To do that we need the obvious, a microphone! but what kind of microphone do we use? are there different types of microphones? how to they work and when should i use the right kind of mic?
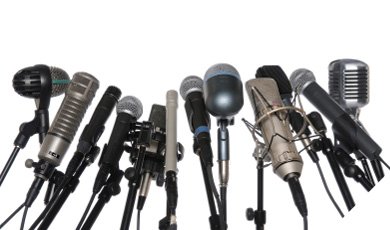
There are 3 main types of microphone being used in many different applications and environments today. Experimentation can always be done with the variety of mics but basically they slot into these three types:
- Dynamic
- Condenser
- Ribbon
- DYNAMIC MICS
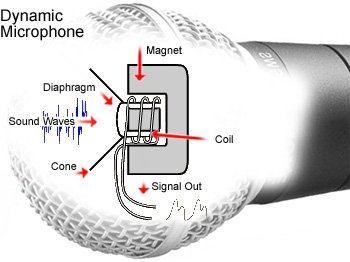
Each of these mics work in different ways because of their design structure to capture sound. The first one and perhaps the most popularly used is the Dynamic mic. This mic has is a magnetic diaphragm wound in copper wire inside the mic. This device then sits inside another magnet and moves forward and back very fast creating an electro-magnetic current as it captures your voice ( as an acoustic sound-wave). The vibrations of air pressure from your words as you speak or sing into the front of the mic pushes the inner magnet forward and back.
These mics are used mainly for live performances because they don't require any extra power source such as phantom power (so don't push that 48v button on your sound card for a dynamic mic and CERTAINLY NOT A RIBBON MIC). Dynamic mics are usually quite responsive and tough handling mics varying in price from $10 bucks to about $1400 and even more depending on brands. If you are looking at vocals then this is generally the mic most will look at using especially for live performances. Another important element you need to understand about any mic is whats called the POLAR FIELD of receptivity. This is the receptive field where your acoustic energy (voice or any other sound) will be received by the mic. Why is this important? well it really matters to make sure your voice is being heard. Below is a look at the polar field of a Dynamic mic with a CARDIOID pattern.
(Shure 58A are among the most popular and reliable dynamic mics used around the world, A popular instrument dynamic mic is the Shure 57 and used for guitars and snares due to the frequency response in their design)
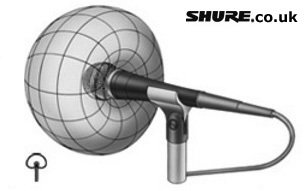
You can see in this picture the general shape of the polar field that receives your voice and of coarse, being directly in front of the mic will give a better, clearer reception. When you move your mouth to the sides, above or below, this is called moving "off axis" and it means you are moving away from the centre of the field which can cause some loss of energy for the mic to pick up, which means that there will be loud and soft dips in your recording, and you don't want that.
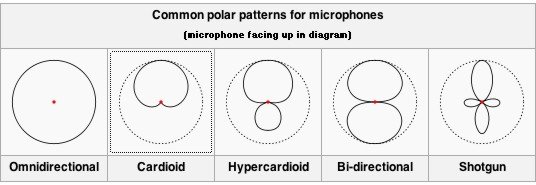
Some mics have different patterns or optional multi patterns, usually on Condenser mics. The reason for the variety of patterns is to provide for different recording environments and used more in recording for film or special projects. These can include, Super-cardioid, Hyper-Cardioid, Omni-directional and Bi-directional or figure of 8. The dynamic mic you use to record for singing won't use these types but they are good to know about especially if you're using mics on other instruments. Have a look at some of these designs in the pic below:
So to summarize, Dynamic Mics-
- most commonly have a Cardioid polar pattern
- do not need 48v phantom power
- Commonly used a vocal mic for live events
- are based on electro-magnetic diaphram design
- are generally strong and durable mics
- CONDENSER MICS
The condenser mic is built on a different design from the dynamic mic and is called a capacitor plate design. Condenser mics are more sensitive and can provide a warmer smoother sound and sometimes less distortion and noise interference. They are more responsive to the incoming sound as well, due to the sensitivity plates. Condenser mics can be used for vocals and often give a very nice tone to the voice. This is why they are commonly used in radio and television Broadcasting as well. Many condenser mics are more expensive than dynamic mics and also have more features such as variations in diaphragm size, polarity patterns (some have a few choices and can switch easily between them) and all require phantom power from a pre-amp (the 48v button on your sound card is switched on). This extra of current is what make them more responsive and sensitive at the same time.
below is a very popular brand of Condenser Mic called the AKG 414. A similar model called the AKG 214 comes standard in a cardioid pattern or you can pay a bit more and you can have the 414 model with a multi pattern option (fig 8, Omni, Cardioid and super cardioid) and you can read more about it here: http://www.akg.com/pro/p/c414xls
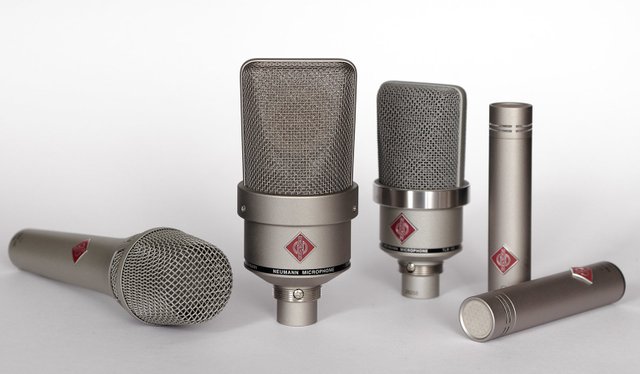
Below is a collection of Neumann (pronounced noi-man)Condenser mics and they are among the best on the market and can get very expensive)
The Condenser Mic works by having two capacitor plates at the front of the mic, one of the plates is thinner than the other (usually plated in gold) and when the acoustic sound waves makes contact with the light plate it presses against the rear plate and draws a charge from the phantom power to add current to the capacitors. you can watch a brief explanation here:
Condenser mics can be used to record your vocals or on most instruments such as a overhead mics for drums and guitars either electric or acoustic.
To summarize, Condenser mics:
- use a capacitance bi plate design
- require the 48v phantom power when plugged into a pre-amp
- can have multiple polarity patterns to select
- often used in broadcasting
- have different sized diaphrams for variation in receptivity from acoustic sound waves
- Can be used for instruments and vocals and can provide a very pristine quality to your recording
- are usually more expensive than the average dynamic mics
- RIBBON MICS
Ribbon mics are not as widely used as the previous two mics we have discussed here and this is due to their expensive design and are more fragile and sensitive. They operate by using a very fine corrugated piece of aluminum ribbon (about as thin as a hair) in the centre of 2 magnetic poles and then vibrates as the acoustic wave hits the ribbon. These mics are very sensitive and SHOULD NOT be used for louder vibrant instruments such as electric guitars and amplifiers or most brass instruments such as trumpets and horns. The ribbon is very fine and can easily be destroyed costing you a lot of cash to repair. Some Ribbon mics such as Telefunkens can cost 20-30 thousand dollars. During my time at JMC college i was able to compare a number of different mics from ribbons and condensers and we were able to compare the differences in these mics and their tonal qualities. One of these was a famous RCA Ribbon mic about 45 years old and personally owned by my teacher. He was offered $8000 bucks for it and he turned down the offer.
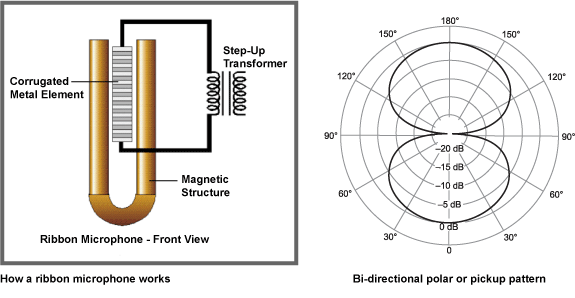
Ribbon mics have a bi-directional polar pattern as their standard pattern design due to the placement and structure of the mic internally and the receptor of the ribbon. As mentioned the Ribbon mic DOES NOT USE 48v phantom power and use a transformer within their design. The increase of power to the unit can blow the whole microphone circuitry out. The transformer is also what makes ribbon mics so desirable as transformers provide a warmth to the electrical circuitry and this improves the quality of the recorded sound into the track. There is 1 Ribbon mic that can take phantom power and that's the Royer 121 Ribbon mic. This is a well designed mic with a lot of interesting sonic tonality and very clean sound. They can retail for around $1200-1800 dollars.
The Ribbon mic summary;
- Doesn't need 48v phantom power (always check some models are different, with newer technology and reduction in production costs and experimentation modern equipment needs to be regularly checked and studied)
- Uses a ribbon of fine aluminum between 2 magnetic poles for electromagnetic induction
- the transformer provides a unique analogue sound and warmth not found in other mics
- can be very expensive (some modern makers have newer cheaper models) but the older the better if kept in good condition.
- have a standard figure 8 (bi-directional) polar pattern
-not suitable for loud dynamic instruments such as kick drums, electric guitar amps and some brass instruments.
So that's a run down on the basic mics you are likely to use in your recording sessions. I hope this section has helped you understand mics better and now we can have a look at how to set them up with your DAW and sound card. In another lesson we will look at how to use mics in a set up to record instruments and vocals.
MIC SET UP
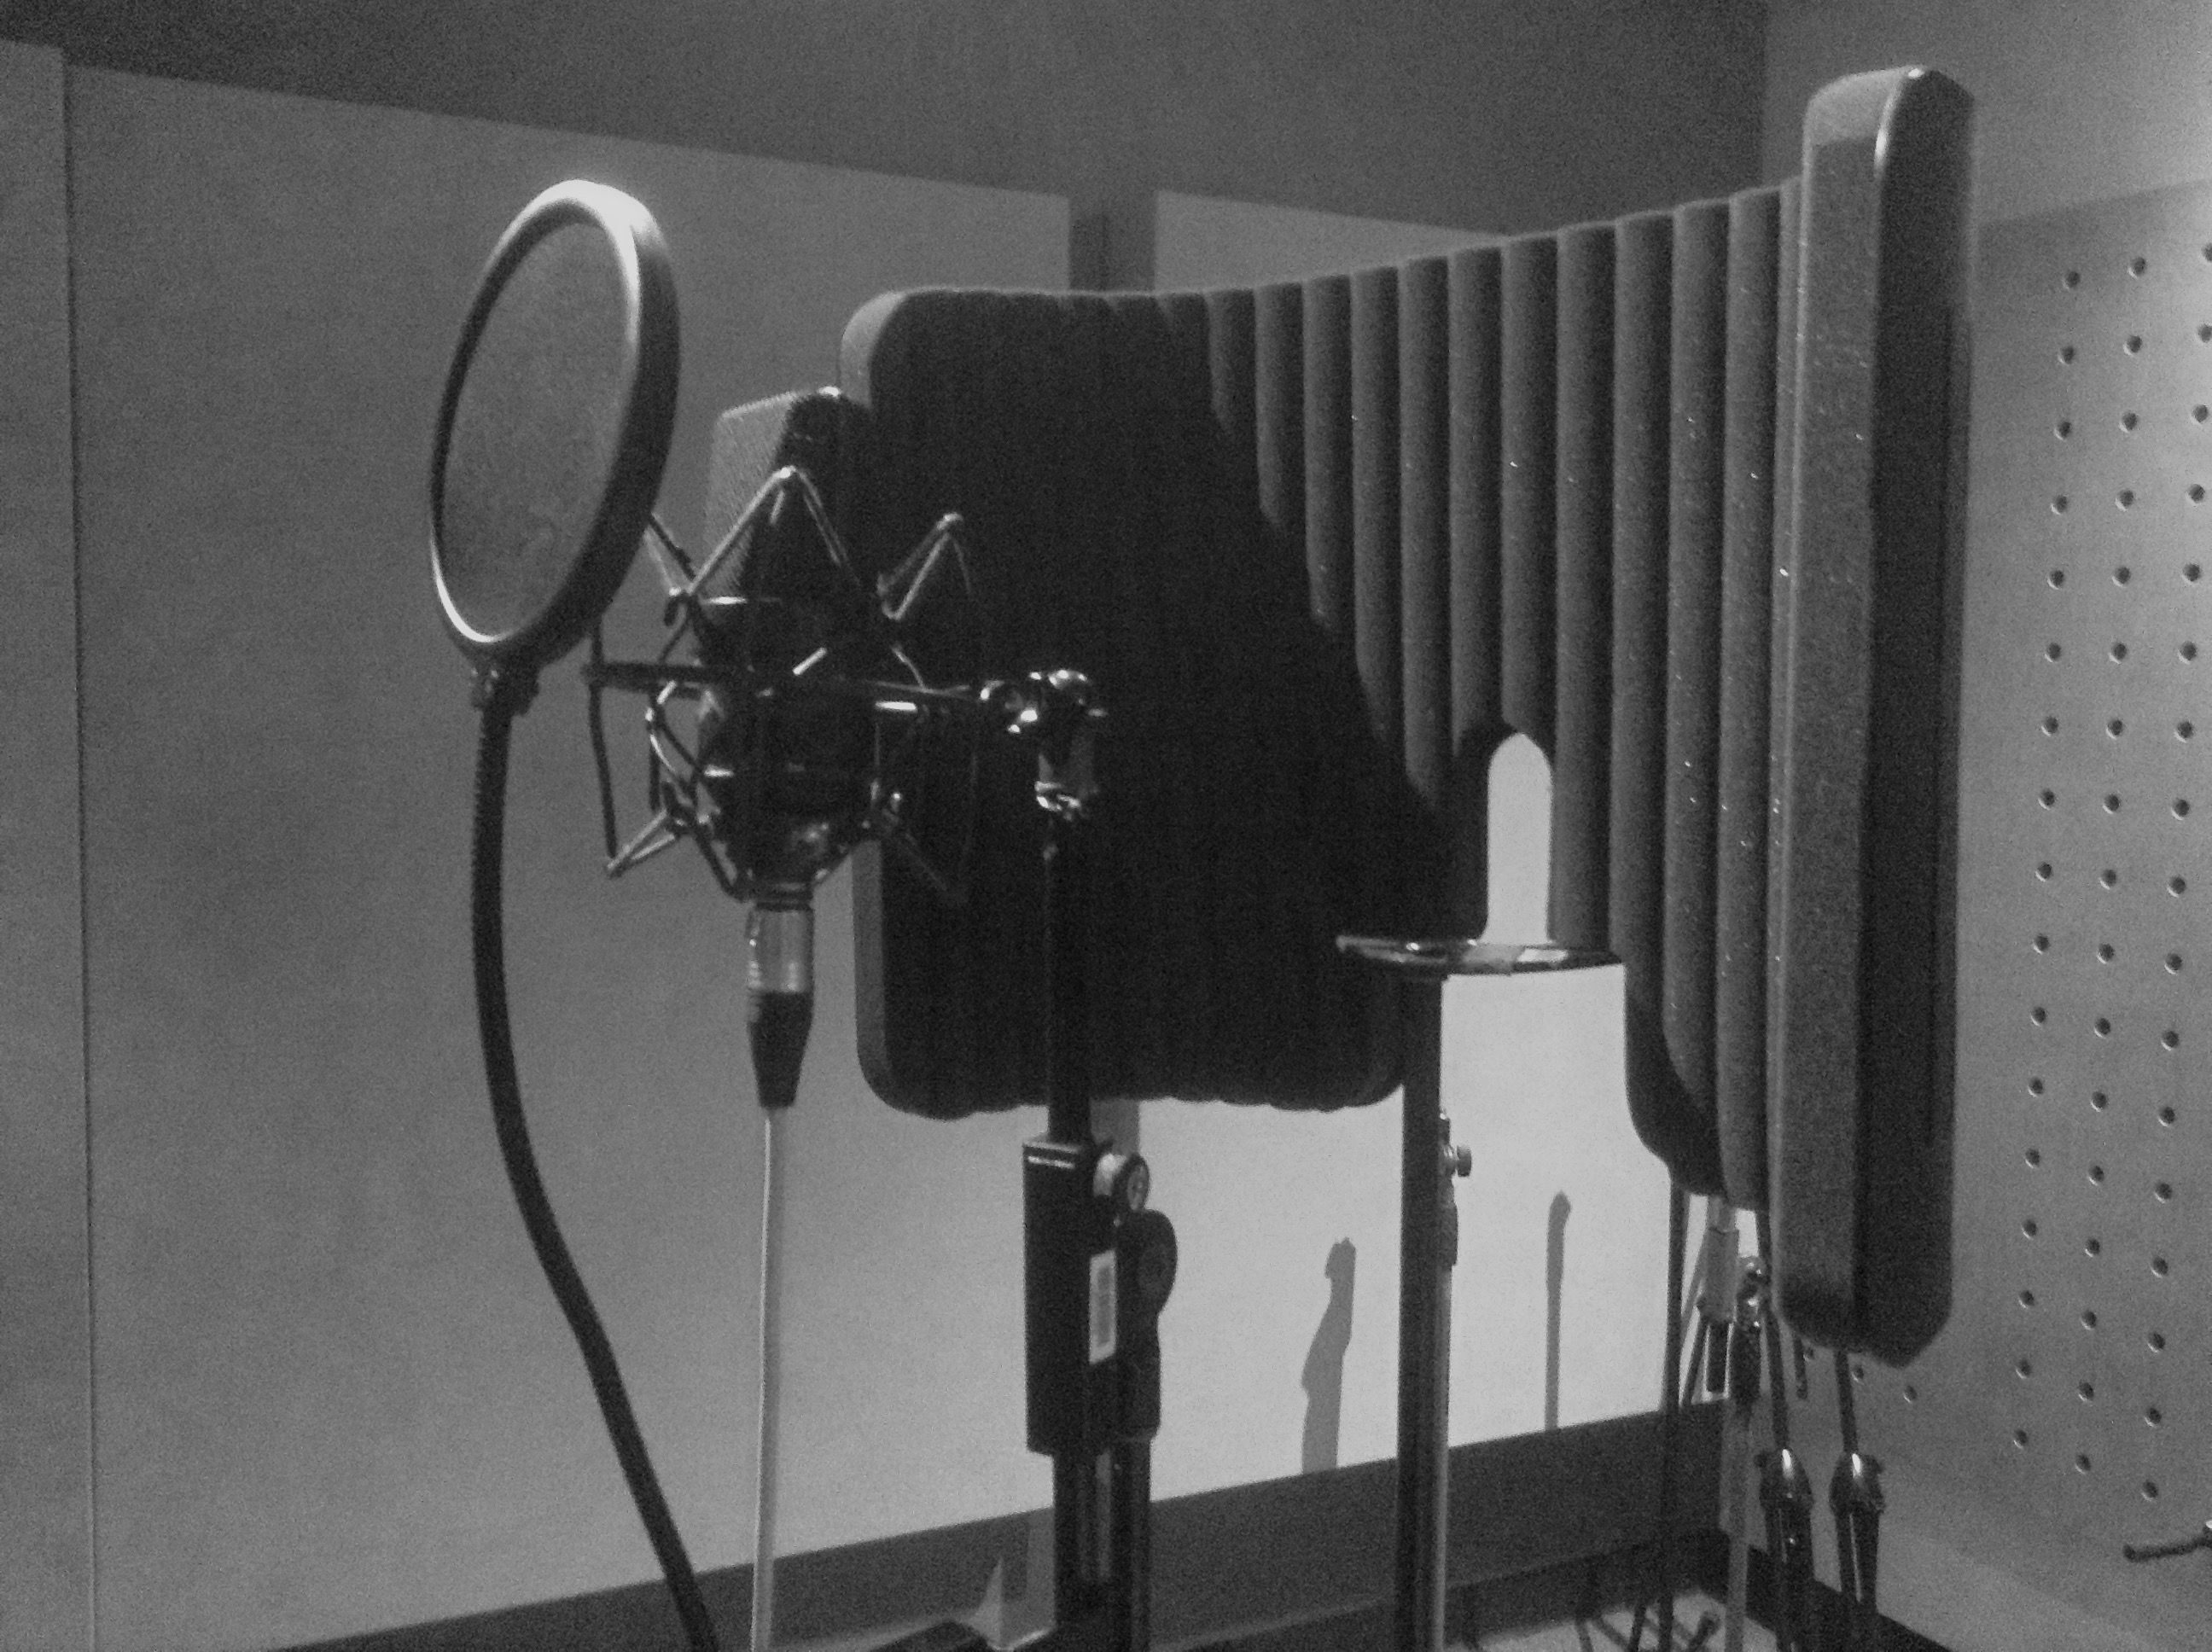
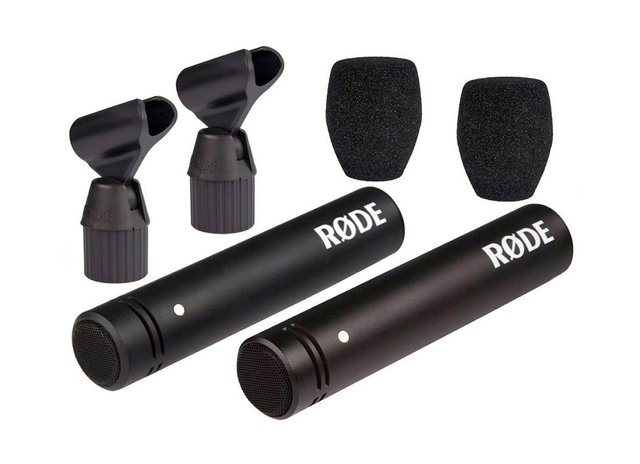
Your sound card and the amount of mics will determine how you record your session but we will start with the idea that you have two condenser mics. These mics are two pencil type mics (Pic Below) and set up for stereo recording of a guitar. The best way to run these in your home studio is to have the mics mounted on two stands. They are using XLR cables and we will run them into two separate mono channels into your sound card, )if you have a mixer you can run one mic into this and back into your sound card to add some color to the recording). You must then make sure the 48v phantom power is on to power the mics. You then have a USB that runs to your PC.
In your DAW you create two mono audio tracks, one for each mic as the line comes in. You need to make sure you can get a signal, so depending on your DAW software you will probably need to 'arm' your track to get a live signal into the software that you can monitor. At this point you can give your instrument a play and see what kind of signal strength you are getting. This stage is very important as you want to make sure your signal strength is not clipping. This means you are not seeing red at the top of the level meter in your DAW on the active audio tracks or in your sound card. If your signal is clipping (going red) then your sound and recording will be distorted and you are driving the signal from the sound card to hard. If you aren't getting any signal, or very low signal, then you need to push your signal strength more.
In either case, this means you have to adjust your gain level for each track at the sound card, this may mean turning it up quite high to get the right level, but you should also give your instrument some hard strumming or blowing to see the difference in signal between a light strum and a hard strum or blow. Getting the gain level right is very important because if its too high you can't undo distortion, but you can always increase the gain if your recording is too low, and i will discuss how in a later blog. For now just make sure you have done the above tips and get a decent level going into your DAW. In your software, you will also want to play a practice song and watch the levels in your tracks with the goal to keep the signal around -16 to -10dB on the meter.
The reason for this is that it allows 'headroom' in your mix for later when you finish recording and need to put the mix together. Head room means that there is enough space for the music to move and make it louder at later stages of the mixing process with out getting distortion again, that is, the space between -16dB and the ) level or UNITY.
So that's enough to get you started and running into your DAW to get recording. I think there is also enough information for you to sink your teeth into for the article as a whole. Perhaps i can cover some microphones that you can consider in the next blog.
So thanks for reading, PLEASE UPVOTE if this was useful information and feel free to join my AudioNRG.com network, SUBSCRIBE on Youtube, Twitter and here on STEEMIT. i might even look at a video version of this blog this week on AudioNRG too so be sure sure to like my Facebook page
regards
Shan the Sound Man
Great stuff! I'm here to help people record too. So it is awesome to see your post. Cheers! Lij
Yes. Let's build a little audio community on this platform :)
Congratulations @audio-nrg! You have completed some achievement on Steemit and have been rewarded with new badge(s) :
Click on any badge to view your own Board of Honor on SteemitBoard.
For more information about SteemitBoard, click here
If you no longer want to receive notifications, reply to this comment with the word
STOPSurely interesting post!