Markdown: Lo que he aprendido en Steemit para hacer un Post: Segunda Parte / Markdown: What I learned in Steemit to do a Post: Second Part

Markdown: Lo que he aprendido en Steemit para hacer un Post: Segunda Parte
Muy buenos días universo, buenos días mundo de Steemit, Hermosos lectores bendiciones para todos. Tengo dos meses en Steemit y ha sido para mi una experiencia muy productiva, quiero hoy compartir este post donde explico cómo colocar el texto a la derecha y a la izquierda de las imágenes, además de como envolver una imagen con el texto.
Realmente me costó un poco al principio querer colocarle a un texto o párrafo una imagen a su derecha o su izquierda, pero después de batallar un poco y probar varias veces puede lugar comprender como usarlos adecuadamente para obtener el resultado que esperaba en mi post.
Quiero aclarar que no soy un experto en Markdown, solo voy a compartir contigo mi aprendizaje en estos dos meses en Steemit y como estoy usando yo estos códigos en mi post. Además, te recomiendo leer mi post titulado Markdown: Lo que he aprendido en Steemit para hacer un Post, en este post doy varios “trucos” que complementan lo escrito en esta publicación.
Imágenes a la derecha del texto
Para colocar las imágenes a la derecha del texto debes usar los siguientes códigos:
<div class="text-justify">

<div class="pull-left">
Después de los códigos procede a colocar o escribir el texto o párrafo que quieres colocar debajo de la imagen. El texto puede tener la extensión de líneas que tu desees, pero yo prefiero no colocar párrafos muy largos mayores a 5 líneas, ni menores de tres líneas, queda a gusto del escritor. En Word este párrafo tiene 5 líneas, sin sangría. Luego que escribas el párrafo debes colocar los siguientes códigos y al final la imagen.
Se debe ver de esta forma:
Después de los códigos procede a colocar o escribir el texto o párrafo que quieres colocar debajo de la imagen. El texto puede tener la extensión de líneas que tu desees, pero yo prefiero no colocar párrafos muy largos mayores a 5 líneas, ni menores de tres líneas, queda a gusto del escritor. En Word este párrafo tiene 5 líneas, sin sangría. Luego que escribas el párrafo debes colocar los siguientes códigos y al final la imagen.
Imágenes a la izquierda del texto
Para colocar las imágenes a la izquierda del texto debes usar los siguientes códigos:
<div class="text-justify">

<div class="pull-right">
Después de colocar el código anterior procedes a escribir o copiar el párrafo, una de las cosas que note fue que la imagen disminuye su tamaño para adaptarse a este esquema, tanto si quieres que la imagen la coloques a la derecha o a la izquierda del texto. Luego de terminar tu párrafo debes colocar el siguiente código justo debajo del párrafo:
Se debe ver de esta forma:
Después de colocar el código anterior procedes a escribir o copiar el párrafo, una de las cosas que note fue que la imagen disminuye su tamaño para adaptarse a este esquema, tanto si quieres que la imagen la coloques a la derecha o a la izquierda del texto. Luego de terminar tu párrafo debes colocar el siguiente código justo debajo del párrafo:
Envolver la imagen con dos párrafos
Para envolver la imagen con dos párrafos debes colocar los siguientes códigos, y seguir este procedimiento que te explico a continuación:
<div class="text-justify">

<div class="pull-left">
Ahora debes escribir el primer párrafo, debe tener un mínimo de 5 líneas, este efecto es muy bonito y más adelante te explicare donde lo debes usar en tu publicación, para que tengas la mejor presentación. Después que escribas tu párrafo debes copiar los siguientes códigos después del punto y final, te sugiero dejar una línea de espacio:
Luego procedes a escribir el segundo párrafo. De esta forma tus dos párrafos envolverán a la imagen que hayas seleccionado:
Se debe ver de esta forma:
Ahora debes escribir el primer párrafo, debe tener un mínimo de 5 líneas, este efecto es muy bonito y más adelante te explicare donde lo debes usar en tu publicación, para que tengas la mejor presentación. Después que escribas tu párrafo debes copiar los siguientes códigos después del punto y final, te sugiero dejar una línea de espacio:

Luego procedes a escribir el segundo párrafo. De esta forma tus dos párrafos envolverán a la imagen que hayas seleccionado:
En el ejemplo anterior puedes observar que al lado de la imagen y los dos párrafos te queda un espacio en blanco, en lo particular a mí no me gusta, además al combinar esta forma envolvente con las imágenes a la derecha o a la izquierda el efecto que se produce no es de mi agrado y se produce esto cuando coloco juntos el ejemplo de la imagen a la derecha y el ejemplo con la imagen a la izquierda seguido de dos párrafos envolviendo una imagen. a continuación, te muestro lo que pasa:
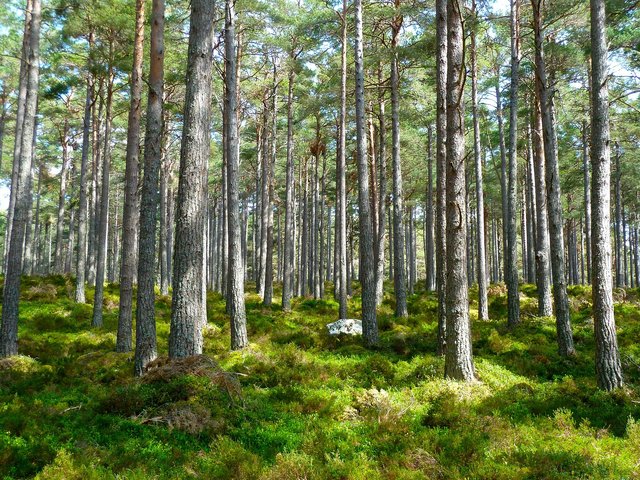
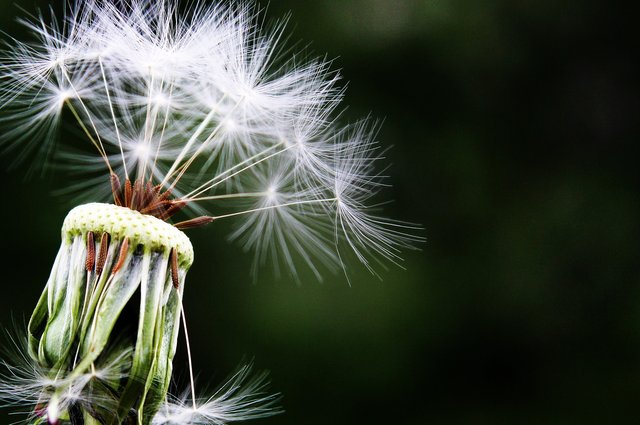
Ejemplo imagen a la derecha. Las plantas son seres vivos, que se alimentan de la energía de la tierra, a través de sus raises absorben los nutrientes esenciales que le permiten llevar el agua y sustancias minerales a todas las hojas (Fuente: producción propia).
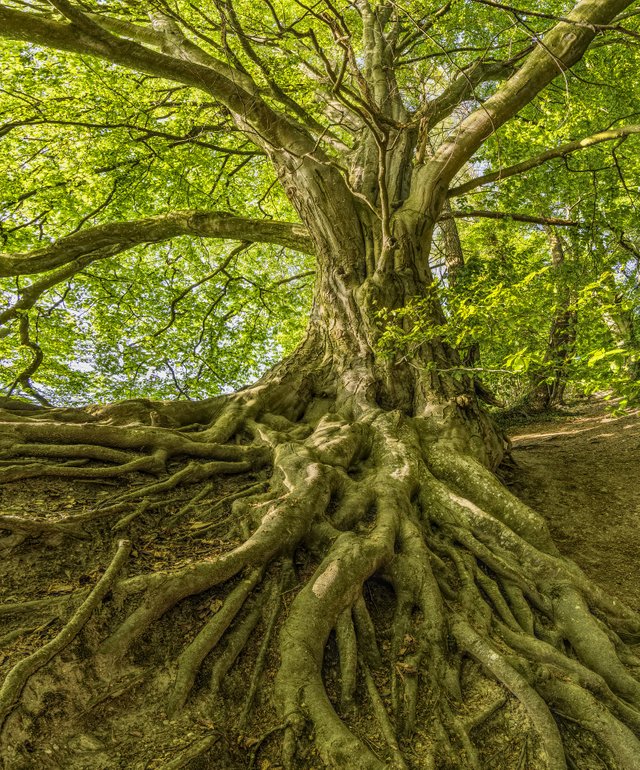
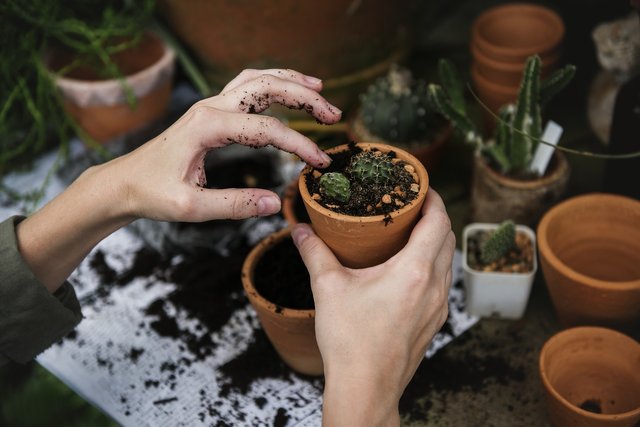
Ejemplo imagen a la izquierda Los nutrientes llegan por las hojas por tubos llamados xilemas donde son procesados y convertidos en energía y de nuevo recorren todas la planta desde la hojas hasta la raíz, por unos conductos llamados floemas. (Fuente: producción propia).
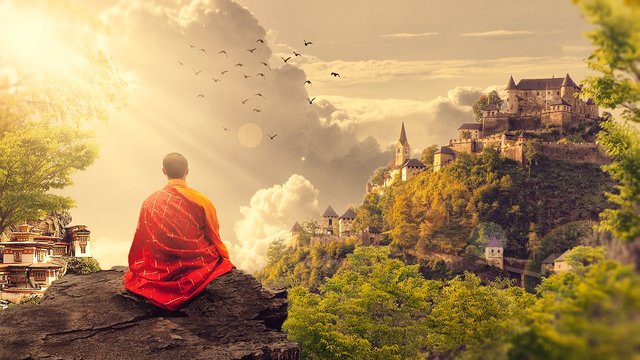
Ejemplo imagen envuelta por dos párrafos. Toda esa energía producida en el laboratorio de las hojas, tomada de la energía del sol y transformada por la fotosíntesis, va a producir nuevas hojas, flores y frutos. (Fuente: producción propia).
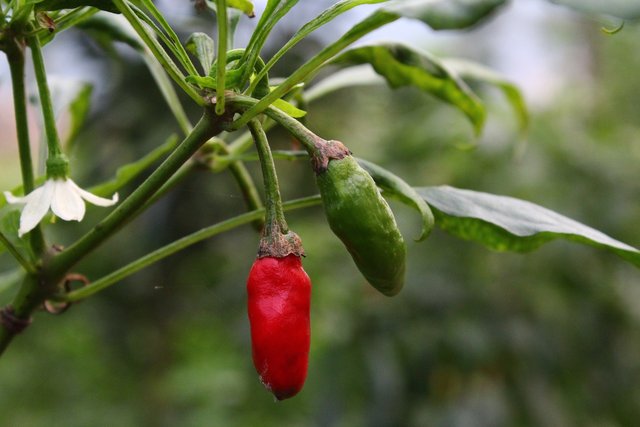
De esta forma la planta toma del universo la energía necesaria para reproducirse, crecer y morir, y en ese intercambio le regala al mundo oxígeno y sus frutos, para el beneficio de todos los seres vivos. (Fuente: producción propia)
Lo que quiere decir que envolver una imagen con dos párrafos no se pueden usar con los dos primeros casos. O yo no los pude usarlo así, a lo mejor tú puedes hacerlo y en el cometario me lo explicas. Pero en fin para quitar esa columna que queda a la derecha de los dos párrafos, después de probar varias opciones elimine el siguiente código en el tercer caso en la primera parte, dejando todo lo demás igual:
<div class="pull-left">
Quedando el código para envolver una imagen con dos párrafos de la siguiente forma:
se debe ver en el post de esta forma:
Ejemplo imagen envuelta por dos párrafos. Toda esa energía producida en el laboratorio de las hojas, tomada de la energía del sol y transformada por la fotosíntesis, va a producir nuevas hojas, flores y frutos. (Fuente: producción propia).
De esta forma la planta toma del universo la energía necesaria para reproducirse, crecer y morir, y en ese intercambio le regala al mundo oxígeno y sus frutos, para el beneficio de todos los seres vivos. Son un gran número de seres vivos que aprovechan lo que producen las plantas, creándose en la mayoría de los casos relaciones de mutuo beneficio como es el caso de los insectos y las aves cuando realizan la polinización de las flores, intercambiado material genético, (Fuente: producción propia)
¿Por qué debes colocar los tres asteriscos al final de cada caso para formar una línea?
Para que no te queden todos los párrafos e imágenes pegados, te lo muestro en el siguiente ejemplo lo que pasa cuando no se le colocan los tres asteriscos y no se forma la línea
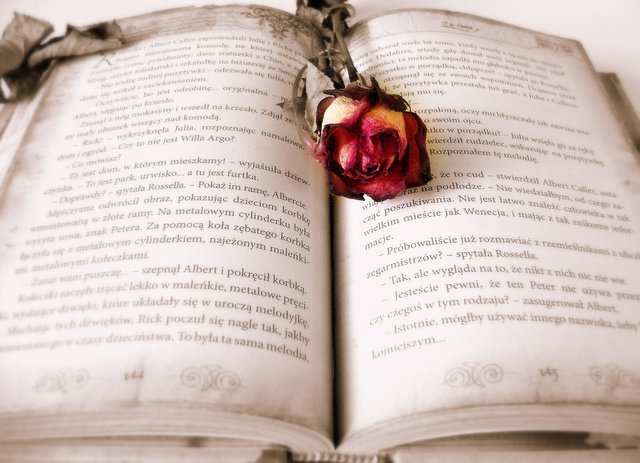
Una planta se puede reproducir sexual y asexualmente, Sexual mediante la siembra de las semillas, donde se intercambian y combinan los genes de los “padres”. Esta semilla puede ser dicotiledónea o monocotiledónea, generando plantas con características diferentes. (Fuente: producción propia).
La reproducción asexual se realiza por partes de la planta, que puede ser una estaca, yemas por injertos, bulbos, raíces entre otros. La planta obtenida es un clon con las mismas características de la planta original. (Fuente: producción propia).
el mismo ejemplo pero si se le colocan los tres asteriscos para forma la línea y separar los párrafos.
Una planta se puede reproducir sexual y asexualmente, Sexual mediante la siembra de las semillas, donde se intercambian y combinan los genes de los “padres”. Esta semilla puede ser dicotiledónea o monocotiledónea, generando plantas con características diferentes. (Fuente: producción propia).
La reproducción asexual se realiza por partes de la planta, que puede ser una estaca, yemas por injertos, bulbos, raíces entre otros. La planta obtenida es un clon con las mismas características de la planta original. (Fuente: producción propia).
Puedes usar los tres asteriscos si ya no quieres seguir escribiendo colocando las imágenes a la derecha y a la izquierda y quieres utilizar un párrafo normal con la imagen arriba o abajo, o con dos párrafos envolviendo una imagen. Tienes como ejemplo el principio de este post, donde comienzo con un párrafo con la imagen a la derecha, continuo con un párrafo la izquierda, y luego finalizo con dos párrafos envolviendo la imagen. Se puede distinguir las líneas que separa cada párrafo.
Ahora con un Poema

para escribir un poema debo cambiar este código:
<div class="text-justify">

Por este

<div class="text-center">
Todo los demás códigos deben quedar igual, tanto en las imágenes a la derecha, a la izquierda o al envolver una imagen en dos párrafos. Yo además uso este código al final de cada verso para separarlos y se vean mejor.
<br/>
Así quedaría el poema con su código con una imagen a la derecha

Así una estrofa con la imagen a la izquierda se vería así con sus códigos.
Así deben ver las dos estrofas en tu post:
Un ejemplo te doy hoy
Para que veas el efecto
De cómo se ven mis versos
Y disfrutes de este momento.
Cada ejemplo
Es un templo
Donde la sabiduría
No es un lamento
Otros códigos que he aprendido
Sangría a un párrafo para colocarle sangría a un párrafo se debe usar este código:
Por cada código para la sangría que coloque aumentas un espacio, de tal forma que si quieres darle más de un espacio de sangría al inicio del párrafo debes pegar varios códigos de esta forma:
Nota Recuerda usar los códigos para justificar o el texto para que tenga una mejor visualización en tu post.
Los códigos de la sangría se verían así:
Con un espacio
<div class="text-justify">
Todos tenemos derecho a ser felices, la felicidad está dentro de ti, para ser feliz no necesitas de personas u objetos materiales para conseguir tu felicidad. No debes buscarla sino dentro de tu alma. <br/>
</div>
Tres espacios
<div class="text-justify">
Todos tenemos derecho a ser felices, la felicidad está dentro de ti, para ser feliz no necesitas de personas u objetos materiales para conseguir tu felicidad. No debes buscarla sino dentro de tu alma. <br/>
</div>
seis espacios
<div class="text-justify">
Todos tenemos derecho a ser felices, la felicidad está dentro de ti, para ser feliz no necesitas de personas u objetos materiales para conseguir tu felicidad. No debes buscarla sino dentro de tu alma. <br/>
</div>
Aquí te muestro como se verían los párrafos con la sangría en tu post:
Con un espacio
Todos tenemos derecho a ser felices, la felicidad está dentro de ti, para ser feliz no necesitas de personas u objetos materiales para conseguir tu felicidad. No debes buscarla sino dentro de tu alma.
Tres espacios
Todos tenemos derecho a ser felices, la felicidad está dentro de ti, para ser feliz no necesitas de personas u objetos materiales para conseguir tu felicidad. No debes buscarla sino dentro de tu alma.
6 espacios
Todos tenemos derecho a ser felices, la felicidad está dentro de ti, para ser feliz no necesitas de personas u objetos materiales para conseguir tu felicidad. No debes buscarla sino dentro de tu alma.
Etiqueta para pots con imágenes que pueden tener erotismo
Cuando en tus posts uses imágenes eróticas, debes usar esta etiqueta nsfw, así evitas que te puedan censurar tu post si las imágenes son muy fuertes. Esto me lo recomendó @ilazramusic en su canal de Discord llamado @SWIM. Puedes ver un ejemplo de como queda tu post en tu blog al usar esta etiqueta en mi poema titulado Te hice el amor con ese vestido
Cambiar el tamaño de una imagen
para cambiar el tamaño de una imagen debes usar este código que te muestro a continuación:
<center>

</center>
La dirección de la imagen debes colocarla después de colocar steemitimages.com/600x350/. Para cambiar el tamaño de la imagen debes modificar los valores o números que te modificaran el ancho y el largo de la imagen. Además, si observas en el siguiente ejemplo para colocar la fuente de la imagen encierro entre dos corchetes el código anterior y al lado abro y cierro paréntesis para colocar la fuente de donde tome la imagen.

Así debes visualizar la imagen anterior en tu post:
En los siguientes ejemplos te muestro como cambio el tamaño de la imagen modificando los valores o números que tiene ese comando cuando los valores los coloco 400x400.
En tu post debes visualizarla de este tamaño

En los siguientes ejemplos te muestro como cambio el tamaño de la imagen modificando los valores o números que tiene ese comando cuando los valores los coloco 800x800.
En tu post debes observar de este tamaño:

Esta información la aprendí al leer el post publicado por @ibaf04 en su publicación titulada Cómo cambiar el tamaño de las imágenes en Steemit SIN APLICACIONES O PÁGINAS EXTERNAS (Actualización).
Los EMOJIS que uso en mis posts
El articulo donde visualice donde tomar los EMOJIS y de donde tome la dirección para colocarlos a color, lo obtuve del siguiente posts de @jorguito, titulado Guía definitiva para redactar tus publicaciones en HTML. Aquí podras copiar los EMOJIS en blanco y negro y conseguir la dirección de los EMOJIS a color .
Fuentes
Además de las dos fuentes mencionadas en los dos últimos puntos, la información para colocar las imágenes a la derecha o a la izquierda de un párrafo, lo tome del articulo Proyecto SWIM | Markdown | Lección #2 | . realizado por @swimproject. Este post me fue recomendado por @ilazramusic. Aprovecho para darle las gracias por todas las recomendaciones y ayuda que me dio en esa oportunidad.
 Soy el autor, escritor de todos mis versos y poemas, cuentos y reseñas, mi musa: tú, y todo el universo.
 Fuente de imágenes: presiona sobre la flecha que tiene cada imagen para ver la fuente.
 Fuente de imágenes: presiona sobre la flecha que tiene cada imagen para ver la fuente.


 Muchas gracias
 Muchas gracias
 ***Post in English ***
 ***Post in English ***
Markdown: What I learned in Steemit to do a Post: Second Part
Good morning universe, good morning world of Steemit, Beautiful readers blessings for all. I have two months in Steemit and it has been a very productive experience for me, I want to share this post today where I explain how to place the text to the right and left of the images, as well as how to wrap an image with the text.
It really took me a bit at first to want to put a text or paragraph an image on your right or left, but after struggling a bit and try several times can understand how to use them properly to get the result I expected in my post.
I want to clarify that I am not an expert in Markdown, I will only share with you my learning in these two months in Steemit and how I am using these codes in my post. Also, I recommend you read my post titled Markdown: What I learned in Steemit to do a Post, in this post I give several "tricks" that complement the written in this publication.
Images to the right of the text
To place the images to the right of the text you must use the following codes:
<div class="text-justify">

<div class="pull-left">
After the codes proceed to place or write the text or paragraph you want to place below the image. The text can have the extension of lines that you want, but I prefer not to place very long paragraphs greater than 5 lines, nor less than three lines, it is to the pleasure of the writer. In Word this paragraph has 5 lines, without indentation. After you write the paragraph you must place the following codes and at the end the image.
It must be seen in this way:
After the codes proceed to place or write the text or paragraph you want to place below the image. The text can have the extension of lines that you want, but I prefer not to place very long paragraphs greater than 5 lines, nor less than three lines, it is to the pleasure of the writer. In Word this paragraph has 5 lines, without indentation. After you write the paragraph you must place the following codes and at the end the image.
Images to the left of the text
To place the images to the left of the text you must use the following codes:
<div class="text-justify">

<div class="pull-right">
After placing the previous code you proceed to write or copy the paragraph, one of the things you noticed was that the image decreases in size to fit this scheme, whether you want the image to place it to the right or to the left of the text. After finishing your paragraph you must place the following code just below the paragraph:
It should look like this:
After placing the previous code you proceed to write or copy the paragraph, one of the things you noticed was that the image decreases in size to fit this scheme, whether you want the image to place it to the right or to the left of the text. After finishing your paragraph you must place the following code just below the paragraph:
Wrap the image with two paragraphs
To wrap the image with two paragraphs you must place the following codes, and follow this procedure that I explain below:
<div class="text-justify">

<div class="pull-left">
Now you must write the first paragraph, you must have a minimum of 5 lines, this effect is very nice and later I will explain where you should use it in your publication, so that you have the best presentation. After you write your paragraph you must copy the following codes after the period and end, I suggest you leave a line of space
Then you proceed to write the second paragraph. This way your two paragraphs will wrap around the image you have selected:
It must be seen in this way:
Now you must write the first paragraph, you must have a minimum of 5 lines, this effect is very nice and later I will explain where you should use it in your publication, so that you have the best presentation. After you write your paragraph you must copy the following codes after the period and end, I suggest you leave a line of space:
Then you proceed to write the second paragraph. This way your two paragraphs will wrap around the image you have selected:
In the previous example you can see that next to the image and the two paragraphs you have a blank space, in particular I do not like it, in addition to combining this enveloping form with the images on the right or on the left the effect that It occurs is not to my liking and this occurs when I put together the example of the image on the right and the example with the image on the left followed by two paragraphs surrounding an image. Next, I show you what happens:
Example image on the right. The plants are living beings, which feed on the energy of the earth, through their raises absorb the essential nutrients that allow them to bring water and mineral substances to all the leaves (Source: own production).
Example image to the left The nutrients arrive through the leaves by tubes called xylem where they are processed and converted into energy and again they travel all the plant from the leaves to the root, through ducts called phloem. (Source: own production).
Example image wrapped by two paragraphs. All that energy produced in the laboratory of the leaves, taken from the energy of the sun and transformed by photosynthesis, will produce new leaves, flowers and fruits. (Source: own production).
In this way the plant takes from the universe the energy necessary to reproduce, grow and die, and in this exchange it gives the world oxygen and its fruits, for the benefit of all living beings. (Source: own production)
Which means that wrapping an image with two paragraphs can not be used with the first two cases. Or I could not use them like that, maybe you can do it and in the comment you explain it to me. But in order to remove that column that is to the right of the two paragraphs, after trying several options delete the following code in the third case in the first part, leaving everything else the same:
<div class="pull-left">
The code is left to wrap an image with two paragraphs as follows:
It should be seen in the post in this way:
Example image wrapped by two paragraphs. All that energy produced in the laboratory of the leaves, taken from the energy of the sun and transformed by photosynthesis, will produce new leaves, flowers and fruits. (Source: own production).
In this way the plant takes from the universe the energy necessary to reproduce, grow and die, and in this exchange it gives the world oxygen and its fruits, for the benefit of all living beings. They are a large number of living beings that take advantage of what the plants produce, creating in most cases mutually beneficial relationships such as insects and birds when they pollinate the flowers, exchanging genetic material, (Source: own production)
***Why should you place the three asterisks at the end of each case to form a line? ***
So that you do not have all the paragraphs and images stuck, I show you in the following example what happens when the three asterisks are not placed and the line is not formed
A plant can be reproduced sexually and asexually, sexually by sowing the seeds, where the genes of the "parents" are exchanged and combined. This seed can be dicotyledonous or monocotyledonous, generating plants with different characteristics. (Source: own production).
The asexual reproduction is done by parts of the plant, which can be a stake, buds by grafts, bulbs, roots among others. The obtained plant is a clone with the same characteristics of the original plant. (Source: own production).
The same example but if you put the three asterisks to form the line and separate the paragraphs.
A plant can be reproduced sexually and asexually, sexually by sowing the seeds, where the genes of the "parents" are exchanged and combined. This seed can be dicotyledonous or monocotyledonous, generating plants with different characteristics. (Source: own production).
The asexual reproduction is done by parts of the plant, which can be a stake, buds by grafts, bulbs, roots among others. The obtained plant is a clone with the same characteristics of the original plant. (Source: own production).
You can use the three asterisks if you no longer want to write by placing the images on the right and left and you want to use a normal paragraph with the image above or below, or with two paragraphs surrounding an image. You have as an example the beginning of this post, where I start with a paragraph with the image on the right, continue with a paragraph on the left, and then end with two paragraphs surrounding the image. You can distinguish the lines that separates each paragraph.
Now with a Poem
to write a poem I should change this code:
<div class="text-justify">

For this

<div class="text-center">
All other codes should remain the same, either in the images on the right, on the left or when wrapping an image in two paragraphs. I also use this code at the end of each verse to separate them and look better.
<br/>
This would be the poem with its code with an image on the right
So a verse with the image on the left would look like this with its codes.
So you should see the two stanzas in your post:
An example I give you today
So you can see the effect
How my verses look
And enjoy this moment
Each example
It's a temple
Where wisdom
It is not a lament
Other codes that I have learned
Bleeding a paragraph to indent a paragraph you must use this code:
For each code for the indentation that you place, you increase a space, so if you want to give more than one indentation space at the beginning of the paragraph, you must paste several codes in this way:
Note Remember to use the codes to justify or the text so you have a better visualization in your post.
The indentation codes would look like this:
With a space
<div class="text-justify">
We all have the right to be happy, happiness is inside you, to be happy you do not need people or material objects to get your happiness. You should not look for it but within your soul.<br/>
</div>
** Three spaces **
<div class="text-justify">
  We all have the right to be happy, happiness is inside you, to be happy you do not need people or material objects to get your happiness. You should not look for it but within your soul.. <br/>
</div>
six spaces
<div class="text-justify">
We all have the right to be happy, happiness is inside you, to be happy you do not need people or material objects to get your happiness. You should not look for it but within your soul. <br/>
</div>
Here I show you how you would see the paragraphs with the indentation in your post:
With a space
We all have the right to be happy, happiness is inside you, to be happy you do not need people or material objects to get your happiness. You should not look for it but within your soul.
Three spaces
  We all have the right to be happy, happiness is inside you, to be happy you do not need people or material objects to get your happiness. You should not look for it but within your soul .
six spaces
  We all have the right to be happy, happiness is inside you, to be happy you do not need people or material objects to get your happiness. You should not look for it but within your soul.
To change the size of an image you must use this code that I show you below:
<center>

</center>
The image address must be placed after placing steemitimages.com/600x350/. To change the size of the image you must modify the values or numbers that will modify the width and length of the image. Also, if you look at the following example to place the source of the image enclosed between two brackets the previous code and next I open and close parentheses to place the source from which I took the image.
So you must visualize the previous image in your post:
In the following examples I show you how I change the size of the image by modifying the values or numbers that command has when the values are placed 400x400.
In your post you should see it in this size:
In the following examples I show you how I change the size of the image by modifying the values or numbers that command has when the values are placed 800x800.
In your post you should observe this size:
I learned this information when reading the post published by @ibaf04 in its publication titled How to change the size of the images in Steemit WITH NO APPLICATIONS OR EXTERNAL PAGES (Upgrade).
The EMOJIS that I use in my posts
The article where to visualize where to take the EMOJIS and from where it takes the direction to place them to colour, I got it from the following posts by @jorguito, titled Definitive guide to write your publications in HTML. Here you can copy the EMOJIS in black and white and get the address of the EMOJIS in colour .
Sources
In addition to the two sources mentioned in the last two points, the information to place the images to the right or to the left of a paragraph, take it from the article Proyecto SWIM | Markdown | Lección #2 | . realizado por @swimproject. This post was recommended to me by @ilazramusic. I take this opportunity to thank you for all the recommendations and help you gave me in that opportunity.
I am the author, writer of all my verses and poems, stories and reviews, my muse: you, and the whole universe.
*** Source of images:*** ** press on the arrow that each image has to see the source.**
*** Source of images:*** ** press on the arrow that each image has to see the source.** Thank you
Thank you
¡Qué bueno ver que está poniendo en práctica lo aprendido en las mentorías de @swimproject! Esa siempre ha sido nuestra idea mister, gracias por difundir el trabajo que hacemos semana tras semana para que los creadores crezcan en esta plataforma, saludos y bendiciones.