Cloudflare - Super charge our website with security and speed
Image source: cloudflare.com
Attended a meetup.com event organised by Wordpress Singapore community last week. The main session that interest me is the Cloudflare supercharge sharing.
Cloudflare is a security company that specialise in DDoS Mitigation Service as well as providing CDN and other services for its customers. I knew about Cloudflare many years back when they became famous for stopping 2 of the largest ever DDoS attacks on the internet. Since then, they had become one of the biggest players in internet security and CDN providers, together with the big brother Akamai.
For the longest time, I had been wanting to add a SSL certificate to our website at https://jrvacation.com but had been too lazy to do it. There were many considerations before embarking on this tedious process, like all the redirections, permalinks, SEO, etc. But after this event, I decided that it is now time to enhance the performance of our blog.
Why use SSL?
First, why is there a need to include SSL certificate to our website? Since 2017, Google had been explicitly targeting websites without SSL. If you are using the Google Chrome browser, chances are you had been seeing something like the below in the address bar when browsing websites without a SSL cert.
The big "Not Secure" sign doesn't necessary mean Insecure for visitors, it simply indicates that the website owner did not install a SSL cert for the domain. Visitors, like you, browsing the site is still safe, as long as you do not fill in and submit any form (like a registration page, or contact form).
Secondly, in the SEO (Search Engine Optimisation) world, experts are encouraging the use of SSL (HTTPS) as that is preferred by Google and you will get a better page rank. I am not sure how true this is, but there were analysis and reports done by these experts that indicate so.
Cloudflare SSL and CDN
Getting a Cloudflare account is easy and free, simply head over to cloudflare.com and sign up for one. For personal websites like ours, a basic Free plan is good enough, that comes with a free SSL cert and CDN service.
Free? Really?
Yes it's free. As a security company that specialise in DMS, Cloudflare needs all the internet traffic it can get, whether it is legitimate or malicious. By offering a free plan to everyone, Cloudflare is now servicing 5 to 10% of the whole Internet now. With all these traffic passing through Cloudflare's servers, they are now able to perform accurate analysis and have an overview of the world's traffic. It is with these analysis that they are able to detect and mitigate malicious traffic for its enterprise paying customers' websites.
Supercharge your website
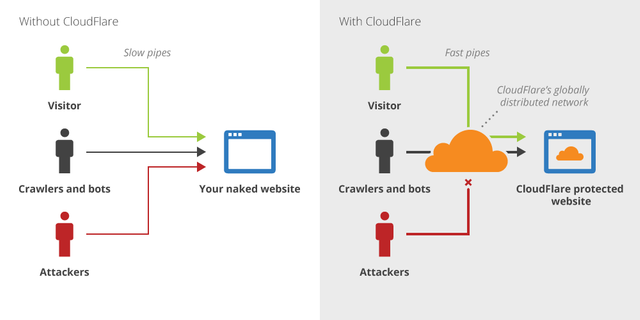
Besides the free SSL cert, Cloudflare free plan also provides you, the website owner, a CDN service. With Edge servers located all around the world, Cloudflare CDN caches your website content serves them to your visitors using the closest Edge server.
For example, our jrvacation.com hosting provider is located in Singapore. When a user from, say Germany, visits our website, there is long route to go before our content reaches his or her computer. With Cloudflare, there is now a cached copy of our website on their Germany servers. The visitor will now experience a much lower latency and faster speed when visiting our cached copy of the website.
Protect your website against hackers
Hackers are attacking your website 24/7, especially if you are using popular open source software like Wordpress. With Cloudflare, such attacks are mitigated and protect against. With their excellent record in security, you can be sure your website is now in safe hands.
Getting everything to work
After signing up the free Cloudflare account, there are a few more steps to do.
1. Change your DNS
Go to your hosting provider or registrar and update the DNS servers to those of Cloudflare. For a simple website, this is probably the only step needed to supercharge your website with Cloudflare.
It can take up to 24 hours before every DNS servers in the world is updated with this new record. But you should be able to start seeing that SSL cert is working for your website, https://jrvacation.com in our case.
Turn on the setting below to force redirect all http requests to https is recommended.

2. Install the "CloudFlare" wordpress plugin
Under the Cloudflare Dashboard, I opted for the Standard caching with 4 hours of of Cache Expiration, this implies that any new or edited articles from our wordpress blog may not be immediately available for our visitors. To resolve this, you can install the CloudFlare wordpress plugin and do a purge of cache whenever there is a new or edited post.
3. Install the "SSL Insecure Content Fixer" wordpress plugin
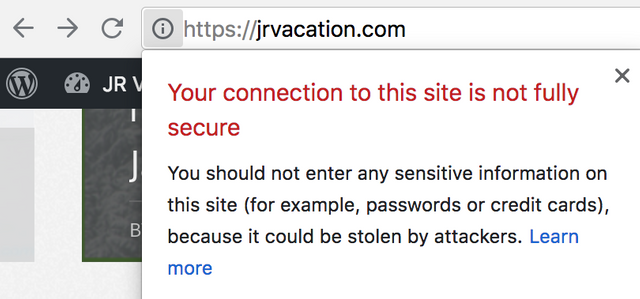
Over the years, I had installed and experimented multiple Wordpress themes, plugins and widgets. Sometimes, these package uses different javascripts or other non-standard scripts that may alter the default behaviour of Wordpress. In my case, the theme that I use for my blog is using hardcoded URL with the "http" for the blog logo image. This results in a mixed content of https and http traffic when visitors visit our blog, and Google Chrome browser will show a warning message like below.
To resolve this issue, I had to delete the logo from the theme settings, and reupload it again. This time, the hardcoded URL will be using https. There will be other widgets or plugins that might throw such errors and the simplest method is to install this amazing wordpress plugin "SSL Insecure Content Fixer" that automatically redirects all http to https.
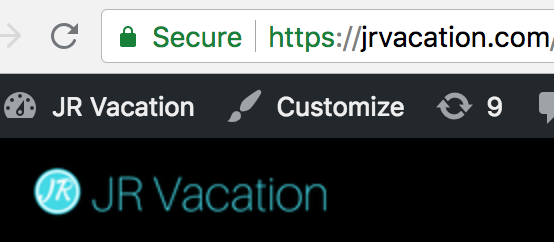
And now I can see the trusted "Secure" lock when visiting our blog using Chrome. Do you own a website? Try Cloudflare to get a free SSL and supercharge your website now.
恭喜你!您的这篇文章入选 @justyy 今日 (2018-08-28) 榜单 【优秀的文章】, 回复本条评论24小时内领赏,点赞本评论将支持 @dailychina 并增加将来您的奖赏。
Congratulations! This post has been selected by @justyy as today's (2018-08-28) 【Good Posts】, Steem On! Reply to this message in 24 hours to get rewards. Upvote this comment to support the @dailychina and increase your future rewards! ^_^
你今天过的开心吗?这是哪里?你是谁?我为什么会来这边?你不要给我点赞不要点赞,哈哈哈哈哈哈。如果不想再收到我的留言,请回复“取消”。
This post has been voted on by the steemstem curation team and voting trail.
There is more to SteemSTEM than just writing posts, check here for some more tips on being a community member. You can also join our discord here to get to know the rest of the community!
Hi @jrvacation!
Your post was upvoted by utopian.io in cooperation with steemstem - supporting knowledge, innovation and technological advancement on the Steem Blockchain.
Contribute to Open Source with utopian.io
Learn how to contribute on our website and join the new open source economy.
Want to chat? Join the Utopian Community on Discord https://discord.gg/h52nFrV
I always wanted to know more about cloudfare.
I googled though but couldn't get something as comprehensive as these
Cloudflare! I'm also using Wordpress. Thank you for good information!
If you are using WordPress, can consider to use the @steempress plugin to automatically publish your blog posts to Steemit, and have chance to get tips(upvotes) from @steempress-io
Posted using Partiko iOS
It's nice to ask steempress to send my post to Steemit autmatically!!
Thanks for this, I got my IT support to install it for me, its still in progress I think