Photography: My Christmas gift and how to use it 📷
A photographer’s perspective at reality, isn’t that what a picture shows us? A photographer has different tools available so that he or she can create that specific image they have in their mind. One of these tools are filters.
 |
|---|
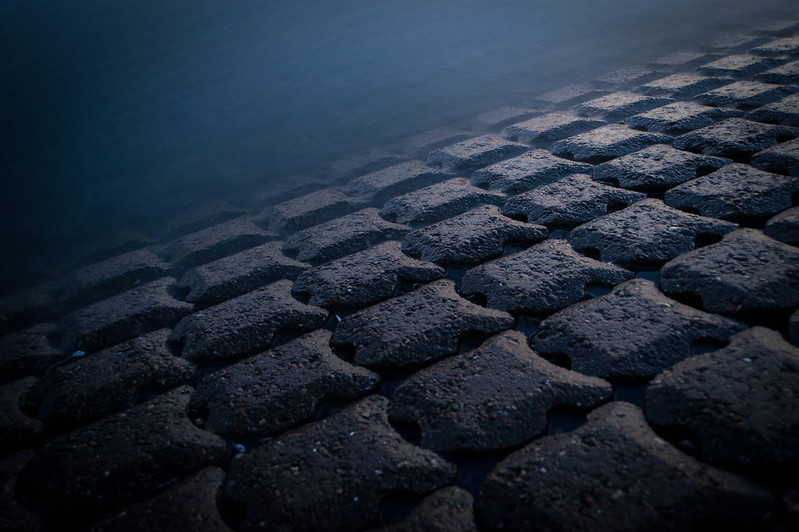
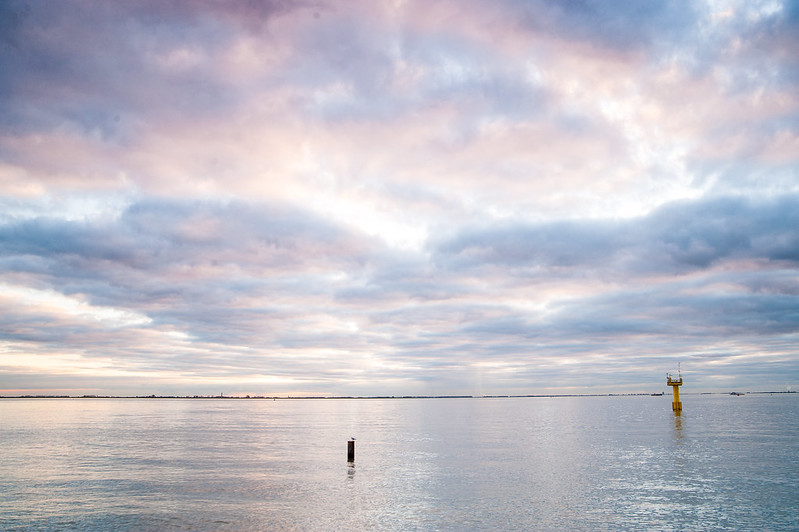
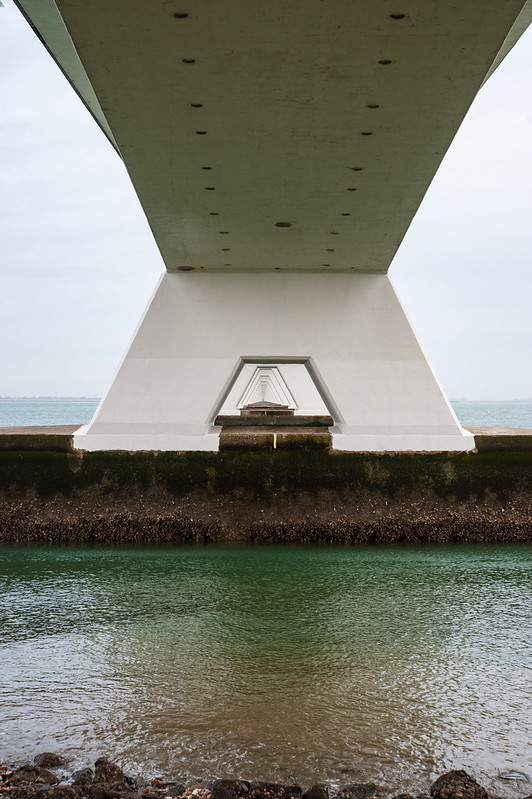
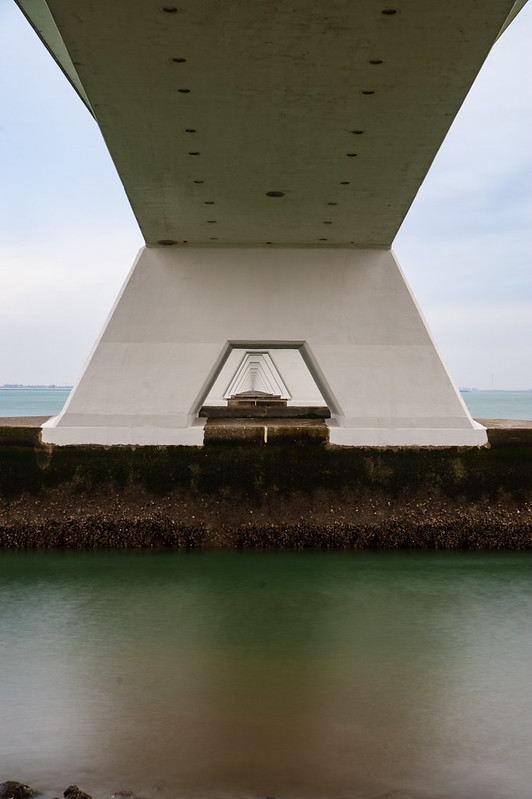
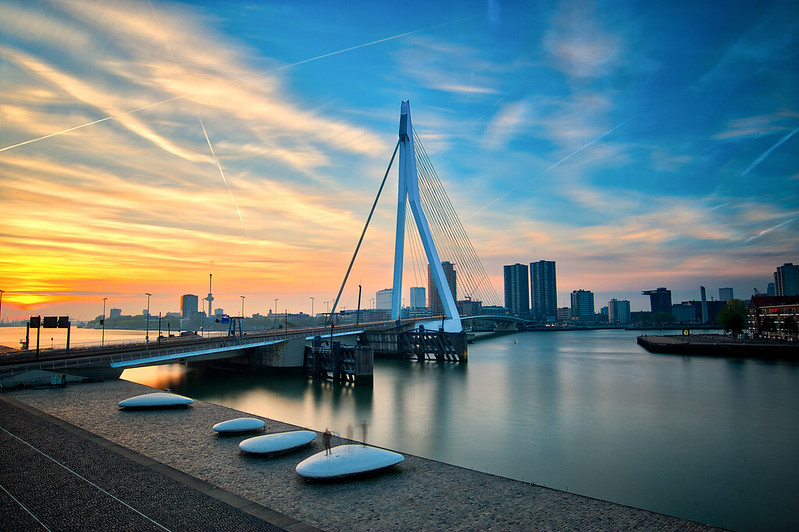
| Created with the Haida ND3.0 filter |
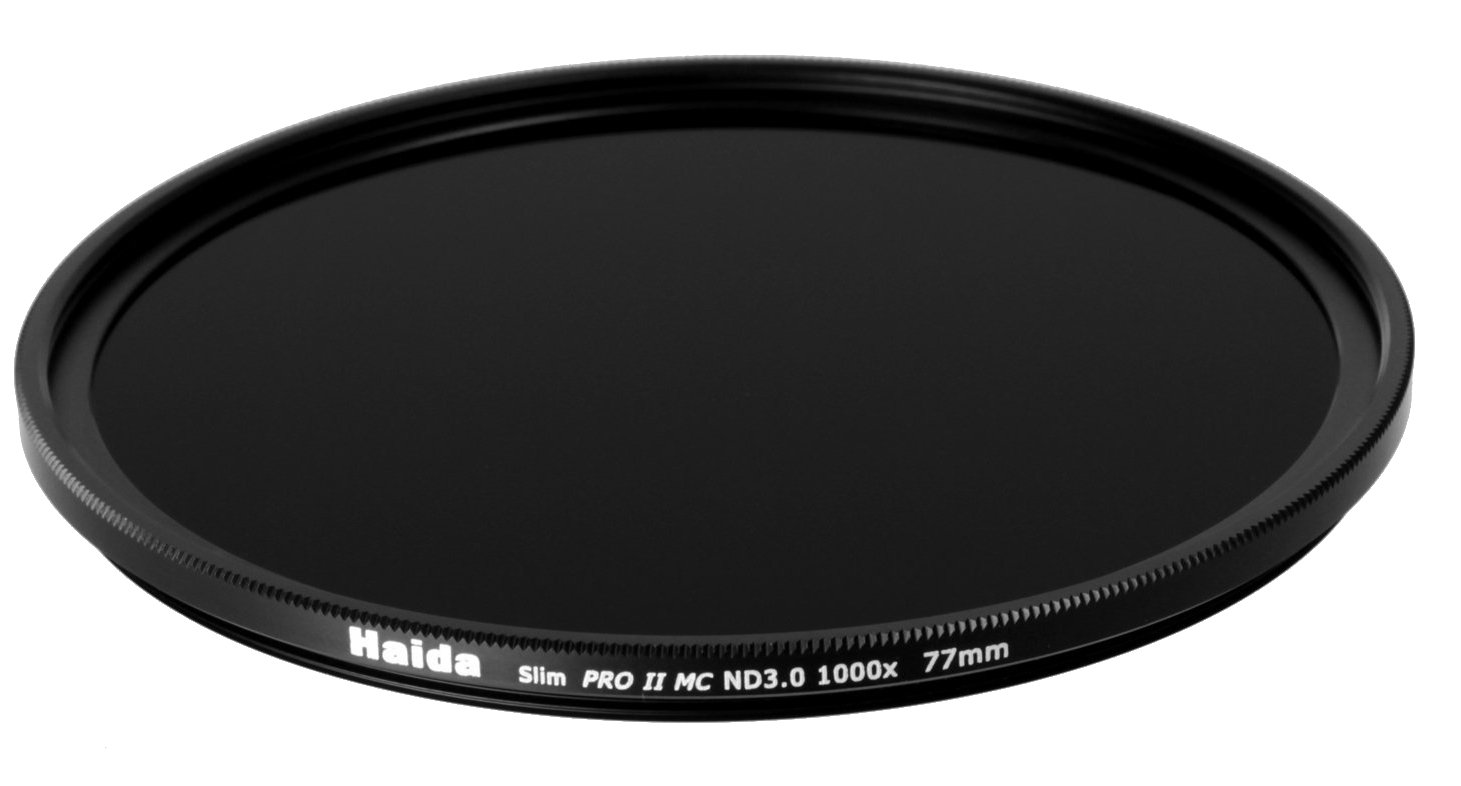
Until now I only had one specific filter in my back, the Haida ND3.0 1000x 77mm filter. This filter is made to use on the thread of a lens and is a ND3.0 filter. What it does is reducing the light with 10 stops, so that I can use longer shutter speeds for the same amount of light on my camera sensor. Lucky me, Santa Claus was very generous this year -I found a whole new set of filters underneath the tree!
 |
|---|
| Source |
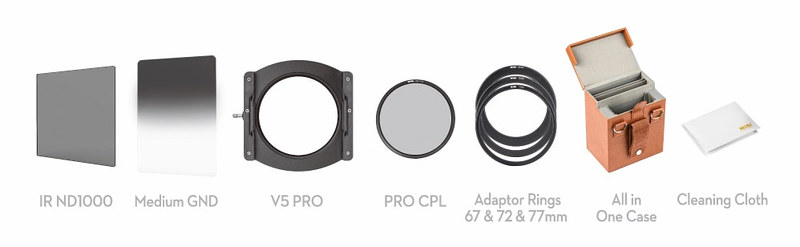
There are many different types and kinds of filters and filter systems. Back in the past you had the very expensive LEE filters (with a huge colorcast) and some other brands. Nowadays the vendors keep popping out of the ground. The vendor I found underneath the tree is NiSi, and I think they’re pretty good. The glass filters are almost without colorcast, they provide for almost every lens a specific adapter or holder so that their system will fit.**
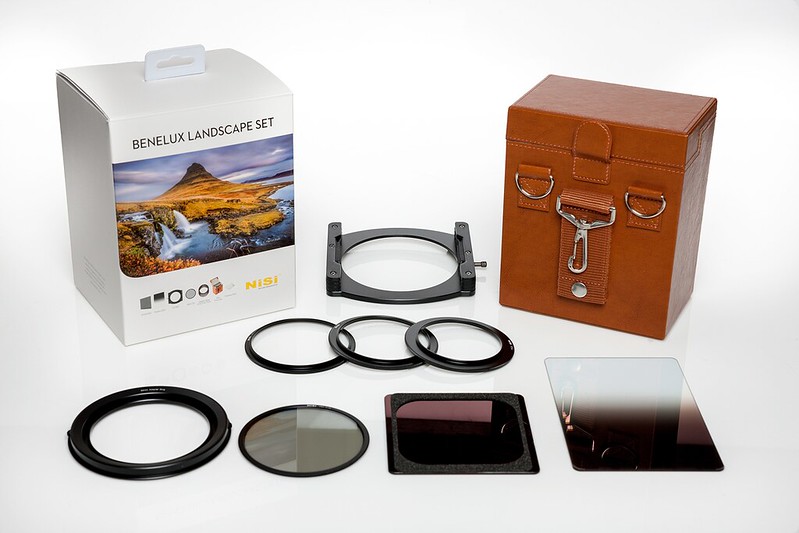
The set I will start using from now on is the NiSi Benelux Landscape filter set. This set contains the following:
- NiSi Glass 100x100mm IR ND 1000 (10 stops)
- NiSi Glass 100x150mm Medium GND8 (3 stops)
- NiSi V5 Pro filter holder with 82mm ring
- 77, 72, 67mm adapter rings
- NiSi Pro CPL (polariser)
- NiSi leather storage box for the V5 Pro holder and 8 filters
- NiSi cleaning cloth
- NiSi booklet with tips
 |
|---|
| Source |
NiSi says about this set that you can use it for landscapes, sunsets and sunrises, waterscapes, cityscapes and architecture. However, anything you can get in your mind you can use this set for. The only thing you might need is another filter add-on.
NiSi Glass 100x150mm Medium GND8 (3 stops)
This filter will be there for you when the contrasts in your picture are large, for example with a landscape scenery and a beautiful sky. Most often when you measure the light at the landscape the sky will be to bright, but when you measure the sky the landscape will be to dark. The human eye can see these differences in contrast fine. But your camera sensor can’t, although the technique of sensors is getting better and better of course. At the current time of writing you will have to choose for a filter or a multiple exposure to get the lightning right. With a GND filter you will keep the light away at the sensor from the lighter parts in your scene. These filters do exist in different kind of grades, so you can expose for 1, 2 3 or more stops lower. The added feature I didn’t have with my filter, is a holder which enables you to combine multiple filters, offering you a choice in the balance between light and dark.
 |
 |
|---|---|
| Taken without filters | Taken with CPL and GND8 filter |
 |
|---|
NiSi Glass 100x100mm IR ND 1000 (10 stops)
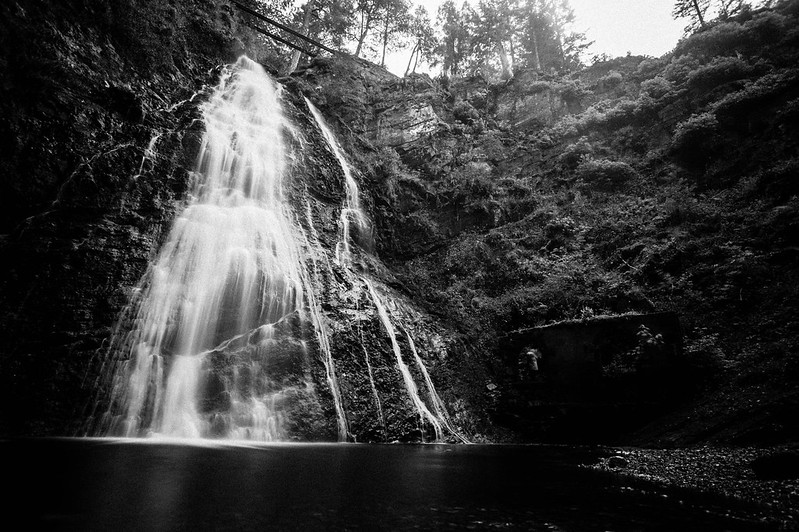
The ND filter comes in handy when you want to use a long shutter speed but there is too much light. Personally, I love to use this filter for waterfall photography. Of course, you can choose a smaller diaphragm so the shutter speed will get longer, but sometimes you just want this to be longer with a huge diaphragm for the shallow depth of field. An ND filter will keep the light away from the whole sensor so you can expose the picture longer. Just like the GNd filters this type of filter is available in different types, from 1,2,3, 10 or maybe even 20 stops.
 |
|---|
| Shot taken by the ND1000 filter without CPL filter |
 |
 |
|---|---|
| Taken without filters | Taken with ND1000 filter |
NiSi Pro CPL
This filter I’m not used to, but @dboontje is a huge fan of these. You can use polarisation filters to reduce reflections in your image. Occasionally you specifically might want reflections but most of the time you don’t want them in your image. Reflections usually are created by shiny and / or reflecting surfaces like water, metal and glass. By using the polariser you can adjust the results you get, as it allows you to alter the reflection. You can make the reflection stronger or remove it. A polarisation filter will keep the light away from beams that got reflected from one side, but all the other directions can passthrough. When you rotate the filter a quarter the first light beams will pass now but others will be blocked. So, this filter allows you to remove or enhance reflections in your photo.
 |
|---|
| How the CPL filter easily rotates |
The set
To use these filters you need a holder, and to fit it on different types of lenses you need adapter rings. The holder is made from a black powder coated aviation-grade billet aluminium. It is very easy to adapt the holder to your lens, just pull the lever and click it on the lens or on an adapterring. Smart design!
All the filters in the set are made of glass. That sounds logic you might think, but in most beginner sets the filters are made of plastics which scratch easily and have colorcasts (but this can happen with a glass filter too, my Haida has a strong blue cast).
Finally the NiSi storage box for the V5 Pro holder and 8 filters is made of leather which gives it a luxuruous feel. NiSi did even take care for plastic spacers, because the two filters are different sized. The square ND filter will drop to the bottom otherwise. So you don't need to turn the case upside down. Will I use this box while I start traveling again? No way this box is huge, I'll start searching for a nice pouch to fit the filters in my bag.
Setup
Setting up the system is not that difficult (and if you don't undersand there is always the manual in the box) and will take three different steps to get you started.
First step
First step will be the use of a step-up ring. Not many lenses have a filter thread of 82mm so you probalby need to use one of the step-up rings Nisi did deliver in the set. The filterholder from NiSi is created to fit on a 82mm thread.
Second step
The second step will be the placement of the adapter ring. I hear you thinking how many rings do we need? Well this adapter ring is needed because it is needed to attach the square filter holder onto.
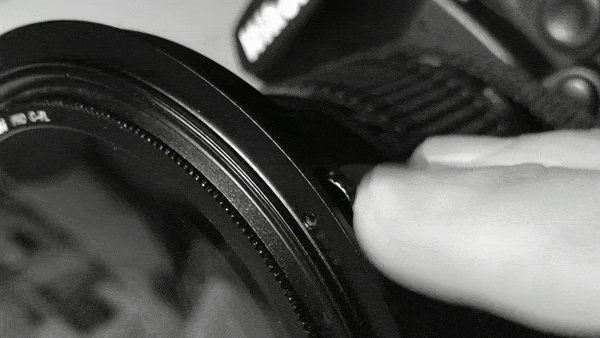
Luckily NiSi did choose to make use of different step-up rings because there are also systems on the market where you have to buy different adapter rings. Step-up rings you can use for many other lens-addons. Another advantage is the built-in filter thread so you can attach a polarizing filter without losing any slots in the adapter. You can see above in the animated GIF how the polarizer can be rotated in the holder and see how good the NiSi system works.
Third step
For the third step you can finally place the filter holder. And I think this acts like every other filter holder. The filters can be 100mm wide maximum and need to have a height of 100mm minimum to cover the whole filter holder. To attach the holder to the adapter ring you have to pull at the little knob and then you can place the adapter holder on the adapter ring. Let go of the knob, and your filter holder stays at its place on the adapter ring.
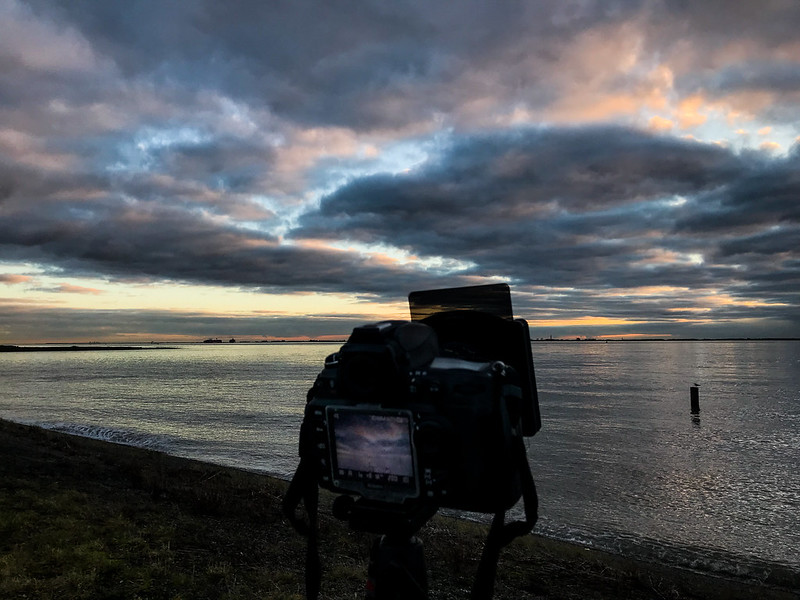
How to take your first long exposures
@goodwithtravels already mentioned underneath my posts that he would love to learn the long exposure tricks I’m using. And now that I’ve got a whole new set of filters, I need to experiment with what can I do better than bring you guys with me on how I think I might use these filters.
At first sight the technique to create photos with the silky waters or moving clouds seems difficult to master. But they’re actually quite easy to create once you know and understand the basics. All you need afterwards is your imagination and don’t limit your creativity.
 |
|---|
But before you start breaking the rules and use your creativity, you first have to understand the (basic) rules. I assume everyone interested in this technique already knows what shutter speed, aperture and ISO can do for a picture. This is the very basic of photography you have to know.
First some background information
A ND filter should be just doing that, blocking out light without leaving a color cast on the final result called your image. And while the light enters your camera it should reduce it by a factor two. A 2 stop filter (ND4) reduces the light that will hit the sensor eventually by a factor 4. The little math you can see in the following table.
| Stops | Math | ND filter |
|---|---|---|
| 1 stop | 2 | ND2 |
| 2 stops | 2X2=4 | ND4 |
| 3 stops | 2X2X2=8 | ND8 |
| 4 stops | 2X2X2X2=16 | ND16 |
| 10 stops | 2X2X2X2X2X2X2X2X2X2 = 1024 | ND1024 |
For example, a photograph that would normally be taken at a shutter speed of 1/1000th of a second becomes a one-second exposure if you would use a 10-stop ND filter.
Gear
Lets get this out of the way once and for all, gear does matter, the better your gear the easier it will get. My camera is an oldie, so I limit myself there because the sensors from nowadays are way better while capturing light or darkness. The dynamic range from these sensors is way better tah mine. But the same counts for your tripod, the lenses, the filters and so on and so on. But even with everything cheap and old you can achieve great results here, but you have to work harder for it.
What we will need for those long exposures:
- Tripod
- Remote
- ND filter
- Calculator
- Light leak protection
Tripod
You will need a tripod or a bean bag or a rock. But make sure your camera is stable. This stable factor is THE key to sharp pictures. A good tripod might be expensive but you'll use it for the rest of your life (if it ain't falling down from a cliff or something...)
Remote
I always did shoot with a remote, but mine did fail not so long ago. Now I’m using the self-timer from the camera, but it isn’t the best option. A new remote isn’t that expensive most of the times. You don’t need them to be wireless (makes it only easier), but you can check if the manufacturer from your camera did create an app so you can use your phone as a remote shutter. My Nikon D700 doesn’t have this luxury, so I’m shooting with the timer nowadays.
ND filter
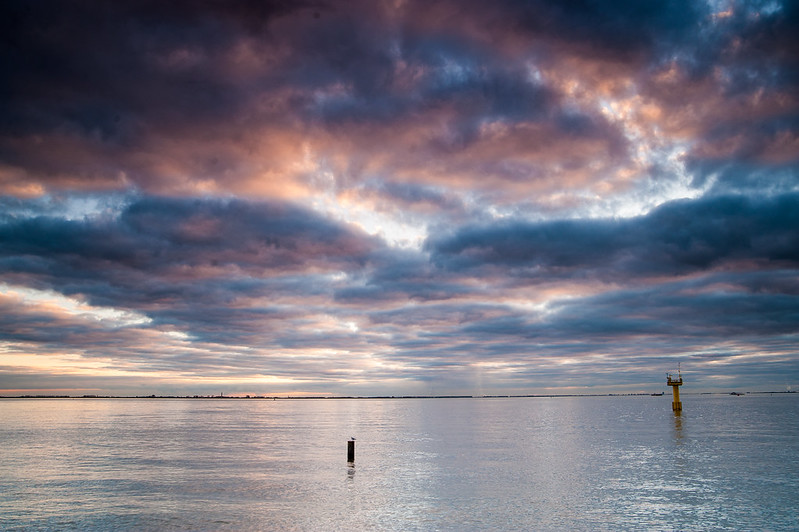
You can’t create the pictures actually without these filters, I just explained what they are. Now I’ll tell what filter the best will be to buy first. When you want to start experimenting, I would go for a cheaper 10 stops ND filter like the Haida. This filter will give you enough possibilities to start experimenting by reducing the light with 10 stops. Edit: In the comments @worldcapture mentioned the filter from Gobe and I did some research at it, and it has a minimal colorcast.
 |
 |
 |
|---|---|---|
| All shots are taken with the Haida ND3.0 filter |
|---|
When you want to experiment while shooting landscape scenery’s with a sunset for example you will need to take multiple exposures or make use of a GND filter. As long as the sky or foreground is way darker or brighter you will need this type of filter.
What filter do I use when?
For the silky water you can use a 10 stops ND filter, at a beach where you maybe want to show the water movement when the tide is getting low you might want to use a 3 stops ND filter, but if you want to add the sunset as well you need to use for that the grad ND.
 |
|---|
Calculator
To calculate the correct shuttertime when you exposue normally without filter your camera will be fine with autometer most of the time. But what about the metering when the filter is attached? Most of the times it is already too dark for your camera to focus for example, so don’t expect an accurate autometer for the lightning. So most photographers do measure the light before attaching the filter. While the filter is attached you can calculate the correct settings but there are also many apps out there who will take this job out of your hands.
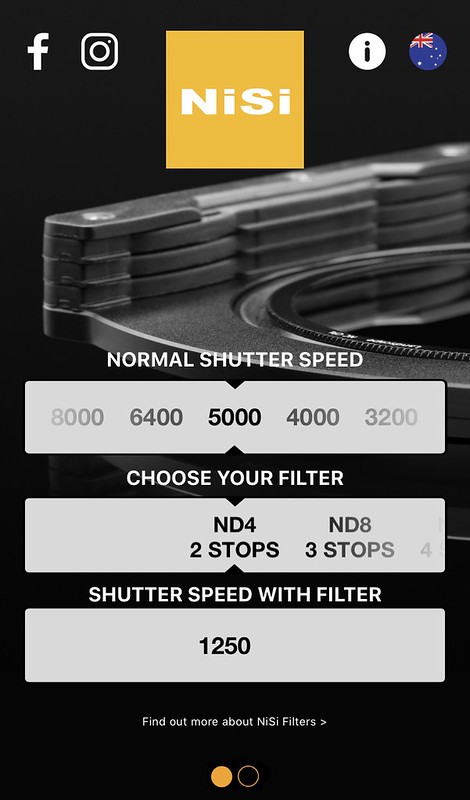
NiSi-filters ND Calculator App
NiSi has it's own app on IOS and Android available build by NiSi Australia and NZ. There are two things you need to know to calculate the desired time for a photo with ND-filters. First you need the Normal Shutter Speed, and second you insert the filter you want to apply. Those two parameters you can set very easily in the NiSi app and the outcome is shown in a third field called Shutter Speed with Filter. No rocket-science just an plain and easy app that does what it has to do.
 |
|---|
Photopills
I bought this app recently, didn't work really with it but already impressed with all its features. A review about this handy app will follow later if you guys want?
 |
 |
 |
|---|---|---|
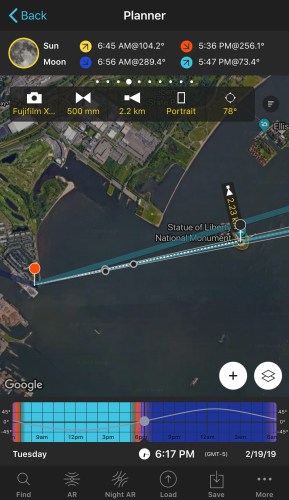
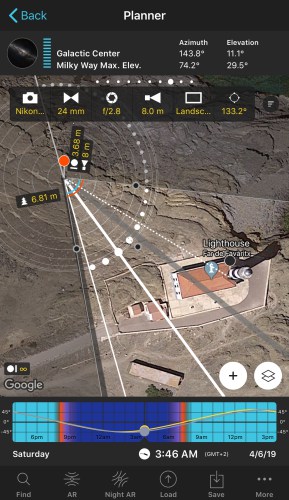
I came accross this app at the NiSi website where they mention this one if you needed a better app than the app NiSi provides. Photopills can calculate the desired shuttertime for you with an added filter, but it does more, much more than you could ever imagine. I think you can say this is your PA while being out there in the field alone. Imagine you are traveling and you found a spot where you thought to bad the sun isn't overthere, what time do I need to be there to get that specific shot or how is the sun orientated here during Golden Hour or where will the moon be tonight if I want a Milky Way shot from this place? All those questions you can ask your new personal PA and you get an answer by the help from different tools, like Augmented Reality. When you found the time for the ideal shot, you can create a favorite for the exact spot and even create a planning for spots when to shoot. There is also an idea list, if you think about something you need to take a picture from later, you can also add pictures to your notes etc. Really looking forward to start using this app in 2019. Download for IOS/Android
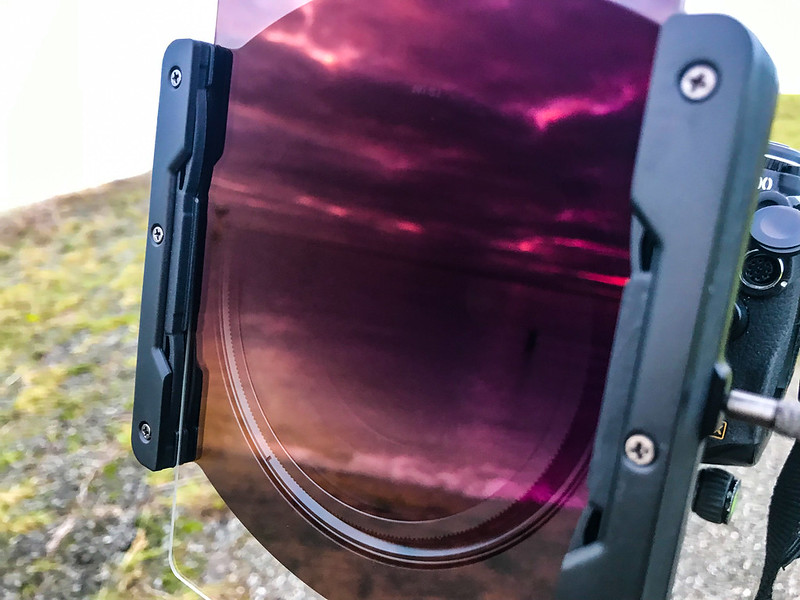
Light leak protection
Make sure there will be no light leaking towards your sensor. When this happens you will notice bright spots, lightflares or lines ruining your photo. The NiSi ND filter has rubbers on one side that attach the filter securely against the filter holder so that there can be no light leakage. But that is not the only position where your camera captures light. You need to check all the holes from your camera. You have special bags you can wrap around your camera, or you can use black tape to cover your eye piece. Just take your time and cover all the possible holes so you won’t have any weird things in your pictures showing up while post processing things back at home. My Nikon D700 has a switch to close a shutter in the eye piece, maybe your camera has that too?
Envision the final product
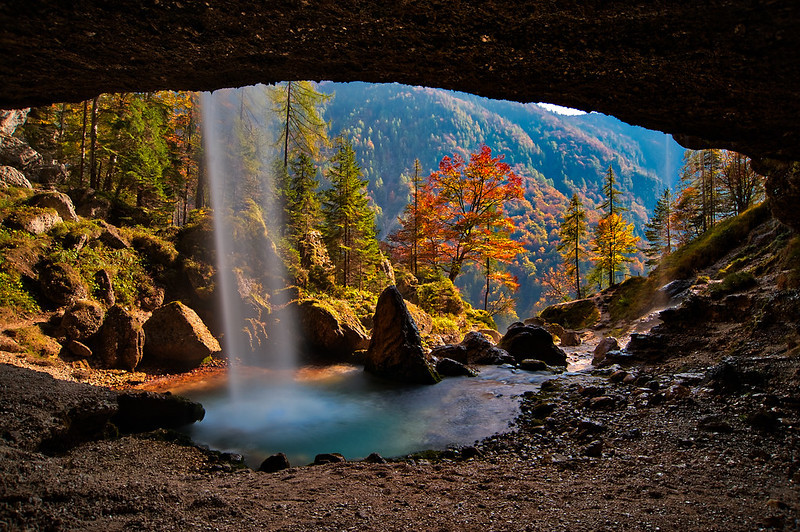
Before you get out in the field, envision your picture first. What do you want to achieve, what do you want to show people with your picture. Why am I asking? Because there aren’t only long exposures where you will use a minute long exposure to light the sensor. Sometimes you only want to create a dynamic scene with just a little bit of movement. You can use this technique in timelapse movies for example. You can use exposures from ½ to 2 a 3 seconds. But if you want to remove waves completely from a moving ocean, you will need an exposure from multiple minutes, and you will have to think about 2 minutes or even longer. You’ll see there are also different types of scenery, like seascapes, waterfalls, architecture cityscapes and so on. They all require different techniques but the fun part is there are no rules. Just envision what your scenery might look like and start experimenting.
What I use most of the times
Well with my new set I need to start experimenting again just like you guys. But with my old ND filter I did use some standard settings to get my waterfalls and seascapes right.
First thing you will never use to compensate the filter, is to raise the aperture till f22 or higher. Your lens has a sweetspot, try to use it in that range. Most of the times going beyond f/16 will create diffractions and shows how dirty your sensor actually is. When the resulting shuttertime isn’t long enough, you can stack some filters toger to get the shuttertime long enough for the scene you want.
Second I will always check is to underexpose a little bit. Never rely on the image at the back from your camera. It is better to check the histogram to see if you did the exposure right. And it will be easier if you do this first without any filter in front of your lens.
Third, I will always disable any noise reduction algorithm on my camera
Fourth, I will always switch to manual mode and start creating my scene.
Fifth, always set your lowest possible native ISO available for your camera.
Short summary
- Pick your scene/composition
- Set your ISO to the lowest native ISO for your camera
- You can focus manually or automatic, but after you did focus turn off the focus system from your camera (might be better to autofocus without any filter attached)
- Set the lens to F/8 till F/11 for the best quality for your lens
- Create a test shot without any filter attached and check the histogram, after this shot you can start adding filters like GNd,ND,CPL etc.
- Calculate the correct exposure time for the composition with the filters you will add (see the apps chapter)
- Never forget to cover the eye piece
- Take your shot
- Don’t forget to enjoy the scenery, your camera is doing the work now.
 |
|---|
Lessons learned
After shooting with the set two types of scenery around my house, I learned that I still don't know everything about how to use filters. But it is fun to look what image you can achieve with the help of just a little piece of glass. Another lesson learned, I need to clean my sensor... Already ordered new sensorswabs for the upcoming year.
Sources
NiSi Benelux
KameraExpress
DPS
Photographylife
Landscape Visuals
Please Follow, Upvote and Resteem
If you like my content, don't forget to upvote this post and follow me for more every day life stories! Also, I will be happy if you leave a comment to tell me your thoughts and resteem this post to share my work!

Travelfeed
Learn more about our travel project on Steemit by clicking on the banner above and join our community on Discord. How does travelfeed work? Simple just use the tag #travelfeed in your travel posts (min. 250 words) for a chance to be curated!
Posted from my blog with SteemPress : https://surfingnomad.nl/photography/photography-my-christmas-gift-and-how-to-use-it-%f0%9f%93%b7/
This can be the solution I've been looking for, as I've been struggling with sunlight in photos and haven't found a good solution so far!
A well written and compact package of information, it's worth far more than what my upvote is worth.
You have any examples from pictures you're struggling with the light? Maybe I or people reading here can help you.
Thanks for the compliment, that feels way better than any upvote could do! 😊
Excellent write up and a bit over my head in some areas. I'm still learning about photography, especially landscape photography. I understand the basics, but I really need to get out and put some things into practice. I nice set of filters is something I need to add to my kit really. Looking forward to seeing how you put them to use :)
Goodmorning @captainbob, thanks for the compliment! 😊
A bit over your head could be because the post shouldn't be online yet... I was helping @dboontje inbetween all the family meetings to get his post online by steempress by our shared blog. After fixing his code and update his last post, there was my WIP post unexpected online too... Don't know what went wrong, but I try to update it in between the work and family meetings.
What parts where a little bit over your head?
PS. Happy New Year, wishing you all the best for 2019!
Dude that was the most informative article I ever red on steemit! Wow ! I learned a ton about things I never really thought of. I honestly just recently got a ND filter and that's pretty much everything I have on equipment :D
Thanks for taking so much time and sharing your knowledge !
Cheers
Goodmorning thanks for the compliment @worldcapture😊 Allthough the post wasn't finished actually...:(
What filter do you have? Only 1 ND filter is already better than no filter at all.
Was everything clear for you? Did you even had the time to read everything while being on a trip?
PS. Happy New Year, wishing you all the best for 2019!
Yeah I red the whole post as there is a ton of things I should know about in it. Gobe ND1000 82mm MRC 16-Schichten ND Filter Thats the one I recently bought. I tried it out on some lake today and it worked quite well!
Hope you have a great year 2019 as well !
If you're missing things, or would love to discuss after your adventure you know where to find me! Lovely to read you're playing with the filters too at the moment. What lake did you visit?
The filters seems pretty ok, a slight colorcast (at the images I found at Google) which you should be able to colorcorrect in Photoshop pretty easily. Compared with the price I think this is one of the better buys. Can I add it to my post?
Yeah I def will have a chat about it with you after my travel!
Of course you can add it !
Ha, very true - I just edited one of the photos and It has some kind of a WarmIsh contrast. But easy to get out with LR. Ill text u when Im back. Cheers!
Looks fantastic @guchtere! Super informative too, thanks for sharing your expertise with us.
Posted using Partiko iOS
No thanks at all @goodwithtravels, it was you who inspired me for this writeup.
Only the post shouldn't be online yet... So I hope everything was clear enough for you already otherwise I did waste your time for reading the whole piece.
PS. Happy New Year, wishing you all the best for 2019!
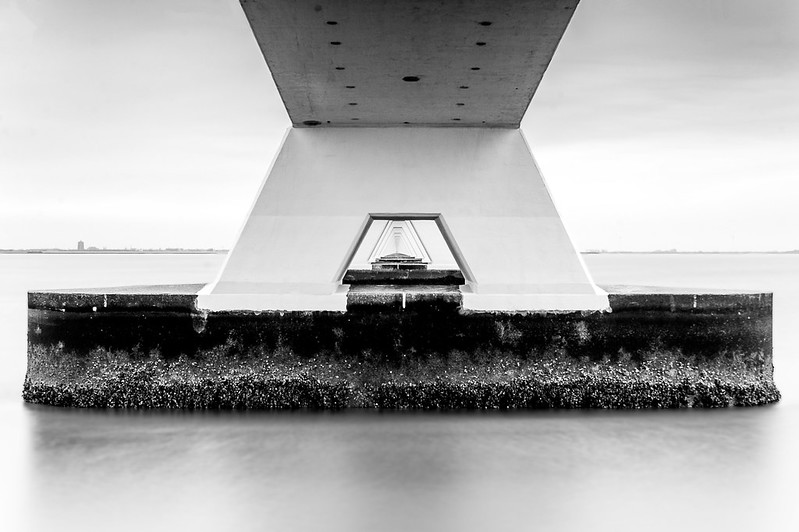
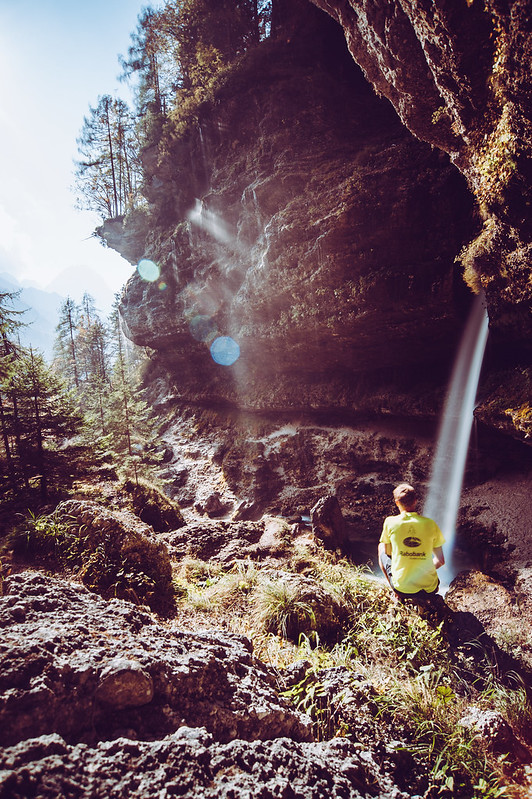
wow awesome write up and I love the picture at the end. Really great post. Happy new year
Thank you very much @paulag! 😊 Allthough the post wasn't finished actually...😞
Happy New Year for you to and wishing you all the best! Hope you had a great years end party?
Hi @guchtere!
Your post was upvoted by @steem-ua, new Steem dApp, using UserAuthority for algorithmic post curation!
Your UA account score is currently 4.305 which ranks you at #2535 across all Steem accounts.
Your rank has improved 1 places in the last three days (old rank 2536).
In our last Algorithmic Curation Round, consisting of 235 contributions, your post is ranked at #68.
Evaluation of your UA score:
Feel free to join our @steem-ua Discord server
Congratulations! This post has been upvoted from the communal account, @minnowsupport, by guchtere from the Minnow Support Project. It's a witness project run by aggroed, ausbitbank, teamsteem, someguy123, neoxian, followbtcnews, and netuoso. The goal is to help Steemit grow by supporting Minnows. Please find us at the Peace, Abundance, and Liberty Network (PALnet) Discord Channel. It's a completely public and open space to all members of the Steemit community who voluntarily choose to be there.
If you would like to delegate to the Minnow Support Project you can do so by clicking on the following links: 50SP, 100SP, 250SP, 500SP, 1000SP, 5000SP.
Be sure to leave at least 50SP undelegated on your account.
Hi, @guchtere!
You just got a 2.89% upvote from SteemPlus!
To get higher upvotes, earn more SteemPlus Points (SPP). On your Steemit wallet, check your SPP balance and click on "How to earn SPP?" to find out all the ways to earn.
If you're not using SteemPlus yet, please check our last posts in here to see the many ways in which SteemPlus can improve your Steem experience on Steemit and Busy.
Wow thanks for all this info very well done
Oh boy! What a post! I must admit I had to look up for some of the terms. Very enlightening and informative. Loved it! Santa must have loved your letter ;0)