Pencil drawing tutorial - capturing the glow of a gentle smile
Greetings to my wonderful Steemit friends. How is everything going? I hope you are all doing alright. Once again I have come to share another portrait drawing which I just recently completed – a portrait that captures a soft, beautiful smile. Portrait drawing has always been one of my favourite art journeys because each line and shade seems to whisper emotion, and this drawing seems to express the emotion of happiness. In this post, I’ll take you through the full process of how I created this portrait using only my pencils, an eraser, and a whole lot of patience. Stay tuned.

Drawing materials
• A4 paper
• mechanical pencil
• graphite pencil
• 6B pencil
• HB and 2B pencil
• black pen
• eraser
• sharpener.

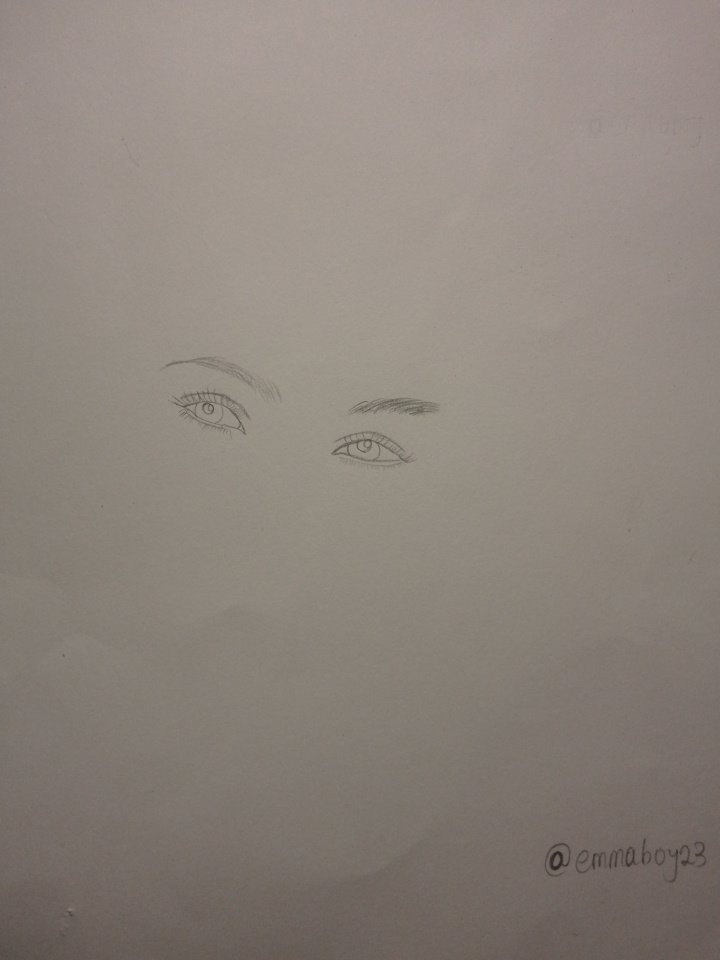
Step 1
Every drawing begins with a foundation, and for this one, I started with an HB pencil to lightly draw the eyes of the girl, then I switched to a 6B pencil to add darker tones and started outlining the eyelids and irises. Small, deliberate strokes gave shape to the lashes, while I left tiny white reflections to keep the eyes bright and expressive. Then I added the nose as well.

Step 2
The next step entails shading of the face. I used 2B and my graphite pencils to build smooth transitions of light and shadow. The aim here was to keep the tones subtle, especially around the cheeks and forehead, so the drawing would have a soft and natural look. To keep it realistic, I worked in layers — applying light pressure, blending with tissue, then reapplying darker tones where necessary.

Step 3
Next was the hair. I started with long, flowing strokes in 4B to establish mass and direction, then added finer individual strands with a 6B to bring depth. I tried to balance dark, rich areas against softer, airy sections so the hair would feel alive, not flat. Occasionally I flicked the tip of the pencil for stray hairs; imperfection adds realism.


Step 4
Next I drew the shoulder, making it look like she was leaning on it. I added soft shading to the neck and parts of the shoulder area to create depth.
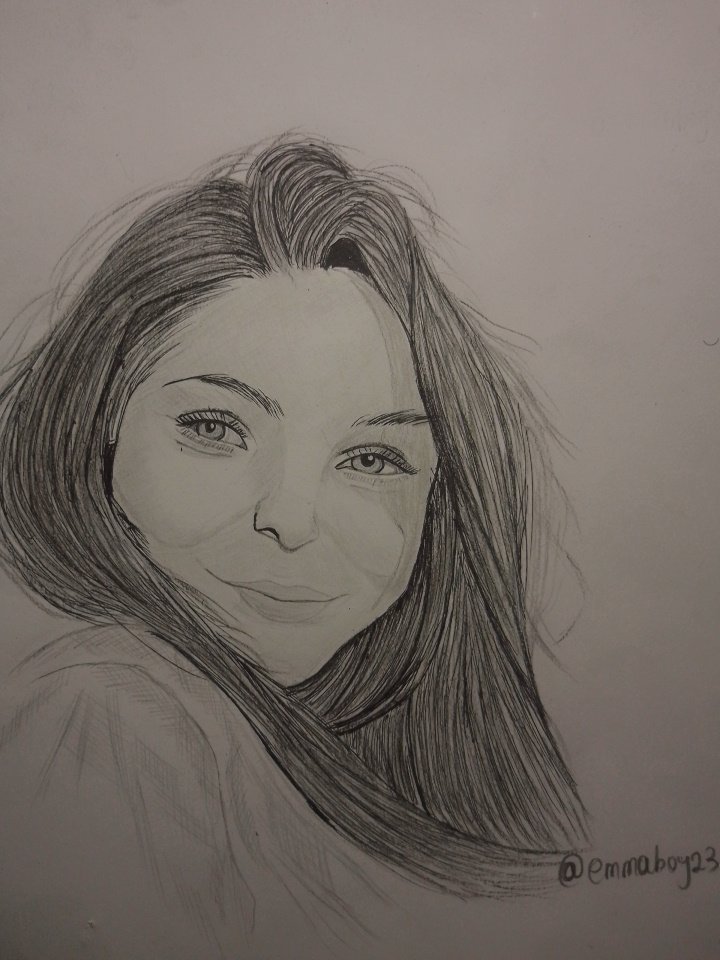
Step 5
In the end, I added subtle shading beneath the chin and around the neck for depth. I erased any rough pencil marks and made sure the tones blended smoothly. I also added dark depth to the hair to make it look realistic. Finally I was done, and below is the final result.
A picture of me and my drawing


Every pencil portrait teaches me something new — not only about drawing but also about patience and observation. This artwork reminded me how a simple pencil can turn an empty page into a moment full of emotion and life. Thank you for reading, my friends! I hope you enjoyed walking through my process. See you in my next art post, and bye for now.
Inviting
My Twitter promotional link 👇
https://twitter.com/emmaboy23/status/1983603535930650665?t=uLPVX_vWp4hJVOBzBhRoBg&s=19
Congratulations!!

Your post has been upvoted through steemcurator06. We encourage you to publish creative and quality content.
Curated By:
Thank you for the support