Reviving a vintage Transmission Electron Microscope - The Philips EM 420 Part 3, Water Lines and Vacuum Gauges.
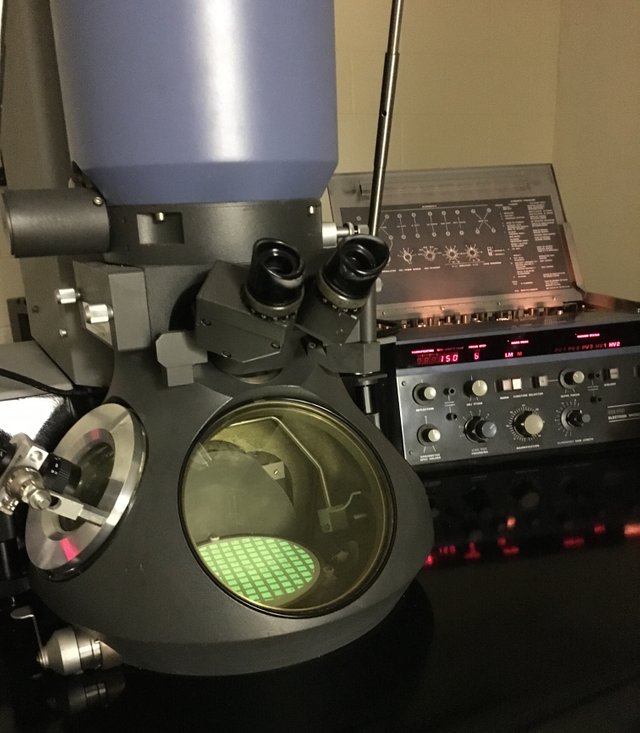
Im just going to use this nice EM410 picture as my default photo for some posts, okay?
Thanks to all who read my first post. I am pretty happy with the response I received. I assume I will pick up more readers as I go along. Something I left out in my first post was when you are putting any kind of electronic equipment back together, look closely at all the connections you are making. Pins in plugs can be pushed back into the socket, wires can be loose, terminals corroded so forth and so on. Pretty basic really, but doing this can prevent some troubleshooting further on. This applies to new systems as well, sometimes poor quality plugs are used and they can get you by surprise later. If you missed my last entry, part 2 you may want to go and check it out. I provide a short overview of TEM electronics and hardware.
So the next thing to address is the water connections. All the lenses, lens and coil supplies, a “measuring resistor unit” (more on this later) as well as the oil diffusion pump are cooled by a water supply typically set to 68 degrees F. Now this number can be played with a bit, you can actually turn it up or down a bit more. However often what happens is water lines will sweat, even at 68. I don’t know how many times I have had to mess around with a labs thermostat and their TEM chiller to eliminate condensation near the lens coils (VERY BAD). Sweating causes other problems too, like an operator or engineer turn the temp up on a chiller a little bit to reduce condensation. Then of course the scope will turn itself off or throw out various error messages because some component is getting to hot.
Next we move along to the Vacuum Gauges. The 420 has 5 vacuum readouts, supplied by 3 Pirani, 1 Penning and one from a current readout of the IGP for ultimate vacuum. This scope in particular had both a Penning and Pirani snagged off of it. I have made a table showing these gauges, their ranges and some other notes.

Table 1 – Gauges Dates of invention are approximate, and IGP functions as a vacuum gauge in this situation (1,2,3,5,7 &8). Note: The IGP can detect vacuums lower than what I have in the table, just not sure what they are at moment
The Piranis provide vacuum readouts for the Line Vacuum (M1), buffer tank (M2) and the viewing chamber (M4, see figure 1 below). These gauges work be applying a current to a wire that in turn gets hot. The heat dissipation from the wire is affected by the conductivity of the surrounding gas density. Low gas density = low conductivity. This change in conductivity in the wire is measured by a Wheatstone bridge that has a compensating resistor in it, and is used as a direct measurement of vacuum when calibrated. (6,9).
A Penning gauge is connected to the oil diffusion pump and reads its ultimate vacuum as well as viewing chamber and indirectly the column and gun. I would like to note that the Penning gauge is a type of Cold Cathode Gage, of which the Magnetron gauges belong to this class as well. In all cold cathode gauges (CCG) ionization is caused by electron plasma trapped in crossed magnetic and electric fields. Collection of positive ions inside the gauge yields an electric current which is used as an indirect measurement of gas density and pressure (2).
Lastly the current draw across the Ion Getter Pumps is used as a measure of ultimate vacuum. Since the penning gauges rely on some form of ionization for pressure measurements under 10-3 Torr (2). It makes since that since the IGP is an ionization process we can measure vacuum with it (8). I will explain IGPs in another post.
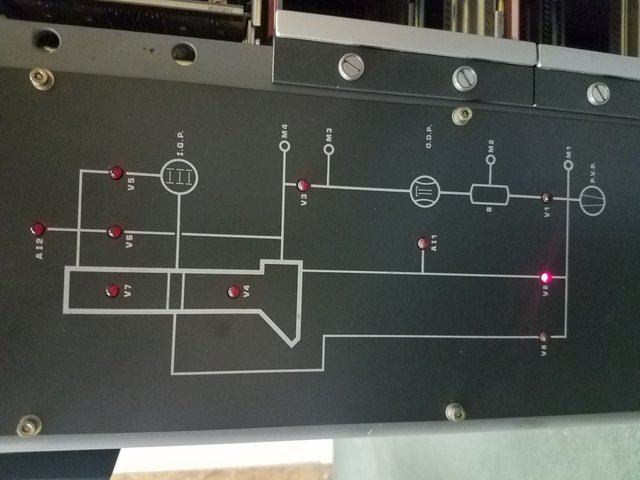
Figure 1. EM420 gauge and valve display, flipped on its side for some silly reason. How do I turn this 90 degrees on here?
Checking Gauges
According to Edwards, their PR10C Pirani gauges should measure 40 ohms across the 12 Micron filament that is in vacuum and 26 ohms across the filament at atmospheric pressure (3,7)). I just measured 40.5 and 26.6 (minus probe resistance), on a used spare in the shop so it should be good. The vacuum area looks clean too, so I will skip cleaning. The filament is very fragile and dropping the gauge or cleaning it could break it. IF cleaning is needed tho due to contamination rinse with “The appropriate greaser” followed by water then methanol rinse is the Edwards way to clean them. Contamination is usually evident when the gauge drifts, however this can go away over time. Never tried this though, and the material that the filament feed through is made of appears to be plastic, not sure what type. Kind of looks like Delrin, but does not scratch like it. Probably a flouropolymer and if so it should definitely not be soaked in Acetone. I think I will take this broken gauge and soak it in my favorite greaser for a while and see if it still holds a vacuum. Stay tuned for that.
Check out pictures of dissected Pirani gauge below!
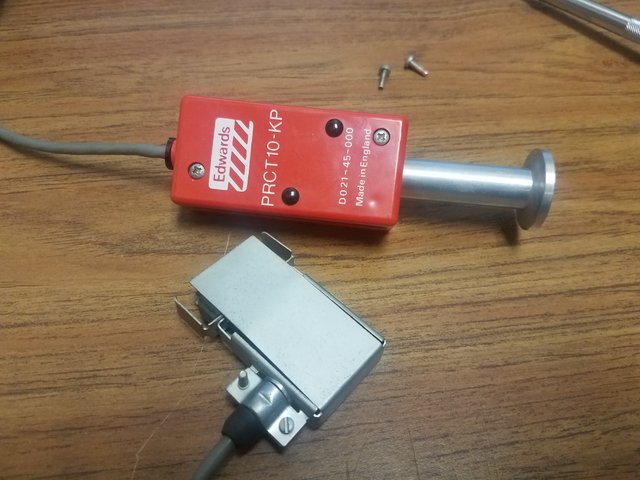
Figure 2 – A PRCT10-KP Perani gauge with KF16 fitting, and old school Philips Plug. The filament is blown so its being sacrificed for you all to see.
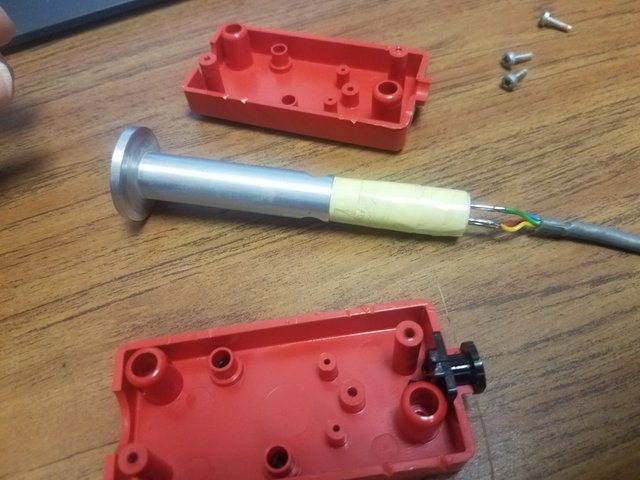
Figure 3 – Housing removed, ambient temperature fluctuation compensation filament is wrapped around aluminum tubing secured by tape. Seems pretty flimsy, however this gauge is pretty old and the filament under the tape reads at spec and the tape is not peeling, so I suppose its good enough….
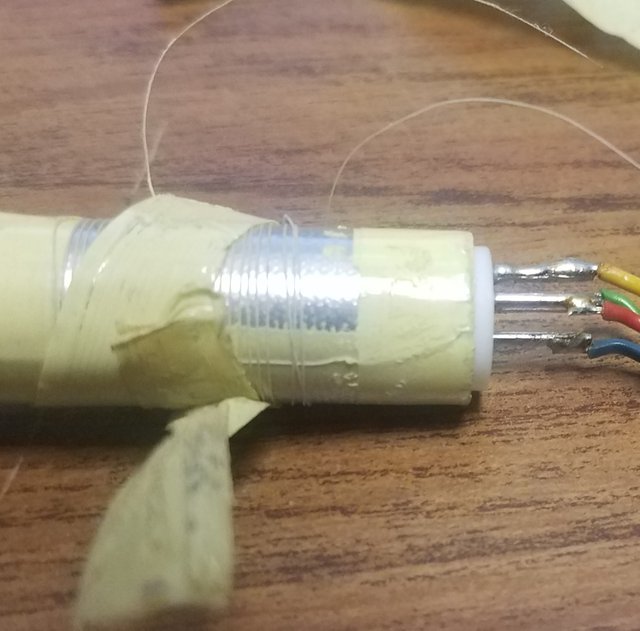
Figure 4 – Filament coiled around tube up close. I cut the filament (2 wispy wires) connections at 2 of the 4 solder joints and the circuit went wide open. The coil spacing is about 0.3mm.
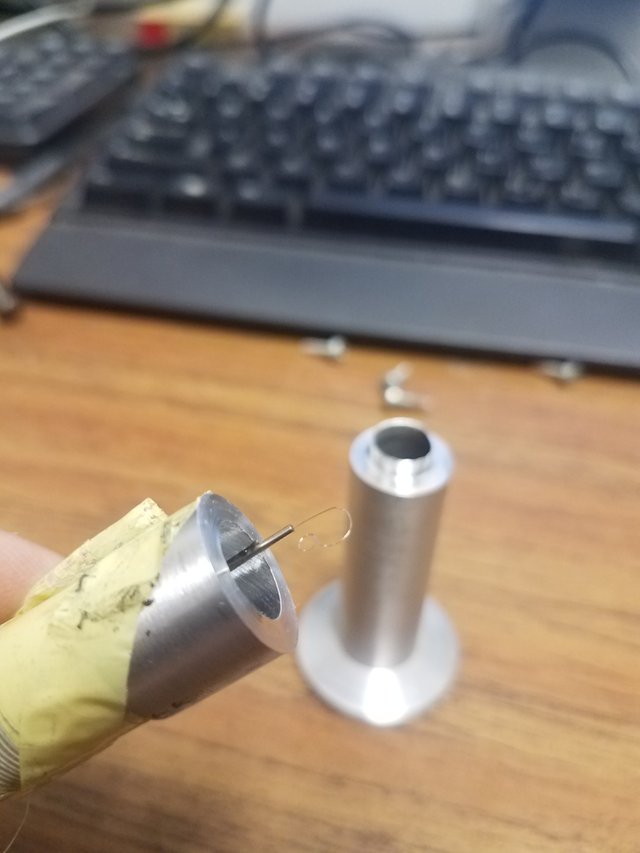
Figure 5 - I parted the gauge on a lathe so the filament can be seen up close. You can see how fine it is and where it became detached from a terminal down inside. Could not really focus on the inside, but there are three terminals. Two stubby ones, on of which the looped filament should be attached to.
The Edwards CP25 Penning Gauges like to get so cruded up that they stop reading correctly. Sometimes taking the cathode baskets out and sanding them with 600 grit can bring them back, however grade 100 glass paper is recommended by Edwards. The anode can be gently cleaned in the same manner, however if you remove to much the nickel plating will come off and your gauge wont work to long, or at all. Rinsing with acetone several times after is necessary after abrasion, however I have got away with sonicating or rinsing in ethanol. The Barium Glass feedthrough on these guys can crack to, creating a bewildering problem if you dont think to check your gauge for leaks (4). Sometimes tapping the gauge head very gently can cause the meter to jump. I bleed dry N2 through the camera airlock up to 1 atm, then turn the scope off and pull the gauge off for visual inspection. Watch out for other types of Penning gauges, one the Edwards CP25-3 has a layer of Beta Emitter (Beta particles are electrons emitted from the nucleus of an atom) Nickel 63 on the gauge head, which is coated with non radioactive Nickel. Safe according to the Edwards manual, however I would avoid breathing dust from polishing it.
I will take a Penning gauge apart in the next post. Also, I have an old that dates back to at least the 60s laying around, I need to find. It was used on the old EM300s and 301s.
So the next thing I will do is replace the missing Pirani and Penning gauges, and get this beast pumping down. Tell you all more about that in the next chapter.
https://www.thinksrs.com/downloads/pdfs/applicationnotes/IG1hotapp.pdf
Pirani Gauge heads. July 1985 Issue D024-22-883 Edwards Vacuum, West Sussex UK
Edwards CP-25 -3 Spec sheet
Philips EM 420 Pumping System and Column service manual
http://live.iop-pp01.agh.sleek.net/2017/07/25/the-invention-that-made-uhv-possible/
This post has been voted on by the SteemSTEM curation team and voting trail in collaboration with @utopian-io and @curie.
If you appreciate the work we are doing then consider voting all three projects for witness by selecting stem.witness, utopian-io and curie!
For additional information please join us on the SteemSTEM discord and to get to know the rest of the community!
Done, done and done!
Glad to see more from this series! I love it! :)
Thank you!
Your series is addictive :D
There are so many cool details that can't be found anywhere
I gotta agree here. It's satisfying to see how this is done and I dunno if anywhere else on the internet has a how-to for repairing something like this.
Thank you Sir. This is just the tip of the iceberg! hahahhaa
This looks like an awesome project! Are you fixing it just for personal satisfaction, or do you plan on using it for some research?
Well, I have been repairing TEMs for 10 years. Before that I was a chemist, and now I want to move on to applications which is what I will use this for. However I do get some satisfaction with showing the "old is useless" crowd that many things can pass the test of time.
Fantastic explanation, I congratulate you for the good content you are contributing from the first part where you show a small theoretical compilation of TEM, the second part showing microscopy components and in the latter showing the team with which you are working.
Currently what are you analyzing? I know you're an engineer but are you working on something specific? compounds, composites, enzymes, some chemical or biological material. It would be interesting to know a little more about this!
Thank you Sir! I am not analyzing anything at the moment. My short term goal is to teach myself some some sample prep. Right now, I am looking for a Dimpler and Jet Electropolisher to repair. Long term goal is a TEM/SEM lab, perhaps doing coatings. But it depends....I am opportunistic, and have a plethora of ideas. I write most of them down and go after them in order of least difficulty and fastest benefit. I realllly...want a CryoEm lab, but that is years off.
Hi @roguescientist84!
Your post was upvoted by Utopian.io in cooperation with @steemstem - supporting knowledge, innovation and technological advancement on the Steem Blockchain.
Contribute to Open Source with utopian.io
Learn how to contribute on our website and join the new open source economy.
Want to chat? Join the Utopian Community on Discord https://discord.gg/h52nFrV
Thank you! Much more to come on this and other scientific apparatus!