ROS MoveIt Robotic Arm Part 2 : Robot Controller
https://github.com/AIWintermuteAI/ros-moveit-arm.git
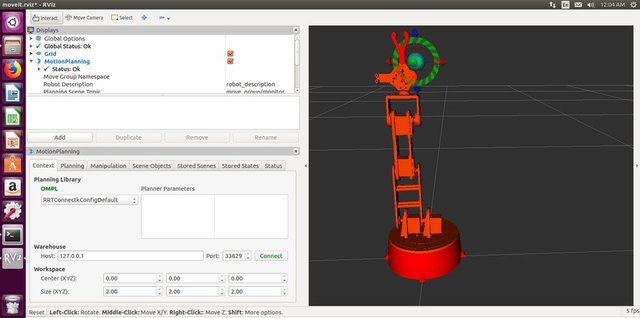
In the previous part of the article we have created URDF and XACRO files for our robotic arm and launched RVIZ to control our robotic arm in simulated environment.This time we'll do it with the real robotic arm! We will add the gripper, write a robot controller and (optional) generate IKfast inverse kinematics solver.
Geronimo!
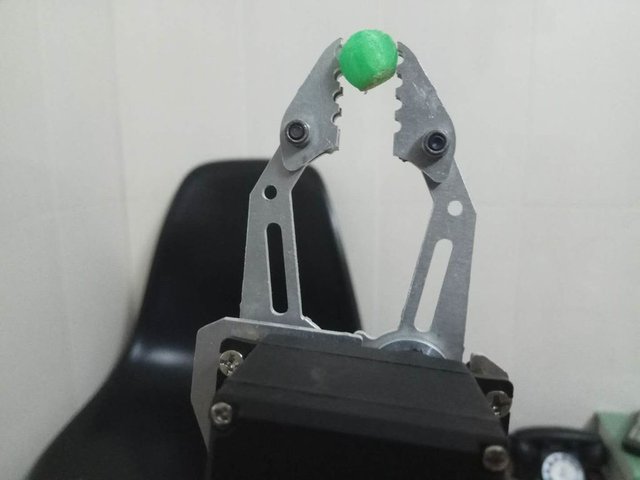
Step 1: Adding the Gripper


Adding gripper was a bit confusing at first, so I skipped this part in the previous article. It turned out to be not so difficult after all.You'll need to modify your URDF file to add gripper links and joints. The modified URDF file for my robot is attached to this step. Basically it follows the same logic as the arm part, I just added three new links (claw_base, claw_r and claw_l) and three new joints(joint5 is fixed, and joint6, joint7 are revolute joints). After you modified your URDF file you'll also need to update MoveIt generated package and xacro file by using MoveIt setup assistant.Launch setup assistant with the following command
roslaunch moveit_setup_assistant setup_assistant.launchClick on Edit Existing MoveIt Configuration and choose the folder with your MoveIt package. Add new planning group gripper (with links and joints for the gripper) and also an end effector. My settings are in the screenshots below. Notice that you don't choose kinematics solver for the gripper, it is not necessary. Generate the package and overwrite the files.Run
catkin make command in your catkin workspace. Alright, now we have an arm with a gripper!
Step 2: Building the Arm
As I mentioned before the arm 3D model is made by Juergenlessner, thank you for an amazing work. The detailed assembly instructions can be found if you follow the link.
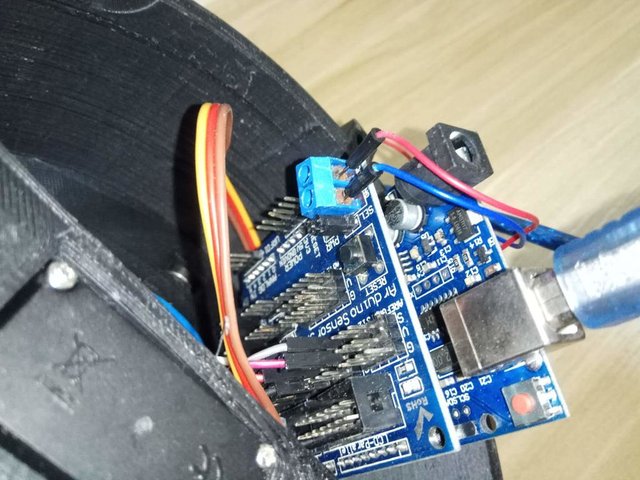
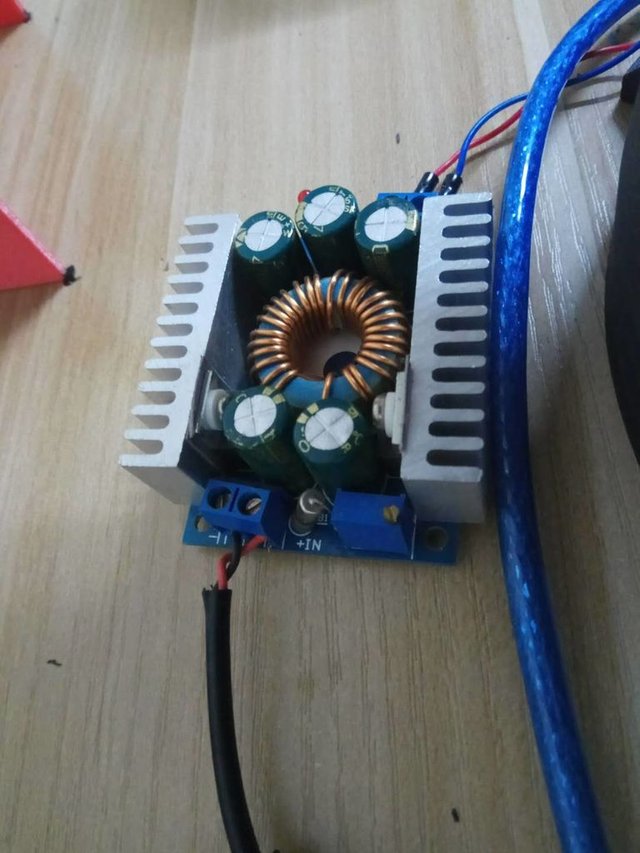
I had to modify the control system though. I use Arduino Uno with Sensor shield for controlling servos. Sensor shield helps a lot with simplifying the wiring and also makes it easy to provide the external power to servos. I use 12V 6A power adapter wired through step-down module(6V) to Sensor Shield. A note on servos. I use MG 996 HR servos bought from Taobao, but the quality is really bad. It is definitely a cheap Chinese knock-off. The one for the elbow joint didn't provide enough torque and even started fuming once under heavy load. I had to replace elbow joint servo with MG 946 HR from a better quality manufacturer.
Long story short - buy quality servos. If magic smoke comes out of your servos, use better servos. 6V is a very safe voltage, don't increase it. It won't increase torque, but can damage the servos.
Wiring for servos as follows:
base 2
shoulder2 4
shoulder1 3
elbow 6
gripper 8
wrist 11
Feel free to change it as long as you also remember to change the Arduino sketch. After you finished with hardware, let's have a look at the bigger picture!
Step 3: MoveIt RobotCommander Interface
So, now what? Why do you need MoveIt and ROS anyway? Can't you just control the arm through Arduino code directly?
Yes, you can.
Okay, now how about using GUI or Python/C++ code to provide robot pose to go to? Can Arduino do that?
Sort of. For that you will need to write an inverse kinematics solver which will take a robot pose(translation and rotation coordinates in 3D space) and convert it to joint angle messages for servos. Despite you can do it yourself, it's a hell of a lot of work to do. So, MoveIt and ROS provide a nice interface for IK(inverse kinematics) solver to do all the heavy trigonometrical lifting for you.
Short answer: Yes, you can do a simple robotic arm that will execute a hard-coded Arduino sketch to go from one pose to another. But if you want to make your robot more intelligent and add computer vision capabilities, MoveIt and ROS is the way to go.
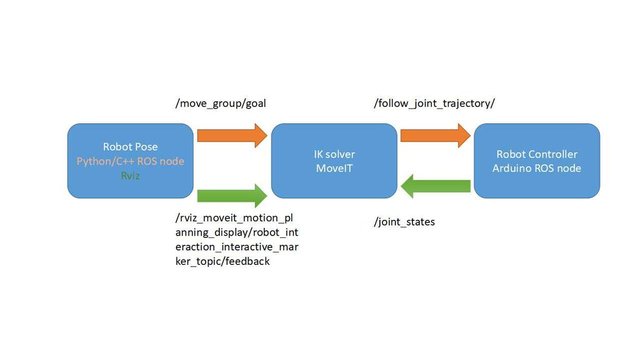
I made a very simplified diagram explaining how MoveIt framework works. In our case it is going to be even simpler, since we don't have feedback from our servos and going to use /joint_states topic to provide robot controller with the angles for servos. We only lack one component which is the robot controller.
What are we waiting for? Let's write some robot controllers, so our robot would be ... you know, more controllable.
Step 4: Arduino Code for Robot Controller
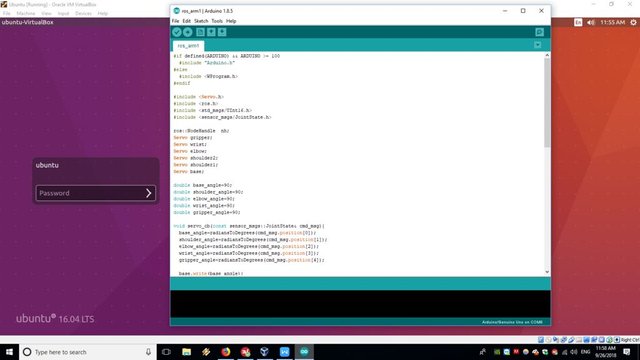
In our case Arduino Uno running a ROS node with rosserial will be the robot controller. The Arduino sketch code is attached to this step and also available on GitHub.
The ROS node running on Arduino Uno basically subscribes to /JointState topic published on the computer running MoveIt and then converts the joint angles from the array from radians to degrees and passes them to servos using standard Servo.h library.
This solution is a bit hacky and not how it is done with industrial robots. Ideally you are supposed to publish the movement trajectory on /FollowJointState topic and then receive the feedback on /JointState topic. But in our arm the hobby servos can't provide the feedback, so we'll just directly subscribe to /JointState topic, published by FakeRobotController node. Basically we'll be assuming that whatever angles we passed to servos are executed ideally.
For more information on how the rosserial works you can consult the following tutorials
http://wiki.ros.org/rosserial_arduino/Tutorials
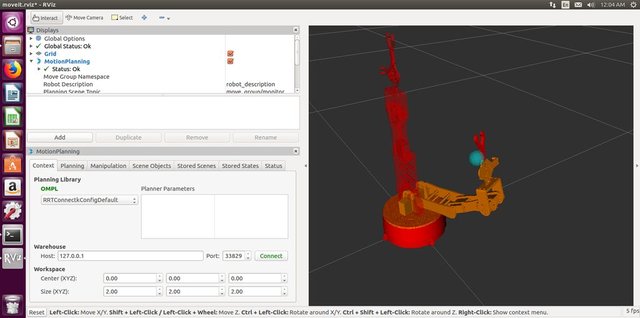
After you upload the sketch to Arduino Uno, you'll need to connect it with the serial cable to the computer running your ROS installation. To bring up the whole system execute the following commands
roslaunch my_arm_xacro demo.launch rviz_tutorial:=truesudo chmod -R 777 /dev/ttyUSB0rosrun rosserial_python serial_node.py _port:=/dev/ttyUSB0 _baud:=115200Now you can use interactive markers in RVIZ to move the robot arm to a pose and then press Plan and Execute for it to actually move into the position.
Magic!
Now we are ready to write Python code for our ramp test. Well, almost...
Step 5: (Optional)Generating IKfast Plug-in
By default MoveIt suggests using KDL kinematics solver, which doesn't really work with less than 6 DOF arms. If you following this tutorial closely then you will notice that the arm model in RVIZ can't go to some poses which should supported by the arm configuration.
The recommended solution is to create custom kinematics solver using OpenRave. It is not that difficult, but you'll have to build it and it's dependencies from source or use the docker container, whichever you prefer. The procedure is very well documented in this tutorial. It is confirmed to work on VM running Ubuntu 16.04 and ROS Kinetic.I used the following command to generate the solver
openrave.py --database inversekinematics --robot=arm.xml --iktype=translation3d --iktests=1000and then ran
rosrun moveit_kinematics create_ikfast_moveit_plugin.py test_robot arm my_arm_xacro ikfast0x1000004a.Translation3D.0_1_2_f3.cppto generate MoveIt IKfast plug-in.The whole procedure is a bit time consuming, but not very difficult if you follow the tutorial closely.
If you have questions about this part, please contact me in the comments or PM.
Step 6: The Ramp Test!
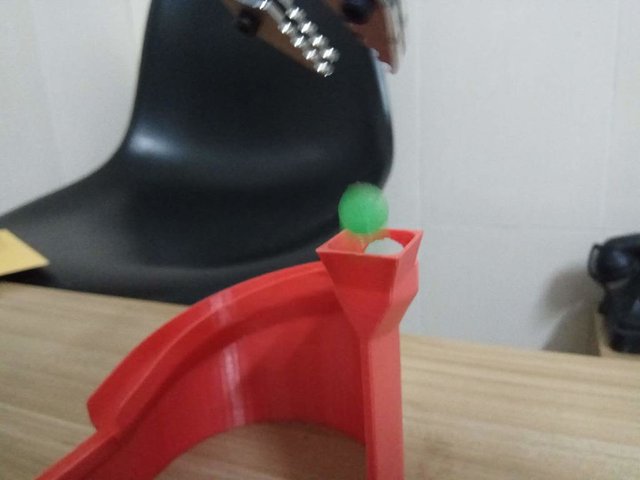

Now we are ready to try the ramp test, which we will execute using ROS MoveIt Python API.The Python code is attached to this step and also available on github repository. If you don't have a ramp or want to try another test you will need to change the robot poses in the code. For that first execute
rostopic echo /rviz_moveit_motion_planning_display/robot_interaction_interactive_marker_topic/feedbackin the terminal when already running RVIZ and MoveIt. Then move robot with interactive markers to the desired position. The position and orientation values will be displayed in the terminal. Just copy them to the Python code.To execute the ramp test run
rosrun my_arm_xacro pick/pick_2.pywith RVIZ and rosserial node already running.
Stay tuned for the third part of the article, where I will use stereo camera for object detection and execute pick and place pipeline for simple objects!