Lighting Ratios to Make or Break your Portrait part 1
In a past article (6 Lighting Patterns each picture taker should know) I discussed lighting examples and how they make shape and measurements on the face. Another factor that adds to the adequacy of a picture is the lighting proportion. As a math term, a proportion is an examination of one thing to another. The word reference definition expresses, "the quantitative connection between two sums demonstrating the quantity of times one esteem contains or is contained inside the other "
In regard to lighting proportions, you measure the light falling on the light or feature side of the face, and contrast it with the shadow side to touch base at the lighting proportion. How precisely do you do that? While you can do it with the inherent meter in your camera, (set to spot meter for more exactness) it is significantly less demanding and more precise to utilize a hand held episode light meter. Your in-camera meter is an intelligent style meter which takes an estimation of the light reflecting OFF of your subject. A handheld meter is an episode meter (in spite of the fact that it can be both with a connection) which measures the measure of light falling Regarding the matter and is a more precise method for measuring lighting proportions.
Key Concepts
To appropriately quantify and comprehend proportions in regard to photography, you have to comprehend a couple of things. To start with that light is measured in photography terms by f-stops. The gap dial or setting on your camera goes up in 1/3 of a stop increases (or ½ stop if that is the means by which you've set your custom settings). The full stops for gap are: f1, f1.4, f2, f2.8, f4, f5.6, f8, f11, f16, f22, f32, and so on. A straightforward approach to recall each one of those numbers is simply to recollect 1 and 1.4, and the greater part of alternate sets are multiplied from these (next combine is 2 and 2.8), with a couple of adjusted off.
We additionally need to comprehend that the shade speeds are likewise illustrative of "stops", with the full quits being at: 1 sec, ½ sec, ¼, sec, 1/eighth, 1/fifteenth, 1/30th, 1/60th, 1/125th, 1/250th, 1/500th, 1/1000th, and so forth. These are less demanding to recall as they are for the most part multiplied (with a couple round offs 1/eighth to 1/fifteenth).
The key idea you have to comprehend is that each full stop is twofold (or ½, depending which course you go on the scale) the measure of light finished the past one. For instance: on the off chance that you are shooting at f4 and need to shoot at f5.6, you should twofold the measure of light to get one more stop. On the off chance that you need a 2 stop contrast at that point we're discussing 2×2 or 4 times all the more light. In like manner 3 stops is 2x2x2, or 8 times all the more light et cetera.
Knowing this we would now be able to make sense of how to make and measure proportions. In the following arrangement of photographs I will exhibit 4 distinct proportions and how they were accomplished.
1:1 Ratio
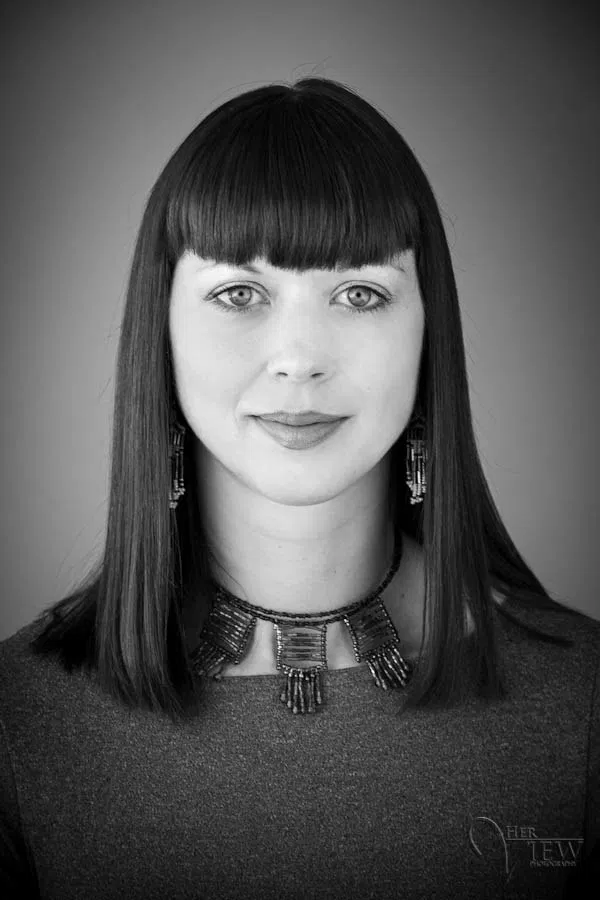
A 1:1 proportion is notwithstanding lighting, it has no proportion, and there is no distinction in meter perusing from one side of the face to the next. This is level lighting, which can be accomplished a few distinctive ways. To begin with, you can utilize a fill glimmer and influence the blaze equivalent to the principle light source or window to light. This is harder to accomplish until you've had some training, and frequently you'll wind up overwhelming the regular light with streak. Also, you could utilize a reflector. It should be truly near the subject with the goal that you can't perceive any shadows regarding the matter's face any more. This is a 1:1 proportion and is quite simple to see and perceive outwardly.
2:1 Ratio
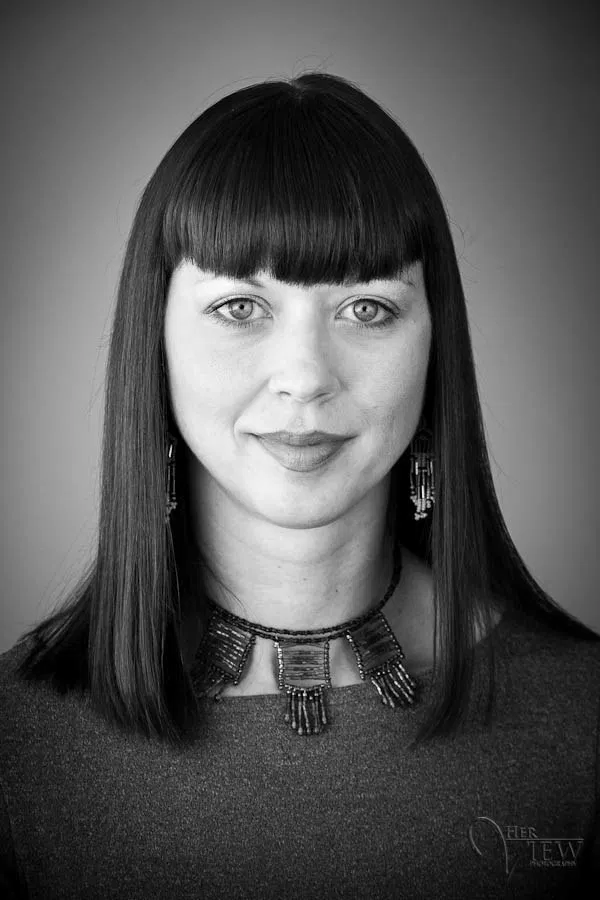
As the numbers recommend, this is where one side is twice as effective as the other.
So realizing that and what we think about f-stops we can set up this lighting proportion.
NOTE: these fstops, or openings, I'm specifying here are for metering purposes, that isn't what you will set your focal point at for the introduction. Meter how you more often than not do to decide the right shooting presentation. Take a test shot, audit the histogram, and alter it in like manner.
Put your subject into the light, where you will photo them. Utilizing a light meter, measure the light falling in favor of their face nearest to the light source (called the feature side). Suppose that measures f8. (Keep your screen speed the same for the two estimations for consistency.) Then get your reflector and utilizing the light meter once more, measure the light falling in favor of the subjects confront that is further far from the light source (from here on in, this will be alluded to as the shadow side).
Note: If you are utilizing a hand held meter, try to shield the meter from getting light from the other way falling on it as you make your readings. EI: in the event that you are metering the shadow side closest the reflector, shield the meter so the principle light source isn't hitting it.
You may need to modify the reflector separation to subject until the point that the perusing measures f5.6 which is ONE STOP, or ½ the measure of light as f8 on the opposite side. Notice the perusing instructs us to utilize a bigger gap (f5.6) which implies there is less light. This will give you a 2:1 proportion. Concentrate the picture above and perceive the difference go from feature to shadow sides on the face. It's unpretentious however you can see it now.
4:1 Ratio
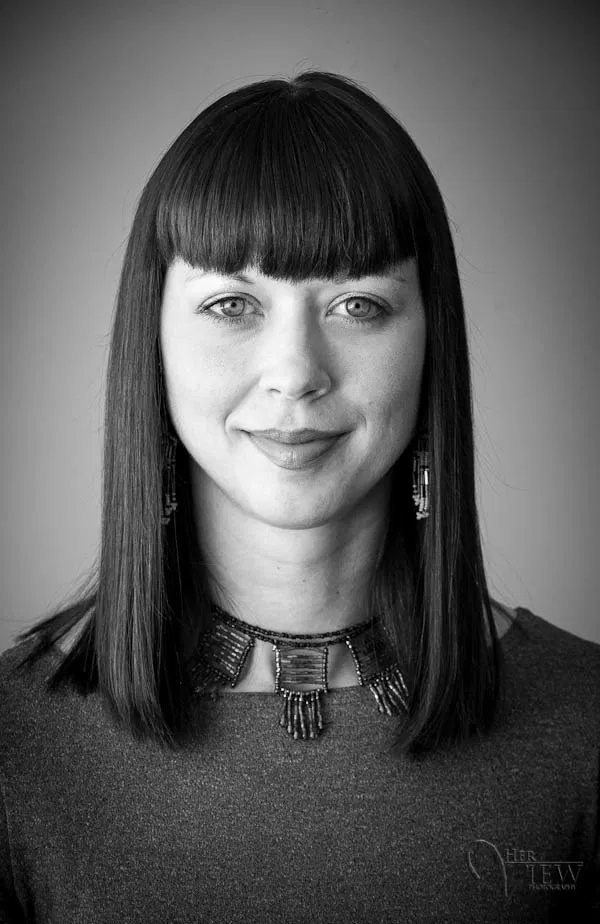
A 4:1 proportion is twofold the last one. So if 2:1 was twice as much light, or one stop – what amount of will 4:1 be? 2X2, 4 fold the amount of light, or a 2 prevent distinction from feature side to the shadow side of the face.
I educate an accessible light class and I generally prescribe working with characteristic light before you progress on to studio lights, and particularly to utilizing speedlights. With accessible or regular light, and a reflector, it is MUCH simpler to learn and work on lighting since you can SEE what occurs as you roll out improvements (WYSIWYG). Streak is harder to foresee, as should be obvious it without really taking a photo.
So if our primary light (the window) is still at f8 – what does our fill light or the shadow side should be to accomplish a 4:1 proportion? We should do the means once more: f8 > f5.6 > f4. In this way two stops under f8 is f4 and the coveted estimation to make a 4:1 proportion. Take a gander at the photograph above and perceive how the shadow side is getting darker each time?
8:1 Ratio
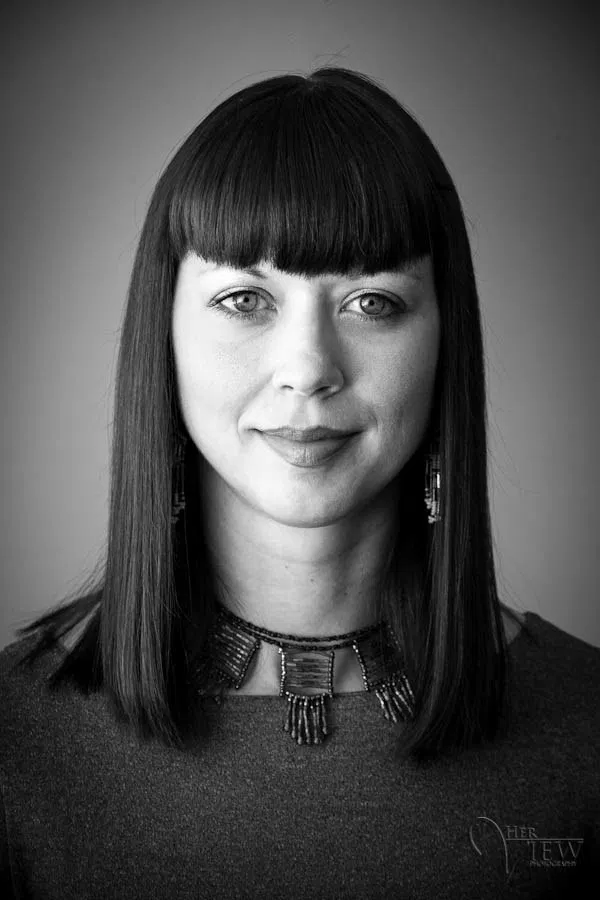
The last ratio we’ll look at is 8:1. This is 8 times as much light, (you can see that in the ratio “8 to 1”), or 3 stops, from one side of the face to the other. It is quite dramatic and anything greater than 8:1 will not hold much detail on the shadow side at all. Prints have a maximum contrast range of 4-6 stops. So unless you want: one side of the face pure white; the shadows pure black; and no mid tones in between; I suggest keeping it to an 8:1 or lower ratio.
This one can be a bit tough to create. You may need a bit harsher lighting and possibly a black reflector to add blacks into the shadow side (rather than reflecting light into it). As before we calculate it the same way. If 4:1 is 4 times the light – 8:1 will be 8 times the light – or 3 stops. So if we are still at f8 on our highlight side, we need to get our shadow side to read: f8 > f5.6 > f4 > f2.8. So our fill must read f2.8 to get an 8:1 ratio. Notice how deep the shadows are in the 8:1 image above? It’s more dramatic than the others.
source : https://digital-photography-school.com
Welcome, i have 1000 + steem power my vote is around 10 cents , if you follow and coment my posts i can help you :D welcome again
Welcome to steemit @digiphotography upvote :)
thank you bro
Welcome to steemit @digiphotography. Join #minnowsupportproject for more help. @OriginalWorks will help you verify original content .
If you want to plant a tree try @treeplanter
Use @tipu to give users a 0.1 SBD tip.
Upvote this comment to keep helping more new steemians
The @OriginalWorks bot has determined this post by @digiphotography to be original material and upvoted(1.5%) it!
To call @OriginalWorks, simply reply to any post with @originalworks or !originalworks in your message!
amazing post
Congratulations @digiphotography! You have completed some achievement on Steemit and have been rewarded with new badge(s) :
Click on any badge to view your own Board of Honor on SteemitBoard.
For more information about SteemitBoard, click here
If you no longer want to receive notifications, reply to this comment with the word
STOP