Your camera settings affect cinematic test editing
Hello everyone is a photography lover!
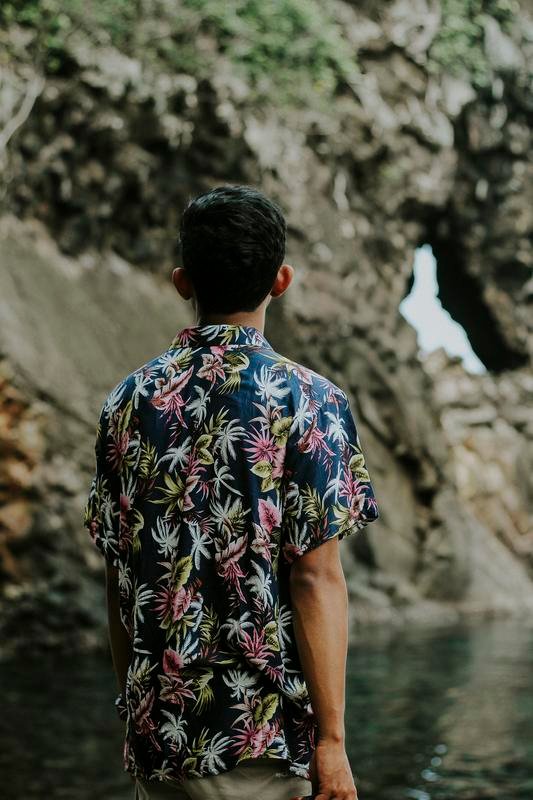
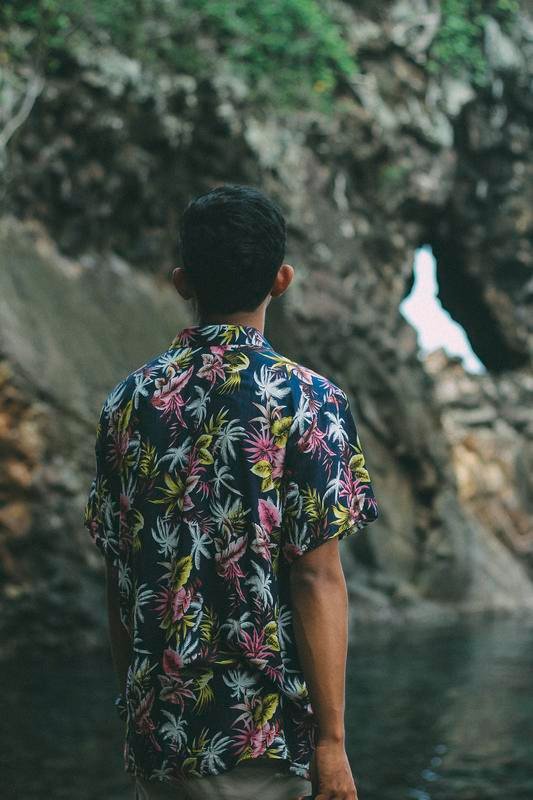
in the world of color selection photography is very important to get an accurate color, ranging from the settings on your camera to the selection of existing picture style settings in the camera coupled with the accuracy and speed of existing manual mode use, pixel is a very basic requirement for photography world especially for photography modeling part, to get detail result on facial area and also skin stability.
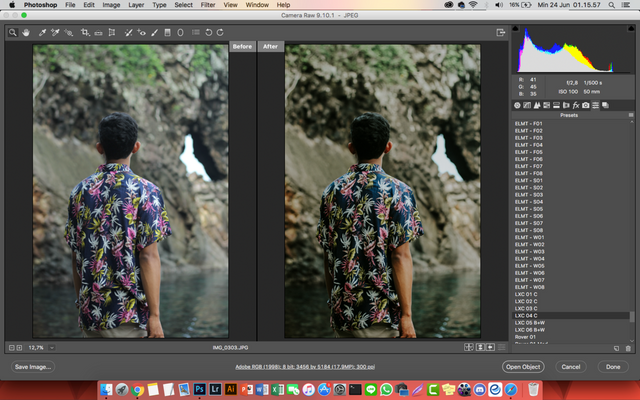
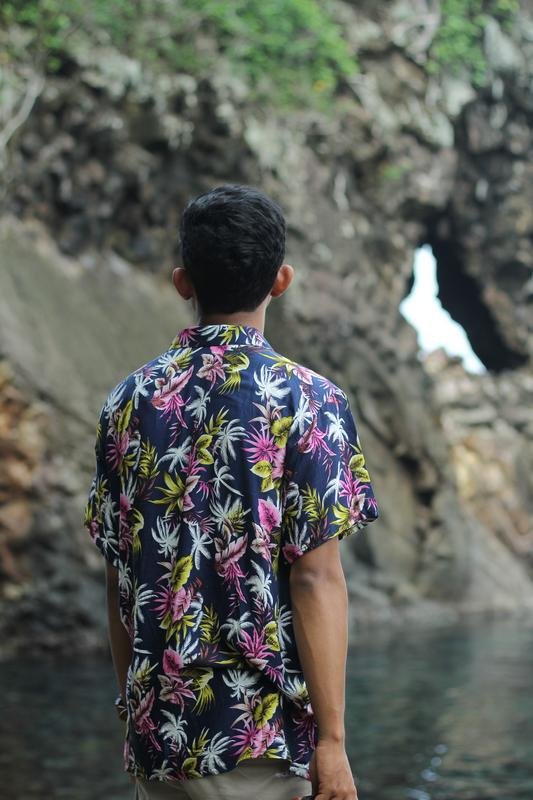
for cinematic editing technique itself is highly recommended setting camera approaching cinema color, for example red and yellow color that we can edit to classic color when we add photo file into adobe photoshop, to get stable color from result of image which we take through DSLR or MIRRORLESS we need to change the image quality setting from JPEG to ACR or to NEF, with the aim that the shots of our camera remain original from the retrieval so that the color of the file will not change when we put into adobe photoshop.
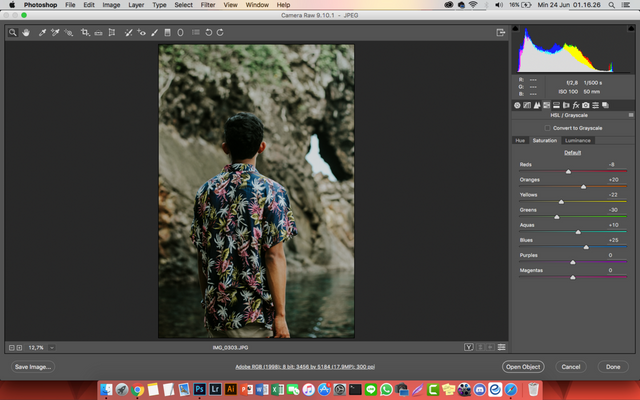
to get a stable cinematic color from a preset provided by the raw camera we need to first learn a bit how a lighting or coloring works so we understand which areas we need to change so that it will get a very stable color,for a quick overview of the coloration you need to change that is in the raw camera or another HUE, SATURATION, and LUMINANCE, the three colors should be changed and play as you want to get the right color in your shots, some color variations are provided on the three bars with the aim of color and cinematic photo texture look sharp as long as it qualifies camera settings as I said above.
Hopefully a steemit friend likes and enjoys my work this one, thank you.
so much for this time stay tuned content tricks and photography tips from me, see you next time!
thank you for visiting hopefully useful do not forget find me on cahnnel :
YOUTUBE

Please upvote: https://steemit.com/free/@bible.com/4qcr2i
Please upvote: https://steemit.com/free/@bible.com/4qcr2iPlease upvote: https://steemit.com/free/@bible.com/4qcr2i
Nice picture brother
This post has received a 1.43 % upvote from @booster thanks to: @wahyurahadiann.