pcste's photography tutorials - How to make your own photography paper - Cyanotype (easy process, no need for enlarger & proper darkroom)
Cyanotype is an old printing process that gives a blue print. Discovered by the astronomer Sir John Herschel in 1842.
His interest was more like a photogram than a photograph though. his idea was for reproducing notes and diagrams.
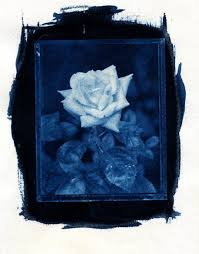
A cyanotype (image from google, labeled for re-use)
Here I show you the original classic version of how to make cyanotype light sensitive photographic paper which is exposed under sunlight or UV light.
Ingredients :
Ferric ammonium citrate (green)
Potassium ferricyanide
Purified water
Good quality artist paper, strong enough to withstand washing
A glass rod or a non-metal brush (a pastry brush is ideal but avoid nylon bristles )
using a glass rod will give you more coverage than a brush, which means your solution will cover more.
Tape
a board to tape your paper to
A contact print frame or piece of glass big enough to cover your image.
safety glasses, gloves and mask
The above chemicals can be obtained on ebay or silverprint, silverprint also sell kits (look under 'alternative process')
http://shop.silverprint.co.uk/Raw-Chemicals/products/461/
Safety :
The ingredients are relatively safe in this process, however Ferric
Ammonium Citrate can cause skin irritation , serious eye irritation and may cause respiratory irritation so i suggest a mask and goggles , also gloves are a good idea to avoid possible skin irritation.
Safety data sheets
https://www.silverprint.co.uk/wp-content/uploads/2015/10/Ferric-Ammonium-Citrate-1185-57-5.pdf
https://www.silverprint.co.uk/wp-content/uploads/2015/07/Potassium-Ferricyanide-MSDS.pdf
Method :
The sensitive chemical is made up from 2 solutions, solution A and solution B.
Sloution A
Dissolove 25g of Ferric ammonium citrate in 100ml of purified water.
Solution B
Dissolve 10g potassium ferrycyanide in 100ml of purified water.
The above amounts will be enough to cover approx 50 10x8" sheets of paper.
The solutions can be stored SEPERATELY in brown bottles away from light until you are ready to use it. (you don't have to store in total darkness but keep away from the sun or uv light.)
The solution will not last long once you mix the 2 together so only mix what you need for each session.
Tape a piece of brown paper or newspaper to a board and then tape your art paper to the brown paper or newspaper.
Then, under subdued artificial light , original light bulb or tungsten (not flourescent)
Mix equal quantities of solution A and solution B (the chemicals will stain carpets fabrics etc so avoid spillages)
Spread the MIXED solution evenly over your paper using the glass rod or paintbrush.
Allow the paper to dry in darkness.
Once the paper is dry you have 2 options, a photograph or a photogram.
To make a photogram place objects on your paper, such as leaves, flowers, or anything really (you need to keep the paper flat)
Then place the sheet of glass over the objects and expose to the sun or a UV light.
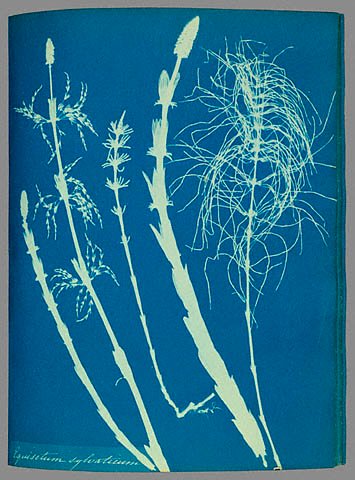
A photogram (image labeled for re-use)
For a photograph you will need a negative the same size as the final image. with this process you can't enlarge the image so really you want a 5x4" minimum or ideally a 10x8" negative.
O.k. so most people don't have any 5x4" or 10x8" negs. don't worry there are options to make your own very easily now.
Best solution is to use Digital negative transfer film. This is film which can be printed on your home printer from any image on your pc. heres a link to a post i wrote on this medium.
https://steemit.com/photography/@pcste/pcste-s-photography-tutorials-introducing-digital-transfer-film-we-ve-come-full-circle-digital-back-to-analogue
link to digital transfer film supplier
http://shop.silverprint.co.uk/Permajet-Digital-Transfer-Film/products/118/
You can also make a paper negative by inverting and flipping horizontal an image in photoshop and then printing onto inkjet paper. it wont be as good as negative but its a starting point and still great fun. Reduce the contrast to 10% (you may have to experiment with density of image)
Take your 10x8" negative and place it onto your cyanotype paper Emulsion side or inkjet side facing down.
place your piece of glass on top of your neg and paper (you should still have your cyanotype on a board or flat surface )
Expose to the sun or a U.V. lamp
For the exposure you want the shadows to look bronzed . you will have to experiment with the exposure time as it can take from a few minutes to a few hrs depending on the light source and the density of the negative or objects.
Allow a 1 stop over exposure of the image as you will lose some density when washing. If you don't know about 'stops' then over expose the image so it is darker than you want the final print to be.
Then take your print and immerse in running water and wash until the green of the ferric ammonium citrate has completely disappeared. Wash for at least 5 minutes.
Finally. dry your paper on a print drying rack or washing line.
more reading If you wan to try more advanced cyanotype or other processes....
http://shop.silverprint.co.uk/Alternative-Processes/catalogue/540/
http://www.alternativephotography.com/wp/processes/cyanotype/new-cyanotype-process
Images used from google (labeled for re-use)
original images....https://www.google.co.uk/search?q=cyanotype&source=lnms&tbm=isch&sa=X&ved=0ahUKEwiYyv619YTPAhXJAMAKHQJPB_IQ_AUICCgB&biw=1024&bih=686#q=cyanotype&tbm=isch&tbs=sur:fc&imgrc=_
Great tutorial. Thank you for. That's an awesome way to do that.