Tips and Tricks on How to Photograph the Milky Way
Astrophotography is such an exciting field of photography. There is always something about the night sky that one can't help but be amaze.
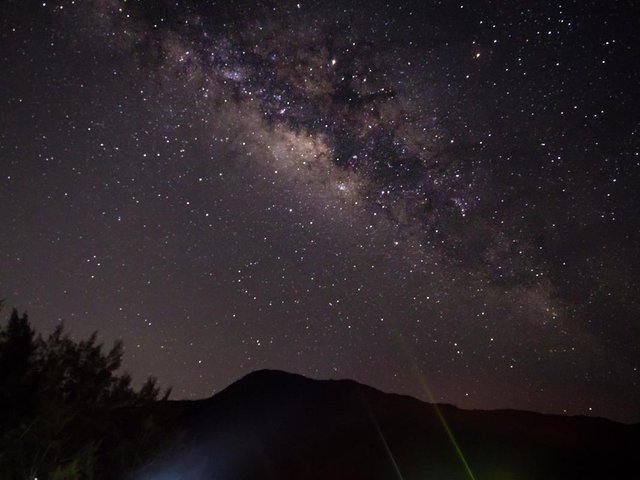
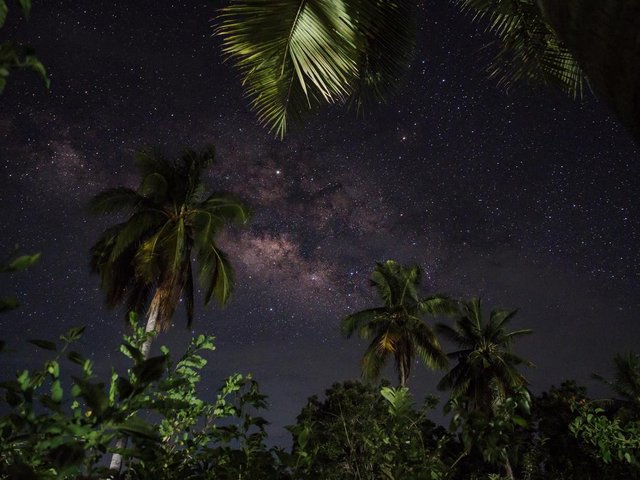
Olympus OMD EM10 MK II 12mm, 20secs, f2.8, ISO 1600
The Milky Way is the favorite subject in this field of photography. We are currently residing inside the Milky Way galaxy but the one that we usually see in those stunning photographs is actually the center or the galactic core. But for simplicity, we'll just refer to it as the Milky Way in this post. If you currently don't have an idea how to photograph the night sky and the Milky Way, this guide might help you in understanding the basics.
Locating the Milky Way (Where and When)
If you want to capture the Milky Way, the first step is to know how to find it. The Milky Way is a very faint target. Total darkness is the most ideal condition to photograph it. A small glow in the sky like city lights or moon light could easily make the Milky Way fade and impossible to find.
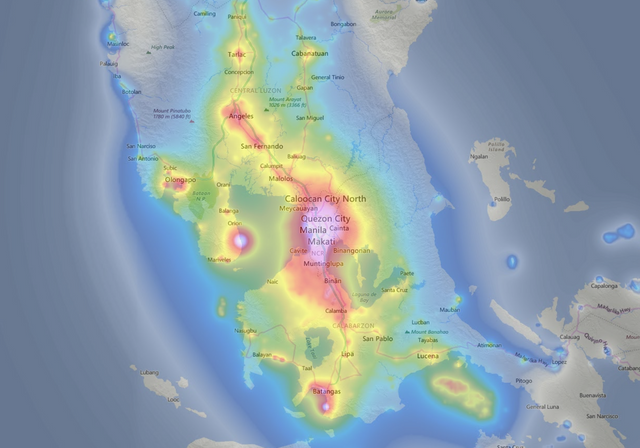
For finding a dark area, I suggest using Light Pollution Map. What you will see is a map with light intensity. You may want to look for an area in the yellow region at minimum. Making your way into the green, blue and gray region will give you a better result.
Moon Phases
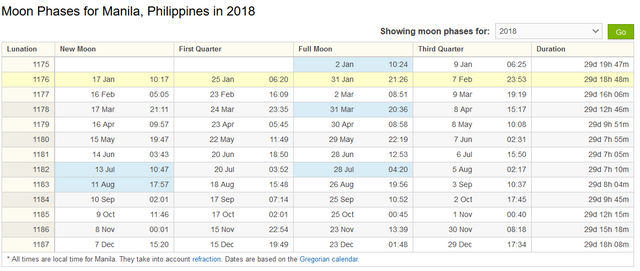
Even the light coming from the Moon can wash out the night sky. That's why another consideration when capturing the galactic core is the Moon Phase. Since we want total darkness, you may want to shoot during a New Moon and ultimately avoiding the Full Moon. Though it is not impossible to shoot during a First Quarter Moon and a Third Quarter one, a more careful planning is needed for that and maybe out of scope for this tutorial.
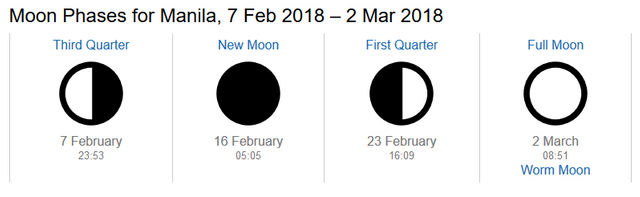
I recommend visiting this site when checking on the moon phases in your area. It can also show the time of moonrise and moonset so you can better plan your shoot.
Weather
As if all the conditions aren't enough. Your Milky Way photo will always be weather dependent. Given how unpredictable the weather is, it is one of the things that can't be plan in advance. You just have to face it as it is.
For this, I suggest using AccuWeather and start checking for at least a 3-day weather forecast in the area you are about to shoot.
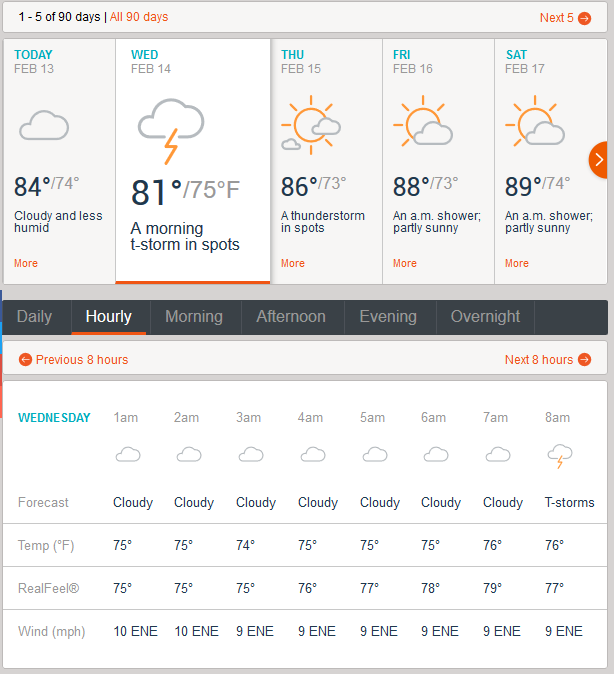
But remember, don't let this discourage you from going out and taking a risk to shoot. Sometimes a few clouds can add drama and mood to your Milky Way shot.
App for Finding the Milky Way
Getting the previous conditions above right in order to shoot takes a lot of planning. There are a number of mobile apps that can help ease this process. I personally use SkyView (available for both Android and IOS).
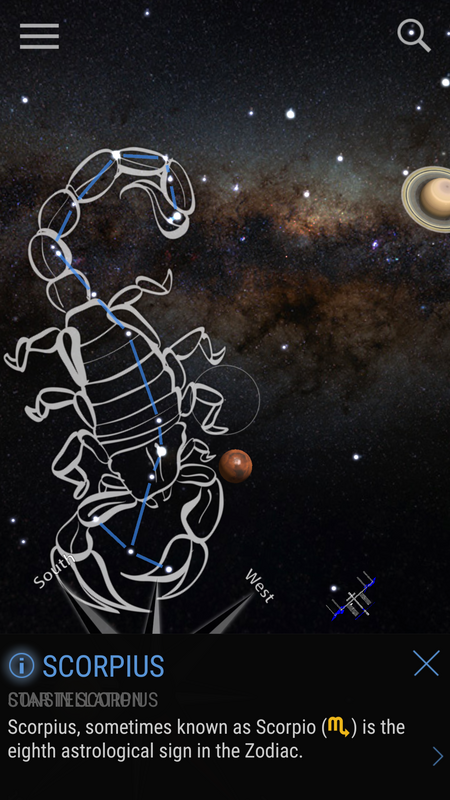
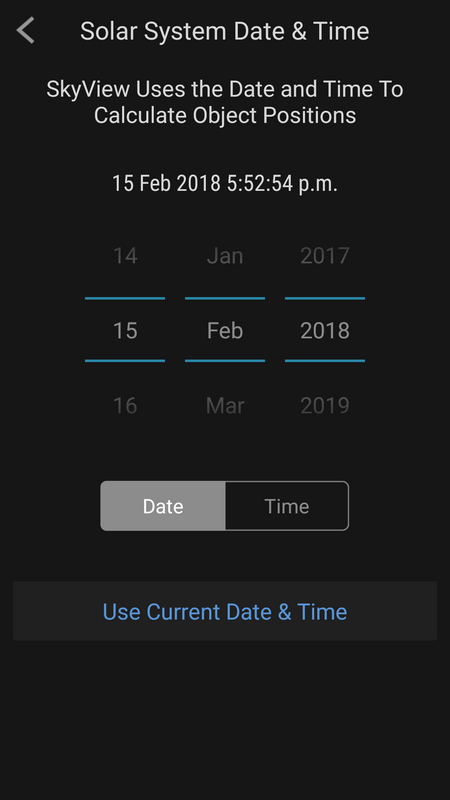
This app will guide you on where to look for the Milky Way. Also one of my favorite feature of this app is being able to adjust the time and date and allow you to search for the Milky Way's position at that specific time.
Composition
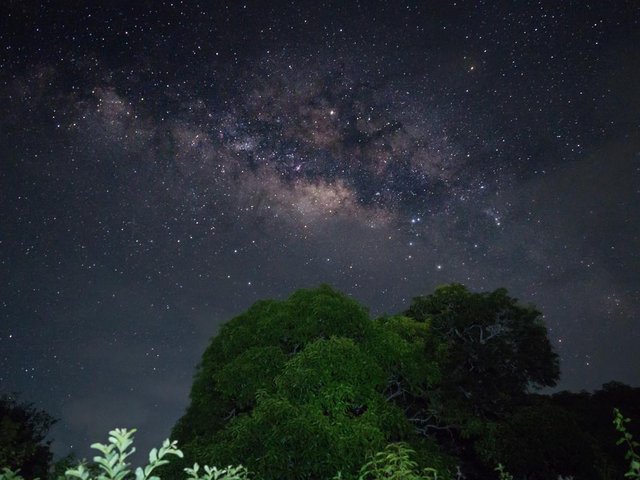
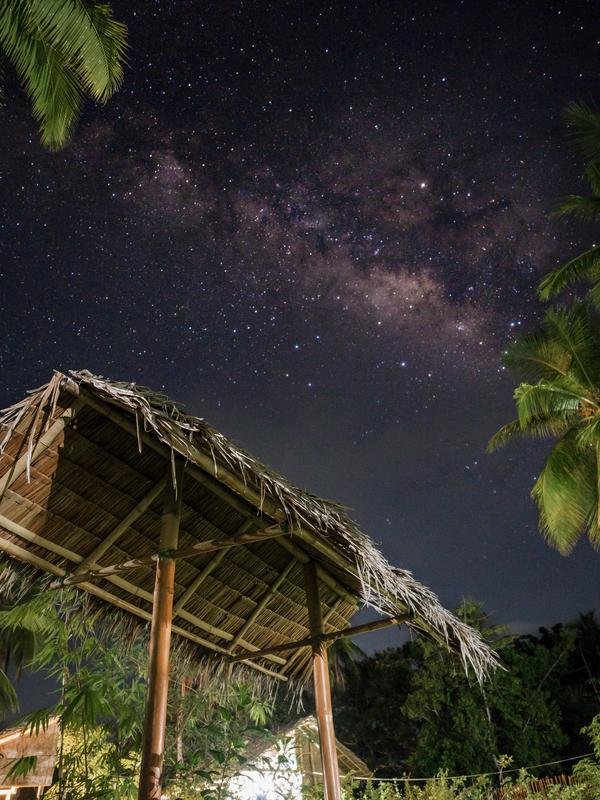
The Milky Way will almost always be the same as it has for the previous years and it will be boring to shoot it by itself. What will make your photo unique and standout is the foreground elements that you will use.
Olympus OMD EM10 MK II 12mm, 20secs, f2.8, ISO 1600
A beautiful mountain, a lake, a tree, a satellite or even a barn make good foreground objects and will make the overall image more appealing to the viewer's eye.
Gears
- A Camera that allows for full manual exposure(ISO, Shutter speed and Aperture). Astrophotography also forces you to use high ISO settings in order to capture stunning photographs so a camera that can operate between 1600 ISO and above and still produce a high quality image is required.
- Fast and Wide Lens - Ideally, you would like to shoot using a wide focal length. Not will this allow you to show the whole Milky Way in your photo, this will also determine your shutter speed that you can use. See 500 Rule below. For the aperture, a minimum of f2.8 (wide open) lens is required to capture more light in your photo.
- Tripod - A good and sturdy tripod will allow your camera to remain still throughout the full capturing process. So it's important choose a good quality one. Also make sure that your camera is properly mounted before you start shooting.
- Remote Shutter - Pressing the camera shutter can instantly cause blur to your photo. Using a remote shutter allows you to take the photo without touching the camera itself. This is totally not necessary as you can always set a timer (at least 2 seconds) in your camera before it starts to take a shot.
- Flashlight - can be use to add some light in your foreground.
Olympus OMD EM10 MK II 20secs, f2.8, ISO 3200
Camera Settings
Aperture and ISO
Both of this settings will be always almost on the fix value when you're starting out. You will want to place your aperture on the widest(f2.8, f2.0 and below) your lens can go in order to capture more light. Your ISO will be dependent on your camera's capability. You will want to choose the highest number that will yield a quality and noise-free image. Try to start at ISO 1600 and try to go up there and check for noise in your image.
Shutter Speed
500 Rule
Given that the earth is rotating, star trails will start to appear in your photos when doing long exposure photographs. This rule determines the optical exposure length (shutter speed) that you can use without seeing star trails in your photo. The formula is:
Shutter Speed = (500 / [focal length * Crop Factor])
Crop factors are given values depending on the camera's sensor where a full frame sensor is equal to 1.
Some of the crop factors for different sensors are:
- APSC Sensor - 1.5 For Sony, Nikon, Fuji and 1.6 for Canon
- Micro Four Thirds(M43) Sensor - 2.0 for both Olympus and Panasonic
So a lens with focal length of 18mm mounted on an APSC sensor will get a maximum shutter speed of
(500 / [18 * 1.5]) = 17.36 or 15 secs as the closes shutter value available.
Olympus OMD EM10 MK II 12mm, 20secs, f2.8, ISO 1600
Focusing
Set the lens’ focus to infinity. It also helps to focus on a brighter star in order to make sure that the focus is set to infinity. If you don't have that, another way is to turn on your flashlight and point it far enough away from you and try to focus on that.
An advance technique also being use for Astrophotography is called Focus Stacking. (I'll definitely make a guide on how to do this in the future).
Post Processing
Post processing will always be a big part of Astrophotography. You will have to learn how to tweak different settings to bring out the details in the Milky Way. This can be a little complicated and will definitely need a more comprehensive guide in the future posts to come so stay tune!
Beautiful photos
Thank you! Hoping you guys learn something from it.
This post has received a 0.15 % upvote from @drotto thanks to: @ajcordenete.
Hi, I think you'll enjoy the challenge I've started: Where Is This Challengeguess the location and win 0.1 SBD.
I'll check this out! Thanks!
Great tutorial and photos! Congratulations for your awsome post!