How I made a $50 HD Livestream Camera with a Raspberry Pi and Youtube
Since I am a kitesurfing fanatic I wanted to have a decent livestream view of one of the main 'flatwater' spots near Amsterdam, the Netherlands. It wasn't only me who wanted this, many more kiters with me were longing for this...
A camera would be a great way to make this happen, however the IP camera solutions where either quite expensive or just outputting a MJPEG stream (image stills). Another thingy was my desire to be able to view on mobile, desktop or even TV... Below the current screen of the livestream, an explanation how I did it and how you can do it too!
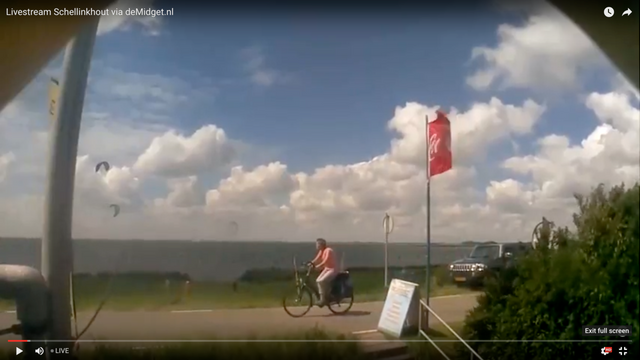
The Livestream result:
Hit play to watch the livestream... Note that overnight I have programmed a filler video loop. The camera is live from around 05:00 AM CET - 22:00 PM CET.Here is how I managed to get a HD Camera Stream from Raspberry Pi to Youtube
What you need
- A Raspberry Pi (model 2 or higher for performance)
- A Raspberry Pi Camera Module
- Some ethernet cable
- A USB charger for your Pi
- Dummy Camera Housing to put everything in
Step 1. Install a RPI OS software image and FFMPEG
1. You can go for a barebones Noobs install of Raspbian.- Install FFMPEG... This needs to be compiled... So it will take a shitload of time because of the RPI's processing (or lack thereof :D) power.
- Poweroff the Raspberry Pi.
- Remove the SD card and clone as an image so you never have to compile FFMpeg again should your SD card get's corrupted
Step 2. Connect the Camera Module
Step 3. Go to your Youtube account and setup a 'Livestream' via 'Events'
Note that your Youtube Account has to be in Good Standing. You can find the Livestream tab in the Dashboard section.- Start a new stream in the events section.. Fill out all the blanks
- Now you will see your stream listed
- Go to the Ingestion Settings and update the stream rate speed your internet connection will be able to serve the video to youtube. Select for example Basic Ingestion 720P
- Under "Copy and paste into your encoder" you will find the necessary 'Stream Name' authorization details... Copy those as we need them in the script in the next step.
Step 4. Run a commandline from your Raspberry Pi:
raspivid -o - -t 0 -vf -hf -fps 30 -b 6000000 | ffmpeg -re -ar 44100 -ac 2 -acodec pcm_s16le -f s16le -ac 2 -i /dev/zero -f h264 -i - -vcodec copy -acodec aac -ab 128k -g 50 -strict experimental -f flv rtmp://a.rtmp.youtube.com/live2/your-custom-session-here
... where 'your-custom-session-here' should be the 'stream key' which you found in the previous step under 'Stream Name' .
Congratulations you are now streaming to youtube in HD from your Raspberry Pi!
The command above explained thanks to Max Blogotronz:
-o -makes it write the video data to STDOUT so it gets piped intoffmpeg.-t 0is how you make it record forever-vf -hfflips it horizontal and vertical so it looks correct-fps 30sets frames per second to 30-b 6000000- output bitrate limit. YouTube recommends 400-600kbps, this is 600kbps. Change this to save upload bandwidth at the expense of a lower quality video-re- tells ffmpeg to slow down the reading of the input to the native frame rate of the input (useful when live streaming)-ar 44100 -ac 2 -acodec pcm_s16le -f s16le -ac 2 -i /dev/zeroand-acodec aac -ab 128kand-strict experimental- adds a fake audio channel filled with zeroes (silence). YouTube rejects streams without an audio channel. You can also change the input device to a microphone if you want (I haven't done this yet)-g 50adds a keyframe every 50 frames. Feel free to tweak, its one of those tradeoff variables.-f h264and-f flvtells ffmpeg it's receiving h264 input and that you should mux it intoflvoutput (flvis the container format that works with YouTube. Others might work but I haven't tried them)- by not specifying
-wand-hto raspivid we get the full 1920x1080 resolution (aka 1080p). You can specify these if you want a lower resolution
Optional enhancements I implemented
Use sunwait
sunwait is a command line program which you can enable to execute a script to shutdown and startup the camera near Sunset and Sunrise.
Add a filler video at night
I've added a filler video at night times because otherwise it would have a dark screen... Alternatively you can buy the Pi Noir Nightview Camera Module which has Infrared sighting built in so you can stream in the dark.
Add a reverse tunnel proxy so your camera connects to the middle man acting server and you don't have to open ports to connect to the camera from remote locations.
Let me know if it worked out of you!
Other usefull resources
- Another tutorial about the livestreaming with Pi http://maxogden.com/hd-live-streaming-cats.html
- Reverse tunnel setup http://www.tunnelsup.com/raspberry-pi-phoning-home-using-a-reverse-remote-ssh-tunnel
- Sunwait program: http://www.risacher.org/sunwait/
- FFMPEG RPI compilation guide: https://trac.ffmpeg.org/wiki/CompilationGuide/RaspberryPi
#introduction #youtube #art #news #surf #surfin #kitesurf #kitesurfing #video #photography #video #help #tutorial #diy #rpi #raspberrypi #raspberry
Incredible! Good work and good guide!
Regards!
I love the idea of bring back the webcam (not that it ever really died). It's great that you can setup a realtime HD webcam for little money. How easy would it be to make a nightvision (IR) version?
good work &nice video
Awesome!
I liked the way you worked on it with such a low budget.
It made us to remember that it's not about spending money on something expensive to get what you want, but actually make things, put the brain to work and that's the awesome result we get.
Congrats! I'd love to follow your guide and see what i can get.
молодец