HTML COIN Series 2 : 채굴 및 스테이킹(HTML COIN Series 2 : How to mine & staking to HTML COIN)
Ⅰ. 이론 설명[Theory explanation]
우선 HTML코인은 Qtum 지갑의 형식을 취한 HTML 지갑을 통해 POW와 POS 채굴 모두 가능합니다.
HTML코인의 POW 채굴은 CPU 채굴형식입니다.
POW는 Proof-of-Working의 약자로 '작업증명'을 의미하며,
POS는 Proof-of-Staking의 약자로 '지분증명'을 의미합니다.
채굴에 관심 있으신 분은 결국 코인을 더 얻고 싶으신 것이므로 더욱 알기 쉽게 말씀드리면
POW는 컴퓨터를 쉴새 없이 가동시키면서 코인을 채굴하는 것이고,
POS는 컴퓨터를 단순히 켜두기만 한 결과로 개인이 보유한 코인의 양에 따른 이자를 받는 셈입니다.
POW와 POS 모두 한번 성공할 때마다 1,250개의 HTML 코인을 얻게 되며,
둘 다 코인 보유량에 대해 월 0.08%, 연 1% 정도의 보상을 받게 됩니다.
[First, the HTML coin can be extracted from both POW and POS using an HTML purse in the format of the Qtum wallet.
Power-detection of HTML coins is a CPU mining type.
POW stands for Proof-of-Work, which stands for ' Job Certificate '.
POS stands for Proof-of-Staking, which stands for ' Equity Certificate '.
If you're interested in mining, you're going to get more coins after all, so let me tell you something.
POW is to mine coins by keeping the computer running nonstop.
POS simply left the computer on, so they receive an interest based on the amount of coins a person owns.
Both POW and POS obtain 1,250 HTML coins per success.
Both receive a reward of 0.08 % per month and 1 % per year for the coin retention.
Ⅱ. How to Mine & Staking
이제부터 사진과 함께 구체적인 방법을 설명드리겠습니다.
1.https://htmlcoin.com/wallets/ 으로 가셔서 지갑을 설치합니다.
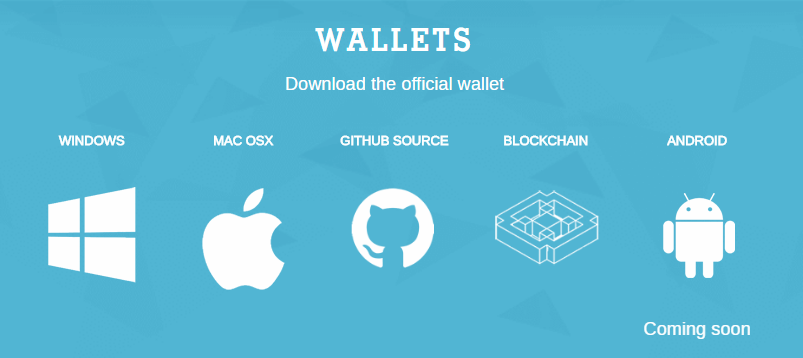
맨 오른쪽은 안드로이드 지갑이 곧 출시될 것임을 보여주고 있습니다.
HTML코인 개발진은 향후 반 년 내에 안드로이드만 아니라 IOS 지갑, 웹 지갑 모두 출시할 계획임을 밝혔습니다.
주로 윈도우를 많이 쓰실 것이므로 윈도우 아이콘을 클릭해서 설치해줍시다.
[Now let me explain how it works with pictures.
The far right shows that Android wallets are about to be released.
HTML Coin Development Agency announced plans to release both an IOS wallet and a Web purse within the next half year, not just Android.
You will mostly use a lot of windows, so click the window icon to install them.]
2.지갑을 처음 실행하면 아래와 같은 화면이 나올 것입니다
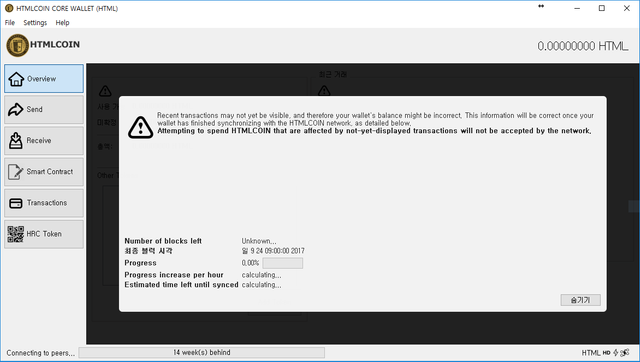
이것은 그동안 이루어진 HTML 거래들을 기록해 온 블록체인과 동기화하는 화면입니다.
맨 밑에 보이는 '14 day(s) behind'란 문구는 동기화가 14일 전의 내용부터 시작된다는 의미입니다.
해결 방법으로는 디버그창 => 콘솔 => addnode "45.55.234.194:4888" "add" 입력하시면 됩니다.
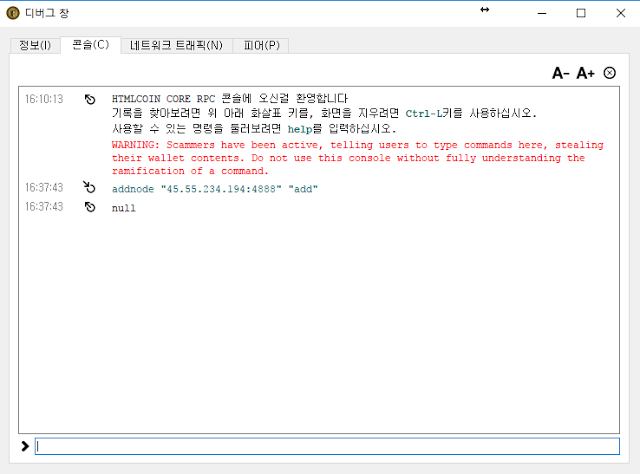
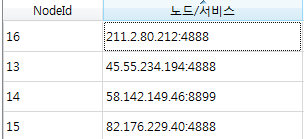
만약 1분 이내에 동기화 시작되지 않을 시 살아있는 노드를 추가해야 하기에
현재 동기화가 되어있는 다른 PC의 지갑에서 살아있는 노드를 입력하면 된다.
(http://1004lucifer.blogspot.kr/2018/01/coin-htmlcoin-wallet.html)
[When you first start your wallet, you will see a screen like this.
This is a screen that synchronizes with the Blockchain account so far being made.
The phrase '14 day(s) behind' at the bottom means that the synchronization begins 14 days ago.
you can enter the following : Debug => Console => addnode "45.55.234.194:4888" "add"
If synchronization does not start within one minute, add a live node.
Just enter the live node in the wallet of another PC that is currently synchronized.]
3.지갑 동기화가 끝나면 가장 먼저 지갑의 비밀번호를 설정해줘야 합니다.
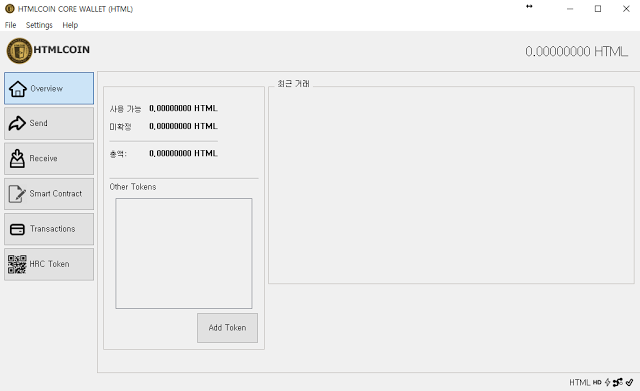
(동기화 된 모습[synchronizied])
Encrypt Wallet을 클릭해서 비밀번호를 설정해줍니다.
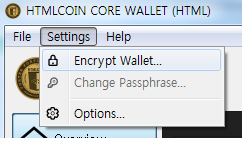
비밀번호는 간단하지 않으면서 본인이 잊어버리지 않을 수 있는 것으로 설정하시기 바랍니다.
[When you finish syncing your wallet, you first need to set the purse's password.
Click Encrypt Wallet, then set up the password
Please make sure your password is not simple and can be forgotten]
4.비밀번호 설정이 끝나면 이제 지갑 백업을 해줍시다.
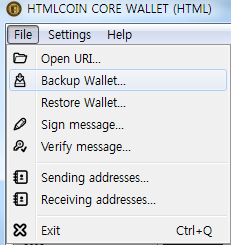
백업까지 완료하면 개인지갑을 사용할 준비가 끝난 것입니다.
백업 파일의 이름은 자유롭게 쓰실 수 있는데, 백업하는 날짜를 제목으로 쓰시는 것이 편합니다.
이렇게 하면 dat 파일이 생성되는데, 이 파일을 USB나 클라우드에 따로 보관하시는 것이 좋습니다.
[Now you can back up the wallet.
When you have finished backing up, you are ready to use your personal wallet.
You can use the name of your backup files freely, but it is convenient to use the date of the backup as your backup title.
This creates dat files, and it is recommended that you keep them separately in USB or cloud.]
5.이제 각자 거래소에서 개인지갑으로 코인을 출금해서 갖고 있다는 것을 전제로 설명하겠습니다.
우선 POS 채굴을 시작하는 방법은 매우 간단합니다.
(1) 지갑 비밀번호 설정
(2) 지갑 백업
(3) 지갑 언락
이 3가지를 완료하면 POS, 즉 스테이킹 과정이 자동으로 진행됩니다.
이 중 (1)과 (2)는 앞서 이미 완료했으므로 (3) 지갑 언락을 해줍시다.
비밀번호를 물어보는 화면이 나타나는데, 본인이 설정한 비밀번호를 입력해줍니다.
이렇게 해서 윗 3가지를 모두 완료하고 코인이 숙성이 된다면
지갑 하단에 있는 번개 아이콘에 다음과 같이 불이 들어옵니다.
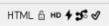
번개 아이콘에 불이 들어오면 스테이킹이 진행 중이라는 의미입니다.
스테이킹을 시작하기 위한 일차조건인 숙성에 필요한 시간에 대해 간략히 설명드리겠습니다.
거래소 또는 타인의 지갑으로부터 본인의 지갑으로 코인을 전송했을 경우, 해당 코인의 숙성 기간은 10블록입니다.
채굴하여 본인의 지갑에 1,250개씩 코인이 입금될 경우, 해당 코인의 숙성 기간은 501블록입니다.
블록 단위로 기간을 얘기하는 것은 해당 갯수의 블록이 발생하는 데 걸리는 기간을 의미하기 때문입니다.
500블록이 발생하는데 걸리는 시간은 보통 8시간 정도로 알려져 있습니다.
즉 채굴로 얻은 코인을 스테이킹하려면 8시간의 숙성 시간을 필요로 합니다.
[Now I will explain on the premise that we have withdrawn coins from the individual exchange to our personal wallets.
First of all, it's very simple to get started with POS mining.
When you complete these three things, the thrashing process is automatic.
Since (1) and (2) have already finished earlier, let's do the Unlock the Wallet .
The screen will ask for your password and enter your password.
If all three of the above are completed and the coin ages,
The lightning icon at the bottom of the wallet lights up as follows :
When the lightning icon is lit, it means that stakings are in progress.
Let me briefly describe the primary condition for starting stakings, which is the time required for aging.
If the coin is transferred from the exchange or from someone else's wallet to his or her wallet, the maturity of the coin is 10 blocks.
If 1,250 coins are deposited in your wallet after being extracted, the maturity of the coin is 501 block.
Because when you talk about the time period per block, you're talking about how long it takes for that number of blocks to occur.
It is generally known that 500 blocks take about 8 hours to form.
That is, you need 8 hours of aging time to stack coins obtained from mining.]
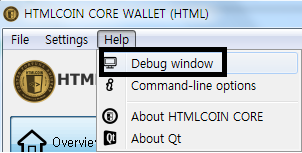
6.이제 POW 채굴에 대해 설명드리겠습니다.
아래와 같은 메뉴로 이동합니다.
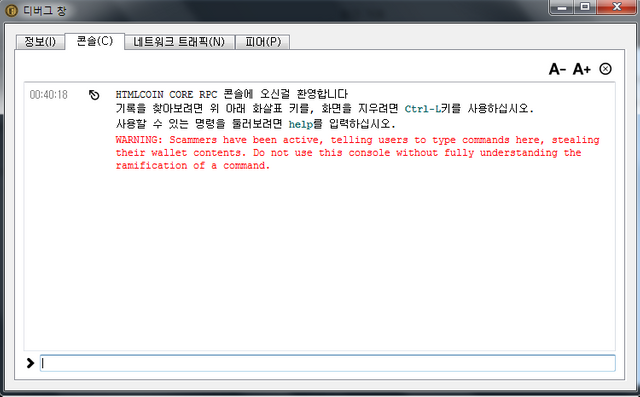
그러면 다음과 같은 화면이 나타납니다.
두번째 탭인 콘솔(C)로 이동합니다.
이 화면에서 채굴 명령어를 입력해주면 채굴이 시작되는 것입니다.
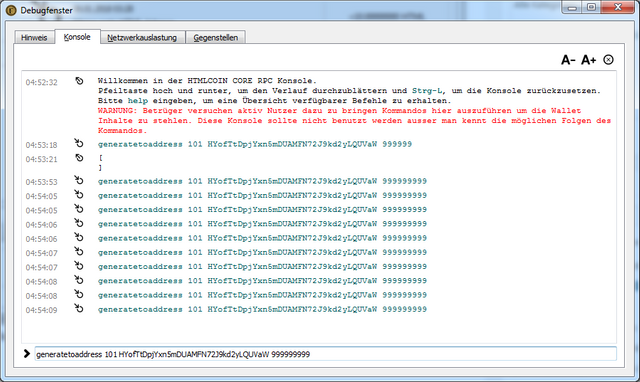
우선 채굴 명령어는 2가지가 있는데 아무거나 써도 차이가 없습니다.
(1) generate 100 999999999
(2) generatetoaddress 100 (본인의 지갑 주소) 999999999
명령어를 입력하면 즉각적인 반응은 없을 것입니다.
그러나 CTRL + ALT + DELETE => '작업 관리자'를 클릭하면 HTML 지갑이 일정점유율을 보이면서 채굴 과정이 잘 진행되고 있음을 알 수 있습니다.
보통 점유율은 각 컴퓨터 CPU마다 다르므로, 그냥 지갑의 평소 점유율에 비해 매우 높다는 점만 확인하면 됩니다.
이제 채굴 결과를 살펴봅시다.
보통 채굴 결과가 나오는 시간은 CPU마다 상이한데, 빠를수록 CPU 성능이 좋은 것입니다.
짧게는 20분, 길게는 2시간이 걸리기도 합니다.
이것은 한 번의 채굴이 끝났으나, 채굴된 것은 없다는 의미입니다.
채굴에 성공하면 알람과 함께 본인의 지갑으로 1,250개의 코인이 입금됩니다.
이렇게 해서 얻은 코인은 HTML 지갑 내 Transactions 탭에서 확인하실 수 있습니다.
마지막으로 알아두셔야 할 사항을 말씀드리겠습니다.
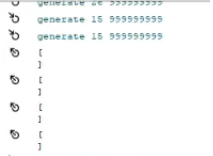
채굴 명령어는 한 번 입력하고 끝나는 것이 아닙니다.
명령어를 한 번 입력하면, 채굴이 성공이든 실패든 한 번의 결과가 나오고 끝입니다.
그래서 채굴 명령어를 다음과 같이 연달아 입력해두는 방법을 쓰는 것이 좋습니다.
자동 채굴 방법은 https://github.com/HTMLCOIN/HTMLCOIN/releases 링크로 가셔서
htmlcoind-2.0.0.2-win32.zip 을 클릭해서 받으신 후, 설명서를 읽고 따라하시면 됩니다.
아직까지 지갑을 킨 채로 채굴기가 작동하는 스크립트는 나오지 않은 것으로 알고 있습니다.
그러니 자동 채굴시 지갑을 꺼야합니다. 이럴 경우에는 Staking은 안됩니다.
P.S 원 글과 동영상링크 남겨드립니다. 참고하세요
(https://htmlcoin.co.kr/mining/485)
(https://www.youtube.com/watch?time_continue=1&v=N_Bi63vBavY)
https://twitter.com/HTMLCOIN
[Now let me explain POW mining.
Navigate to the menu shown below
The following screen will appear
Go to the second tab, Console (C).
On this screen, you can enter a mining command and it will start mining.
First, there are two mining commands, but they don't make any difference to you.
(1) generate 100 9999999
(2) generatetoaddress 100 (your wallet address) 999999999
If you type a command, there will be no immediate response.
However, when you click CTRL+ALT+DELETE=>DELETE MAINTER, the HTML wallet has a certain share and the extraction process is progressing well.
Normally the shares are different for each computer CPU, so you just have to check that your wallet is very much larger than your normal share.
Now let's take a look at the mining results.
The time that the extraction results are usually different for each CPU, the faster the better the CPU performance.
It may take as little as 20 minutes or as long as 2 hours.
That means one mining is complete, but none has been done.
If mining is successful, 1,250 coins are deposited in your wallet with the alarm.
You can check the coins you got through this way by checking the Transactions tab in your HTML wallet.
Let me tell you one last thing you need to know.
The mining commands do not end with a one-time entry.
If you type in the command once, it ends with a single successful mining or failure.
For this reason, it is recommended that you keep the mining commands in succession :
For automatic mining, go to https://github.com/HTMLCOIN/HTMLCOIN/releases
Click htmlcoind-2.0.0.2-wi32.zip to download and follow the instructions.
We know that no script has ever been written to operate the machine with the wallet on its back.
So when you do automatic mining, you have to turn off your wallet, In this case, you can not perform the tipping.
P.S If you don't know that, Refer to the Original text and video link.
(https://htmlcoin.co.kr/mining/485)
(https://www.youtube.com/watch?time_continue=1&v=N_Bi63vBavY)
https://twitter.com/HTMLCOIN ]
좋은 글 감사 합니다.
채굴을 시도해 봐야 겠어요
네. 성투하세요!!
htmlcoind-2.0.0.4-win32.zip 와 htmlcoin-2.0.0.4-win32-setup.exe 의
차이는 뭔가요?
htmlcoind-2.0.0.4-win32.zip는 자동 채굴기고
htmlcoin-2.0.0.4-win32-setup.exe 는 지갑입니다.
HTML코인 투자하고 싶은데, 구매 가능한 거래소가 BLEUTRADE가 있던데 거기는 구매하면 입금만 되고 출금이 안되는데, HTML지갑으로 보낼수가 없어서 스태킹을 못할거 같은데, 혹시 어디서 구매하면 지갑으로 출금까지 가능한 거래소가 있나요? 그리고 HTML5랑은 뭐가 다른가요
pos로 보름 지나서 1250이 들어왔는데, 이제는 번개표시부가 꺼져있어서 마우스를 갖다데보면 ' not staking because you don't have mature coins' 라고 뜨네요. 어떻게 하면되는지요