HOW TO MEASURE THE INTERNAL AND EXTERNAL DIAMETERS OF AN OBJECT WITH A VERNIER CALLIPER, EXPLAINED WITH IMAGES.
As an engineering student I’ve been taught how to use the vernier calliper to measure the internal and external diameters of circular or round objects and also the depth of small groves and cavities that may be too small to allow a rule go in for measurement. So today I’m going to share my knowledge on vernier callipers with us steemians so we can all know how to use the instrument for measurement.
The vernier calliper is quite a handy tool in the workshop as it gives an accurate measurement of the internal or external diameter of the circular structure being measured. Before we learn how to use the vernier calliper let us first know what the vernier calliper is and the various parts of the calliper.
As already stated before, a vernier calliper is a tool used for measuring both the internal and external diameter of objects, thickness and also the depth of a cavity or groove by means of a rod that moves with the movable head of the calliper.
The vernier calliper has different parts and they are:
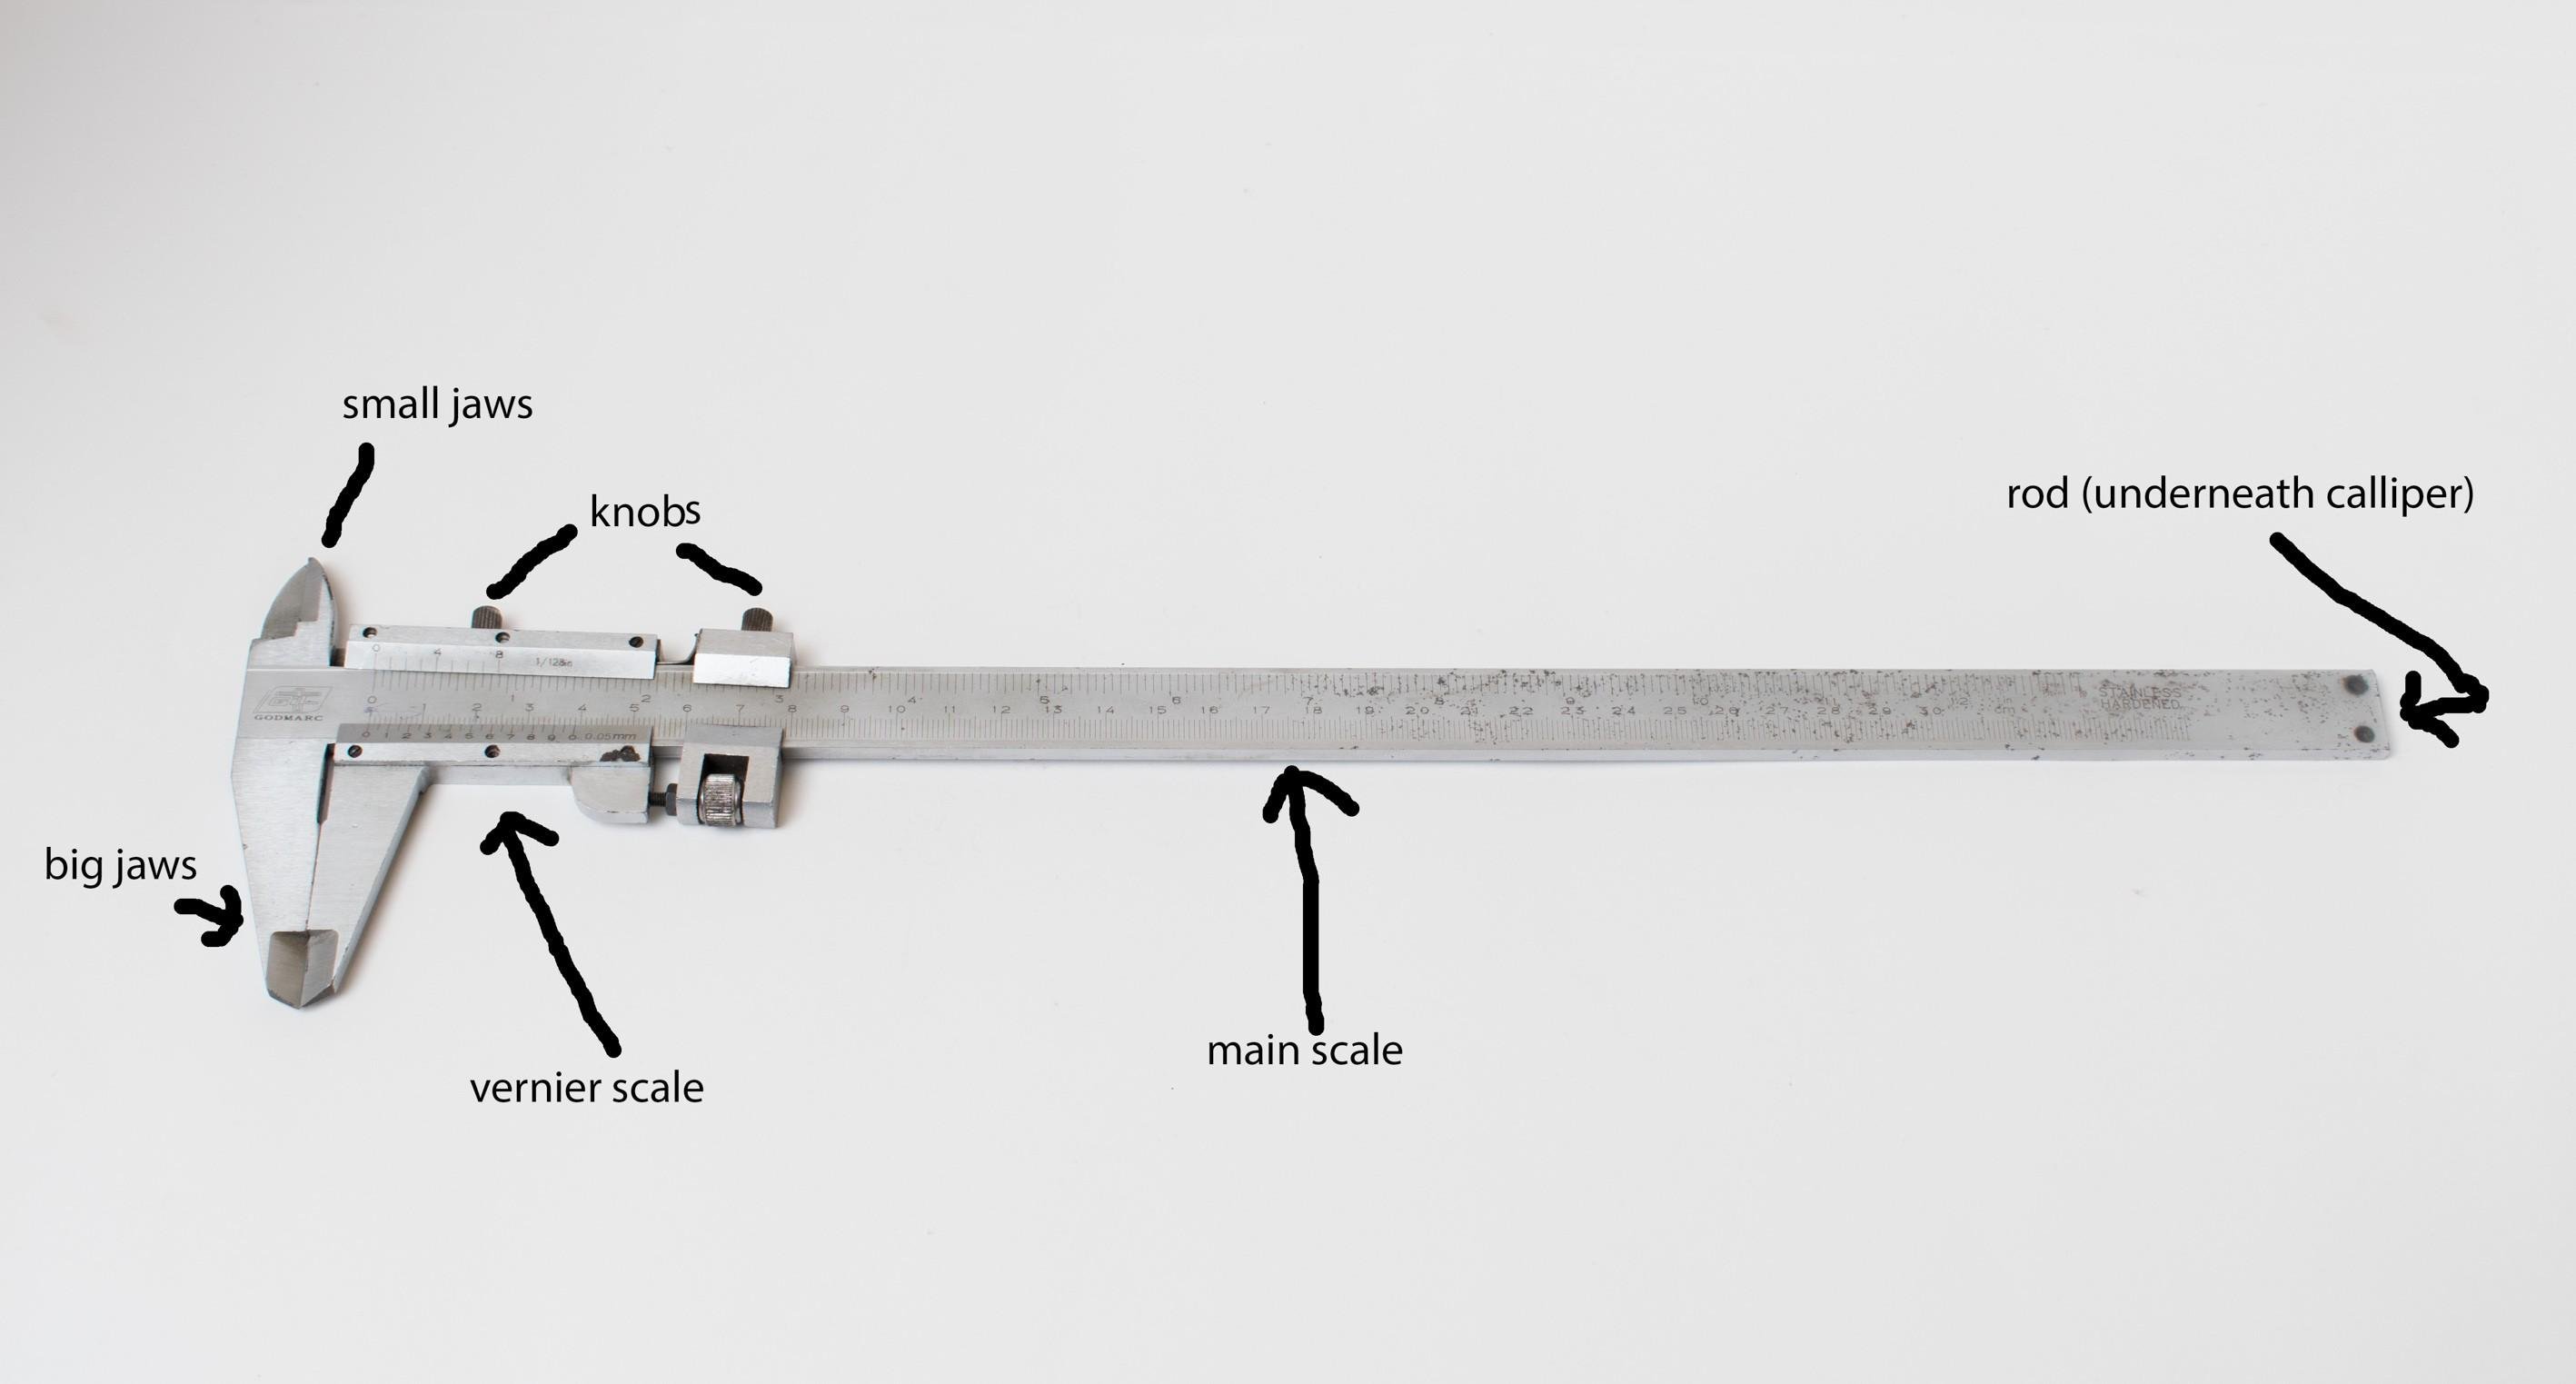
The main scale
This is on the longest side of the calliper and is calibrated in millimetres, inches or centimetres
The vernier scale
This is on the movable head of the calliper and is also calibrated in millimetres, inches or centimetres.
Outside or big jaws
This part is used for the measurement of the external diameter and thickness of an object.
Inside or small jaws
This part is used in the measurement of the internal diameter of an object
Rod
This is used in the measurement of the depth of grooves and cavities. It is located underneath the calliper along the center.
Knobs
These are used to fasten the movable head which carries the vernier scale to the calliper’s body which carries the main scale.
Now let’s learn how to measure with this instrument
Step1
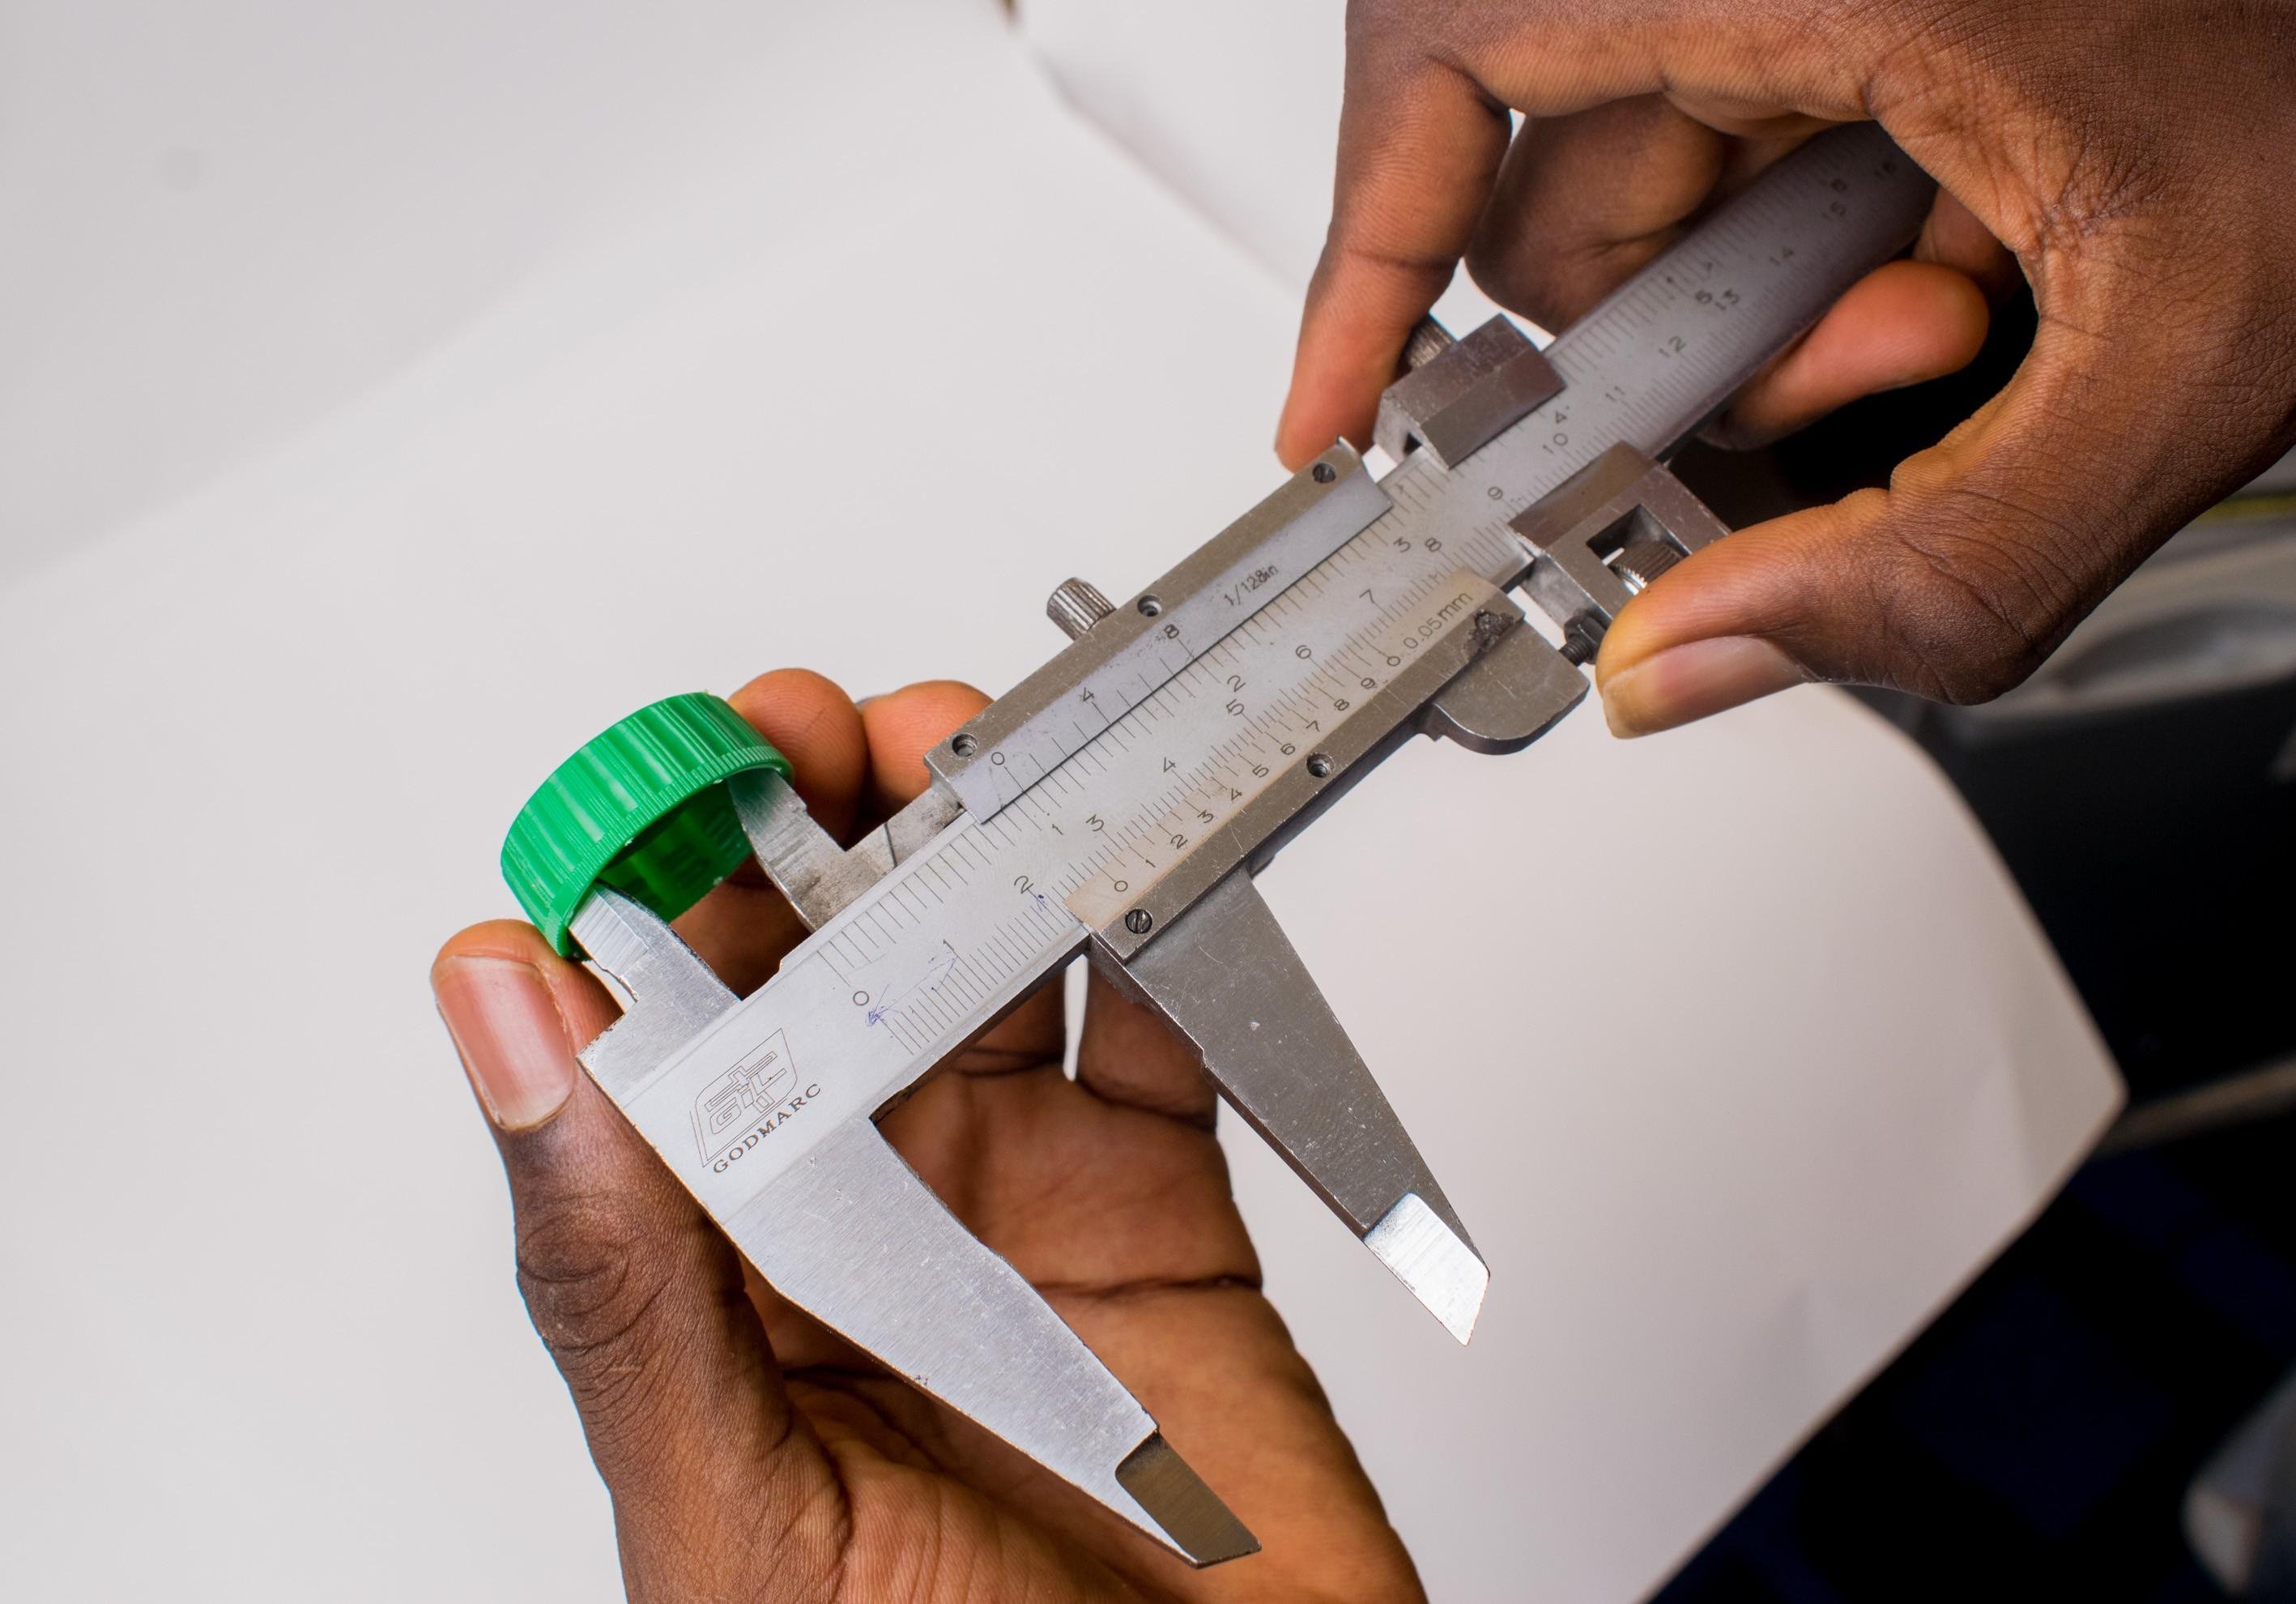
Put the big jaws around the object to be measured and close it but don’t press it too hard especially in the case of tubes and soft materials to avoid error.

Step 2
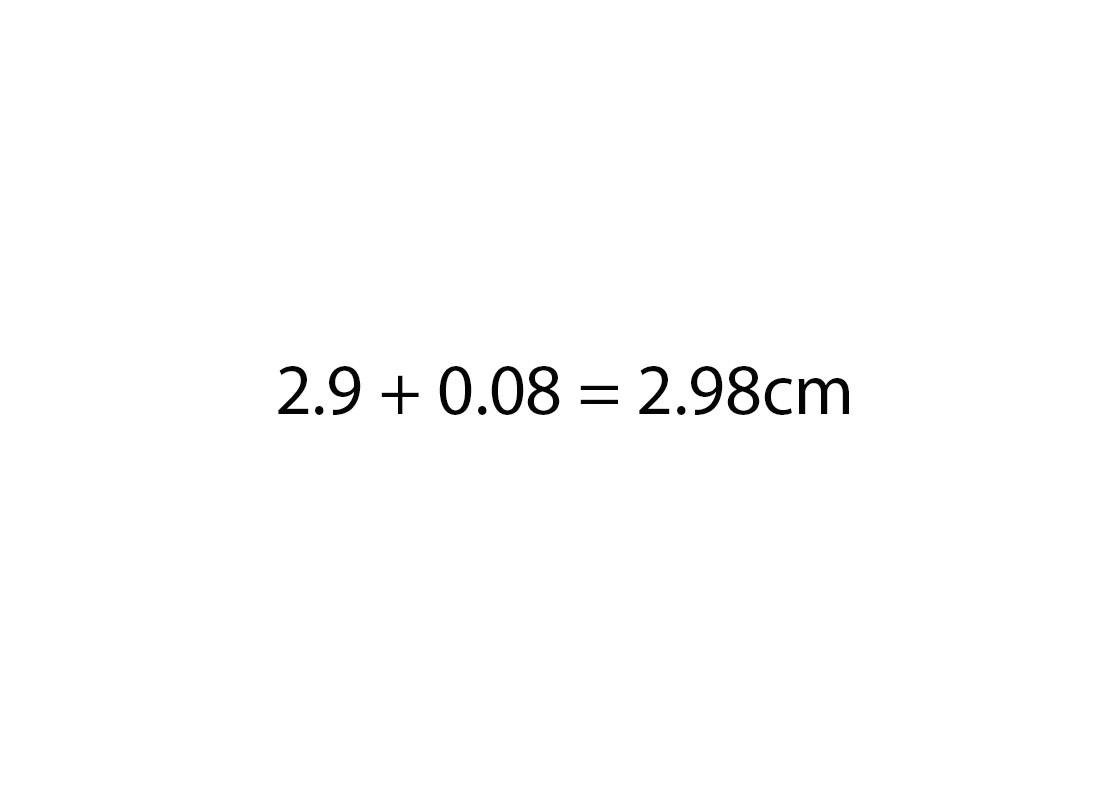
Now read off the reading on the main scale by picking the point which coincides or is immediately before the 0 mark on the vernier scale. The calliper I’m using for this tutorial has its main scale calibrated in centimetres. As seen in the image below the main scale reading is 2.9cm because the main whole number reading is 2cm and counting 9 divisions foward before the 0 marker we have 2.9cm.

Step 3
Now read off the reading on the vernier scale by picking the markers that coincide both on the main scale and the vernier scale. As seen in the image above the vernier scale reading is 0.08cm since 8 coincides perfectly with a marker on the main scale.
Step 4
Now add both readings and you get the final reading which is the external diameter of the bottle cover.
To measure internal diameter
Measuring the internal diameter follows the same procedure but this time the smaller jaws are used by putting them inside the bottle cover and then taking readings as explained above.
To measure depth
Measuring depth also follows the same procedure to get the measurement. Just put the rod into the hole or cavity to be measured as shown in the image below and then read off the measurement from the main and vernier scales as explained above too.

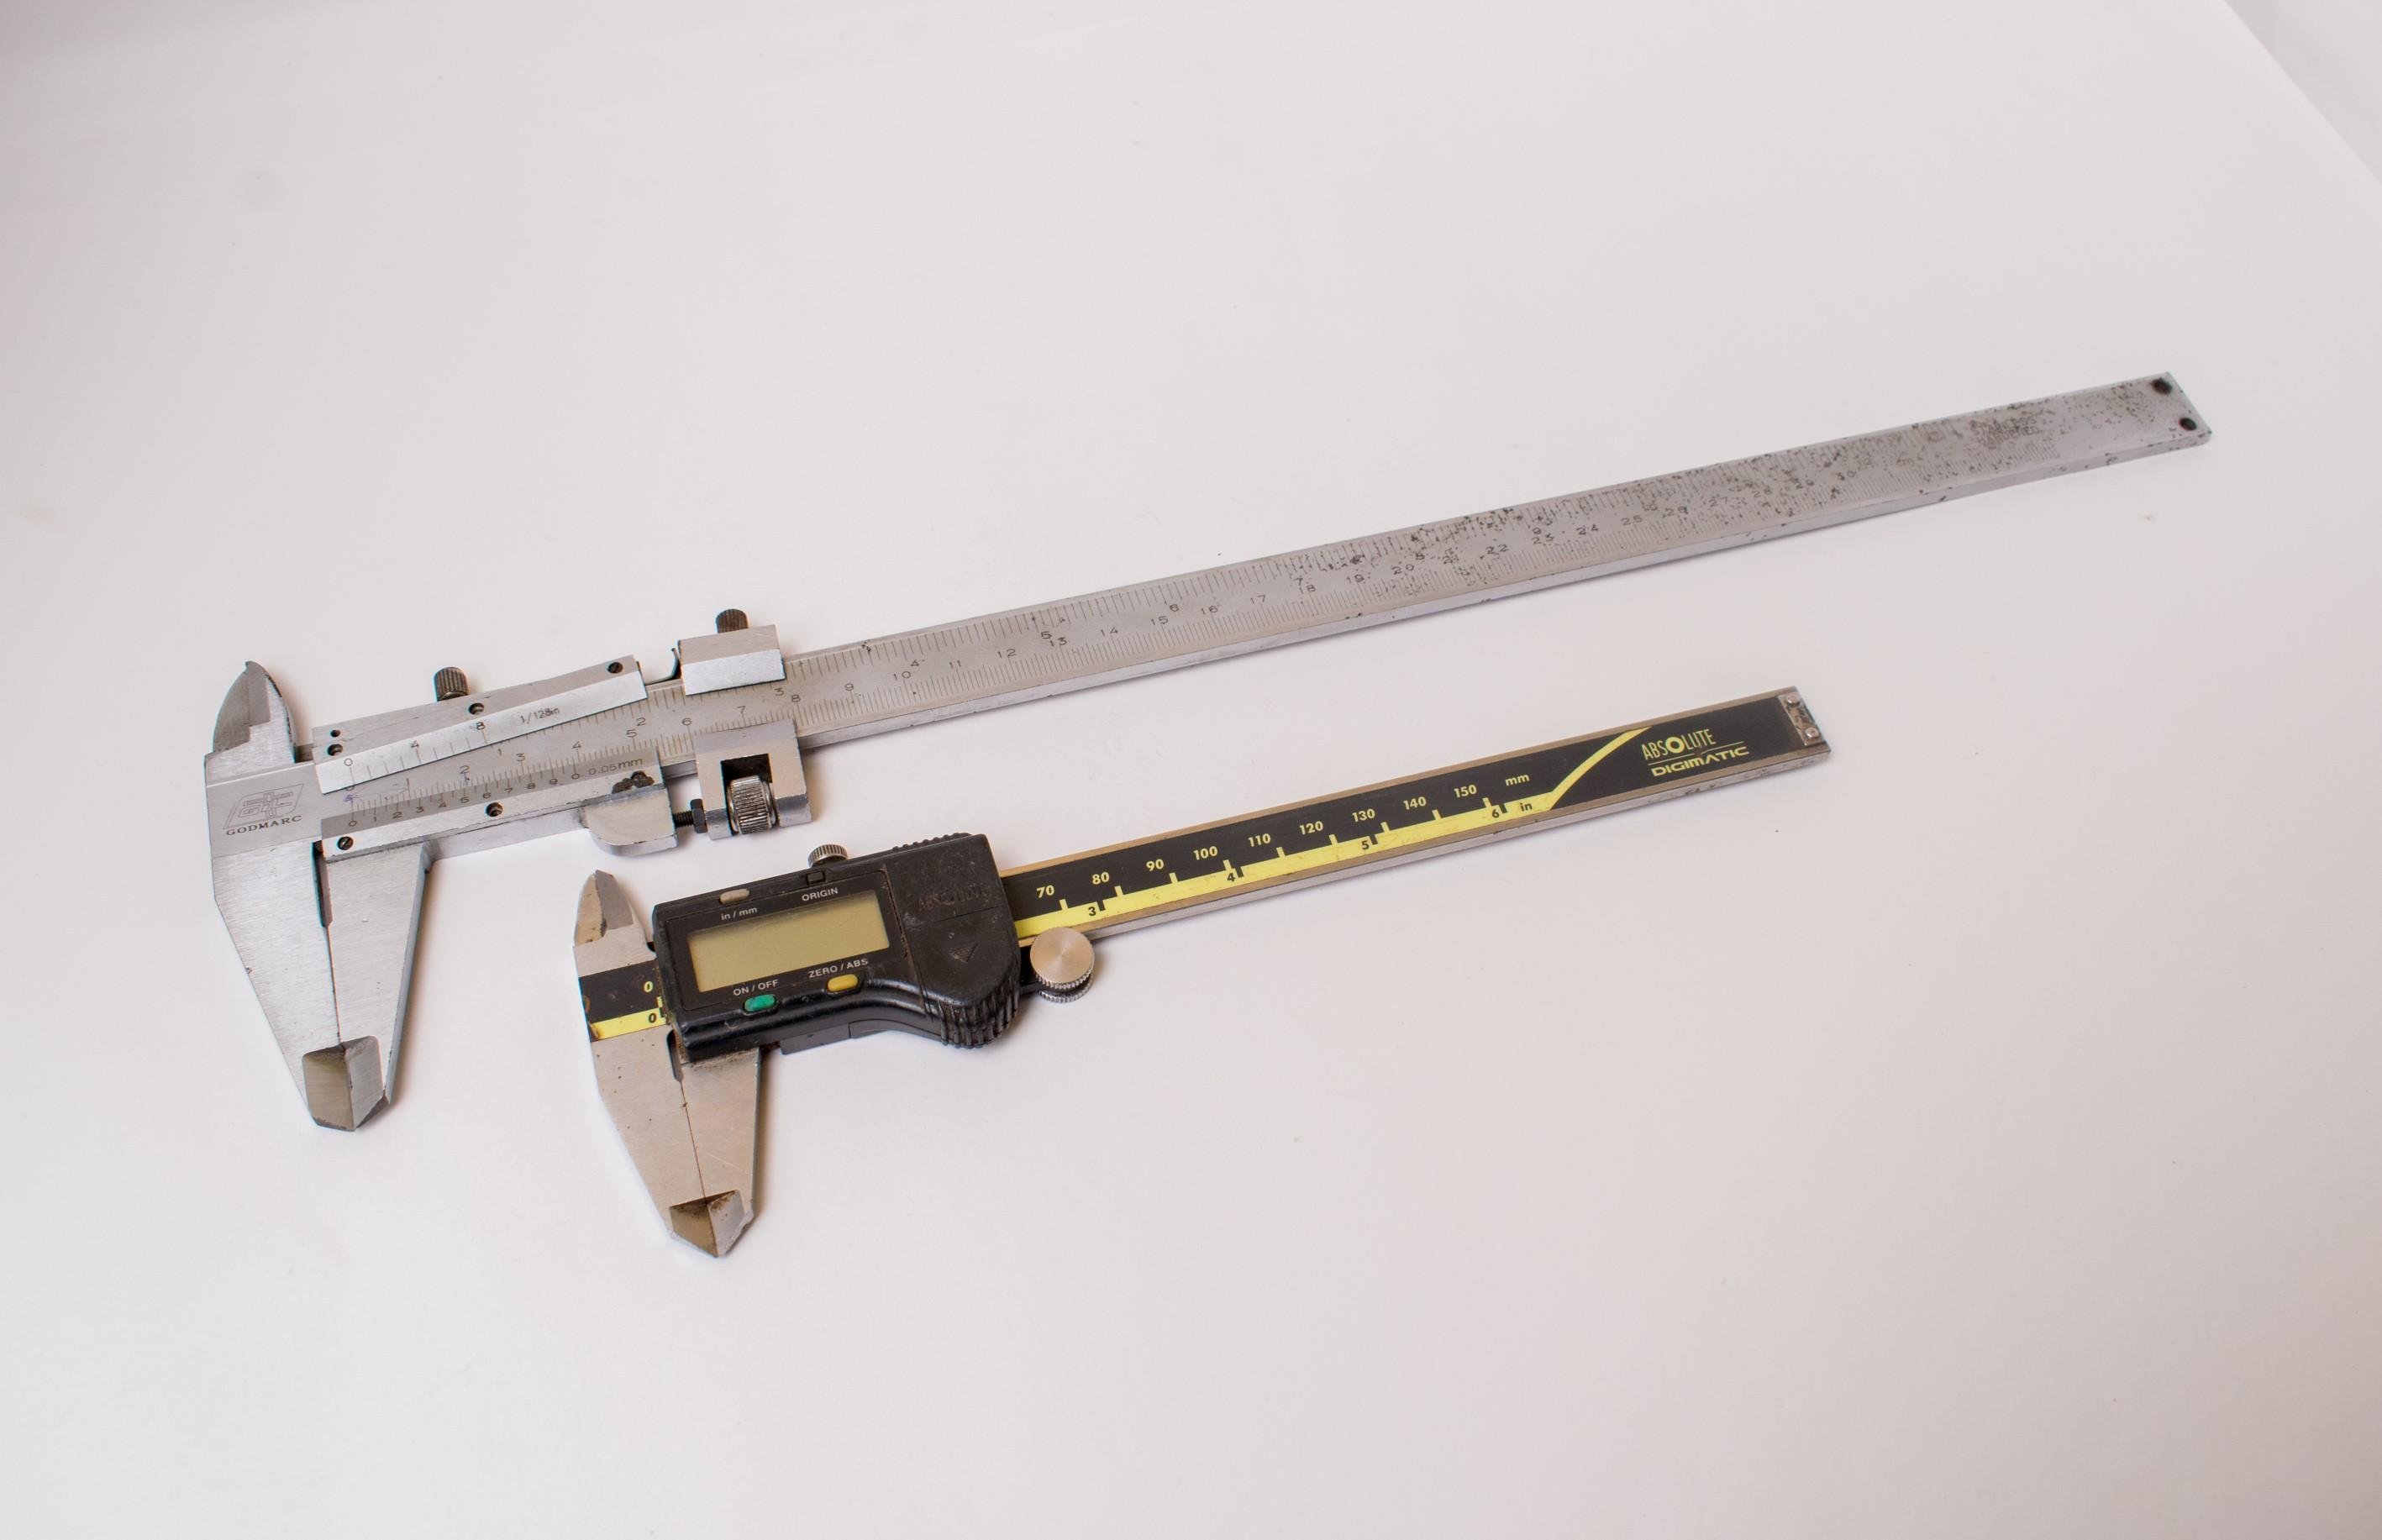
So there we go, measuring with the calliper is easy. There are other types of callipers that can carry out the measurements of internal and external diameters and depth of objects too. They are automatic and dial gauge callipers. Here is a picture of the vernier and automatic callipers.
All images here are my original works shot with a nikon D5300 DSLR.
I hope this post was helpful and educative. Thank you for stopping by.
Your vote is compled
please follow me and follow back
I am a active parson