Mighty Honors
This weekend I was blessed to have one of the greatest honors I've had to date.
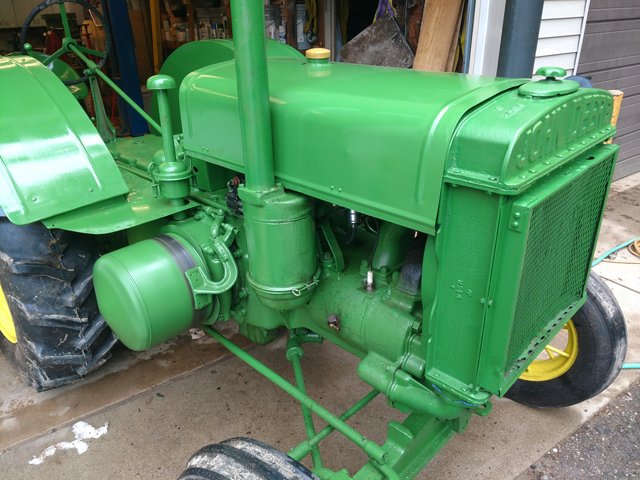
The pastor at the Church campground I work at this summer had been pastoring to a man in hospice who was dying of cancer. The last project that this man had been working on is restoring a 1937 John Deere D tractor. He wanted to drive it before he passed on to Heaven and be with God. By Gods grace, they were able to start this beauty (pic below) by pulling it and he was able to drive it around the yard.
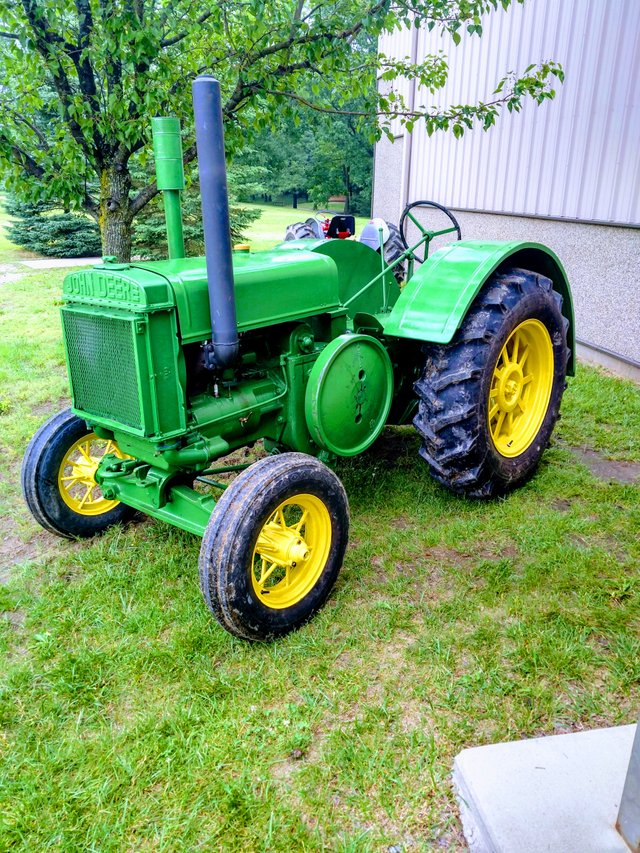
(Sitting outside the building where they held the memorial service.)
This past weekend was the memorial celebration ("not funeral, as he's going to be with Jesus" he said) and the pastor asked my grandpa, who had owned a number of historic tractors like this, including a similar era D when I was a kid, if he would bring it over for the memorial service. My grandpa was more than happy to help. Friday we went over to the barn where the tractor was to see if we could turn it over again. The son and father of the man who passed away were there in hopes we could start it again. Grandpa checked all the systems and we got it ready to start.
The starting procedure on these old beasts is quite unique by today's standards:
- Fill up the gas/kerosene tanks (this one didn't have the gas starter tank attached so we just put gas in the main tank) these tractors are designed to be started on gasoline and run on kerosene, fuel oil, etc.
- Open the fuel flow into the glass sediment bulb.
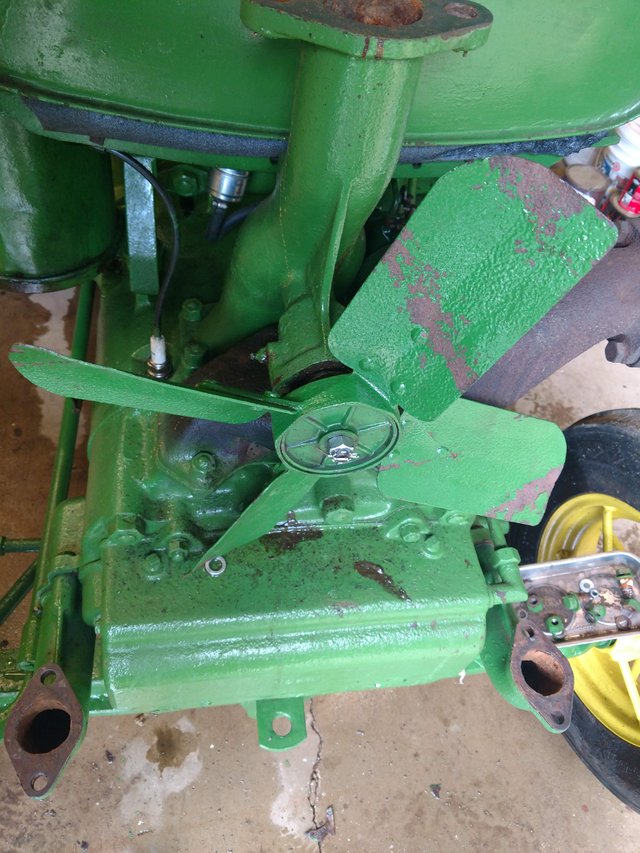
- Open the petcocks (brass colored valve coming off the side of each cylinder, left valve pictured below) to vent some compression and be able to spin the flywheel.
- Choke the carburetor.
- Throttle to idle and gearshift in neutral.
- Spin the flywheel (large green disk on left side), slowly push through compression cycles and give it a spin right as the magneto fires.
- Assuming it's not temperamental (I'll get into whats up with this one) it should fire off pretty quickly.
Compared to your car, hows that for a starting procedure?
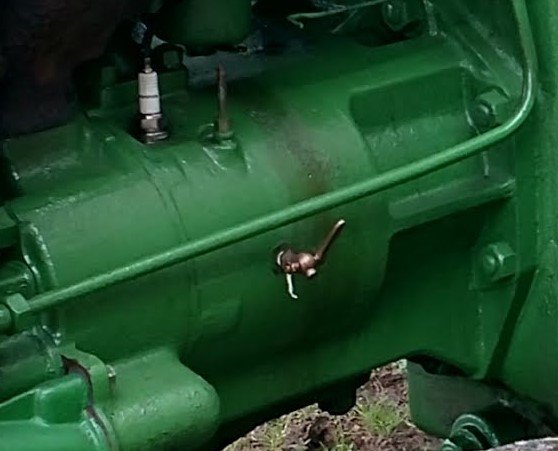
(Left petcock)
We got it to fire a few times at first but it wouldn't take and keep running. We were preparing to try pull starting it when my grandpa gave it a few more spins and it fired real easy. He went to adjust something and I gave it a try again and it roared to life! We closed the petcocks and opened the throttle and this thing sat there a shaking. Below is a video I found on youtube of someone starting a similar year to give you an idea of how these things run (this is not my video and I take no credit for it, just want you to see this run) sadly I can't find a good audio of it running as its quite the unique sound.
The son had been up at the house to look for something to pull the tractor with and came running down when he heard that engine firing. I think he was crying but I couldn't tell because it was raining. My dad hopped on the fender to show him how to drive it and my grandpa and I followed with the pastor in his truck. We got it over to the camp barn and noticed steem (oops I mean steam) was coming out of the radiator about anywhere there was a seal. We checked the radiator and noticed the fan was off the shaft. (didn't think to grab a picture) We backed it into one of the service bays and shut it down to work on it after lunch.
We got back from lunch and took the radiator assembly off with an engine hoist to see what had happened and if we could fix it.
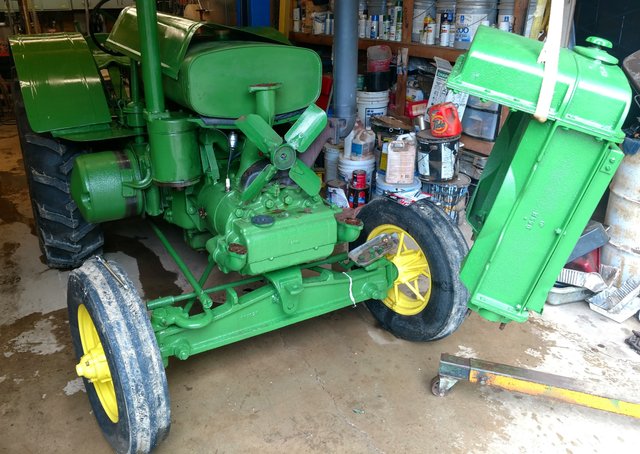
(Radiator assembly on the hoist, we had the fan back on the shaft to see what we could do to put it back together)
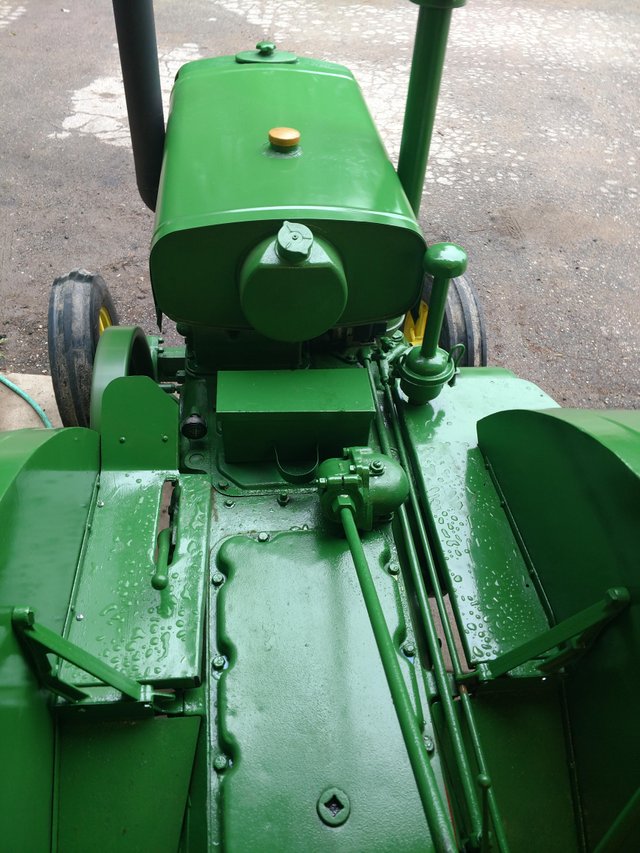
Something very interesting about the cooling system on these tractors. There is no water pump. If you look at the connection points for the radiator you will see one above the cylinders in the center of the tractor and two on the bottom at either side of the pistons. This system worked on gravity and steem (whoops did it again, steam*) power. As the water would heat up around the cylinders it would rise up the large central pipe into the reservoir. Cooler water that was sitting in the reservoir near the front would then flow down through the veins to be cooled and replace the water that had moved out of the pistons. This system is quite simple and yet very effective. Something you don't see these days. Just one example these machines shows of the "they don't build it like they used to" saying.
Looking at the radiator we a bit of work to do there to get it up to snuff.

The fan had cut into the first layer of veins (there are 4 rows front to back) and was the cause of the loss of water that was on the shop floor. Now we had two projects, remount the fan the proper way. And fix the radiator.
First thing we did was take a look at the fan:
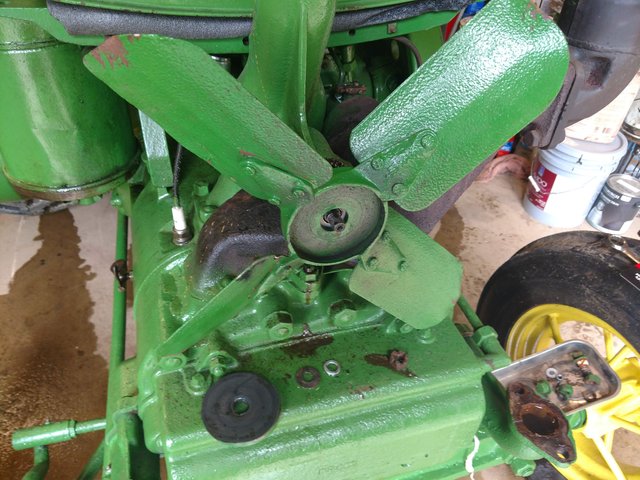
You can't really tell in this picture but some of the blades were pretty bent up from biting into the radiator. We also realized that it likely came off because there had been a standard nut and washer on the shaft as opposed to the castle nut + cotter pin it was designed for (hence the hole in the shaft if you look closely), and it was on backward.
We got the fan straightened out and on the way, it needed to be after we got a new castle nut from the hardware store and rethreaded the shaft we put it back together:
(looking at this picture again and the way the paint is scraped off, I wonder if it was on the same way before just not as securely)
We took out the fins around the damaged veins in the radiator and pinched them shut folding them over themselves before we remounted the radiator we flushed the water system a second time as we had noticed some gunk come out when we first flushed it. We ground down the connection points and resealed them (the blue you see in the finished pictures) and had her looking sharp and running good again. We did wind up putting some stop leak into the water to help seal some smaller holes in the radiator we had missed.
She looks beautiful.
We had hoped to drive it up to where they had the funeral under her own power but she didn't want to run well the next day, we had to pull start it and every time we tried moving her on her own power shed backfire twice and die. My grandpa looked at it and realized they had carbon spark plug wires on instead of copper like the original. He had tried that with an M but it never worked. We have the right wires on the way now and the family left the tractor with us to get it running. I plan on putting out an update once we get that work done.
It was an honor to be able to work on a piece of history and also something I think will become a family heirloom. I'm glad we could make the families day this way, and I hope we can bring them more joy by getting it running even better than it is now.
I know the read was long but I hope you enjoyed it. If you have worked on these before or have any thourhgts or questions please feel free to comment! I would love to talk about it more and learn more about this beauty.
Have a great day an God bless!
hehehehe it was long! Just a suggestion... if you do posts like this - it's fun to see them broken up into Part 1-3 or... whatever!
It gets people excited to see the end result AND gives you a chance at 3 payouts :)
I really like the way you write! I see that these are from 2 months ago - so I hope that I can encourage you to start writing a bit more :) I think you have a very sweet style of writing - you draw the reader in to come sit down at your table for a chat and some cookies! (gluten free of course) hehehehehe
@dreemsteem, for the Welcome Wagon
oh - and since this is past its payout - please accept this tip!
@tipu send tip please :)
I'll have to try and keep that in mind. The first trick is sitting down and writing things! I have a lot of photos I could write about but not much drive to sit down and actually write. I also wouldn't know where to break things up until I wrote out the entire post. Although if I broke it up I would want to break it up as I write as it would help me write more.
Well.... you have a new follower! :)
I'd love to see a photo with a story behind it!
Try to capture me in 100 words or less hehehehehe I just did a contest the other day where I had to tell a story in 50 words about the photo prompt. I didn't think it was possible (i love words too much) but i did it! :)
there are a lot of freewrites and micro-fiction contests and challenges out there that are GREAT for getting your motivation for the day! You should try them :)
Here is another contest hehehehe by a good friend of mine @mariannewest Favorite Freewrite
you don't have to enter the contest -but you can take a peek at her site and see if writing freewrites would be fun! :)
or not! hehehehehe
Oh, I can definitely throw together a few hundred words around most photos I have. The limit tends to be a challenge, I hated them in school when I had writing prompts, I would always have too few or too many. I think I have the perfect photo too. I'll have to work on it!
looking forward to it! :) feel free to tag me in the comments to get my attention sooner hehehe
One is up for you too peek at
i'm faster than you! hehehehe i already started reading ;)
by the way... my name has only e's hehehe no a's ;)
Speel check must have grabbed that as I posted because I made sure it was right when I first wrote it!
And thank you for the follow!
you're welcome for the follow ;)