About drunken horizons - #PhotoTips
Since I started curating the rookie support program, I have had to go through a lot of different posts. Most of the posts are based on the application of photographs. The smartphone is now very common and every smartphone has a camera. Therefore, photography is now available as never before. No need to carry a camera, multiple lenses, or a heavy tripod. He took his phone out of his pocket and pressed the screen.
I have nothing against this kind of photography. Sometimes I also shoot with my smartphone and that's good and right. There is not always a camera at hand. Now we are talking about something else.
The availability of photography breeds carelessness in its production. I want to talk about one type of negligence now. We are talking about verticals and horizontals. Or as I call them "drunken horizons". This is when the horizon in the photograph has an angle of inclination to the edge of the photograph. The same goes for verticals. You look at the building and it resembles the Leaning Tower of Pisa. I consider such a situation to be negligence or a defect that greatly spoils the photo.
I myself once filmed for a long time without paying any attention to this fact. But they prompted me in time and helped me figure out how this can be avoided. Now I want to share with you some thoughts on this matter.
- When you shoot something, try to keep the camera / smartphone porridge horizontally on the ground.
- If at the time of shooting it was not possible to do this, then you need to correct your picture before publishing.
In fact, a snapshot that does not require correction in any way is extremely rare. You always want to fix something. For example, remove any random spots or even unnecessary objects, make light or color correction, crop a photo to a different format ... align the horizon line.
There are many photo editing programs for this purpose. Personally, I use the Lightroom program. But there are good programs that can be freely downloaded from the Internet. At the same time, you can download it for free and without violating the copyright law.
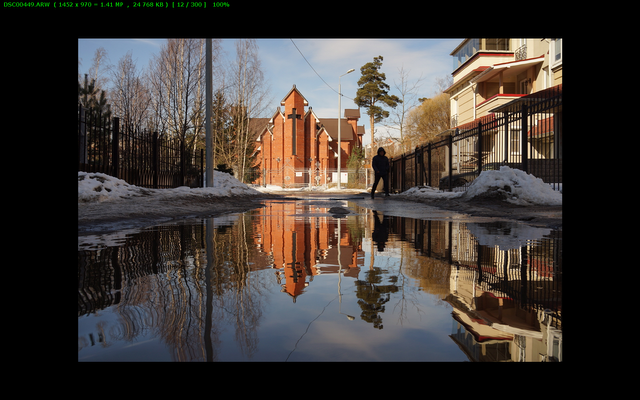
One such program is FastStone (https://www.faststone.org/). Using this link, you can download and install the program on your computer. Now I will show you with examples how you can correct a slanted horizon line. I'll take any of my photos and demonstrate just for an example of how the program works.
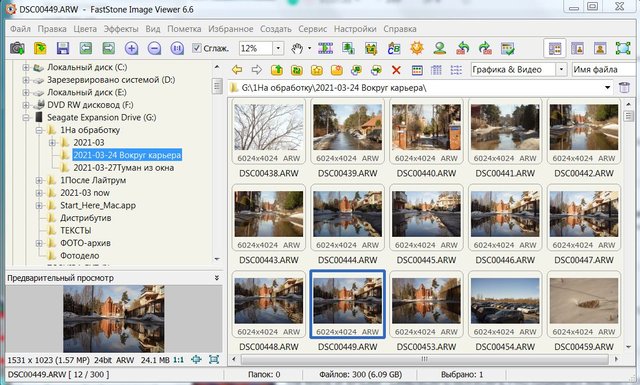
This is what the program's interface looks like when you installed and opened it.
I use the menu in Russian. In the settings, you can choose other languages that are convenient for you.
So you're looking for the file you want to process. Open the photo and you get this screen.
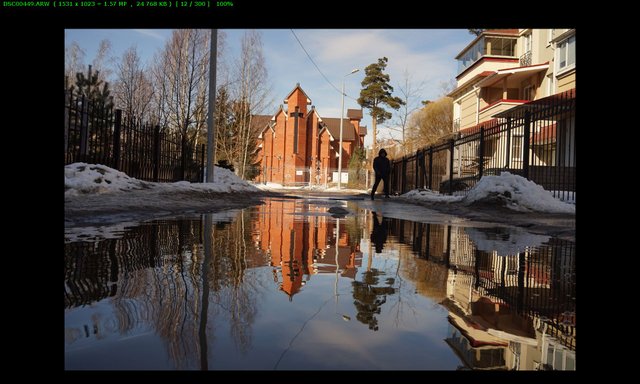
There is nothing on the screen other than a photograph, but it only seems to be. Take your mouse and move your cursor to the left edge of the screen.
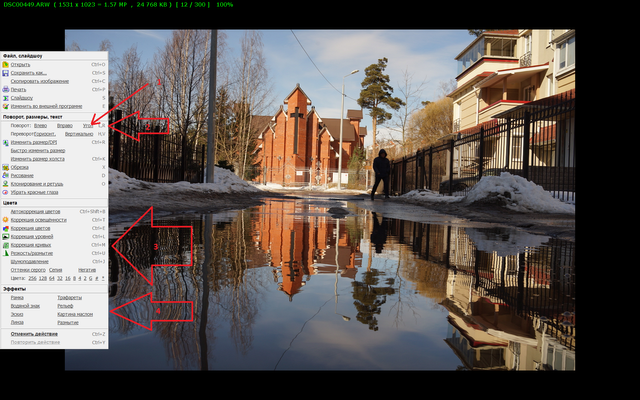
I congratulate you, you have found a photo editing tool.
The large arrow (2) points to a group of tools for formatting the size and position of the photo. This group also contains the "corner" function (arrow 1). Below there are groups of tools for adjusting light and color (3), below there are various effects. But we are now interested in the angle of the horizon (1). Click and get:
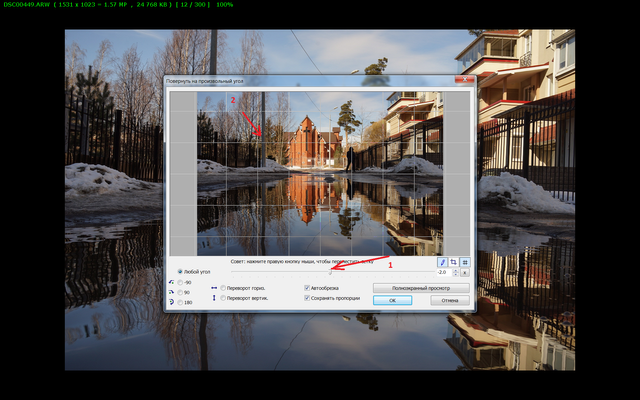
Your photo falls into a separate window with a grid and adjustment tools. You can use the movement of the slider (1), or any of the other suggested methods. They are all intuitive.
Using the horizon line, or vertically standing objects, rotate your photo so that these lines are parallel to the grid. All that remains is to save the result by pressing the "Ok" (enter) button.
If you no longer need correction for other parameters, you can simply save the file (blue floppy disk icon, second line of the left menu)
By pressing ESC you will return to the general view of the program.
If you want to adjust the illumination, then just in the left panel, click on the corresponding icon (sun).
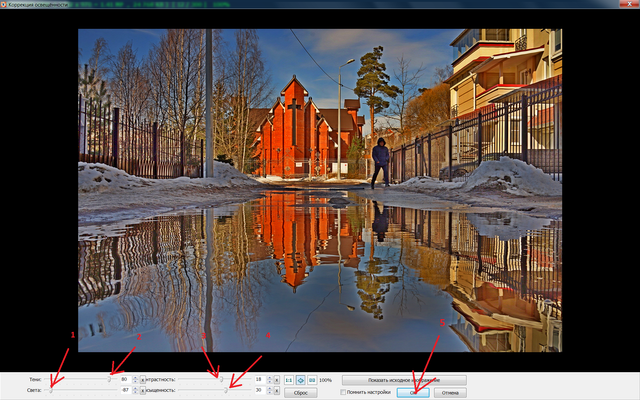
You will see your photo in a new window with other correction tools. Here I just showed you how much you can change the look of your photo by moving these sliders. This is not the result that is needed here. This is just an example of the adjustment possibilities. I advise you to just try each tool to understand its capabilities.
As you can see, nothing complicated. Once you get the hang of this editor, small adjustments to one photo can take only a couple of minutes. But you will get a good result and your post will benefit from a quality photo.
Sloppy photos do not attract attention. There is no desire even to open them. This means that many can pass by even an interesting post, but with a bad design. Remember, they are greeted primarily by their clothes. We first look, and only then we read.
I wish you all success and prosperity.

From Russia with Love


Regards, @bambuka
Great information, have even used the program
Thanks :)
I sometimes use this program for a quick small correction . It loads easier than Lightroom, and the horizon is even more convenient to correct in it.
I am using the windows edit to align the horizon line. But I am looking for a new program to edit my photos since I have no experience with photoshop and Lightroom, and they seem to me very difficult to work with. I will try the Fast stone program.
Thanks for the infos :)
For photo editing Lightroom provides all possible tools. There you only need to understand the general algorithm. It is a very simple and powerful program. But for a quick and shallow correction, FastStone works well