Online store on Steemit blockchain| Step nine | Full product card and activate absolute links.
Hello, friends!

Today we will create a full description of the course, as well as write a small code on the backend in order to create links to our courses and make the menu work as it should.
Let's start by creating a file in which our full description of the course will be created. I have it called: views_product.html.
Now we add statistics and open the content block by which django will understand what exactly he needs to display on the page.
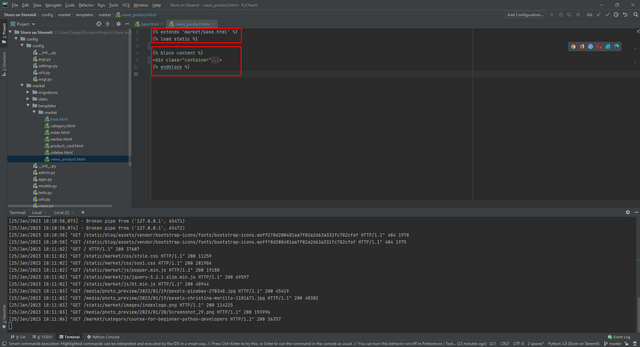
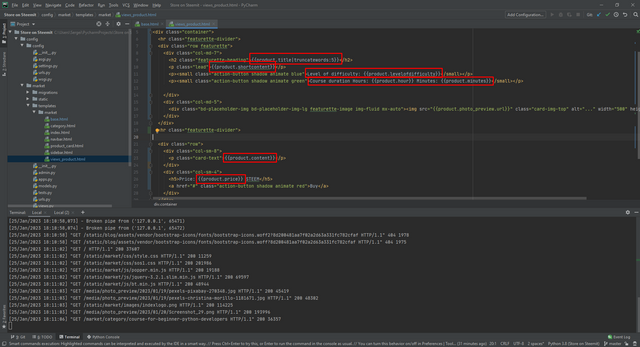
Now we move on to html and css adding markup and styles.
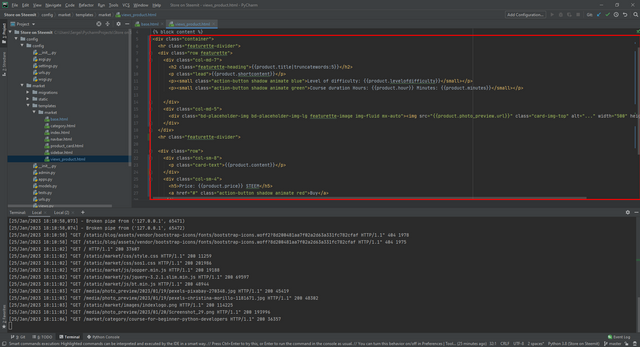
It is also worth paying attention to the fact that we start with container markup, and not with main. We do not add it because it is already in our default base template. This is done in order to have as little repetitive code as possible.
Now let's move on to adding django variables. Which were created in our model and will have to be worked out in the view. To do this, go to the file view.
Everything is standard. In parentheses, we enter the name of the model and then, through a dot, what we want to derive from this model.
Now let's move on to creating the view. And also create a link to the full description of the course.
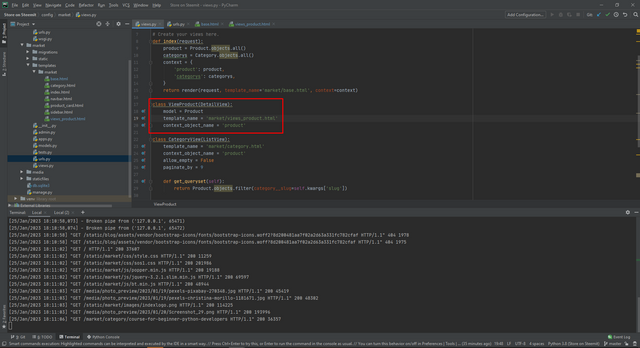
We create a class in which we specify the model with which we will work. And also specify the html file template which we will use. And we pass the context itself.

We also use Django's standard DetailView function, which we import from django.views.generic import ListView, DetailView.
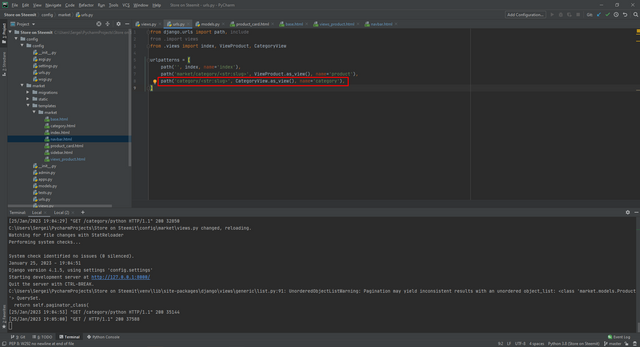
Now we create a link to our full course in the urls.py file.
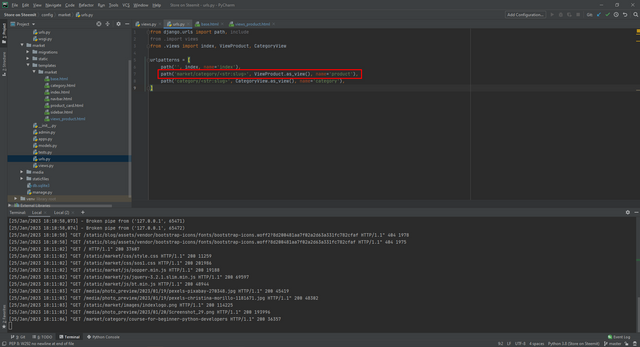
And also do not forget to carry out the necessary view imports.
Ready!
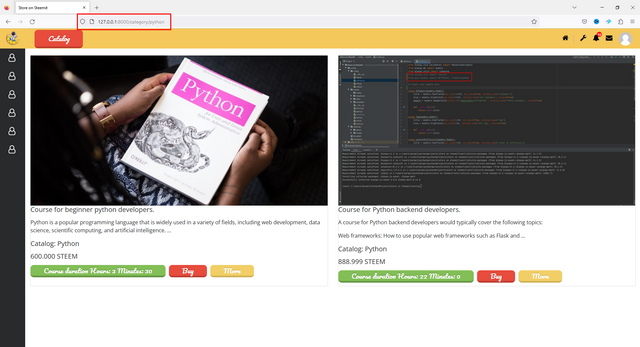
Our static page of the full course is ready and now we can see the created courses at the link:
http://127.0.0.1:8000/market/category/course-for-beginner-python-developers
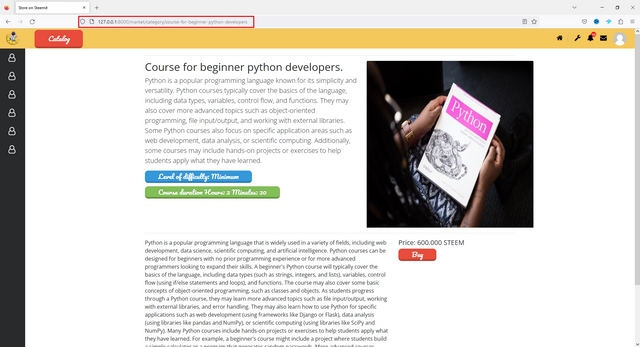
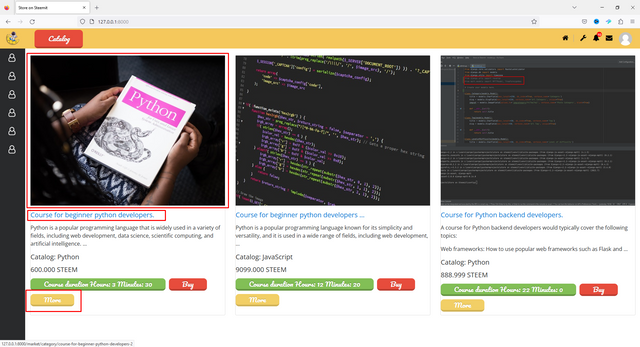
What do we have in the full version of the course?
Title
Short description
Course cover
Course Difficulty Level
Time to be spent on the course
Full course description
Course price
And the buy button
After we create another application that will contain users, a model will be created there, and then the teacher's card. Which we will also display on the full course page.
Let's go back a little to our backend and write a rather small piece of code there in order to make our title and more buttons active.
Go to the model and import the standard django library.
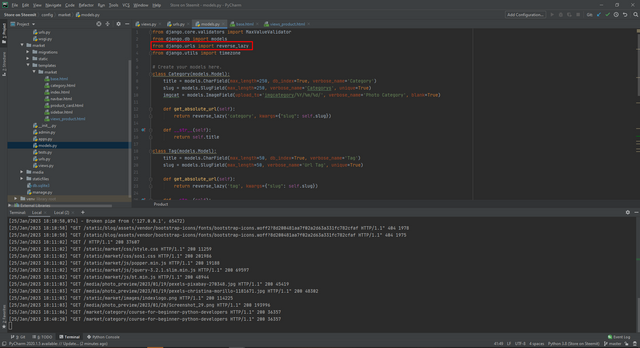
Next, we write get_absolute_url for all sections that need active links.
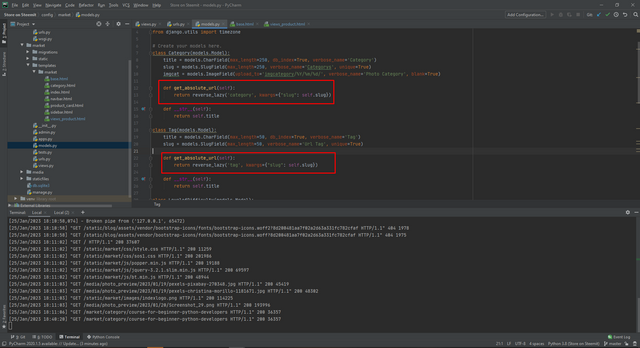
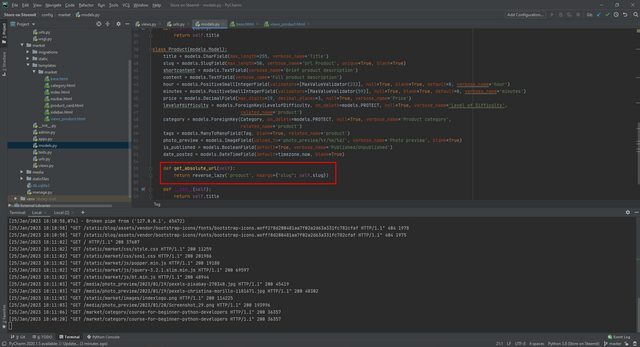
In the return itself, we write our model slug, as well as the context of the model.
Now in the files where active links are needed, we write our get_absolute_url. It looks like this.
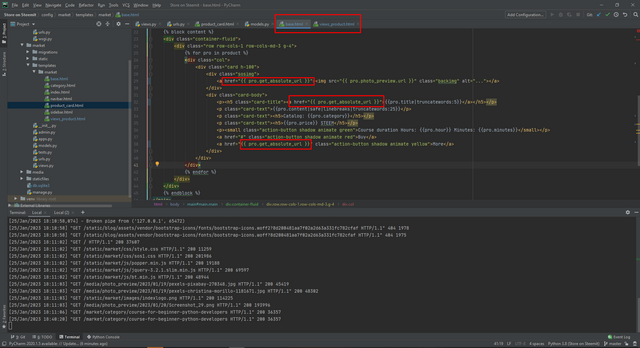
After such simple manipulations, our cover, as well as the title and the more button become active and when you click on them, you can get to the full course description.
Now we create automatic links in our menu. Go to our navbar and iterate over our menu with the addition.
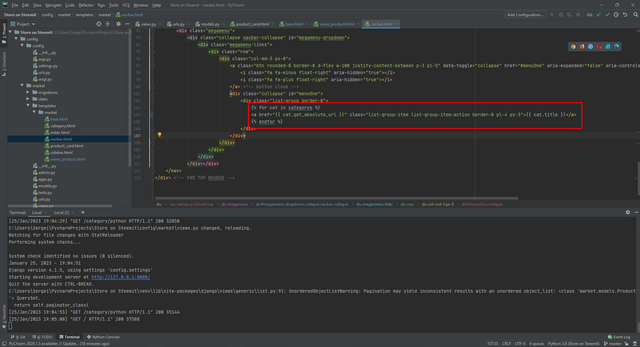
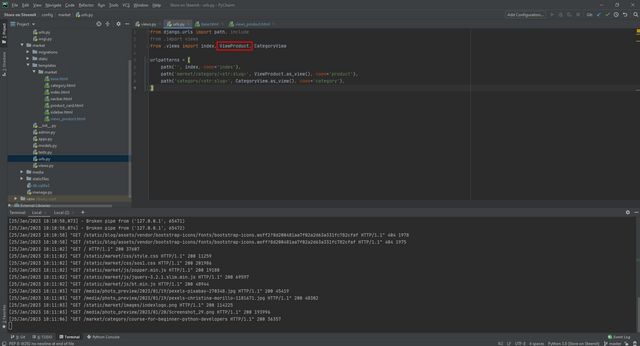
We also need to create a view. For our categories with the output of the data we need.
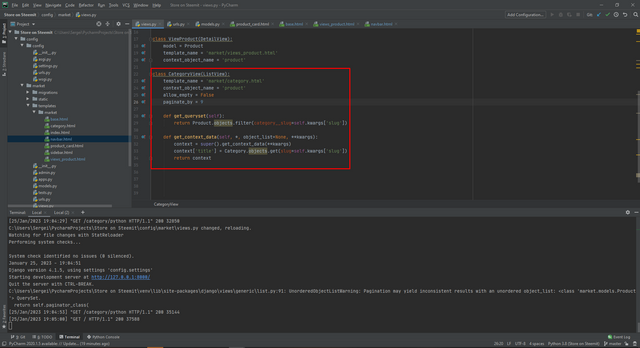
We create a class and specify the ListView in it, which was previously imported along with the DetailView.
In the class, we specify the html template, as well as the context.
Now let's go to the urls .py file to create the universal category link.
Ready! Our menu works, our links work. Now you can create and edit your product through the admin panel, and your users will be able to see all your menu categories, as well as see what is in the categories themselves and a full description of your course or product.
As we can see the link has changed when clicking on: http://127.0.0.1:8000/category/python
Which tells us that now only products from the Python category are displayed.
In the next post, we will create user applications in order to provide more advanced features. Since the standard features of Django will not suit us and there is no way to supplement the functionality.
Thanks for supporting the project.
@rme , @rex-sumon , @shy-fox , @hungry-griffin, @pennsif
The project is being created in partnership with @steemit-market.
Above may be wrong. Since I wrote the code from memory and then corrected it. But git will have no errors.
Link to the git.
You can get acquainted with the project here.
You can find all parts of the projects by the tag: #storeonsteemit
To be continued...
Sincerely, your HardPhotographer
Thank you, friend!


I'm @steem.history, who is steem witness.
Thank you for witnessvoting for me.
please click it!
(Go to https://steemit.com/~witnesses and type fbslo at the bottom of the page)
The weight is reduced because of the lack of Voting Power. If you vote for me as a witness, you can get my little vote.
Upvoted! Thank you for supporting witness @jswit.