Let's Build a Game! #2 - Building your first game with BYOND
Have you ever wanted to create your own game, but didn't know where to start?
This post will assume you have read part one of this series, and have at least installed BYOND, but know nothing about how to use Dream Maker to compile a game. By the end of this post, you should have a working environment that will introduce you to many of the basics of using the DM coding language.
This is a modified and updated version of Zilal's Beginner Tutorial for Action RPGs. I used this tutorial nearly 20 years ago, and found it so inspirational that I have recommended it to anyone wanting to learn how to build games. The original is gone, but the link above is a preservation by a long standing member of the BYOND community from 11 years ago. I will be elaborating on some points, and expanding certain elements, but for the most part, I will follow through the tutorial as it stands. When we're finished, we will have a world all our own!

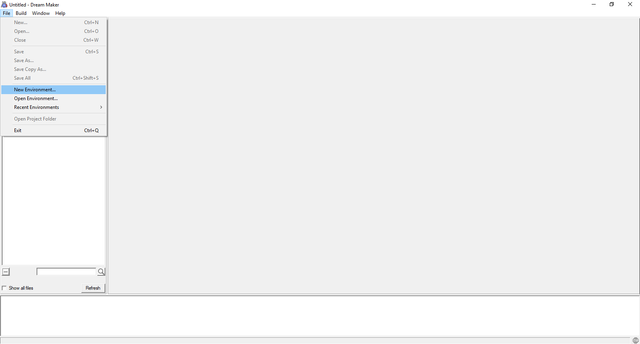
To begin, open  Dream Maker
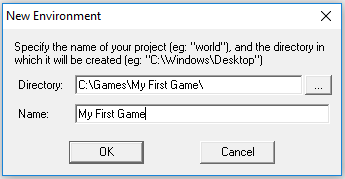
Dream Maker Click on File, and create a New Environment.
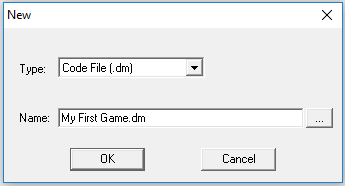
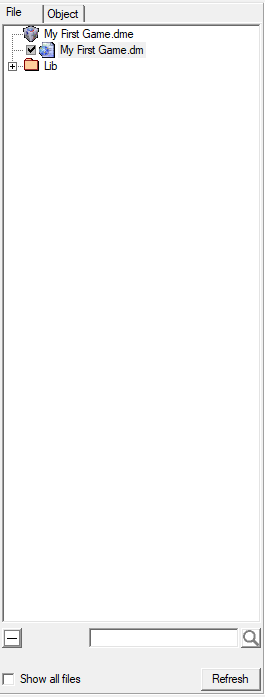
To the left side of your screen, you'll see all of the files for your project organized by type. This makes finding a particular file at any given time incredibly easy!
Your environment is your world. There can be many code files, icon files, sound files, and even map files, that all work together within the overarching environment.
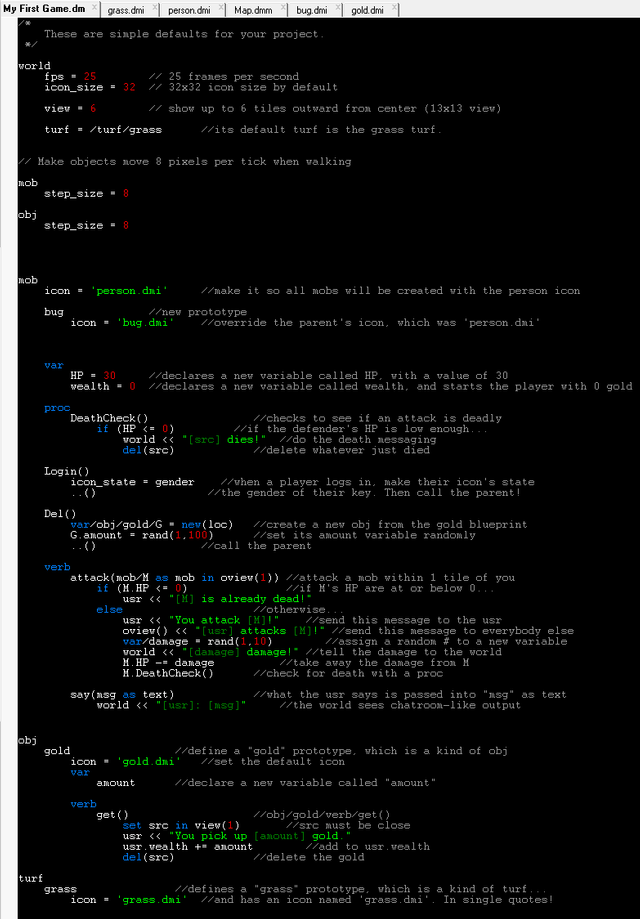
To the right, you'll see the code file you created open and ready to edit. The code you see there are some defaults that will define different things about your world like how big your icons are, how large a player's "view" is, how far/fast something moves, and more. Unless you know what you're doing, it's probably best to leave those be, and we'll come back to them in a future post.
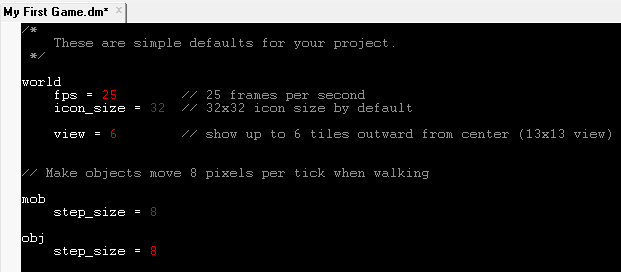
The text in gray that comes after "//" marks are comments, and are not compiled into the code at runtime. This makes it easy to leaves notes explaining what the code does, as it can be somewhat easy to forget what a particular snippet does in accordance with another.
For now, we'll start with something incredibly simple to show just how easy it is to have an application up and running, while writing very minimal code.
"Code that does stuff (Verbs)"
You'll need to be able to do things in your world, and one of the most obvious first steps is to be able to communicate, would you agree? Let's create a simple command that will allow us to broadcast a message to any and every client connected to the world. For now, yours will be the only client connecting to the world, so you'll sorta be talking to yourself, but "normal" people don't do things like make video games, do they?
A few lines below the "default code", write these three lines of code, making sure to mind the indention of each line, as this is very important.

mob stands for "mobile", and typically refers to a player, or some other entity within the world like NPCs, monsters, etc.
We want this verb to "belong" to all mobs, so we indent the verb command to establish we are assigning a verb to the mob. If we didn't indent the verb line, it wouldn't belong to anything, namely the "mobs" we want to be able to speak. We indent the next line because we want to establish that we are creating a verb, and naming it "say".
You'll see the "()" after the name of every verb or procedure, denoting it as a command. Some commands require "arguments" to carry out a specific task. In this case, the say() verb requires an input. What do you want to say, and how will you let the client know?
We want the input to be a message, so we call our input argument "msg". We could call it anything, but "msg" is short, sweet, descriptive. We also want that message to be text, so "msg as text" is our verb input. Putting it in the parentheses will prompt the client for the input each time the verb is run.
The next line takes whatever is given to the input, and outputs it to the world. Any client within the world will see this message.

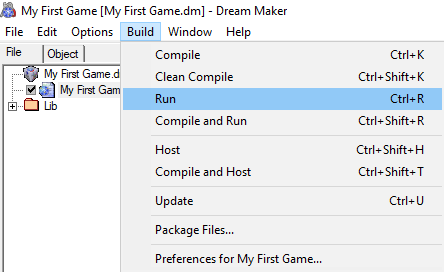
Under the Build menu, click Compile. DM is incredibly flexible, and comes with a built-in debugger. This debugger will catch a lot of different sorts of errors within the code like misspellings, inconsistent indentation, a bracket in the wrong place, etc. It won't catch the more elusive types of bugs where your code technically works, just not the way you intended it to. The computer can only know so much, and can't begin to assume an intended outcome for the code before it's run. This debugger, however, will save you numerous headaches when it comes to finding technical errors.
As long as your code looks like what is above, and you've indented your lines properly, you should see the box at the bottom of the editor explain that it's getting the client ready, saving the environment, and say you have zero errors.

You'll need to compile your code anytime you want to test it, and the process also saves your project, so it's wise to compile often in order to avoid unfortunate events involving losing hours of work because it didn't save. It can happen to the best of us...
After you've compiled, go back to the Build menu, and this time click Run.
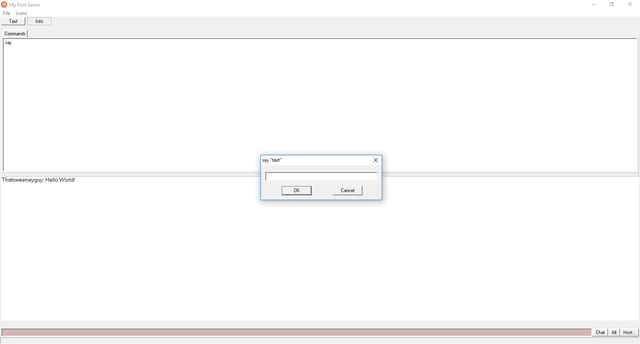
This will execute your project files, and opens BYOND's built-in client, Dream Seeker. The panel at the top of the screen holds any commands available to the user, while the bottom panel will display any output text the client receives. This is all completely modifiable, and what you see here is the client's default interface. That's the beauty of BYOND. All you've done is code a simple three line command. No client code. No interface code. No networking Code. Just a command.
Congratulations!!
You've just built your very own chatroom application! If you were to click the 'Host' button at the bottom right of the client, you could even host the chatroom on your computer, and your friends could, firewalls willing, join in and chat with you! That was easy, right? Almost too easy?
Now you might be thinking to yourself, "A chatroom is not a game... where is this going?" All we've done so far is create a way to speak to the world we're about to create. From here, things get awesome, but it'll require a lot more than a few lines of code.
You can't see anything without Icons!
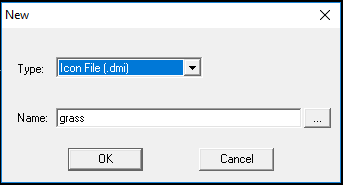
Icons are how DM displays things to the client. Every game needs graphics. If we want to build a world, we'll probably need ground to walk on. Under the File menu, click New, and when prompted, select "Icon File (.dmi)" from the dropdown. For tutorial purposes, I'm going to call this first icon "grass". Note the lack of capitalization there. When referencing a file, your code will be case specific. It's usually wise to be consistent with capitalization so it's easier to remember.
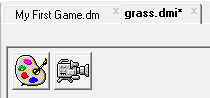
When you create a new Icon file, you'll see a couple buttons at the top of the screen.Don't worry much about the Camera button, we'll get to that in a future post. For now, click the palette and you'll be taken to the 'Icon Editor'.
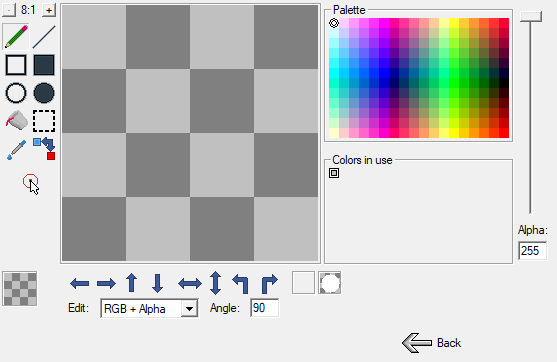
If you've ever used Paint on your computer, this should be pretty easy to understand. By default, the world's "icon size" is 32x32, meaning that in order to fit together correctly, icons will need to be 32 pixels by 32 pixels large. This can be changed, just like everything else, but for now we'll stick to the basics, and fill our canvas with grass. It doesn't have to be pretty, I just colored it green and scattered some speckles of different greens, simple enough. 
Dream Maker Icon files work just like PNGs. As a matter of fact, to display the grass icon you see above, I simply copied and pasted it from the Icon editor directly into the post!
You'll also want some way to represent yourself, and those around you as well, right?
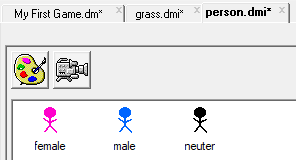
Create a second Icon file. This time draw a little pink stick figure. Click the big 'back' arrow, and click the palette again. Draw a blue stick figure. Repeat the process one more time, and draw a black stick figure. Click the back arrow once more. You've just created a single Icon file, that has multiple states.
Double click just a tiny bit below the pink stick figure icon state, and you'll receive a prompt. Name the pink figure "female", the blue figure "male", and the black figure "neuter". You've now labeled each state in the icon file, allowing you to point to a particular state within a file.
Now that we have our shiny new graphics, we have to create a way for the world to recognize them for what we want them to be. You already have some code for mobs, so you'll want to keep as much of it together as you can. Right below mob, indented one line, insert the following:

Now all mobs that login to the game will have a graphic applied to them, but what about the grass? We want the grass to be something we walk on, a background of sorts, so we want to create a turf.
A few lines below your mob code, create a turf called grass, and point it's icon variable to the 'grass.dmi' file you already created.

Then within the world code that was provided when you started the environment, add this little line, and we'll go over what it does in just a moment.

Now would be a good time to compile your project.
A world is born...
If you were to run your environment as is, you'd see the same thing you did before. You're going to need a map to let the world track where someone is, and what the terrain looks like.
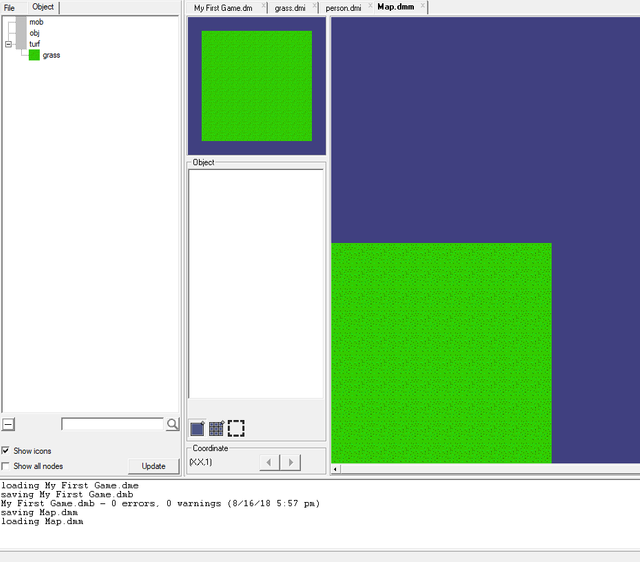
Create a new file, and this time select "Map File (.dmm)", giving it a name. You'll be asked how many "Z levels" the map should have, and how large each should be (by number of tiles). We'll just leave this at 10x10x1 for now, and when the map loads up... it should be full of the grass you drew!
The line of code you put under world established the "default turf" as grass, preventing us from having to fill in each tile using the map editor. Shortcuts like this can save you a lot of time when you're developing the next epic RPG...
Now compile and run your environment.

POOF!
Your chat app has a world! But wait... where are you? You told the code to use the 'person.dmi' file you created for mobs, so what gives? The problem here is that you assigned all the states in the icon file a name, but didn't specify which one should be used for the player. Had one of the states been left unnamed, it would be considered the default, and all mobs would be that color unless otherwise specified, so let's do some specifying!
The DM programming language comes with a handful of built-in "procedures". Procedures are a lot like verbs, but for the computer, not players. One of these built-in procedures is called Login(), and as you can probably guess, it takes care of what needs to be done when a new client logs in to the world. Once again, these built-in procedures can be overridden to do anything we want them to. In this case, we need to determine what a player should look like, and we want to do that when the player first logs in.
Insert this little snippet to tell the world to make the icon state of mobs the same as their gender variable. This is defined in their BYOND account settings.
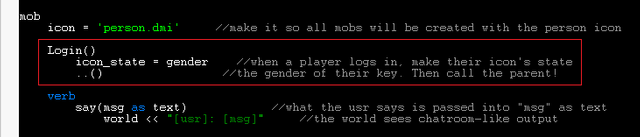
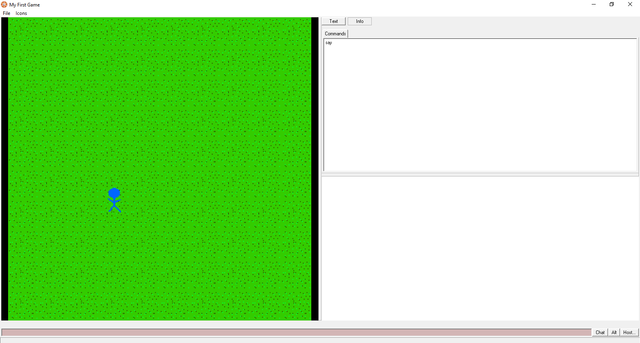
The little ..() on the third line is an "operator" that "calls" the parent procedure, and runs any other code associated with it. Now when people login to the world, they will be either pink, blue, or black, depending on their own preferences. Go ahead, give it a try! Compile and run, and you yourself should be a stick figure that is able to move around the map using your keyboard's arrow keys!
Now we're getting somewhere!
Your world is now capable of hosting players who you can see, that are able to talk, and walk around in the grass! We've still got a ways to go before we have a best seller on our hands, but we're making progress. Now let's give our potential players a reason to come play in the grass and talk.
Lights, Camera, Action!
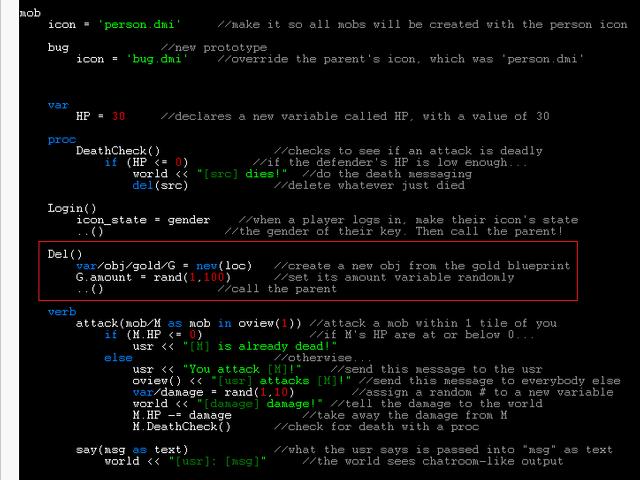
If we want to build an RPG, we'll probably want to know how much health a character has. In order to do that, we'll need to define a new variable for mobs. Under mob, right above verb, create a variable (var) named "HP", and give it a value of 30.
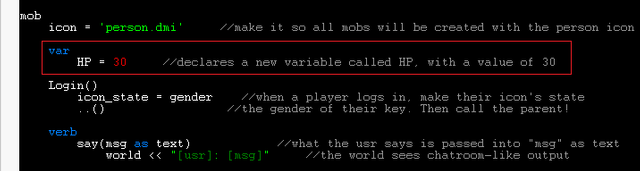
Variables are named as such because they are intended to be, well, variable. They can be changed to alter the outcome of anything. They are data points to be referenced, and everything has them. The variable in question is "HP", meant to signify a mobs health, so we need a way to alter a mob's health... Such devious deities we are indeed. Let's give mobs a way to fight each other! Add this chunk of code under verb. It's a lot, but we'll go through it.

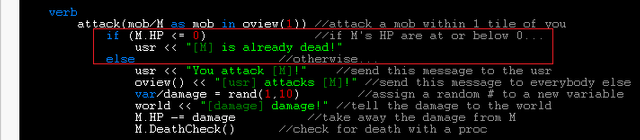
Our new "attack" verb calls for a mob as an input, and will call that mob "M" for the duration of the procedure. It also states that the mob must be with"in" 1 tile of the mob using the verb.
Instead of sending a message to the entire world like the say verb, here we send two separate outputs, one for the person attacking, and the other for everyone around them. We want to give players a feeling of immersion, and make them feel like they're in the game.
The next line defines a "damage" variable, and gives it a random value between 1 and 10.
The next part of the message can be the same for everyone, so everyone sees the same message about how much damage was dealt. It's almost always better to accomplish the same task with fewer lines of code, as a computer can only read so many lines, or "operations" per second.
Now that the amount of damage to be dealt has been calculated, we need to take it away from the mob being attacked. Simple enough, but how do we know when we've taken all of a mobs hit points. What's the point in an enemy having health if you can't take it all away, right?

The best time to check would be right after health is taken away, so we'll tell the client to call a procedure called "DeathCheck" which belongs to whatever mob is being pointed to with the "M" variable. Since one of the few things the engine isn't built to do is recognize death, we'll need to create that procedure ourselves.
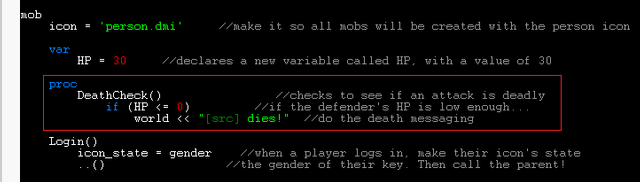
Just like declaring a variable, we'll put this procedure right under mob, so that it "belongs" to them. It's a pretty simple procedure, determining "if" the HP variable has fallen to or below zero. The code that comes indented after the "if statement" will only run if the condition is met, in this case sending a message to the world that the mob has died.
So now you can attack mobs, but unless you have other people to join your world, there are no mobs beside yourself. We need some targets to practice with. Let's make our first monster. A bug seems fitting...
Create a new Icon file, naming it "bug". Click the palette and draw a little bug creature. Just like you did with yourself, you'll need to define the bug you've just created, so that it can exist within the world. Jump back over to your code file, and under mob between the icon and Login lines, define your new mob, and tell the engine what Icon to use to represent it.

This new bug mob is a "child" of the default, so it will inherit any variables assigned to the parent. Any variables created for the child mob will not be usable for the parent unless one is also defined at that level. I hope that makes sense. Basically, we don't need to tell the system that the bug should have 30 HP, because we've already stated that all mobs should have 30 HP.
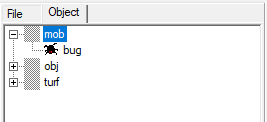
Now that we've created our bug, Compile to save what you've done so far, and open your map file. You'll notice the tree at the left side of the screen changes from listing project files to listing things you've defined in the code. Click on "mob" and you'll open a branch containing every child of mob that has been defined.
Click on the bug, and then click around the map a few times to place them. Once you're satisfied, Compile and Run.
You now have a buggy game!
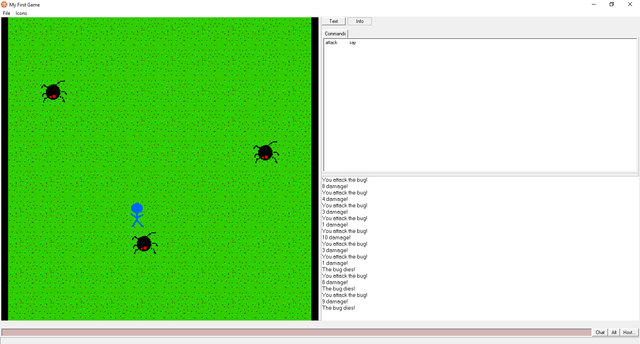
That's meant to be both figurative and literal...
Explore your world like a player would. Frolic through the grass, let your excitement be known, attack bugs, keep attacking bugs, and then get frustrated when the game keeps telling you the bug you're attacking has died, even though it's clearly still there to continue taking an endless barrage of torture without flinching...
You have a bug that the compiler didn't catch, because there's nothing "wrong" with your code. Remember what we learned earlier:
The computer can only know so much, and can't begin to assume an intended outcome for the code before it's run.
When programming, you have to be very literal, and explain each detail of what you want accomplished. If you don't want to be able to attack the bug once it's HP has dropped to zero, you have to say so. Edit your attack verb to include an if statement determining whether the mob's HP is less than or equal to zero.
If the statement is true, you don't want to allow the player to continue attacking it, so send them a message instead. If the statement is not true, you'll need to define what "else" could happen, in this case, you want to have the player attack the mob in question.
If you want the bug to also go away when you kill it, instead of lingering on the map to be attacked in the first place, you'll also need to let the computer know that, too. In the DeathCheck procedure we set up, after we declare the mob has died, we'll delete it.

Now when you smash those pesky bugs, they'll stay gone! We've almost got ourselves a nifty little game here, but we're still missing one thing...
In games, accomplishments beget rewards.
Your players now have an enemy to fight in the world, but what reason do they have to kill the bugs in the first place? Let's make it worth their while, and allow them to gather that most classic of RPG rewards, gold coins.
The coins won't be a mob, and they aren't terrain, so we want to define them as an object (obj). Create an icon for them, and define a variable that would store data determining the number of coins in a given instance of the object.

We'll want the reward to be dropped when a player successfully kills an enemy, so we're going to override the code that's run when the mob is deleted. Insert the code you see below, just under Login(). It creates a new instance of the gold object and places it in the location of whatever just got deleted. It then alters the "amount" variable of the obj, giving the gold a random value between 1 and 100, finally calling the parent Del() procedure to do anything else that might need doing when something is deleted.
We'll now need a way for the player to pick the gold up from the ground after it's been dropped by an enemy. In order for the player to do something, we'll need what? A verb. Objects can't use verbs, as they're "inanimate". When defining a verb for an object, you're essentially creating a command for something that can be done to or with that object. We also want to get the gold in a different way than we would other objects, so we make sure to indent the code so that it only pertains to the gold object.
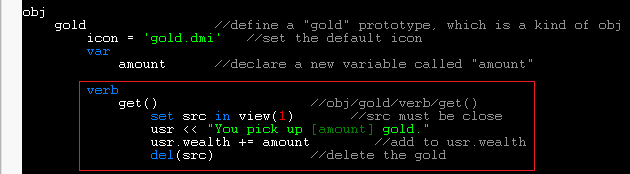
After naming the verb, we establish that the verb should only be usable if the "source" object (the gold) is with"in" 1 tile of the mob using the verb. We then tell the player how much gold they've picked up, add the amount to the player's "wealth" variable to keep track of their total, and then delete the source (again, the gold that's being picked up).
But wait... The player doesn't have a "wealth" variable to keep track of their gold...
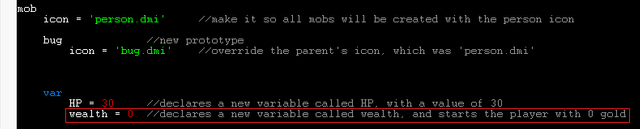
...but using what we've learned here, adding one is a piece of cake! Compile and Run. Play around. Everything working the way it should? You can kill bugs and take their money, yeah? Awesome. Guess what. We're finished!! In it's entirety, your code should look a lot like what you see below.
You've just built your very own game!
So how does it feel to be a game developer? You're not likely to land your dream job just yet, but you've taken the first steps toward creating intriguing and immersive environments like those played by billions of people the world around.
BYOND simplifies the whole process so that you can focus on what you really want to be doing, developing a game, not spending hours writing client code, network algorithms, or creating systems to render the map.
In the original tutorial, Zilal leaves us with some exercises to challenge ourselves. With what you've learned in this tutorial, can you expand upon this project, and add the following features?
Send a message to the world that a player has logged in?
Make a new "tree" obj, with icon, and place some on the map?
Alter the DeathCheck() messaging to say who the bug was killed by?
Write a verb allowing the usr to check her wealth?
Make "damaged" icon states for the bug, and show them as the bug is injured?
I hope this tutorial has inspired you to learn more about BYOND and how powerful, yet easy to use, it can be. As I stated in the first post in the series, I intend to build upon this project, turning it into a game that uses a cryptocurrency/token as an in-game currency for transfers between players. The next post in the series will lay out the full game concept for what I have planned, and be a call-to-arms for community members interested in participating. If this tutorial has intrigued you, and you'd like to come work and learn with me, comment below and I'll be in touch!
Thanks for reading!


I wanted to learn how to make games, but because of the art required I don't think I'll be able to do it(plus manipulating 3d elements).
I'm by no means an artist, and have typically opted to use royalty free graphics from the community. The BYOND engine can use 3d elements, but it's best when used for 2d projects.
This time around, I hope to gather artists, developers, sound techs, and writers from the blockchain interested in providing their services for a cut of the project earnings. Should be pretty fun!
cool i suck at code i going to check this out maybe i learn it
Cool i suck at code
I going to check this out
Maybe i learn it
- seveaux
I'm a bot. I detect haiku.
I want to learn how to make games ..Good work ...keep it up .I will follow it
Nice tutorial :) cool to see this in action, I usually use unity so nice to see an alternative method to making games.
Interesting, wonder if I can create a master piece with this
Maybe not only this, but you'll be well on your way!
Your post was upvoted by the @archdruid gaming curation team in partnership with @curie to support spreading the rewards to great content. Join the Archdruid Gaming Community at https://discord.gg/nAUkxws. Good Game, Well Played!
You have recieved a free upvote from minnowpond, Send 0.1 -> 10 SBD with your post url as the memo to recieve an upvote from up to 100 accounts!
You got a 13.45% upvote from @postpromoter courtesy of @postcurator!
Want to promote your posts too? Check out the Steem Bot Tracker website for more info. If you would like to support the development of @postpromoter and the bot tracker please vote for @yabapmatt for witness!
Upvoted , return the love
This post has received a 53.77 % upvote from @booster thanks to: @thatsweeneyguy.