How To Sketch – Water
Water is around us everywhere. It is in the clouds, in the ocean, in rain, in mist and in fog. water can be gentle and calm, or can be wild and ferocious. It can reflect like a mirror, echoing the sky and clouds or the surrounding foliage or landscape.
The colour of water can change depending on the water depth or the water clarity. It can change according to the weather conditions, where wind will create ripples on a pond, a river or the sea. It is ever changing, beautiful in all its moods and a rewarding challenge.
As in all sketching, it is all in observation and awareness and your skills will develop the more you sketch.
REFLECTIONS IN WATER
If you are close to the water, the sky and cloud reflections are not as clear as if you were seeingthem from a distance. Scenes from a distance on still water can
almost create a mirror reflection.
The length of reflections will bedetermined by the position of the sun. If it is directly overhead there will be very little reflection. If it is rising or setting, this will determine the length of the reflection. Reflections can mirror the colour of the surrounding skyscape or landscape exactly, if the conditions are right. The colour ofthe reflections will depend on the strength and position of the sun.
Choppy or moving water will not show the same details in the reflections as still water, as the reflected image is broken by ripples, but will still give an indication.
The reflections will alter depending on whether they are on still or rippled water. The size and clarity will also change if you are painting the scene close up at eye level, or painting it from a higher viewing point. From a distance the viewing angle would be altered.
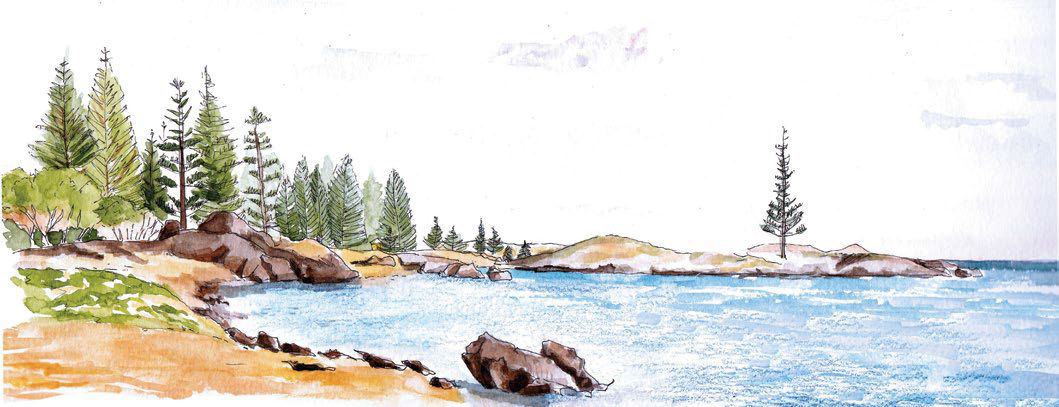
Water does not have pen lines.
The background is cooler in colour, has less detail and no pen lines.This sets it back and creates depth of field in the sketch.
Angles of Reflections
If the scene has upright vertical
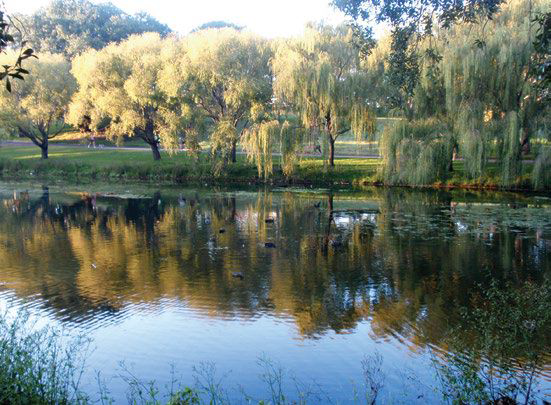
subjects such as trees or buildings, you will see the reflections will be directed straight towards you. If a tree or object is leaning to one side, its reflection will be a mirrored image and also lean to the same side.
Note the mirrored reflected image of the swan. Also notice the ripples in the water. The swan produces large ripples as it moves through the water. The ripples are also smaller and closer together in the distance as they recede.If putting in any sky reflections, these will be upside down, or a reflected mirror image.
RIPPLES & PERSPECTIVE
Ripples are composed of a contrast of hues and tones. Notice they have highlights and shadows. They do not have hard lines. Paint the lightest colour first, then add
short strokes using darker colours, appropriate to the water colour and conditions. To avoid hard edges, paint the ripples on to damp paper.Ripples can be smooth or choppy, so it is important you determine the patterning you want to apply.
The closer the ripples are to you, the stronger in colour, larger and further apart. As they recede into the distance, they become lighter in colour, smaller and closer together.
White caps give an indication of rough water, and sunlight hitting the waves.
Do not draw pen lines on water, reflections or horizons.
WAVES
Waves have many moods. They change from minute to minute, and can be huge and ferocious, or can break gently onto the sand, or onto a shallow rock bottom. Waves are always lighter at the top as they are breaking, as this is where there is less water and the light is showing through.
Observe the movement of the waves before beginning your sketch. Remember to take some photos which you may want to refer to later.
Note the size and colour of the waves and the direction they are breaking. Squint your eyes to get a feel for the light and dark areas in the water. Leave the foamy areas where the waves are breaking white. As the waves hit rocks, they will throw up a lot of foam. Try and keep the white wave areas the white of the paper. It is easier to add colou around the white than to try and paint white over the ocean colour.
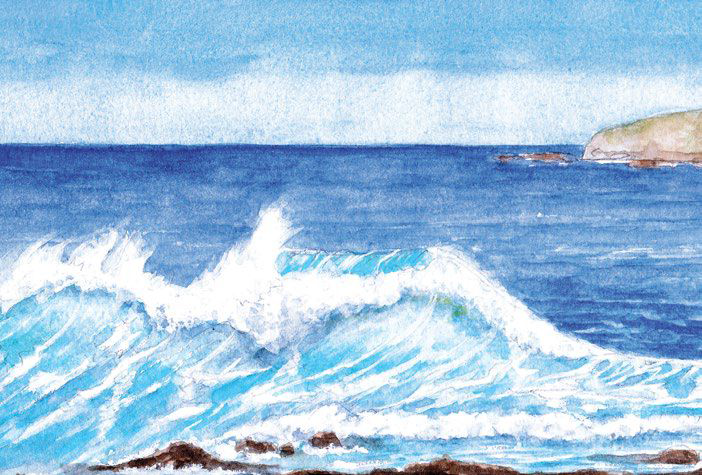
STEP BY STEP TO PAINTING A BREAKING WAVE
STEP ONE
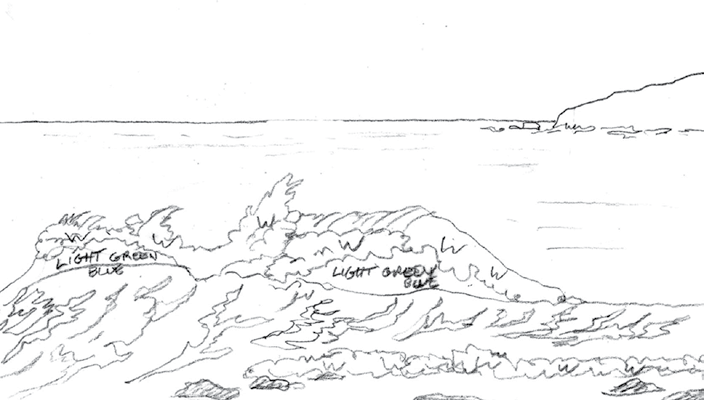
Quickly sketch the wave, and mark the areas you want to keep white. I have done this with a
‘W’. I have also indicated where other colours will go, as well as the rocks in the foreground. This preliminary sketch works very well and gives enough information to finish later, if time is scarce.
STEP TWO
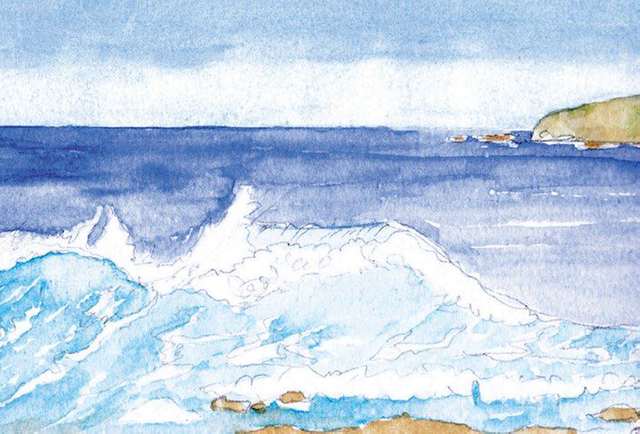
Put washes over all areas of the sketch, leaving the wave areas white.
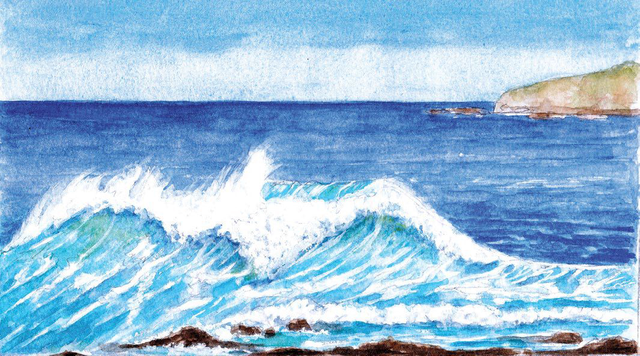
STEP THREE
Add wave spray with white gouache. Add more colour in the waves, and shadows under the break.
STEP FOUR
Intensify colours to add contrast and three-dimensionality.
HOW TO CREATE DEPTH OF FIELD
Areas at the front are stronger in colour and have more detail and pen lines Areas in the rear are softer in colour, have less detail and do not have pen linesWarmer colours in the front
can bring the area forward Cooler colours in the rear will send the areas back Do not draw pen lines on horizons, clouds or distant areas.
This will bring the areas forward. Paint these areas without penlines to create distance.
Above all – OBSERVE, OBSERVE, OBSERVE
Nice! :)
Lovely painting! Nice work. Love the Observe Observe Observe mantra! Such a good one to remember.